Do you want to create a membership landing page for your website?
With custom landing pages, it’s easier to draw attention to your membership program, and in turn, sell memberships to your target audience.
In this article, we’ll show you how to create a landing page that boosts sales and conversions for your membership website.
What Is a Membership Landing Page?
A membership landing page focuses on lead generation and increasing conversions like long-form sales pages. And its primary goal is to persuade visitors to become members.
Moreover, your landing page isn’t where people go to check out your latest blog post or read about your brand. Instead, everything on your membership page drives readers towards one thing – to convert.
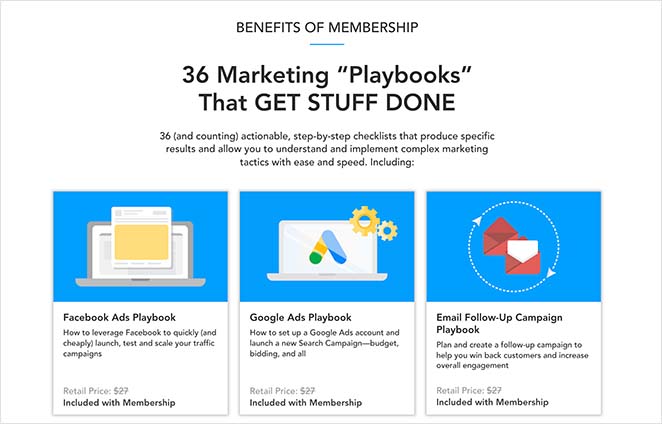
So why do you need a landing page for your membership site?
Why Do You Need a Membership Landing Page?
It could be that your membership site is getting plenty of traffic but not many signups. And if that’s the case, you likely need something to convince people to take the plunge.
That’s where a landing page can help.
A landing page stands apart from the rest of your membership site and has different features. For instance, it may not have a footer or header navigation, and the details on the page usually focus only on moving visitors toward signing up.
In essence, a membership sales page removes distractions to boost conversions.
How to Create a Membership Landing Page in WordPress
So how do you create a membership landing page if you have a WordPress membership site?
Many modern WordPress themes include a landing page you can use right away. But if your theme doesn’t have one, you can use a landing page plugin instead.
Our top choice for creating landing pages is SeedProd. It’s the best WordPress page builder with powerful features to make your job easier.
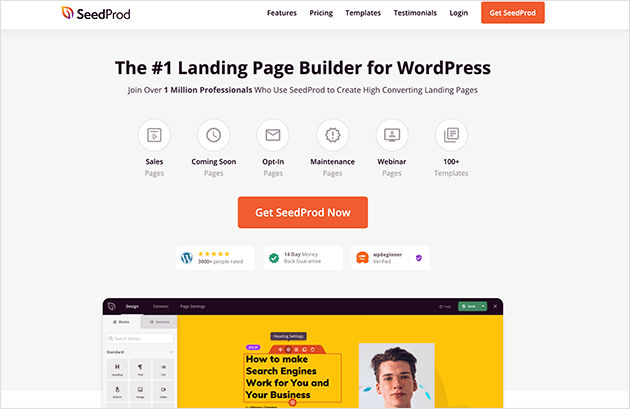
SeedProd includes a drag and drop visual editor, allowing you to create a landing page design without writing code. And with hundreds of responsive landing page templates, you can get started quickly.
You can also use SeedProd to:
- Create different types of landing pages
- Put your website in maintenance mode
- Announce a new website launch
- Grow your email list
- Sell products with WooCommerce
- And much more
Not to mention, this plugin is lightweight and bloat-free, so your pages will always load fast. So if you want to create a membership landing page in WordPress, here’s how to do it with SeedProd.
Step 1. Install and Activate SeedProd
The first step is to get a copy of the SeedProd landing page plugin.
From there, install and activate the plugin on your WordPress website. Here’s a step-by-step guide on how to install a WordPress plugin if you need help.
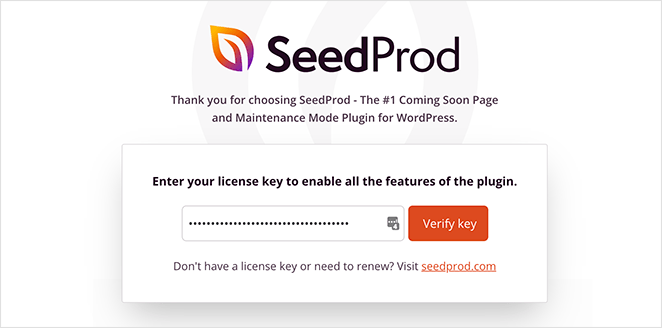
After installing SeedProd, head to your account area on the SeedProd website and click the Downloads tab. On that page, you can copy your license key.
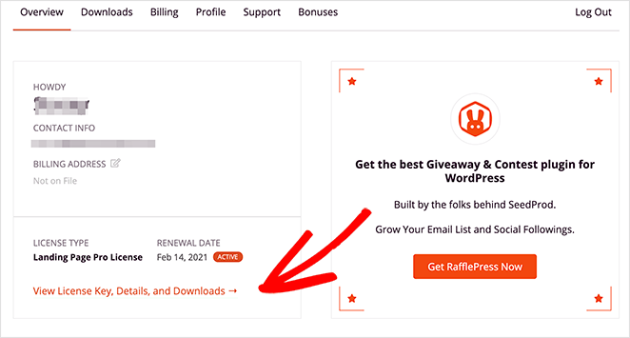
Now head back to your website, where you’ll see the plugin’s welcome screen. Then, paste your license key into the field and click Verify Key.
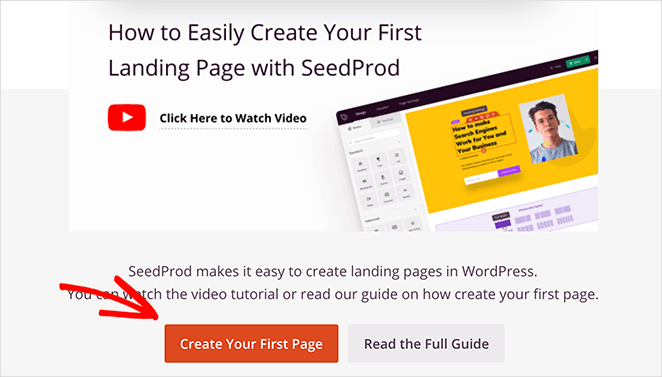
You can now scroll down the page and click the Create Your First Page button.
Step 2. Create a New Landing Page
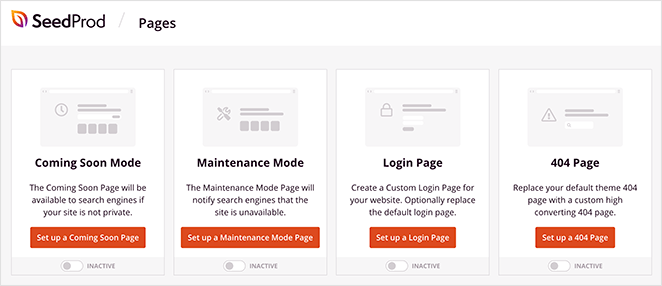
SeedProd’s landing page dashboard is on the next screen. At the top of the page are landing page modes that let you enable a coming soon page, maintenance mode, 404, and login pages.
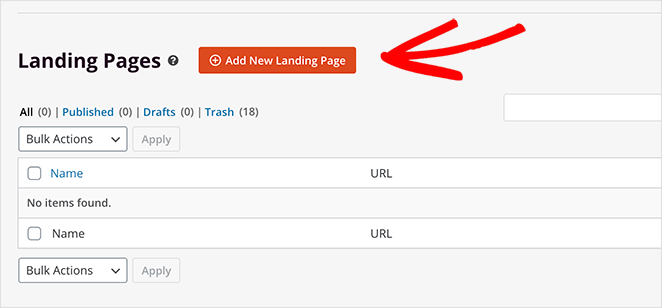
Below that is an area for creating single landing pages. So click the Add New Landing Page button to get started.
Now you can choose a template for your landing page design.
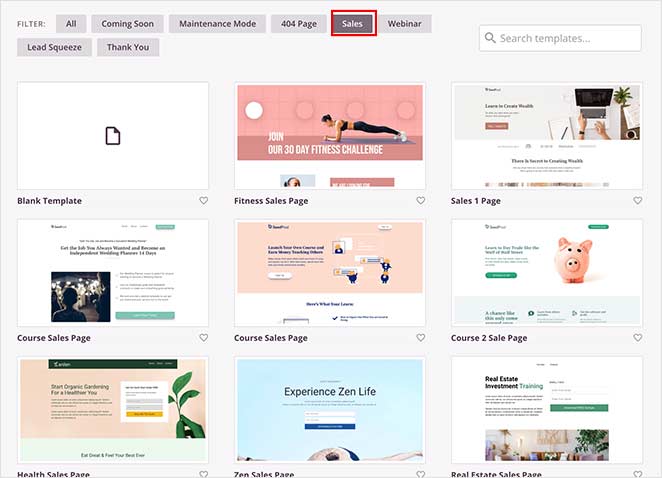
Click any tab along the top to filter the landing page templates by page type, including:
- Coming Soon
- Maintenance Mode
- 404 Page
- Sales
- Webinar
- Lead Squeeze
- Thank You
- Login
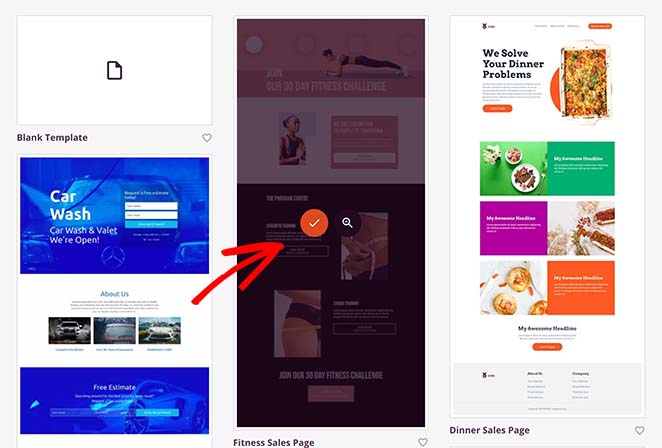
And when you find a design you like, hover over it and click the checkmark icon to choose it.
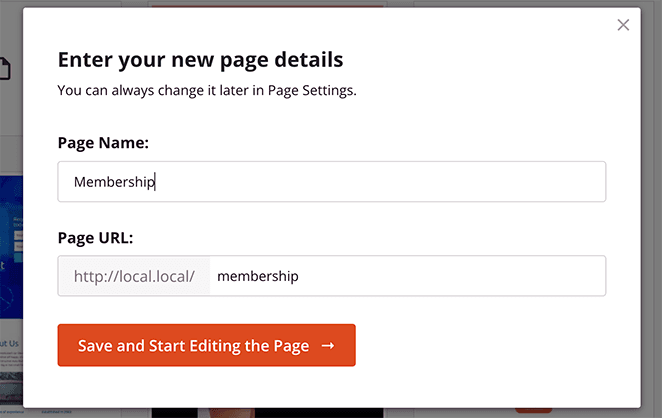
Next, enter a name and URL for your membership page, and click the Save and Start Editing the Page button. Your design will now launch in the visual editor.
Step 3. Add Details About Your Membership Program
SeedProd’s drag and drop editor is super easy to use.
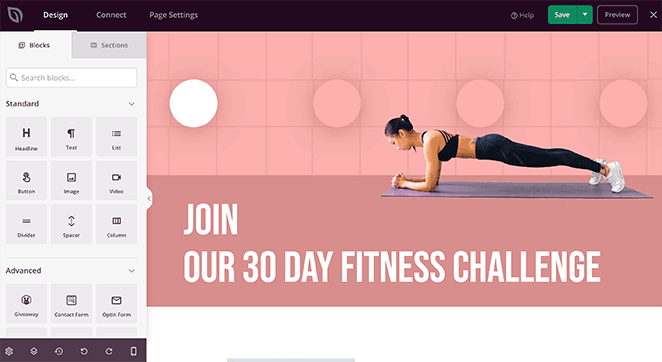
On the left are blocks and sections to build and customize your page. And on the right, you can preview your design in real-time.
Let’s start by adding information about your membership program. That will help visitors learn more about your program and encourage them to sign up.
For example, you can click the headline and see its settings panel on the right. Then you can change it to something more compelling and targeted to your audience.
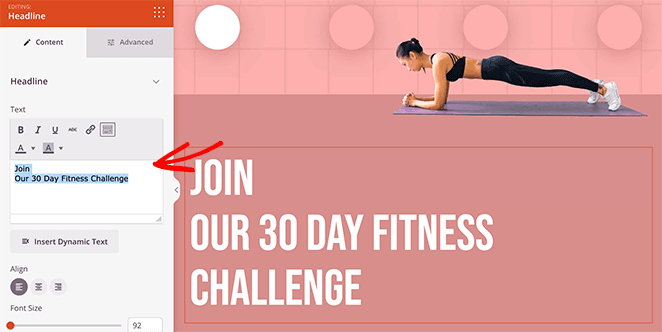
You can also click the Advanced tab to control the headline’s color, font, spacing, and margin settings.
Now, let’s change the default hero image. To do that, hover over the section until it has a purple outline and click it.
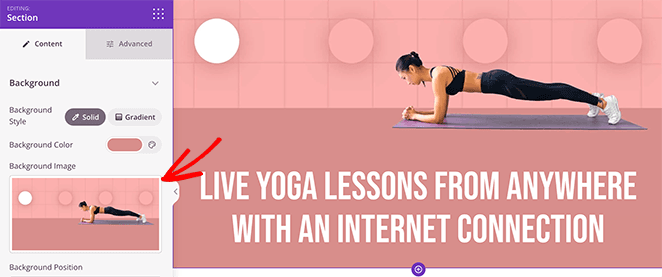
You can then click the trashcan icon to remove the image and upload a new one from your computer or WordPress media library.
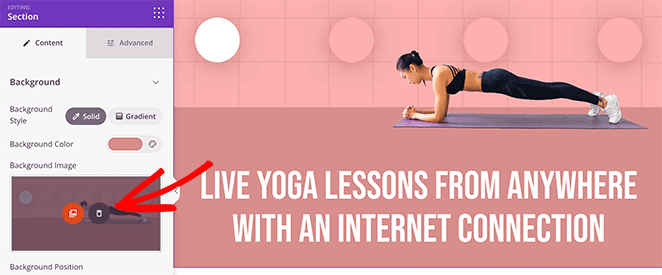
In fact, you can do that for any image on the page. Simply click it, remove it, and replace it with a new photo.
Next, you can add a call to action button that calls users to sign up. There are 2 ways you can do this in SeedProd:
- Add a single CTA button that leads users to your sign up page
- Add a sign-up form directly on your membership landing page.
Since many WordPress sites use a membership plugin to handle registrations, we’ll use a single CTA button. That way, we can link the button to our dedicated membership registration page.
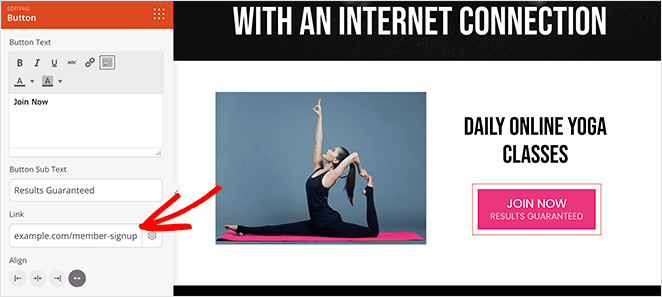
Luckily, this template already has a CTA button, so all you need to do is customize it.
For instance, you can click the existing button and select the Advanced tab to change its color, spacing, and typography.
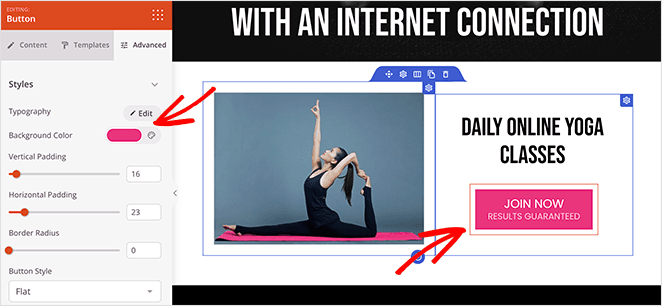
And in the Content tab, you can add a custom link to your signup page.
Step 4. Add Social Proof to Boost Trust
Digital marketers know that potential customers respond better to reviews and testimonials from their peers. So It’s an excellent idea to display customer testimonials and reviews on your membership page.
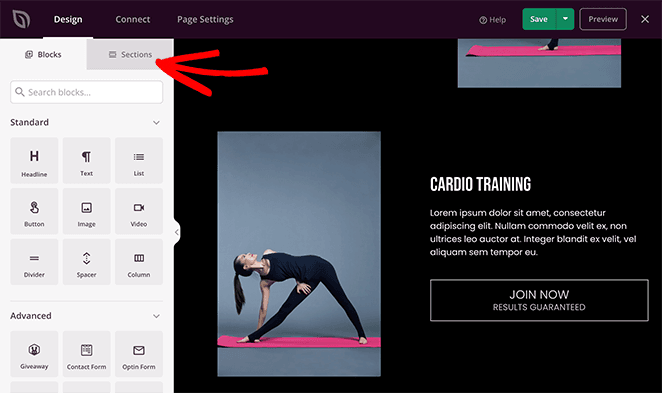
The good news is, SeedProd includes ready-made sections that allow you to do just that. From the landing page editor, click the Sections tab on the right.
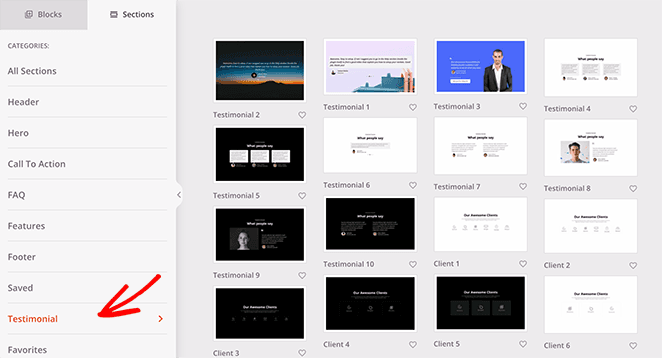
Then, scroll down to the Testimonial heading and choose a section from the many templates available.
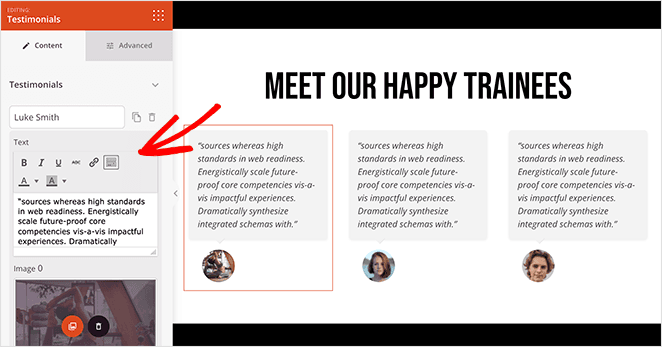
To add the section to your page, just click the plus icon. Then you can customize it as you would with any other SeedProd block.
For example, you can edit the testimonial content, add customer photos, enable comment bubbles, and even turn your testimonials into a scrolling carousel.
Continue customizing your membership page until you’re happy with how it looks.
Step 5. Configure Your Settings
After finishing your design, click the Page Settings tab at the top of your screen.

On this page, you can:
- Change your landing page name and URL
- Configure your on-page SEO Settings
- Install an Analytics plugin to monitor your performance
- Paste tracking and retargeting scripts
- Give your landing page a custom domain name
And if you want to connect your membership page to an email list, you can do so by clicking the Connect tab.
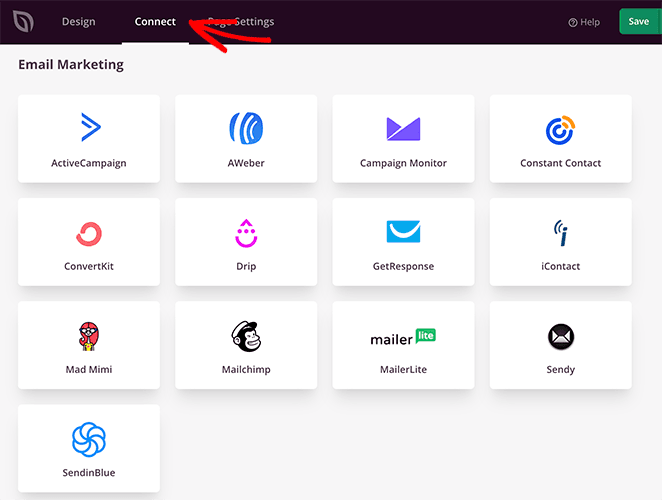
From there, you can connect to popular email marketing services like Constant Contact, Mailchimp, and more.
See our email integration documentation for more details on integrating your email list.
Step 6. Publish Your Membership Landing Page
Now it’s time to publish your membership landing page and start driving targeted traffic to it.
So head to the Save button in the top-right corner of the builder. Then click the dropdown menu and click Publish.
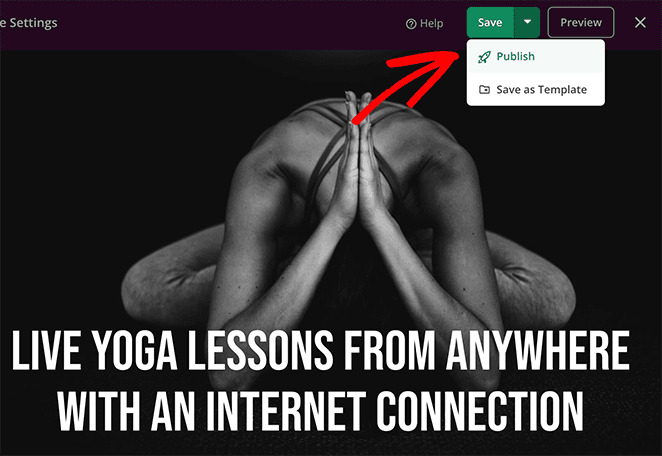
Congratulations! Your membership page is live, and you can preview it to see how it looks.

Membership Landing Page Frequently Asked Questions
Key elements to include in a membership landing page are a strong headline, benefit-oriented subheading, high-quality images or videos, clear call-to-action (CTA) buttons, testimonials or social proof, feature highlights, pricing options, and a FAQ section.
Promote your membership landing page through social media marketing, email marketing, search engine optimization, pay-per-click advertising, influencer marketing, content marketing, and by hosting webinars or virtual events.
Best practices for designing a membership landing page include using a clean and uncluttered design, prioritizing readability with clear fonts and colors, having a strong and benefit-focused headline, using high-quality visuals, and optimizing for mobile devices.
We hope this article helped you learn how to create a membership landing page in WordPress. While you’re here, you might like this guide on how to create a client login page.
Thanks for reading! We’d love to hear your thoughts, so please feel free to leave a comment with any questions and feedback.
You can also follow us on YouTube, X (formerly Twitter), and Facebook for more helpful content to grow your business.

