Do you want to create a landing page without a website?
If you’re testing a new business idea, you may not be ready to create a brand new website. A landing page may be all you need to conduct audience research, generate leads, and collect feedback for your digital marketing campaigns.
So how do you create a landing page without creating a new website? We’ll show you how in this article.
First, let’s answer a popular question: what is the purpose of a landing page?
What Is the Purpose of a Landing Page?
A landing page is a standalone web page you can use to generate leads and potential customers through your online marketing strategy. Unlike a complex website, a dedicated landing page is a single page that grabs visitors’ attention, offers a focused user experience, and tells them what to do next.
You can use landing pages to promote a specific product, generate leads through a PPC campaign, or offer a promotion or discount coupon. Every landing page should also have a clear call-to-action (CTA), so visitors know what to do.
Check out our guide on the anatomy of a landing page for a complete overview.
Landing Pages vs Websites: What’s the Difference?
You might be thinking, doesn’t a landing page sound like a website homepage? The truth is landing pages and websites have different objectives.
A landing page is highly specific and focuses on a single goal, such as lead generation or promoting a single product or offer. They often also target a single type of audience.
However, a website homepage is designed to educate visitors and may have links to different pages, broader calls to action, and target multiple audiences.
Visitors can take many paths from your website homepage. For example, they could click your blog page, read your about page, etc. Yet, a landing page only offers users a single path to act, such as buying your product, signing up with their email address, or claiming an offer.
For more details, see our guide: Landing Page vs Website.
Can You Have a Landing Page Without a Website?
The answer to your question is yes. You CAN have a landing page without a website, but you’ll miss out on the benefits a website can provide.
For example, a website shows that your brand is established. It will often include your phone number, contact details, and other important information that gives your business authority.
Without a website, you risk visitors thinking, “Why should I trust them? They don’t even have a website”.
An established website is also an excellent way to generate organic traffic. Because websites include multiple pages, there are more chances to rank for relevant search terms, helping you reach your target audience through search engines.
Because of those benefits, you should have at least one website to use as your starting point. You can then build as many landing pages as you like, and as we’ll explain later, you can give each landing page a custom domain name, making it look like a standalone website.
If you don’t already have a website, follow this tutorial to create a website in WordPress.
How Do You Build a Landing Page Without a Website?
Once you have a WordPress website, you can use SeedProd to create as many landing pages as you like.
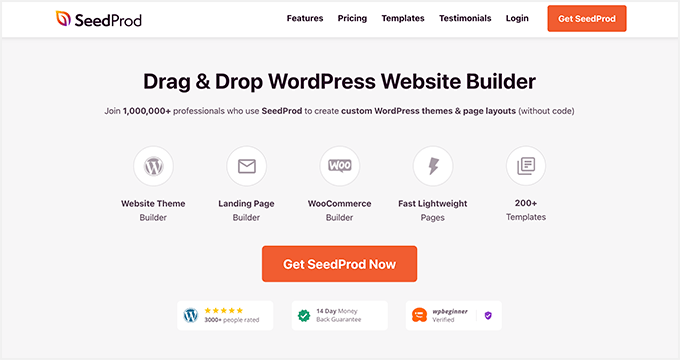
SeedProd is the best landing page builder for WordPress. It lets you create custom WordPress themes and high-converting landing pages without writing code.
You can choose from hundreds of mobile responsive landing page templates and customize each design with its drag-and-drop landing page builder. You can also add functionality to your landing page with content blocks designed to generate leads.
SeedProd also includes a Domain Mapping feature that lets you assign custom domain names to landing pages without building a website for each domain. You can have multiple microsites all on a single WordPress installation.
Follow the steps below to create a landing page without additional websites with SeedProd step-by-step.
Step 1. Install and Activate SeedProd
First, click here to get started with SeedProd and download the plugin to your computer.
Note: You’ll need a SeedProd Elite plan to access the Domain Mapping feature we use in this tutorial.
After downloading the plugin, you’ll need to install and activate it on your WordPress website. You can follow this guide on installing a WordPress plugin if you need help.
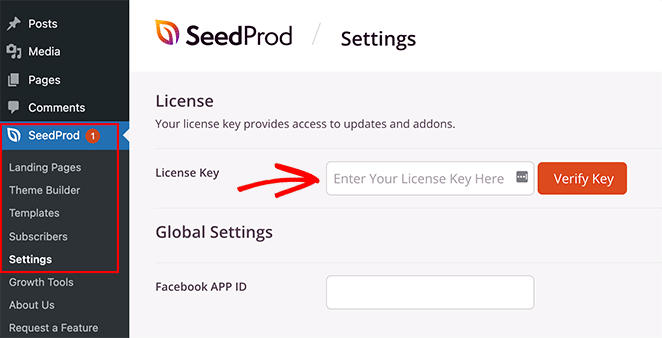
Once SeedProd is live on your website, go to SeedProd » Settings and enter your license key.
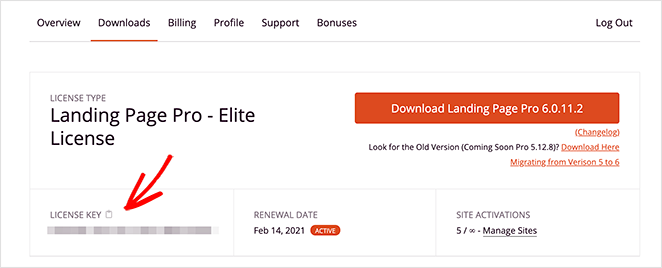
You can find your license key by logging into the SeedProd website and clicking on the Downloads tab.
Step 2. Create a Landing Page
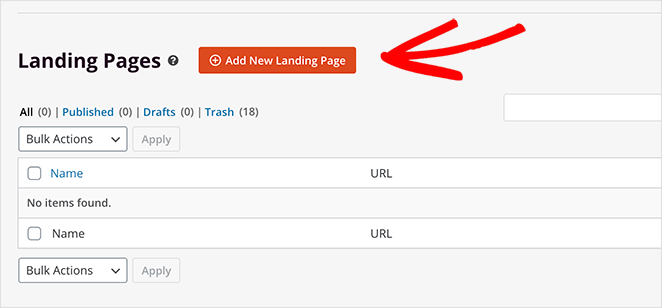
The next step is to navigate to SeedProd » Landing Pages, where you’ll see the landing page overview.
Different page modes are at the top of the page, allowing you to create a coming soon page, put your WordPress site in maintenance mode, etc.
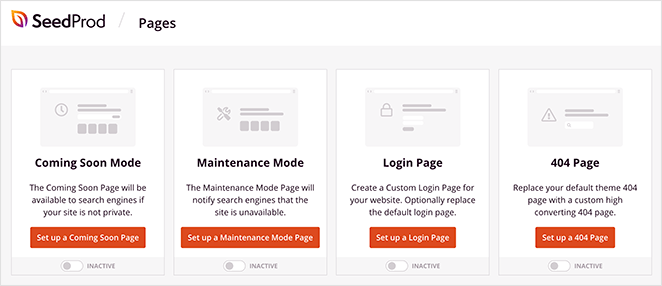
Below that is where you’ll see any landing page you create with SeedProd.
Click the Add New Landing Page button to create your first page.
On the next screen, you’ll see various pre-made landing page templates.
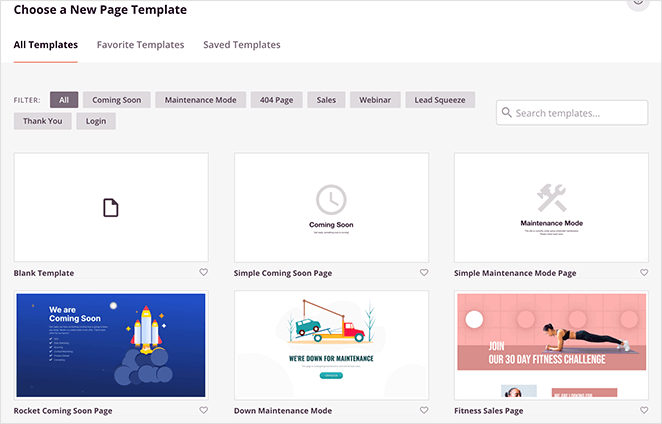
You can sort the landing page designs by category, such as coming soon, webinar, lead squeeze, thank you page, etc. Look for a landing page that fits your small business needs best.
After finding a design you like, hover over the landing page example, and click the checkmark icon.
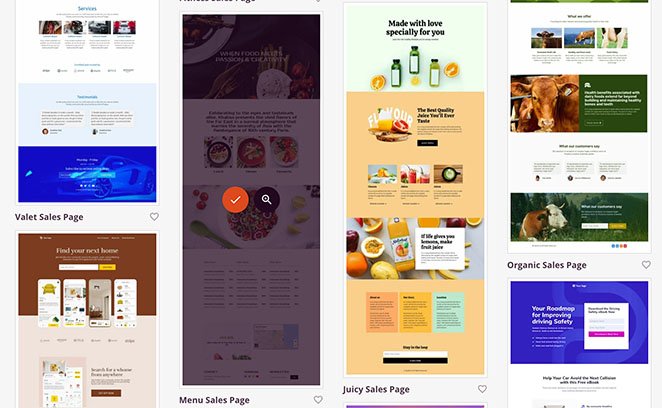
You can now enter a name and URL for your landing page. Click the Save and Start Editing the Page button to start building your page.
Step 3. Customize your Landing Page
Your landing page template will now open in SeedProd’s visual page builder. It has a 2-column layout with blocks and sections on the left and a live visual preview on the right.

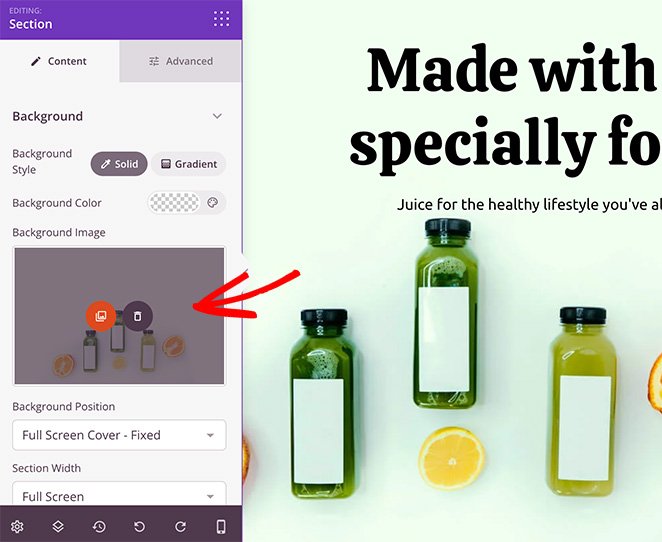
You can customize any content element by clicking on your live preview. The settings for that element will then open in a new panel on the left-hand side.
For example, clicking the header section shows the background image currently in use. You can then delete the image and replace it with a new background photo from your computer or WordPress media library.
Adding new content to your landing page is just as straightforward. SeedProd has various blocks and sections you can drag and drop onto your page.
For example, you can add the Testimonials block to display valuable social proof and give visitors an authentic first impression of your business.

Or you can use the Optin Form block to grow your email list with more subscribers.
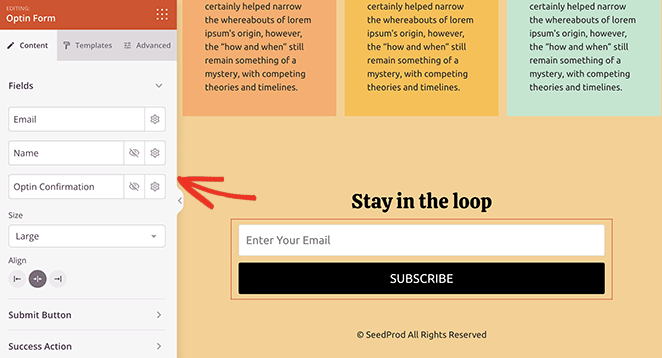
Here are some other types of content you can add to your page to boost conversion rates:
- Social media profile buttons
- Pricing tables
- CTA buttons
- Countdown timer
- eCommerce products
- Giveaways
- Contact forms
You can also customize your landing page’s fonts, colors, and global styling with a few clicks. For example, you can use the color palettes to create your own landing page color scheme.
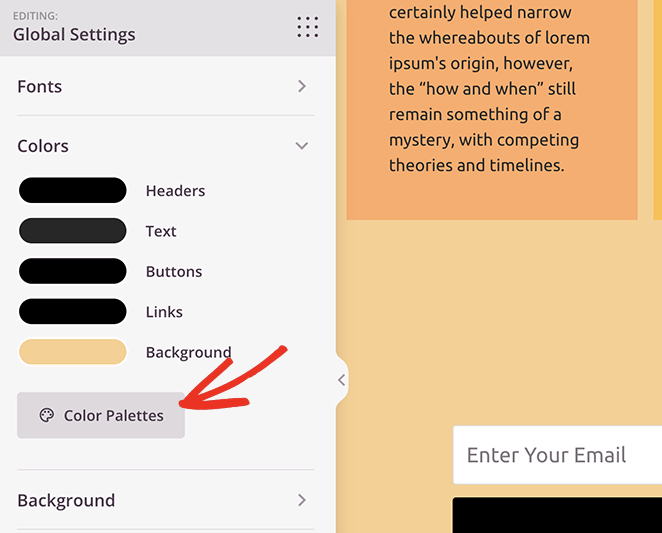
Continue customizing your landing page until you’re happy with how it looks. Make sure you click the Save button in the top-right corner to preserve your changes.
Step 4. Connect Your Email Marketing Service
If you plan to use your landing page to collect email addresses, you’ll need to connect it with your email marketing service. To do that, click the Connect tab at the top of the screen.
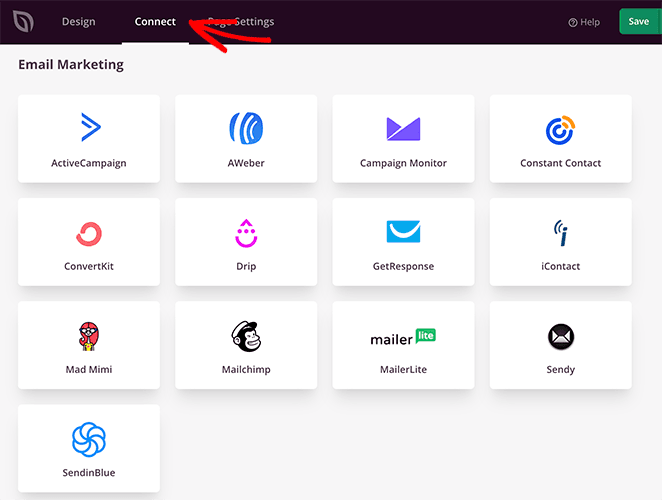
On the following screen, you’ll see the different email marketing integrations available with SeedProd, including Mailchimp, Constant Contact, Get Response, and more.
Click any integration and follow the instructions to link your email marketing service. Any emails you collect through your landing page will automatically be added to your email list.
You can also connect to Google Analytics, Zapier, and Recaptcha on the same page.
Step 5. Add Your Custom Domain Name
Now let’s look at adding a custom domain to your landing page. You’ll first need to click the Page Settings tab to do that.
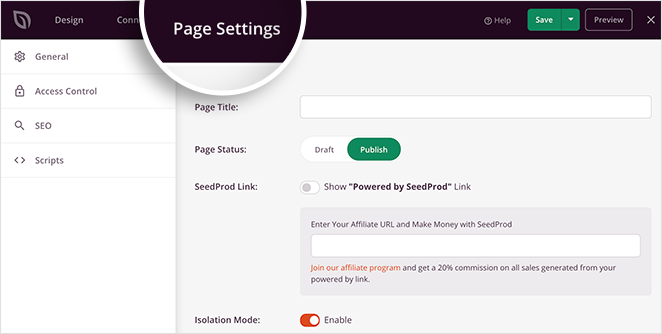
You can edit your page name, configure your SEO and Analytics settings, and even add custom scripts to this page. But the setting you’ll need for your domain name is the Custom Domain tab.
First, you need to ensure the domain name you wish to assign to this page is mapped correctly.
Go to your custom domain registrar’s management panel to do that, and add an “A” type DNS record pointing to the IP web server hosting your website. Then go to your website hosting panel, and add that domain as an additional domain for your website.
You can ask your domain registrar’s support team for help adding this record. You can also reach out to your web hosting provider’s team for help finding your web server’s IP address.
After following those instructions, go back to the Custom Domain tab in SeedProd and enter your domain in the “Domain Name” text field.
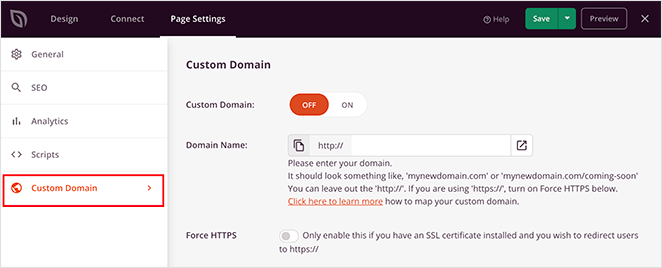
Now turn on the Custom Domain toggle, and that’s it. After publishing your landing page, you can type that domain into your address bar and see your new landing page.
Step 6. Publish Your Landing Page
To publish your landing page, click the dropdown arrow next to the Save button and click Publish.
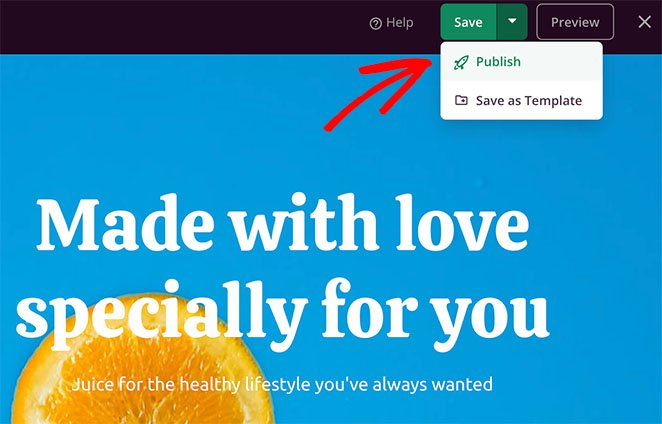
You can now visit the page and see your new landing page live on your custom domain.

Now repeat these steps for every landing page you wish to create with a custom domain.
SeedProd and Your Small Business
We hope this article helped you learn how to create a landing page without a website. Ready to build multiple microsites on a single instance of WordPress?
SeedProd is here to help you grow your business in all ways! For more small business tips, check out our blog. Here are a few of our favorite relevant posts:
- How to Export a WordPress Theme (+ Import to Another Site)
- How to Run Google Optimize A/B Testing (Step-by-Step)
- How to Improve Your Landing Page Bounce Rate (15 Tips)
Thanks for reading! We’d love to hear your thoughts, so please feel free to leave a comment with any questions and feedback.
You can also follow us on YouTube, X (formerly Twitter), and Facebook for more helpful content to grow your business.


