Do you want to make your WordPress posts more engaging but are confused by the WordPress featured image setting?
Featured images are an excellent way to grab attention and get more people to read your blog posts. But how do featured images work, and what are the steps for adding them to your WordPress site?
In this guide, we’ll show you how to use the WordPress featured image setting to add beautiful thumbnails to your posts and pages.
What Is a WordPress Featured Image?
A WordPress featured image, or a post thumbnail, is the primary image representing the post or page content on your WordPress website. It’s like a teaser that sits above or below your post title, enticing users to click and read your content.

These images enhance your site’s appeal, improve user engagement, and increase click-through rates (CTRs).
Featured post images not only appear on your WordPress blog’s homepage, archive pages, custom post types, and related posts. They’re also shown when sharing your content on social media platforms using a WordPress SEO plugin like All in One SEO.
Additionally, your images can appear in search engine results as a featured snippet. This can help drive traffic to your website from organic search results.

Almost all WordPress themes allow you to set featured images, but the size, shape, and layout may differ across different themes. If your theme supports them, you’ll see a featured image section where you can upload images, set the dimensions, and more.
That being said, let’s dive in and look at how to add a featured image to your WordPress site step-by-step.
How to Add a Featured Image or Post Thumbnail in WordPress
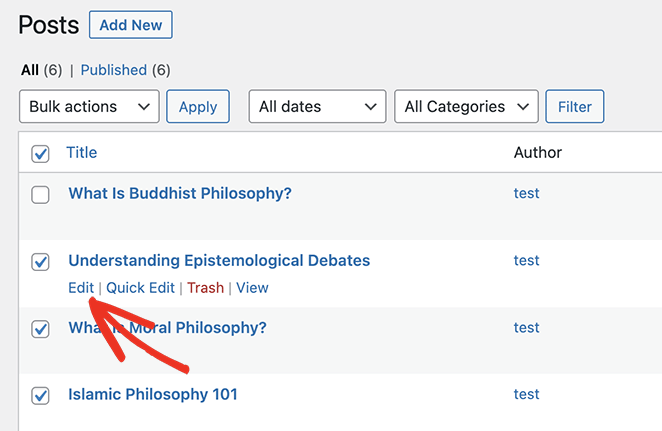
To add a featured image to any WordPress post, head to Posts » Add New from your WordPress dashboard. You can also edit an existing post by clicking Edit.
Once you’re inside the post’s content editor (the block editor or Gutenberg), you’ll see the Featured Image panel on the right-hand side.
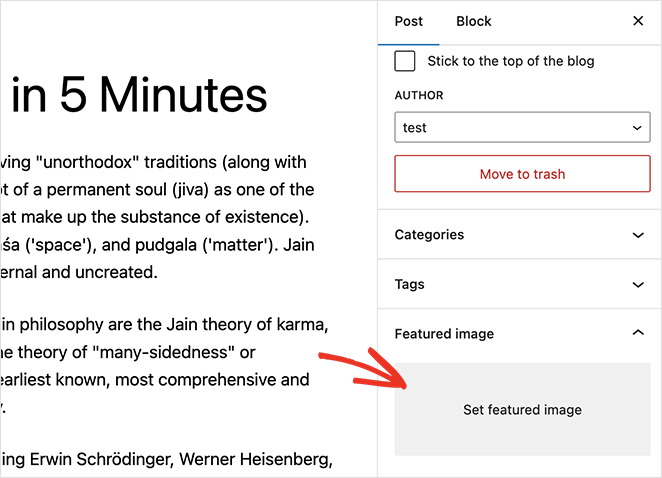
Next, you’ll need to click the ‘Set featured image’ area. Doing this will open the WordPress media uploader as a popup overlay.
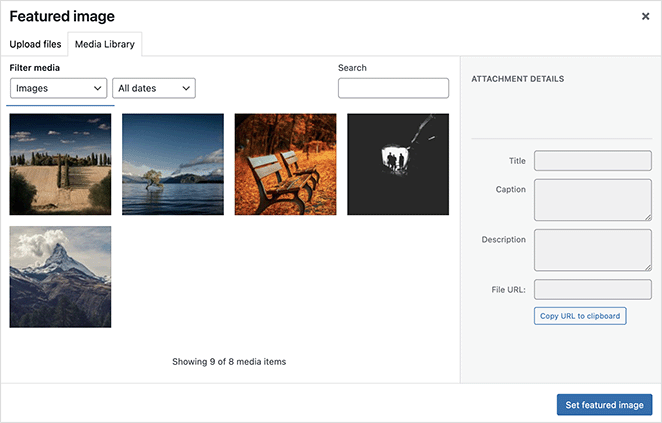
From there, you’ll have two options.
You can choose an existing image from your WordPress media library by clicking the image thumbnail. This will select the image and allow you to enter custom alt text, title, caption, and descriptions.
Alternatively, you can click the Upload Files tab and upload an image from your computer. This will upload it to your media library, where you can enter similar descriptions and captions.
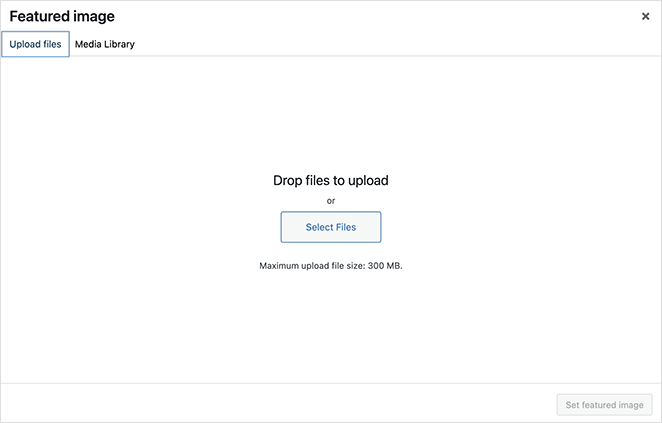
After uploading or selecting a default image, simply click the Set Featured Image button.
WordPress will now display a preview of your image in the right-hand sidebar.
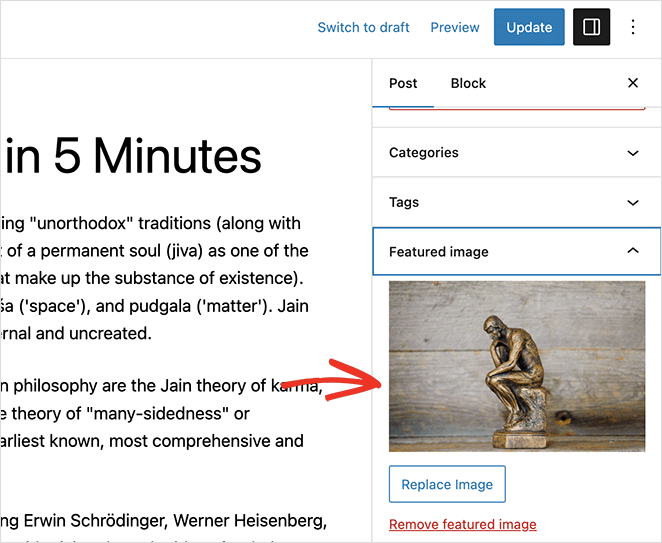
Depending on your theme, you can adjust the image thumbnail size and choose other customization options.
In this guide, we’re using the WordPress Twenty Twenty-Three theme, which has no additional featured image options.
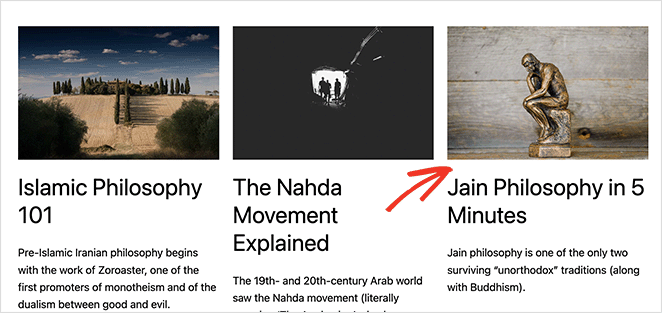
When you’re happy with its appearance, you can save changes, and your new featured image will automatically appear in your WordPress posts.
Where to Find Featured Images for WordPress?
The next question you may ask is, where can you find photos to use as featured images?
Unfortunately, you can’t simply take images and photos from Google image search or swipe any random picture from the internet. Most of those images are protected by copyright laws, so you can face copyright infringement issues if you use them without the owner’s permission.
However, the good news is that there are several places where you can find free images for your blog posts and, in turn, use them as WordPress featured images.
Our favorite places to find free high-resolution images with a creative commons license are as follows:
- Unsplash – A popular website with thousands of images you can download and use on your website and other projects for free.
- Pixabay – Another popular site with a large collection of free images sorted into categories and tags.
- New Old Stock – A creative collection of vintage photos from various public archives.
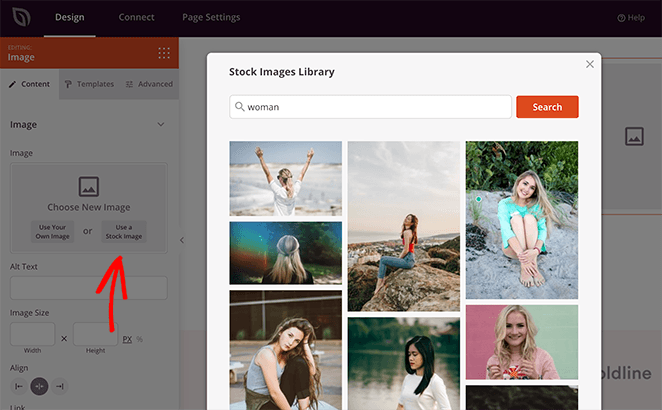
There are also several WordPress plugins that let you import free stock photos to your website. Users of SeedProd Pro, for example, can access 2 million stock photos to use with its powerful drag-and-drop page builder.
How to Create a Featured Image for Your WordPress Site
Sometimes a stock photo won’t cut it for representing your blog post. You may need something more unique or custom-made to really illustrate your content.
In this situation, you can use a free tool to create an original image. Image creation and editing software like Canva make it easy for beginners to make and even sell professional-looking graphics quickly.
To get started, you’ll need to find your featured image dimensions. This is typically the width of your main content area.
If you’re a Chrome user, you can find your WordPress featured image size by right-clicking on your blog post content and selecting the ‘inspect’ tool.
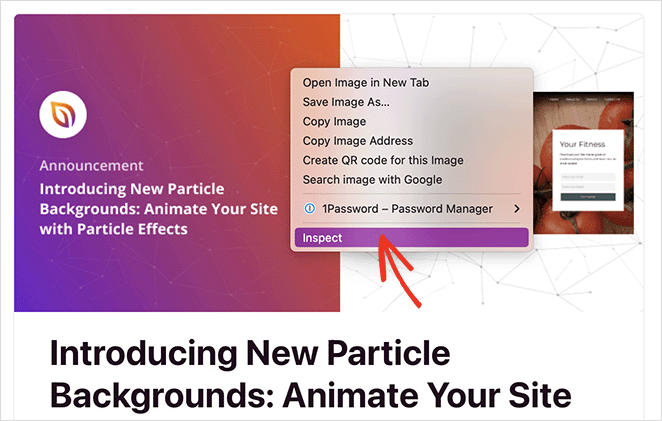
From there, hover over the lines of code until the full content width is highlighted in the preview.
You should now see a tooltip with the content dimensions. In our case, the width of our featured image should be around 717 pixels.
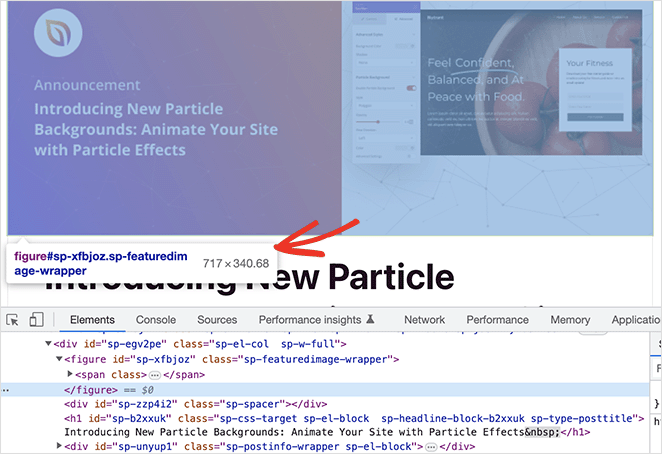
Next, log into Canva (you can get started with a free account), and click the custom size icon from the dashboard.

In the popup panel, enter your content width, which you found by inspecting your blog, and choose an image height.

Typically, it’s best to choose an image height smaller than the width, but this depends on your blog’s overall look and feel. Once you’ve done that, click the Create New Design button.
Canva will open a new window with a blank canvas for your design.
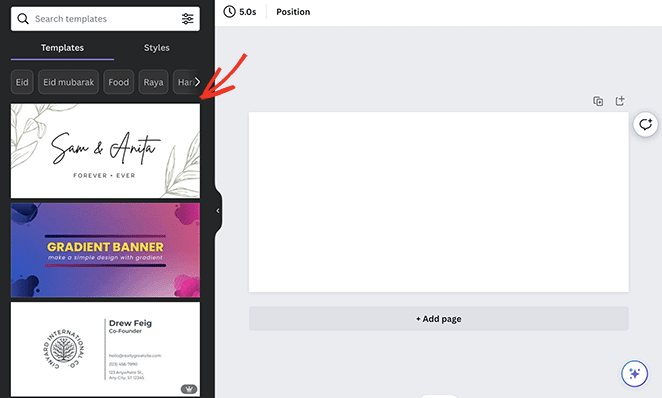
From there, you can choose from many pre-made templates and customize them until you have a stunning design for your WordPress featured image.
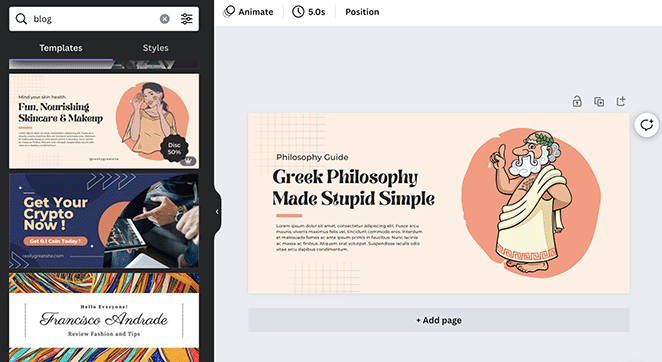
Now it’s simply a case of clicking the Share button and downloading your image.
How to Optimize WordPress Featured Images
Before uploading any images to WordPress, optimizing them is good practice to ensure they don’t add bloat to your site. Large-size images can impact your site’s loading time and harm the user experience.
To help, here are some tips for optimizing images for the web:
- Pick the best file format: When saving your image, ensure you save it in the correct file format. Choose JPEG for photos with lots of colors, PNG for images with transparency or sharp lines, and GIF for small animations.
- Make images smaller: Scale down full-size images to fit your website design. You can use tools like Photoshop, GIMP, or Pixlr online.
- Compress images: Reduce the file size of your images with compression tools like TinyPNG or JPEGmini. Lossless compression is best for PNGs and GIFs to reduce sizes without losing quality. Lossy compression has a slight quality drop but is best for JPEGs and WebP file formats.
Following these steps will help you optimize featured images and make your WordPress website faster.
Once your images are optimized, you can head back to your WordPress admin and follow the instructions from earlier to add them to WordPress as featured images.
How to Remove a WordPress Featured Image
Sometimes, you may want to replace or remove a featured image from specific WordPress posts or pages. Doing this is just as straightforward as adding them.
To remove a featured image in WordPress, edit the post or page. Then in the right-hand sidebar, click the Remove featured image link.
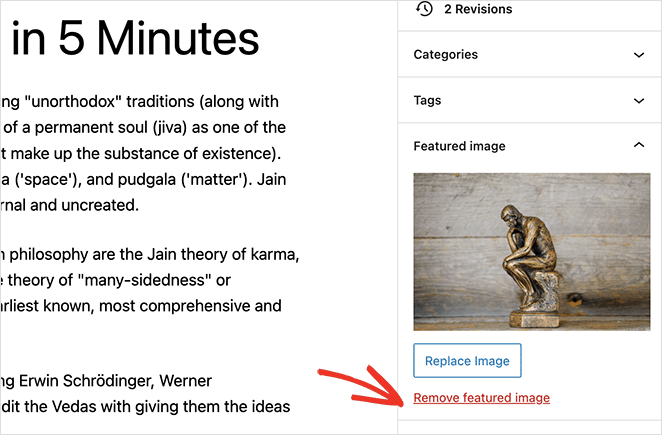
Alternatively, you can click the Replace Image button, which opens the media library to select a new image.
WordPress Featured Image: Frequently Asked Questions
The recommended size for a featured image varies depending on your WordPress theme and layout. However, a common size for blog post featured images is 1200×628 pixels.
By default, WordPress only allows one featured image per post or page. However, you can use plugins to add additional featured images if needed.
If your featured image is not showing up, it could be due to several reasons, such as:
- Your theme doesn’t support featured images.
- You haven’t set a featured image for the specific post or page.
- There is a conflict with a plugin or custom code.
- The image file is too large or has an unsupported format.
To resolve the issue, ensure that your theme supports featured images, double-check your post or page settings, and troubleshoot any plugin or code conflicts.
To optimize your featured images for SEO and social media sharing, follow these tips:
- Use descriptive file names and alt text to provide context for search engines.
- Choose the right image format for optimal quality and file size.
- Compress your images to reduce file size without sacrificing quality.
- Use plugins like All in One SEO to set up Open Graph and Twitter Card metadata for better social media sharing previews.
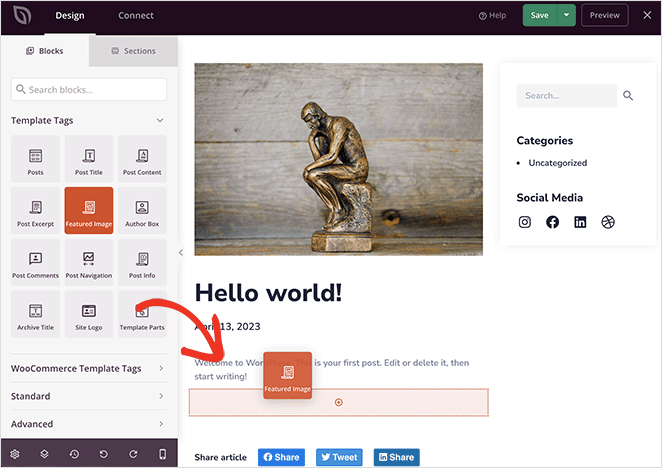
The featured image’s location depends on your theme’s design. To change the location, you can either customize your theme’s PHP templates or use a page builder like SeedProd to design custom layouts with more control over the featured image placement.
There you have it!
We hope this article has helped you learn how to add a WordPress featured image to your site content. You might also like this guide on how to change your WordPress theme without losing content.
Thanks for reading! We’d love to hear your thoughts, so please feel free to leave a comment with any questions and feedback.
You can also follow us on YouTube, X (formerly Twitter), and Facebook for more helpful content to grow your business.

