Do you want to create a coupon code landing page for your online store?
Many eCommerce stores use coupon pages to engage existing shoppers and attract new potential customers. Yet with a landing page, you can focus peoples’ attention, increasing your store’s conversions and sales.
In this article, we’ll show you how to create a coupon code landing page in WordPress easily.
What Is a Coupon Code Landing Page?
A coupon code landing page is a web page that offers visitors money off their next purchase. And unlike regular website pages, landing pages focus on a single goal.
For example, eCommerce website owners can use a discount landing page to offer savings on new products. And as a result, they increase product awareness and encourage more people to buy that product with a steep discount.
There are many ways you can use coupon code pages on your website:
- Reward people for entering a giveaway or contest
- During seasonal promotions like Black Friday
- Collect email addresses to grow your list
- Incentives for retargeting ad campaigns
- Promote limited-time flash sales
But if you want to increase leads and sales, the key is to focus each page on a single goal.
Now that you know what a coupon code landing page is, let’s look at creating one on your WordPress site.
How to Create a Coupon Code Landing Page in WordPress
In this tutorial, we’ll use SeedProd to show you how to create a discount code landing page.
SeedProd is the best WordPress page builder with coming soon and maintenance mode functionality. You can use this plugin to create any landing page in WordPress without writing code.
It offers 150+ responsive landing page templates to get started quickly. And with tons of blocks and sections, you can customize your page without hiring a developer.
The beginner-friendly visual editor is super easy to use, allowing you to preview your changes in real-time. Plus, with device visibility and mobile preview options, your design always looks impressive on any screen size.
So, follow the steps below to start creating a coupon code landing page with SeedProd.
Step 1. Install and Activate SeedProd
The first step is to install and activate SeedProd on your WordPress website.
And if you need help adding SeedProd to your site, you can check out this guide on installing a WordPress plugin.
Note: SeedProd also has a free version you can install. But we’ll use the Pro version today because it has some really cool features we want to take advantage of.
After installing and activating SeedProd, head to SeedProd » Settings from your WordPress dashboard. On this page, you can enter your license key to access plugin updates and advanced features.
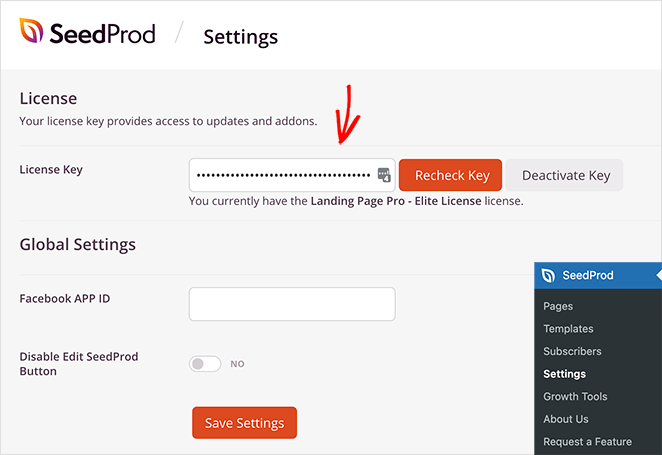
You can find your SeedProd license key on the SeedProd website in your account area, under the Downloads tab.
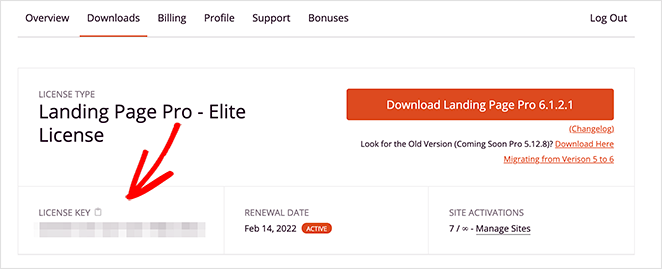
After verifying your license key, you’re ready to start creating your coupon page.
Step 2. Create a Coupon Code Landing Page
To create your coupon code landing page, go to SeedProd » Pages from your WordPress admin panel.
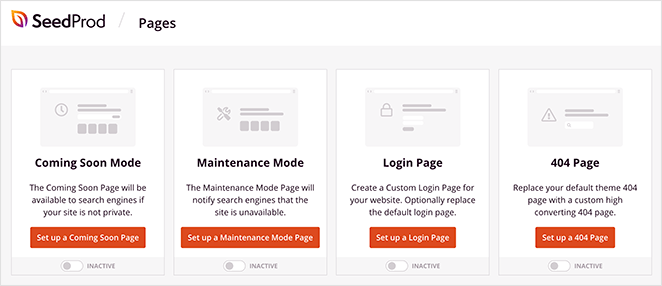
On the following screen, you’ll see several different page modes, including:
- Coming Soon
- Maintenance Mode
- Login Page
- 404 Page
Each mode lets you create that specific page type with just a few clicks. For example, you can create a coming soon page to hide your WordPress site while it’s under development.
Under the page mode section is an area to create any type of page. So click the Add New Landing Page button to create a brand new page with SeedProd.
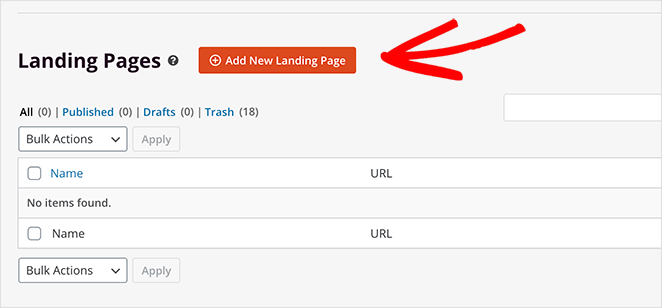
On the next screen, you’ll see SeedProd’s library of responsive landing page templates.
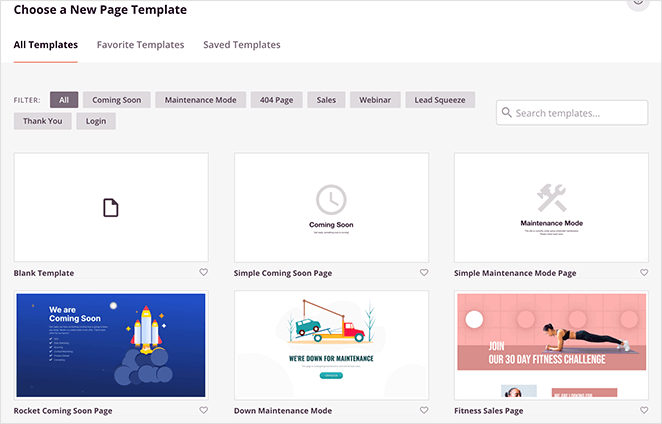
You can filter the designs by clicking any of the tabs along the top:
- All
- Coming Soon
- Maintenance Mode
- 404 Page
- Sales
- Webinar
- Lead Squeeze
- Thank You
- Login
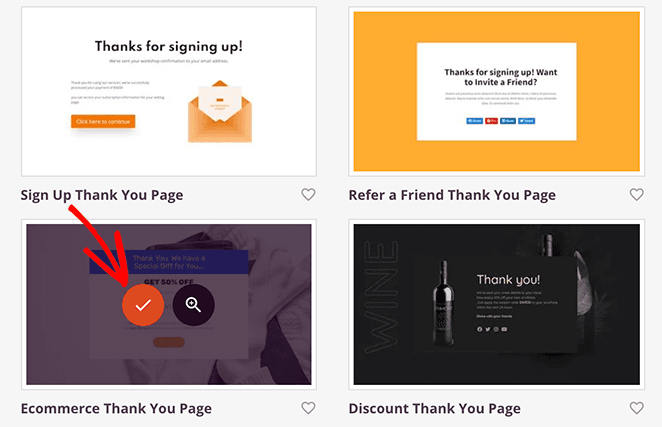
Hover over any template to see options to preview it and click on the checkmark icon to choose that design.
For this tutorial, we chose the “Ecommerce Thank You Page” template under the Thank You tab.
As soon as you choose the template, you’ll see a window where you can add your page name and URL.
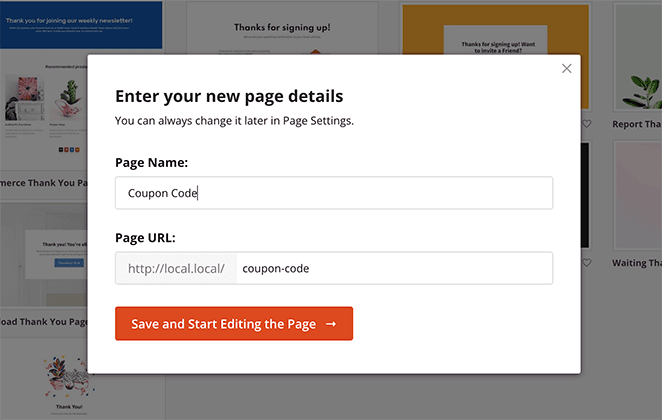
And after launching the template, SeedProd opens it in the drag-and-drop builder. From there, you can customize your coupon code page easily.
Step 3. Customize Your Promo Code Page
SeedProd’s visual editor makes it easy to customize your coupon code screen. On the right side is a live preview of your design to make edits and see the changes in real-time.
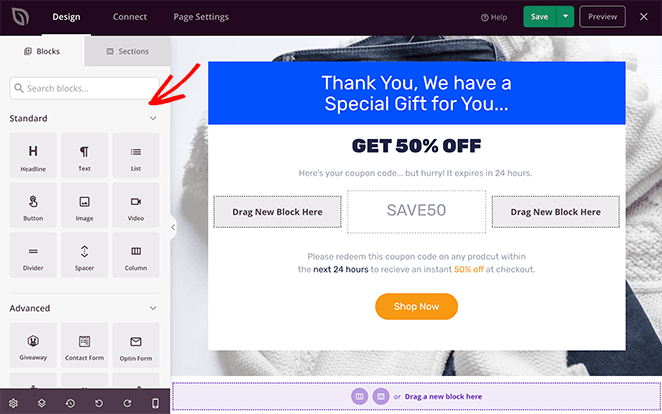
And on the left are various sections and blocks for building and customizing your design.
To edit an element, simply click it, and the settings for that block will open on the left. For example, clicking the heading element opens its content settings panel.
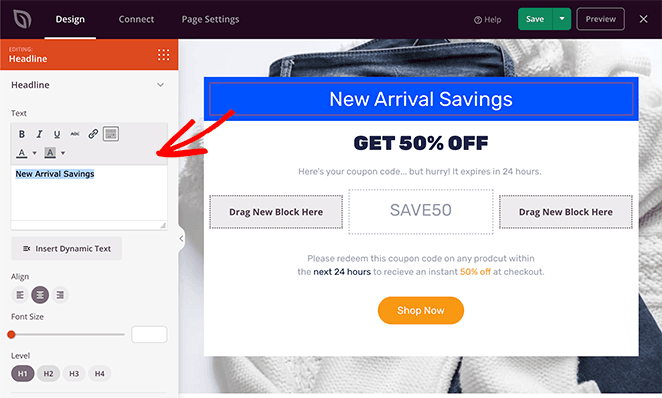
From there, you can edit the content, change the font colors and size, and even change the heading tags to optimize your page for search engines.
You can do the same for any other elements on your page, such as your subheadings, unique code, and call-to-action buttons.
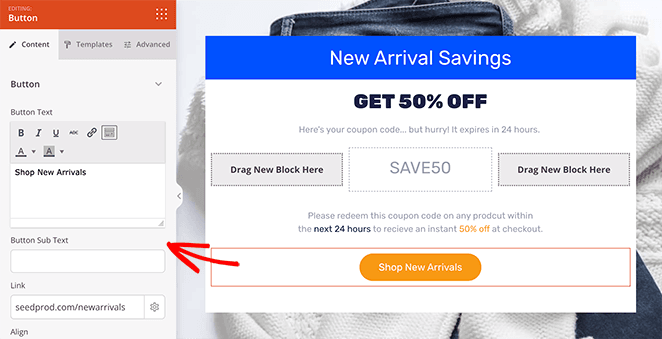
For instance, clicking the call to action button lets you change the button link, colors, and more.
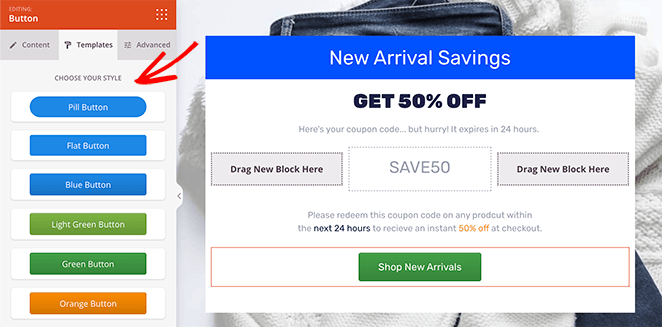
You can also click the Templates tab to change your button style quickly.
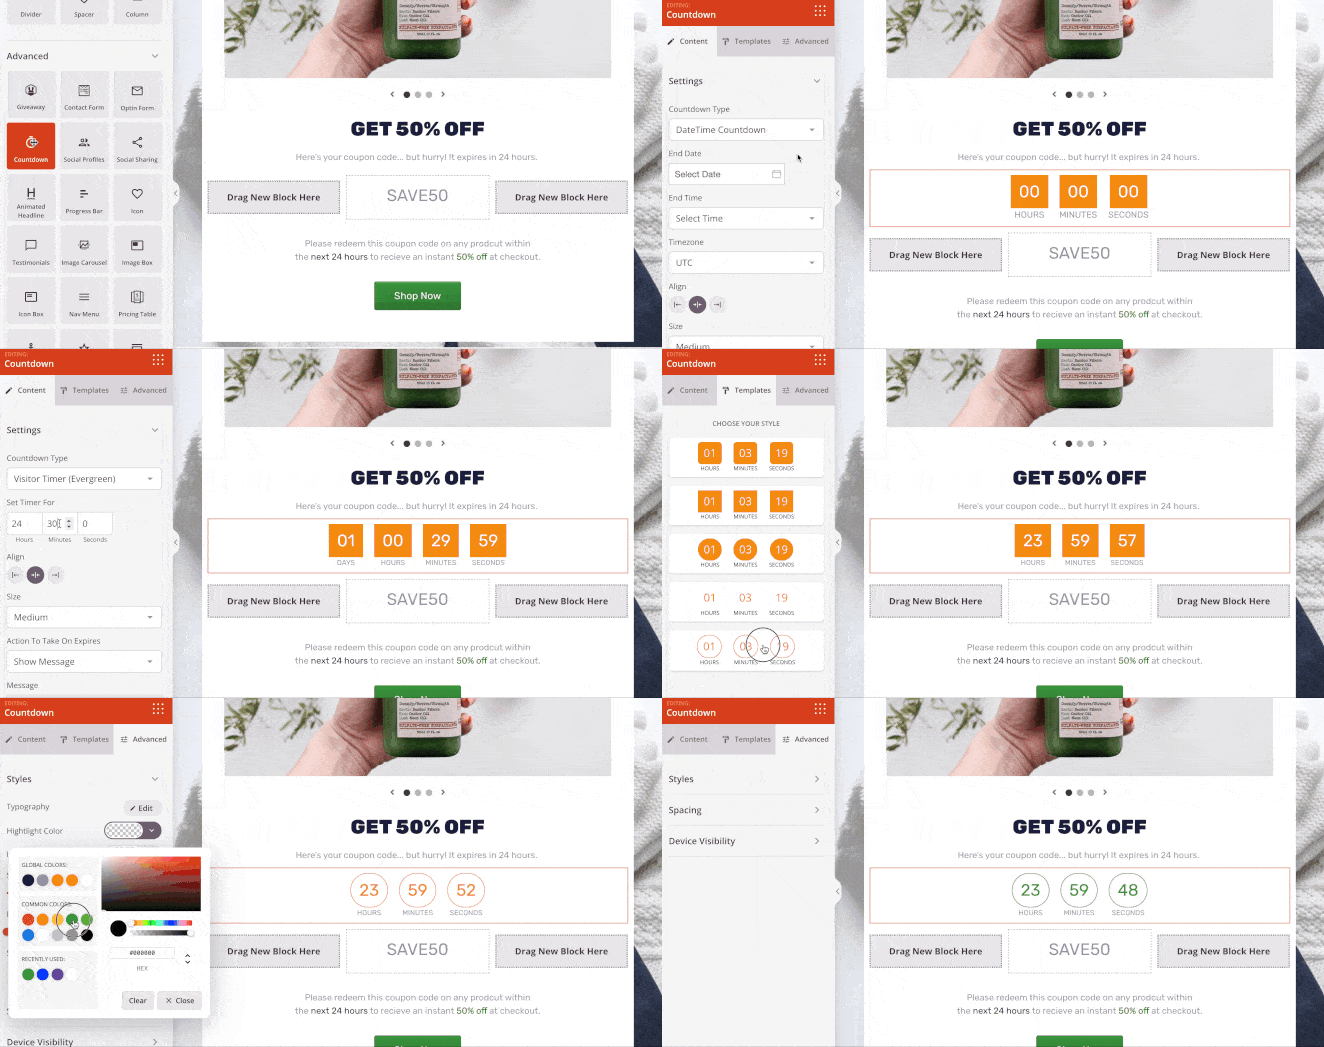
You can add more content to your page by choosing a block from the Standard, Advanced, or WooCommerce block sections.
- The Standard blocks include bullet lists, images, buttons, and videos, etc.
- Advanced blocks include optin forms, giveaways, countdown timers, and many more lead generation tools.
- The WooCommerce blocks allow you to add shopping carts, checkouts, product grids, and add-to-cart buttons to your coupon page.
We recommend adding a countdown timer to create a sense of urgency and an image gallery to highlight new products.
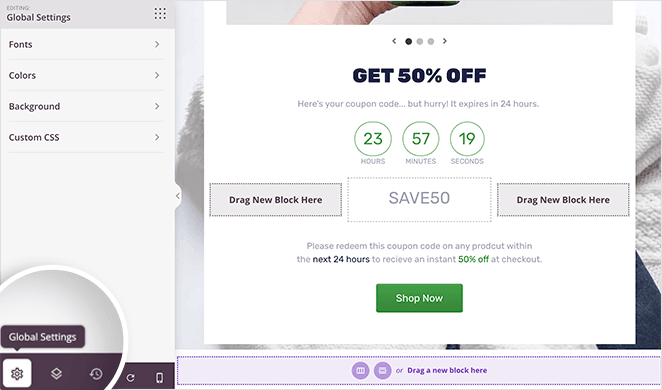
In addition to customizing and adding fresh content to your coupon code landing page, you can also control the colors, fonts, and styles globally in the Global Settings panel. This saves you from customizing every block manually.
You can find the Global Settings panel by clicking the gear icon in the bottom corner of your screen.
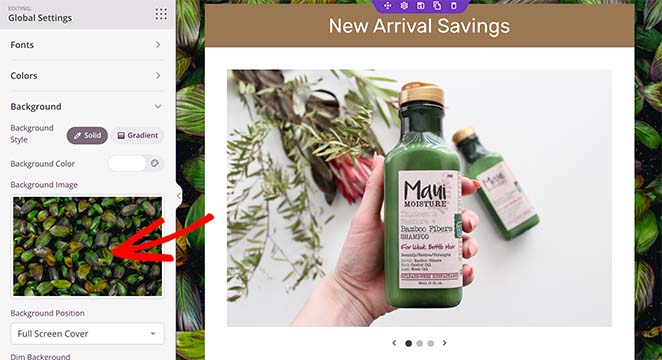
From there, click any heading to add a global color scheme, fonts, background image, or custom CSS.
For example, you can remove the default background image and replace it with something relevant to your offer.
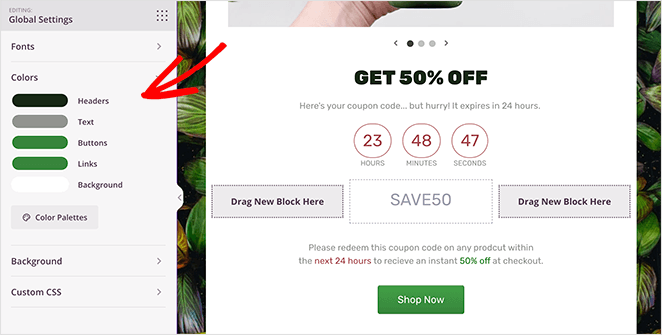
You can also change the global font, link, and button colors to match your website’s branding.
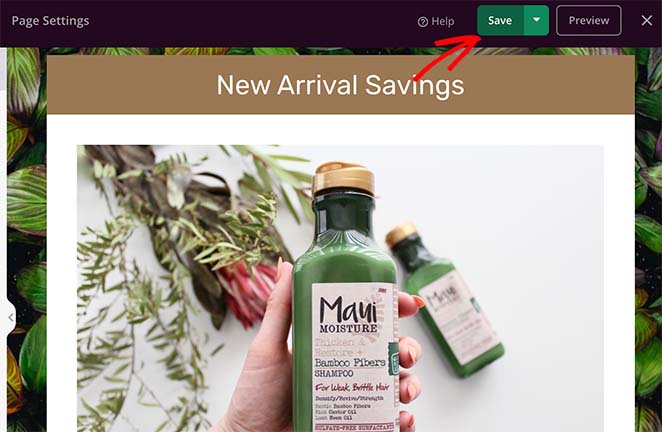
When you’re happy with how things look, click the Save button at the top of your screen.
Step 4. Configure Your Page Settings
Before publishing your discount landing page, there are several settings you can configure. For example, if your page’s goal is to collect email addresses, you can connect to an email marketing service.
To do that, click the Connect tab at the top of your screen.
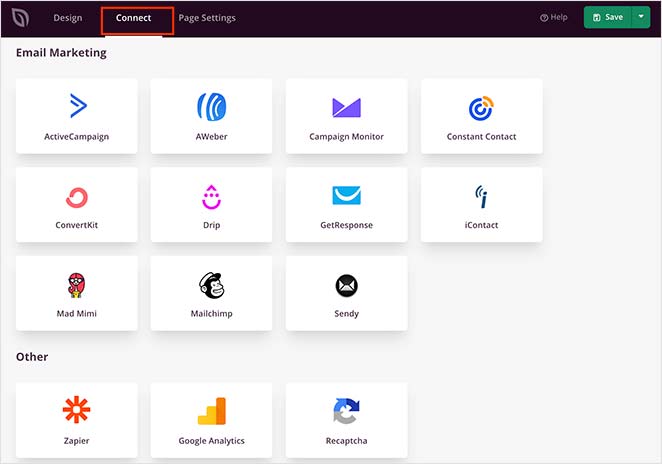
From there, you can choose from popular email marketing services, including Constant Contact, Mailchimp, MailerLite, and more.
Then, follow the instructions to link and authorize your service. For instructions on connecting to each email marketing service, check out our email integration documentation.
Now, click the Page Settings tab to look at the different landing page options there.
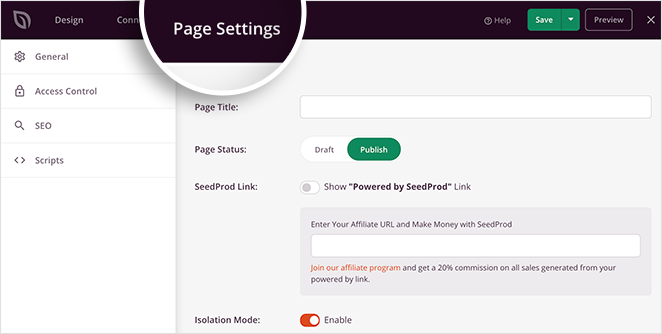
Depending on your SeedProd plan, this page has several sections, including:
- General – Change your page title, URL, and publish status
- SEO – Add an SEO title, meta description, and more to your landing page
- Analytics – Connect a WordPress Google Analytics plugin to track your performance
- Scripts – Add 3rd-party scripts like your Facebook pixel
- Custom Domain – Point your landing page to a custom domain name (Elite plans only)
Remember to click Save to store your settings before moving on to the last step.
Step 5. Publish Your Discount Code Landing Page
Before publishing your page, let’s see how it looks on mobile screens. To do that, click the mobile preview icon in the bottom toolbar, and you’ll see your page as it looks on mobile devices like smartphones.
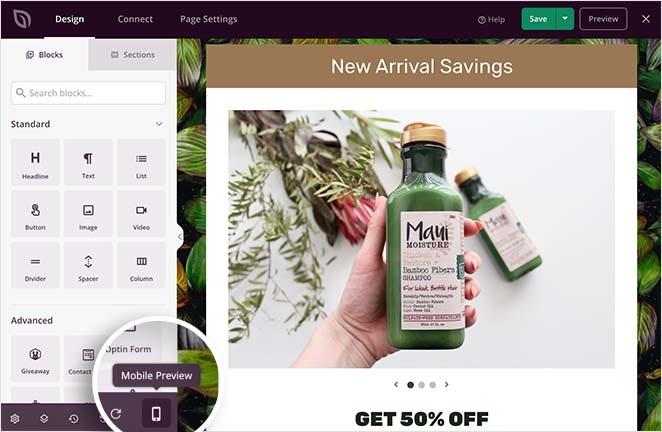
From there, you can edit your design and even hide some elements from showing on desktop or mobile.
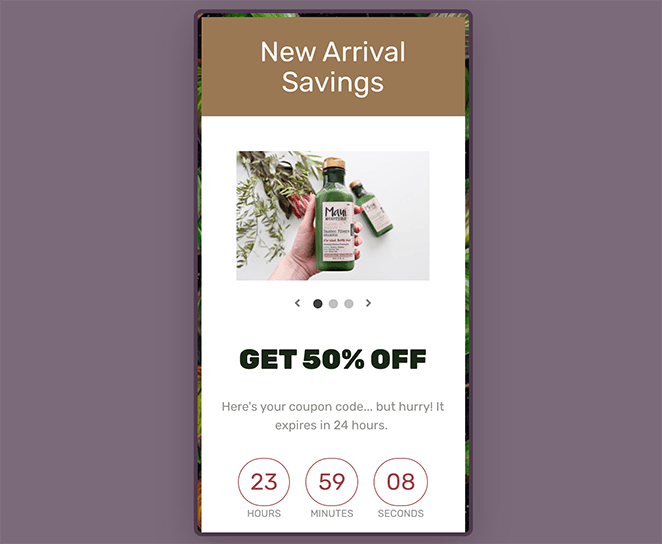
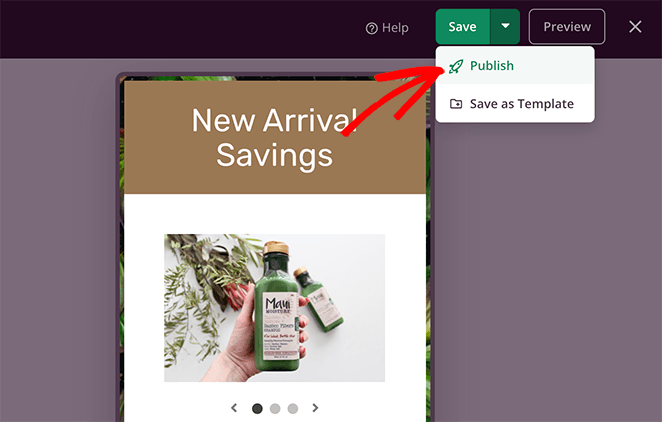
When you’re ready to publish your promo code page, click the drop-down arrow beside the Save button and click Publish.
And that’s it!

You’ve successfully added a coupon code landing page to your WordPress site.
Frequently Asked Questions
Promote your coupon code landing page through various marketing channels like email newsletters, social media platforms, search engine marketing, and affiliate marketing. You could also consider using pay-per-click advertising or collaborating with influencers in your industry.
A coupon code landing page should include the coupon code, details about the discount or deal, terms and conditions, an easy way to copy the code, and a call-to-action that leads the visitor to the checkout or shopping cart. It’s also helpful to include a FAQ section to address common questions or concerns.
You can track the success of your coupon code landing page by using tracking tools like Google Analytics. These tools can provide insights into how many people visit your page, how long they stay, and whether they take any actions like copying the code or making a purchase. You can also track the number of redeemed codes to measure direct success.
We hope this article helped you learn how to create a coupon code landing page for your online store. You might also like this guide on how to display new products in WooCommerce.
Thanks for reading. Please follow us on YouTube, Twitter, and Facebook for more helpful content to grow your business if you liked this article.


