Want to create a WordPress splash page that makes a strong first impression?
A splash page is like a welcome screen that appears before visitors reach your main site. Think of it as a short intro page where you can highlight a special offer, collect emails, or share an announcement. It’s different from a landing page because its main job is to grab attention fast.
In this guide, I’ll explain exactly what a splash page is and show you step-by-step how to create a WordPress splash page using SeedProd, the easiest drag-and-drop page builder for beginners.
Quick steps to create a splash page in WordPress:
- What Should You Include in a Splash Page?
- Step 1. Install SeedProd WordPress Landing Page Builder
- Step 2. Create a New Landing Page in WordPress
- Step 3. Choose a WordPress Splash Page Template
- Step 4. Add Content to Your Splash Page
- Step 5. Customize Your Splash Page Design
- Step 6. Connect Your Email Marketing Provider
- Step 7. Configure Your Page Settings
- Step 8. Check Your Page is Mobile Friendly
- Step 9. Publish Your WordPress Splash Page
What Is a WordPress Splash Page?
A WordPress splash page is a short intro screen that appears before your homepage, designed to grab attention right away.
It can include your logo, a welcome message, or key details like a special offer. Many sites also use splash pages for age verification, under construction notices, or language and location selection.
What Is the Purpose of a WordPress Splash Page?
The purpose of a WordPress splash page is to capture attention before visitors reach your main site and guide them to the right next step.
- Promote a special offer or new product
- Show an age verification disclaimer
- Highlight an upcoming event
- Collect contact details and grow your email list
- Promote your social media profiles
- Tell visitors your new website is coming soon

For example, Zara uses a splash page to send shoppers to the right country store, while Forbes displays a daily quote before showing its main site.
In short, splash pages create a strong first impression and direct visitors where you want them to go.
What Should You Include in a Splash Page?
A good splash page includes just the essentials—enough to introduce your site, share key info, and let visitors move forward quickly.
- Logo or design elements: Instantly reinforces your brand.
- Short message or mission statement: Explains the purpose of your site.
- Navigation links: Direct visitors to the right area of your website.
- Skip option: Lets users bypass the splash page if they prefer.
- Loading indicator: Shows progress if your site takes a moment to load.
- Language or location selector: Helpful for global audiences.
The goal is to keep it simple. Make your splash page clear, fast, and easy to skip when needed.
How Do I Create a WordPress Splash Page?
The fastest way to create a WordPress splash page is with a drag-and-drop builder like SeedProd. It lets you design a professional page in minutes without coding or hiring a developer.

SeedProd comes with pre-built templates, point-and-click customization, and built-in coming soon and maintenance mode options so you can work privately while keeping your site looking professional.
Here’s what makes SeedProd stand out:
- Dozens of professionally designed splash page templates
- Lead-focused blocks and pre-built page sections
- One-click integrations with popular email services
- Point-and-click design controls with live preview
- Mobile-friendly editing and previews
- Lightweight code for fast load speeds
Because it’s optimized for speed, SeedProd won’t slow down your site like bulkier builders. That means better SEO, a smoother visitor experience, and more conversions.
If you want to launch a splash page quickly and effectively, here’s how to do it step by step with SeedProd.
Step 1. Install SeedProd WordPress Landing Page Builder
First, click here to get started with SeedProd and download the plugin. Then, install and activate the plugin on your WordPress website. If you need help with this, check out this tutorial for installing a WordPress plugin.
After activating SeedProd, you’ll see a welcome screen asking you to enter your license key. You can find the license key by checking the inbox of the email you used to register. Or you can log in to SeedProd and see it in the Downloads section of your account.
Copy your license key, paste it into the field provided, and click the Verify Key button.

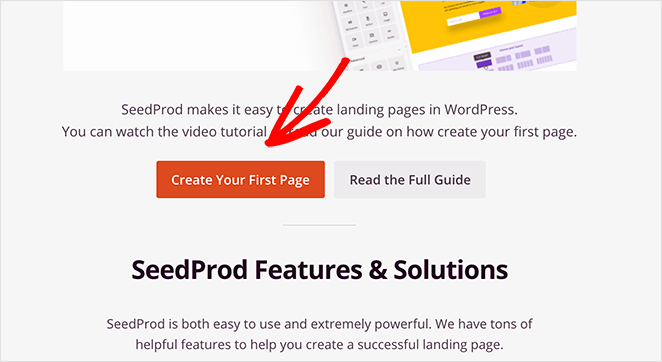
Next, scroll a short way down the page and click the Create Your First Page button.
Step 2. Create a New Landing Page in WordPress
On the following screen is SeedProd’s landing page dashboard. You’ll see several page modes across the top, including Coming Soon Mode, Maintenance Mode, and 404 Page.
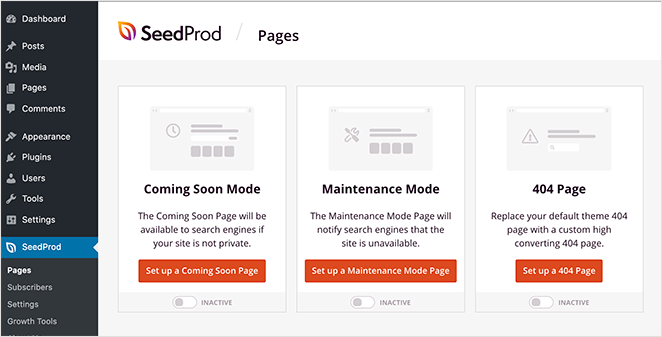
You can activate each mode with a single click to show customized landing pages to your website visitors.
Beneath the different page modes is where your landing pages are displayed after creating them. You won’t see anything in this section yet, but they’ll show in a list once you’ve made them.
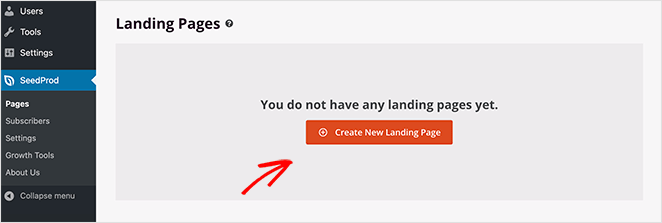
To make your first page, click the Create New Landing Page button.
Step 3. Choose a WordPress Splash Page Template
The next page shows SeedProd’s library of responsive landing page templates. Each design is fully customizable in the drag and drop builder.
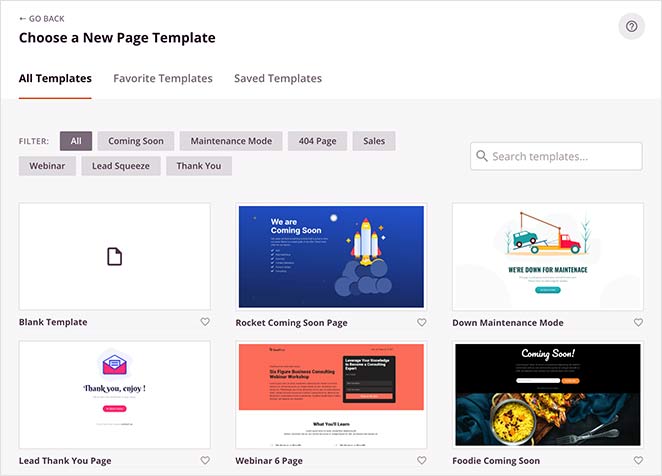
To help you find a template quickly, you can filter them by category. Just click any category label along the top to see the available:
- Coming Soon templates
- Maintenance Mode templates
- 404 Page templates
- Sales page templates
- Webinar page templates
- Squeeze page templates
- Thank You page templates
You can also use the search box to refine your results further.
Pick a template that closely resembles how you want your splash page to look. Then hover your mouse over the template image, and click the tick icon.
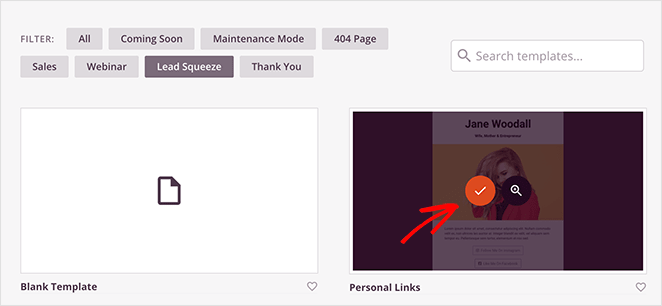
For our example, we chose the Personal Links lead squeeze template, which we’ll customize to use as a splash page.
After picking your template, you’ll see a popup asking you to enter your page name and URL.
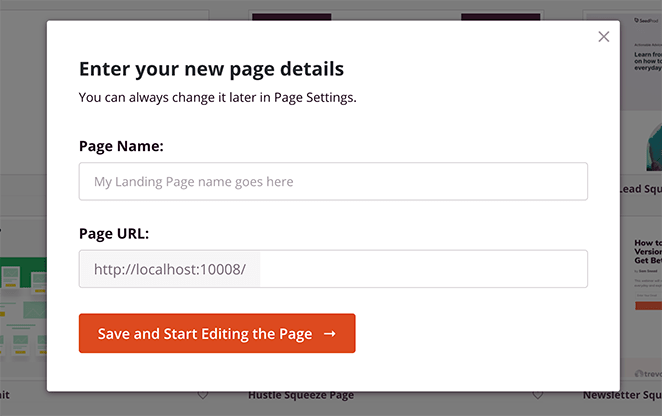
You can then click the Save and Start Editing the Page button to launch your template in the visual editor.
Step 4. Add Content to Your Splash Page
SeedProd’s visual editor has 2 distinct sections. On the left is a panel showing all the page blocks and sections you can use. While on the right is a preview of how your page looks.
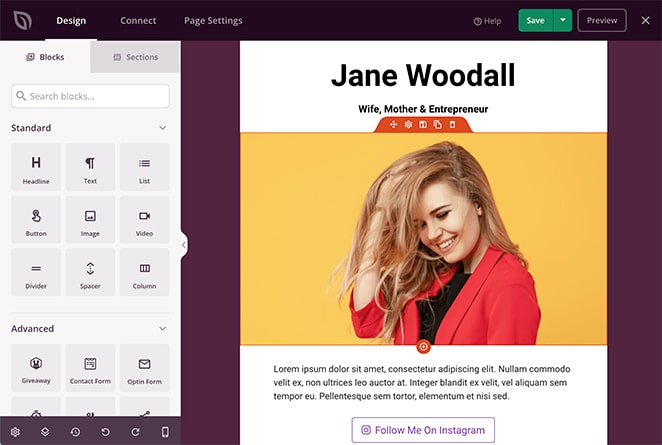
Adding content to your page is as simple as dragging a block from the left-hand panel and dropping it onto your preview on the right.
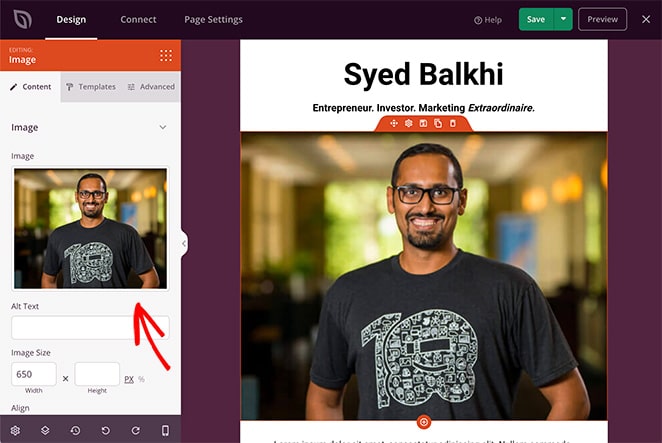
Clicking any element on your page shows that block’s settings in the left-hand panel.
For example, you can click the image block to remove the original photo and replace it with yours.
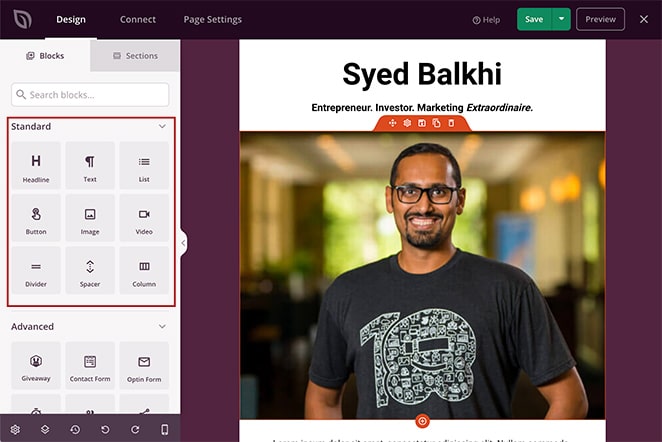
SeedProd’s landing page blocks come in 2 sections: Standard and Advanced blocks.
Standard blocks are the essential elements you need for any page, including images, buttons, spacers, dividers, lists, and more.
The Advanced blocks are a little different in that they’re focused mainly on lead generation.
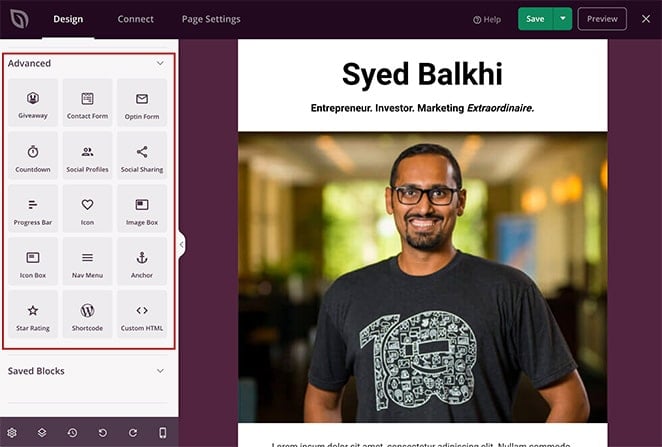
This means with just a few clicks, you can insert contact forms, giveaways, sign-up forms, star ratings, anchor links, and more to your page.
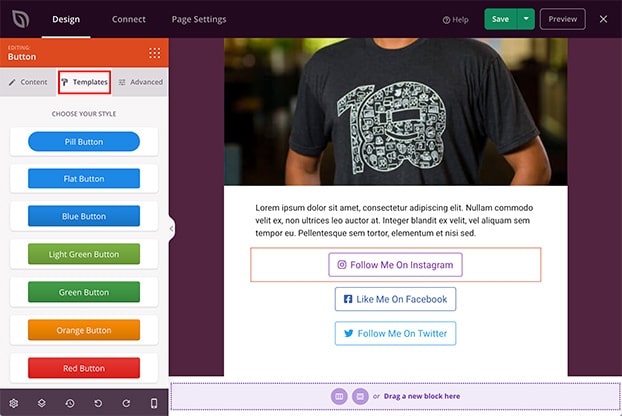
The majority of SeedProd’s blocks also include pre-made templates. You can implement these different styles with a single click, meaning you won’t need to customize each block manually.
For instance, clicking the Button block and selecting the Templates tab shows several different button styles to choose from.
Besides individual blocks, SeedProd has landing page Sections. You don’t need to build entire page sections manually, block by block. You can see the different areas by clicking the Sections tab.
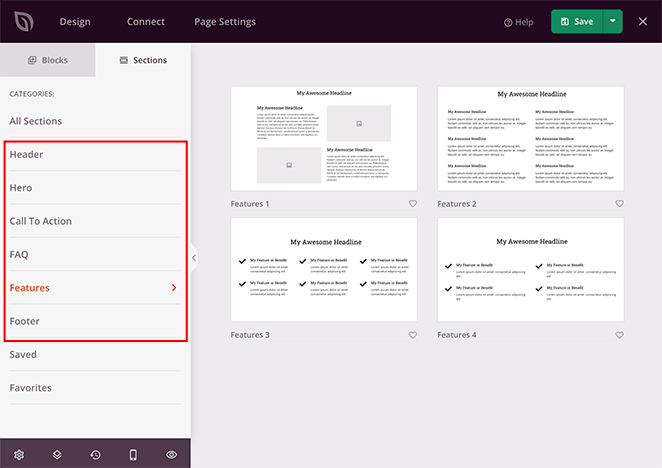
From there, you can choose a new:
- Header
- Hero area
- Call to Action
- FAQ section
- Features area
- Footer
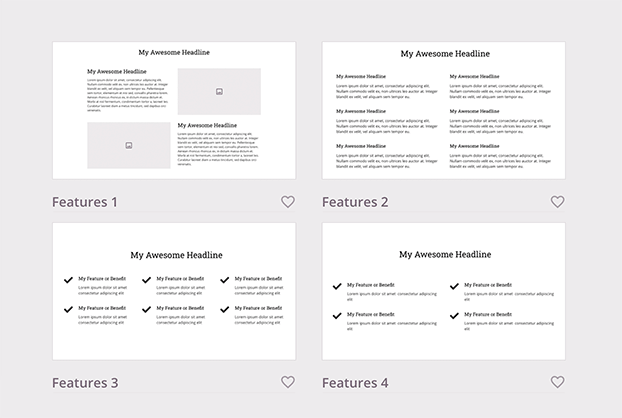
Continue adding content to your splash page until it includes all the information you want visitors to see.
You can save your progress by clicking the green Save button in the top-right corner.
Step 5. Customize Your Splash Page Design
With your content in place, chances are some parts of your WordPress splash page design still don’t look right. Maybe the background color is wrong, or your fonts look out of place.
The good news is you can change all of these things using SeedProd’s easy customization settings.
Just click the gear icon in the bottom-left corner of your screen to see your Global Settings.
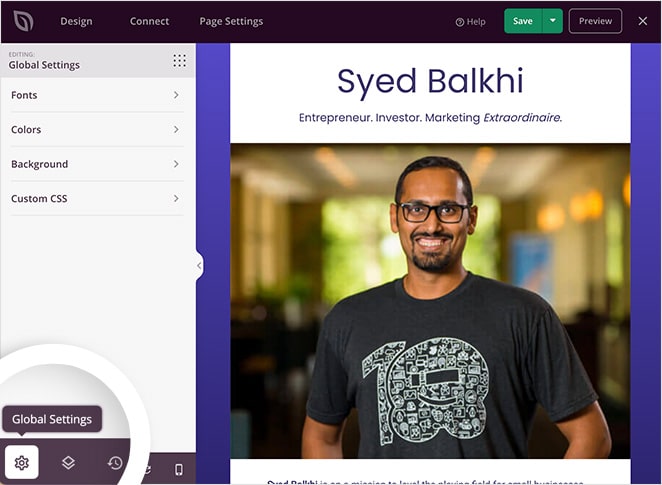
In this area, you can customize your global:
- Background
- Colors
- Fonts
- Custom CSS
Under the Fonts heading, you can change your global header and body fonts and weights. Just choose a new font or weight from the respective drop-down menus.
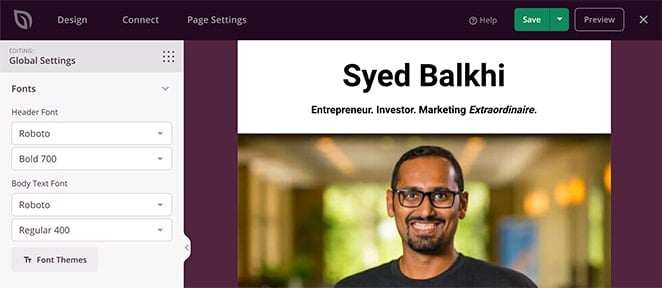
Alternatively, you can browse SeedProd’s curated library of font combinations by clicking the Font Themes button.
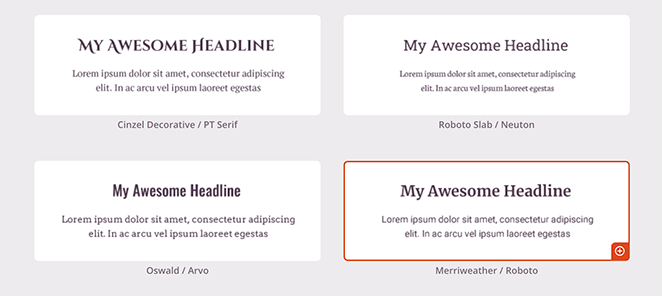
This shows you which fonts look the best together. Just click any font pairing to add your selection to your page instantly.
The Colors heading works in the same way. You can individually select different colors for global links, headers, text, buttons, and backgrounds with the handy color picker tool.
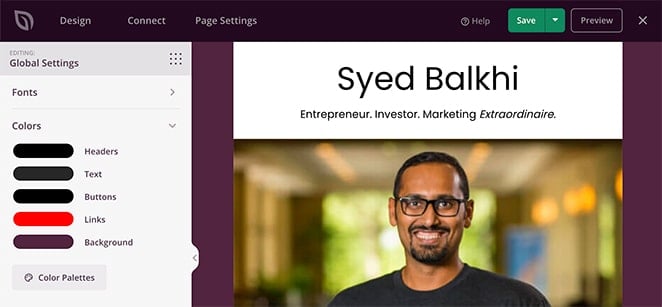
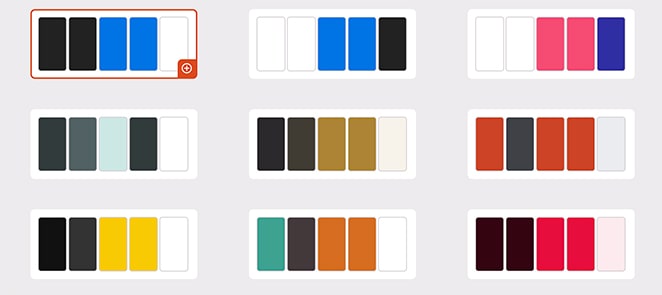
Or, if you prefer, you can click the Color Palettes button to choose from 20+ premade color schemes.
The Background section provides an easy way to customize your splash page background. You can set it as a solid color or gradient or upload a full-width background image from your WordPress media library or computer.
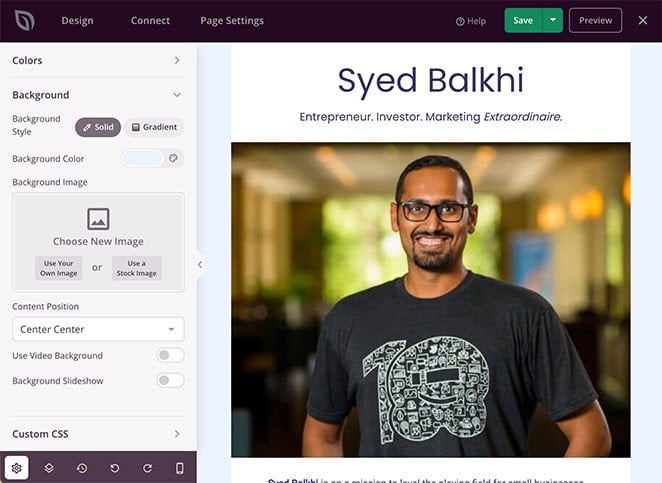
It’s also possible to add a video background or background slideshow by selecting the toggle for each setting.
Remember to click Save to preserve your customization settings.
Step 6. Connect Your Email Marketing Provider
Many splash pages offer users a free download in exchange for their contact details. To create this type of splash page, you’ll need the ability to connect your email marketing service.
Unlike other page builders that only connect to a few providers, SeedProd integrates with popular email newsletter services, including:
- ActiveCampaign
- AWeber
- Campaign Monitor
- Constant Contact
- ConvertKit
- Drip
- GetResponse
- iContact
- Mad Mimi
- Sendy
- Mailchimp
Just click the Connect tab at the top of the page builder to see the available providers. Then select your preferred service and follow the instructions to authorize your account.
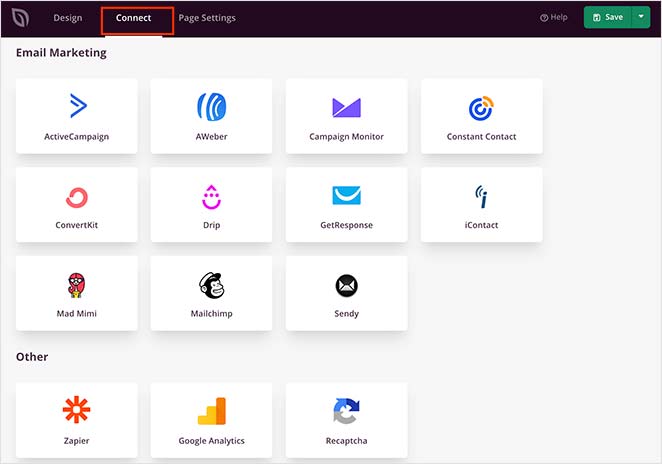
You can also use Zapier to link your page with thousands of other popular applications to automate your marketing efforts.
Don’t worry if you don’t have an email marketing provider yet.
Instead, you can use SeedProd’s built-in subscriber management dashboard. Whenever someone subscribes via your splash page, their details are stored automatically on your WordPress website.
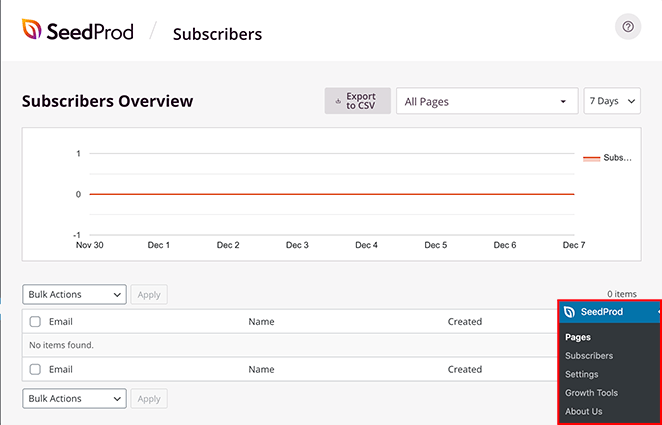
You can see them by visiting SeedProd » Subscribers from your WordPress dashboard.
Step 7. Configure Your Page Settings
Now that you’ve finished designing your splash page, you’ll want to configure a few necessary settings. To do that, click the Page Settings tab at the top of the page builder.

On this page, you can change the settings for your pages:
- General details – Change your page name and URL, and set it to draft or published.
- SEO – Fill in your on-page SEO information using relevant keywords in the page title and meta description via an SEO plugin like All in One SEO.
- Analytics – View your splash page performance with an analytics plugin such as MonsterInsights.
- Scripts – Enter tracking and retargeting scripts such as cookies or Facebook tracking pixels.
Remember to click the Save button before moving on to the next step.
Step 8. Check Your Page is Mobile Friendly
Almost everyone browses the internet from mobile devices nowadays. To offer a more streamlined experience to those particular website visitors, you’ll need a mobile-friendly splash page.
This is why SeedProd has a built-in mobile preview option. Just click the mobile preview icon to see how your splash page looks on mobile devices.

If anything doesn’t look right, you can quickly adjust things until you have a page that visitors can browse easily from their phones, tablets, laptops, or desktops.
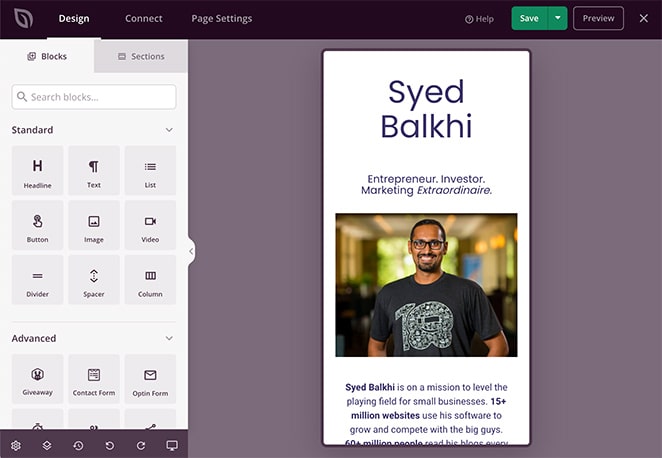
Click the same icon to switch back to the original desktop view.
Don’t worry; you won’t lose your changes. Any changes you make in the mobile view are applied to the desktop view.
Just remember to click the Save button.
Step 9. Publish Your WordPress Splash Page
Now that your design looks exactly how you want, it’s time to publish your splash page on your WordPress site.
To do this, click the down arrow next to the Save button and select Publish.
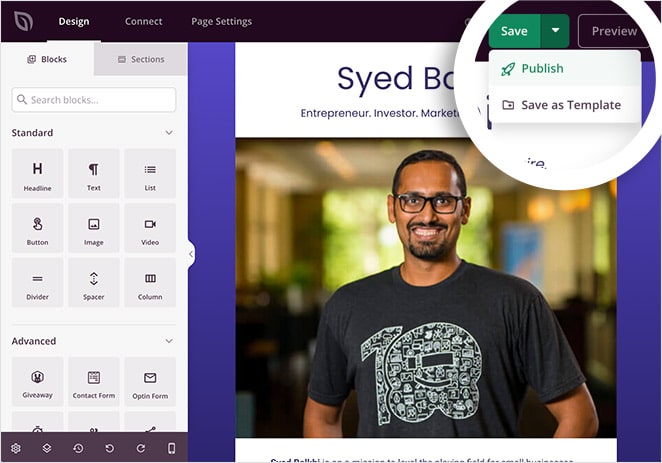
You’ll then see a popup telling you your page is now live.
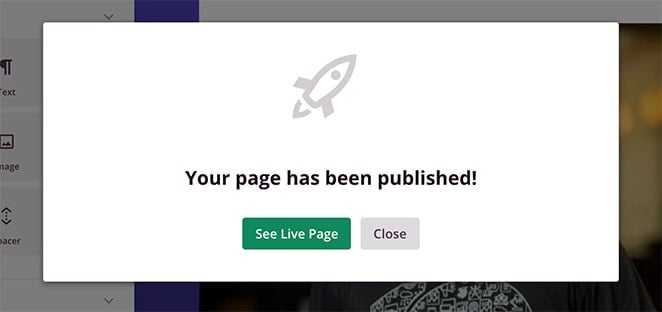
Click the See Live Page button to see how it looks.

Optimizing Your Splash Page with A/B Testing
The best way to improve your splash page is to run A/B tests and see which version drives more results.
A/B testing (or split testing) compares two versions of a page: version A (the control) and version B (with one change). That change could be a different call to action, a new color scheme, a layout tweak, or even a full redesign.
By sending traffic to both versions and tracking conversions, you’ll know exactly which design performs better. This step-by-step guide shows you how to set up A/B tests for your splash page.
FAQs About WordPress Splash Pages
Now you know what a WordPress splash page is, why it matters, and how to create one. With a tool like SeedProd, you can build a professional splash page in minutes without coding. A well-designed splash page helps you make a strong first impression, guide visitors where you want them to go, and even capture new leads.
Ready to create your own?
You might also find these guides helpful while setting up your splash page:
- Event Landing Page Examples
- Landing Page Best Practices
- Squeeze Page Examples
- Coming Soon Page Examples
Thanks for reading! We’d love to hear your thoughts, so please feel free to join the conversation on YouTube, X and Facebook for more helpful advice and content to grow your business.

