Want to learn how to make a video landing page for your WordPress website?
When I first started building websites, video landing pages felt overwhelming. I didn’t know how to add videos or use them in a way that actually got results. But over time, I figured it out.
Videos are a great way to get your message across fast. When you add one to a landing page, it can help grab attention and get visitors to take action.
In this guide, I’ll show you how I make video landing pages in WordPress that help turn visitors into customers.
What Is a Video Landing Page?
A video landing page is a web page where the main focus is a video. The video helps explain your product or service and encourages people to sign up or make a purchase.
Video landing pages can:
- Boost Conversions: Increase conversions by up to 86%.
- Enhance Engagement: Viewers retain 95% of a video’s message compared to 10% from text.
- Improve SEO: Pages with videos are 53 times more likely to rank first on Google.
- Meet Demand: 96% of consumers increased their video consumption in 2020.
Making a Video Landing Page WordPress
At first, I thought making a video landing page in WordPress would be hard. But once I found the right tool, it got a lot easier.
There are many landing page builders out there. Some, like Unbounce, are powerful but expensive and not made for WordPress. After testing a bunch of tools, I found SeedProd was the easiest one to use.
In this tutorial, I’ll use SeedProd to walk you through how I make a video landing page from scratch.

SeedProd is one of the most popular WordPress page builders with over 1 million users. It lets you create landing pages, themes, and layouts without any coding.
It comes with built-in blocks, sections, and customizable templates that make things simple. It also works with your email service, any WordPress theme, and WooCommerce.
Plus, it’s lightweight and loads fast, which helps with conversions and search rankings.
Let’s get started step-by-step:
- Step 1. Install SeedProd
- Step 2. Create a New Landing Page
- Step 3. Choose a Video Landing Page Template
- Step 4. Add Your Video Content
- Step 5. Customize Your Page Design
- Step 6. Connect Your Email Marketing Service
- Step 7: Publish Your Page
Step 1. Install SeedProd
To begin, download the SeedProd plugin and install it on your WordPress site.
✏️ Note
There is a free version of SeedProd, but I’m using the Pro version here for extra features.
If you need help, you can follow these instructions to install a WordPress plugin.
Once activated, you’ll see a welcome screen asking for your license key. Paste it in and click Verify Key.

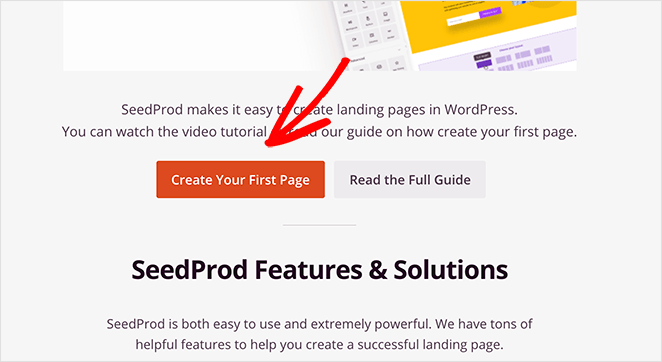
Then scroll down and click Create Your First Page.
Step 2. Create a New Landing Page
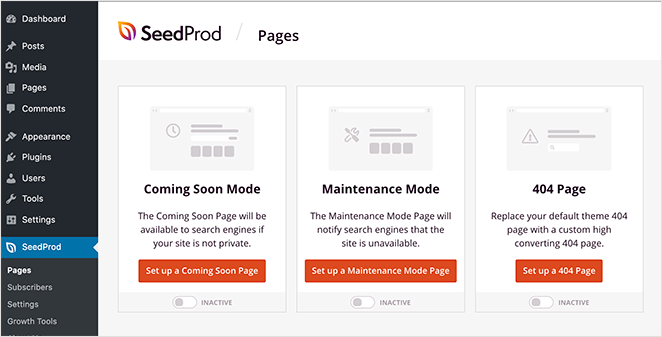
Next, you’ll see the SeedProd dashboard. At the top, you can enable Coming Soon Mode, Maintenance Mode, or a custom 404 Page.
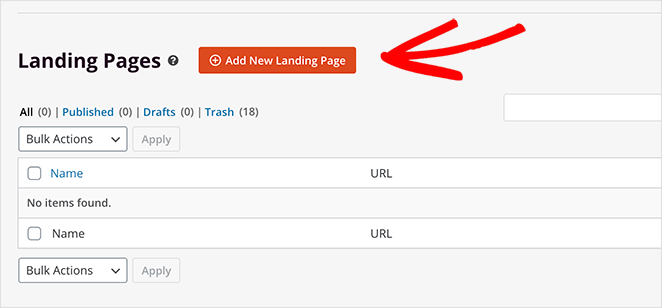
Below that, you’ll see a list of landing pages you’ve created. If this is your first time, it’ll be empty.
Click Add New Landing Page to start.
Step 3. Choose a Video Landing Page Template
Now, SeedProd will show a library of templates. You can filter by type or search for “video.”
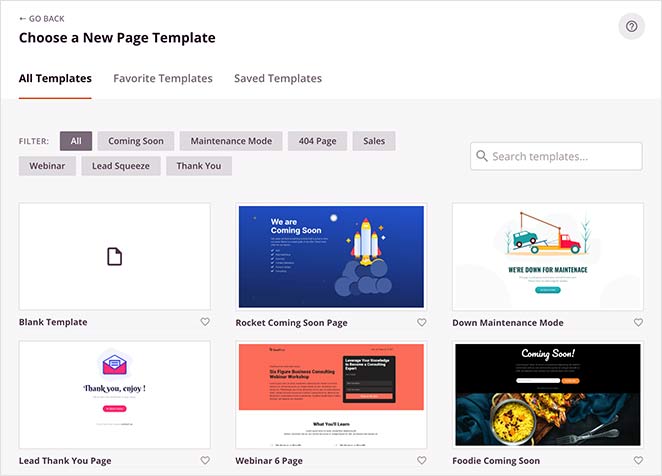
Many templates already have video blocks included. You can also start with a blank template and add your own.
For this tutorial, I’ll use the Real Estate Squeeze Page.
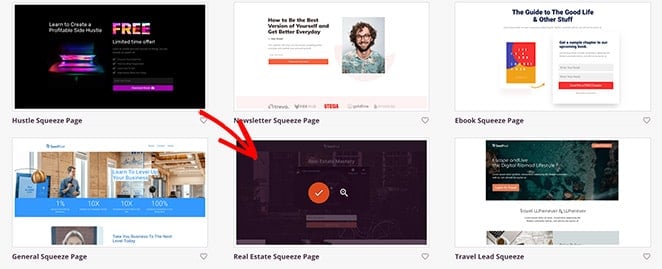
Hover over the template and click the tick to select it. Then give your page a name and URL. You can change these later.
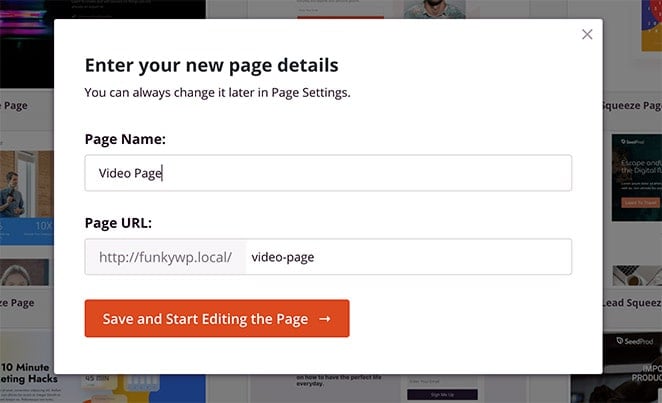
Finally, click Save and Start Editing the Page.
Step 4. Add Your Video Content
Now you’re in the visual editor. On the left are the blocks you can drag onto your page preview on the right.
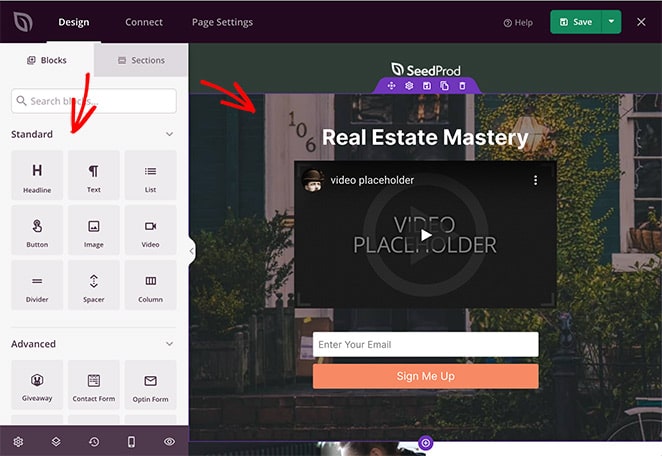
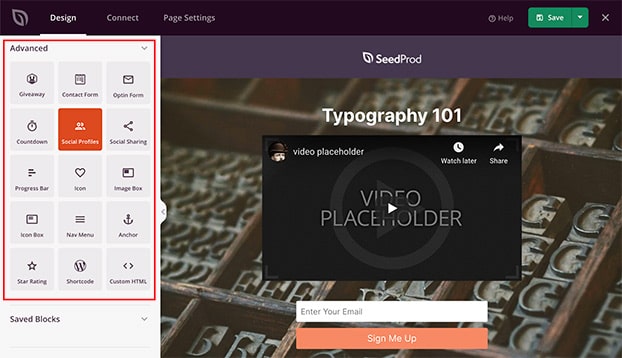
There are two types of blocks:
- Advanced blocks: Forms, giveaways, CTA buttons, countdown timers, testimonials, and more.
- Standard blocks: Text, images, buttons, columns, and videos.
To add your video, drag the Video block where you want it. Then click on it to open the settings and paste in your video URL.
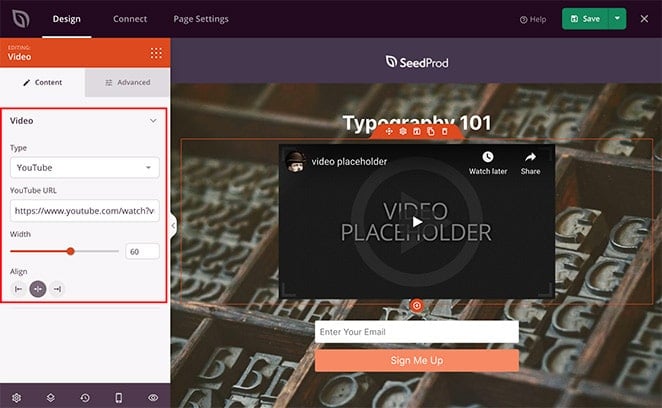
You can change the video size, alignment, and even add animation. If you want more options, try the Video Popup block.
Don’t forget to add a clear call-to-action under or near the video.
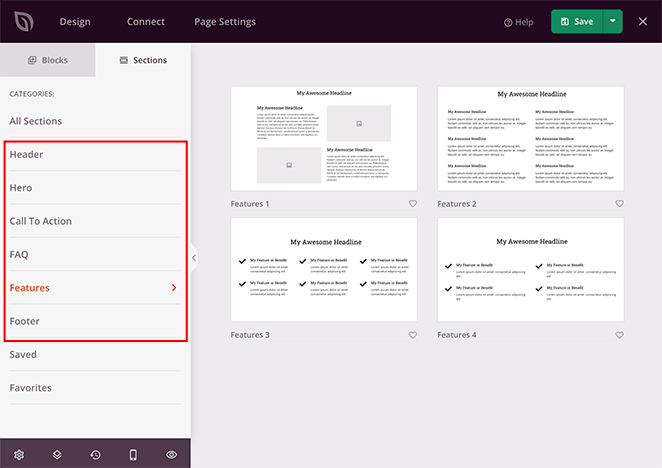
SeedProd also has ready-made sections for CTAs, FAQs, features, and more, so you don’t have to build everything from scratch.
Step 5. Customize Your Page Design
Once you’ve added your content, it’s time to make sure your page looks and feels like your brand.
Click the gear icon in the bottom-left corner to open SeedProd’s Global Settings.
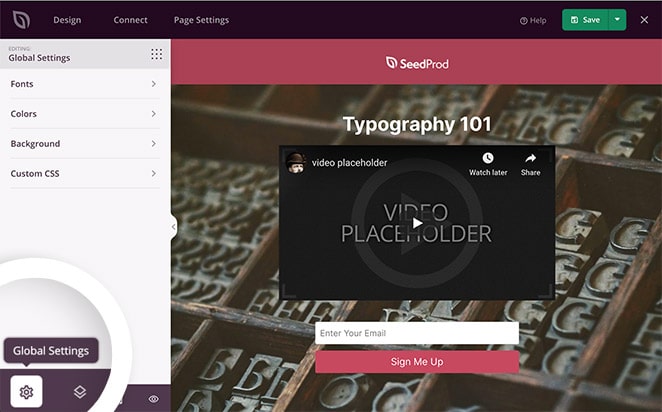
From there, you can customize things like:
- Fonts: Choose from built-in font themes or explore Google Font combinations to find styles that work well together.
- Colors: Set global colors for headings, text, buttons, and backgrounds. Or click Color Palettes to pick from 20+ pre-designed color schemes.
- Backgrounds: Upload a full-screen image, use a gradient, or set a background video or slideshow.
- Custom CSS: If you’re comfortable with CSS, this is where you can add extra styling to fine-tune your design.
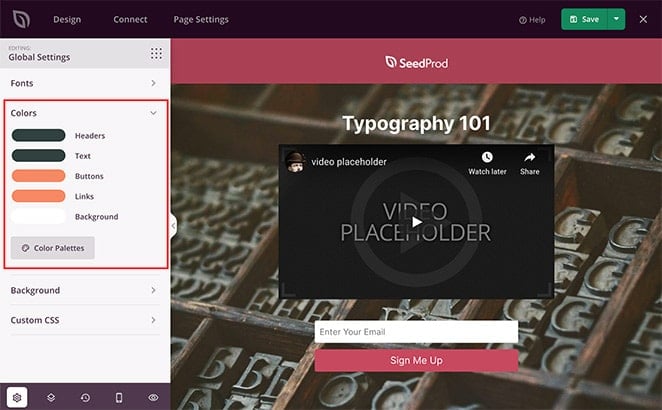
These settings make it easy to give your page a polished, professional look that still feels personal to your brand.
Step 6. Connect Your Email Marketing Service
To grow your email list, click the Connect tab and choose your email provider. Then follow the prompts to connect your account.
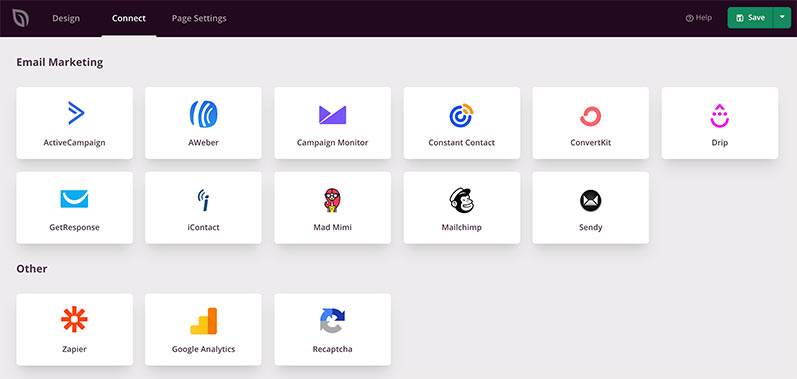
You can also set up Google Analytics, Recaptcha, or connect to Zapier for more tools.
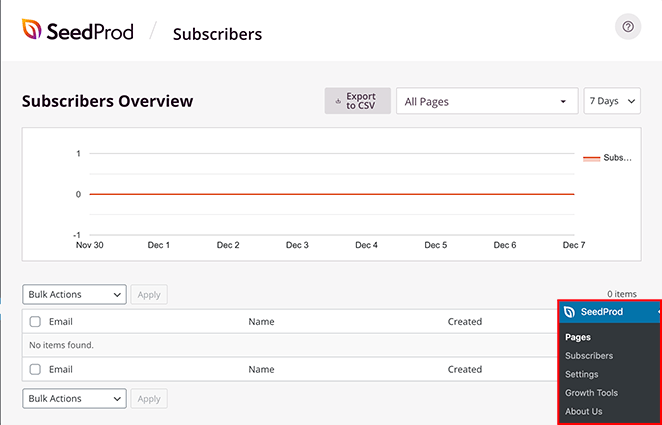
No email provider yet? SeedProd stores signups in your WordPress dashboard under SeedProd » Subscribers.
Step 7: Publish Your Page
Before you publish, it’s a good idea to do two quick checks.
Mobile preview
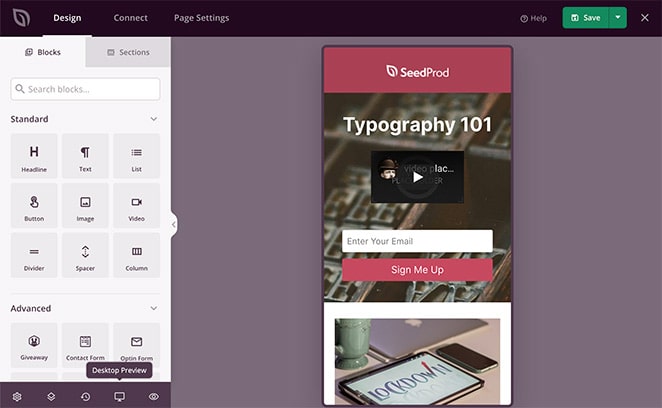
Click the mobile icon at the bottom of the editor to see how your page looks on phones and tablets.
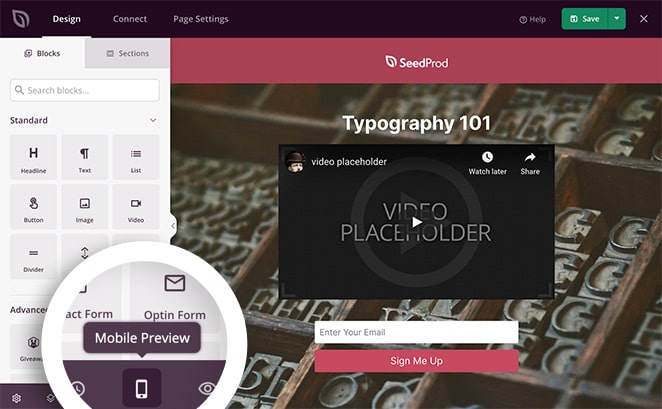
If anything looks off, you can adjust the layout in mobile view. Keeping your video above the fold helps increase engagement.
Page settings
Click the Page Settings tab to update your page name and URL, set the status to Published, enable Isolation Mode, or add things like SEO meta info, Google Analytics, or custom tracking scripts.

Once everything looks good, click the arrow next to Save, then click Publish.
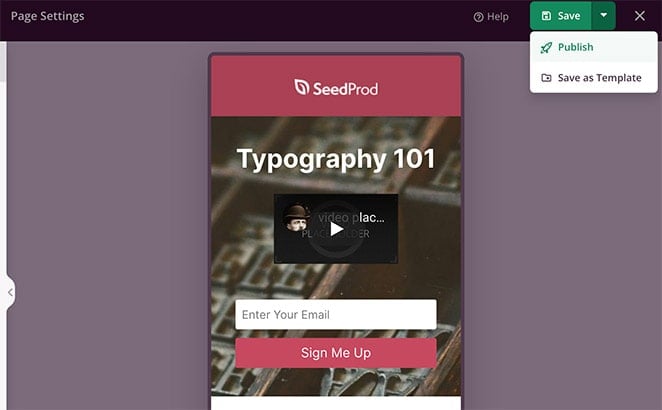
You’ll get a confirmation that your page is live. Click See Live Page to preview it.
Here is a video landing page example that we made following the steps above:
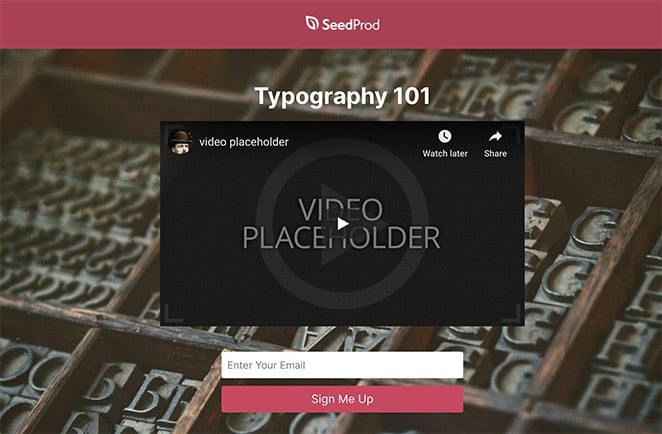
Examples of Video Landing Pages
Now, let’s look at some excellent examples of video landing pages created using our drag-and-drop builder.
Case Study 1 – Welcome Video Page
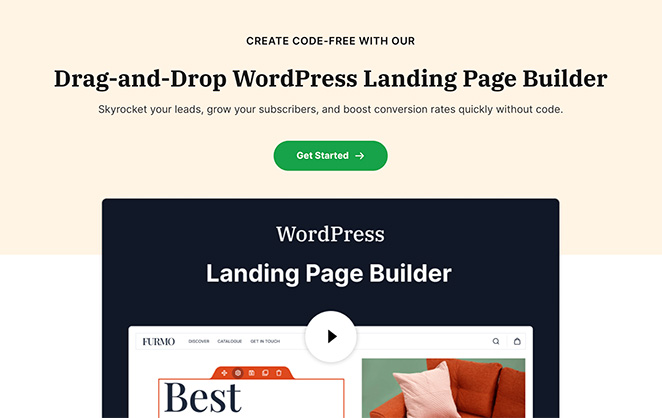
I built this one myself using SeedProd—even with no coding or design skills. The video explains what the product does, and the simple layout keeps things clear and fast.
Case Study 2 – PPC Video Landing Page
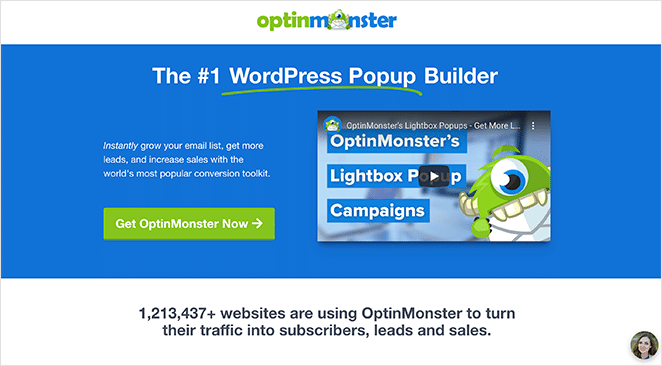
OptinMonster used a video landing page to lower cost-per-acquisition and boost conversions.
Their video helped explain the product clearly and led to:
- 13.3% higher click-through rate
- 47.2% lower CPA
- 340% more conversions
Read the full OptinMonster case study here.
Video Landing Page Best Practices
Here are some practical ways to get better results from your video landing page:
- Keep your video short and clear: Aim for under 90 seconds. Focus on the essentials.
- Choose a strong thumbnail: Pick an image that makes people want to click play.
- Avoid autoplay: Let visitors decide when to watch. It’s less intrusive.
- Add strong CTAs and supporting content: Don’t rely on the video alone—include headlines, buttons, and testimonials.
- Make sure your page loads quickly: A fast-loading page helps with conversions and SEO.
- Use relevant keywords: Add them to your video caption, description, and page content.
- Test different versions: A/B test things like CTA buttons, video placement, or colors to see what performs best.
FAQs About Video Landing Pages
That’s it!
I hope this helped you learn how to create a video landing page in WordPress.
With SeedProd’s drag-and-drop builder, you can make effective landing pages in just a few minutes—no coding needed.
You might also like these landing page best practices and this guide on A/B testing to optimize your page.
Thanks for reading! We’d love to hear your thoughts, so please feel free to join the conversation on YouTube, X and Facebook for more helpful advice and content to grow your business.

