When I started my small business blog in WordPress I made a costly mistake. I didn’t have a media kit page. Every time sponsors asked for my site’s information, I spent hours gathering stats and details to send by email.
I solved this problem by creating a dedicated media kit page. Now, instead of typing out the same information repeatedly, I direct potential partners to a single, professional-looking page.
A media kit page is simply a dedicated section of your website that contains all your important business information, media assets, and statistics in one place.
In this guide, I’ll show you how to create your own media kit page in WordPress. I less than 30 minutes, you’ll have a professional page that shows potential partners why they should work with you.
Steps to Create a Media Kit Page:
Why Do You Need a Media Kit Page?
Your media kit page is a lot like your business’s online resume. It’s a single page on your WordPress site where you share important details about your business with people who want to work with you.
When someone wants to write about you or buy advertising space, they need specific information. Instead of sending these details through email, you can point them to your media kit page. This saves you time and makes your business look more professional.
Your media kit should tell visitors about your business, show them your logo and photos, and share your website’s statistics (like how many people visit your site each month).
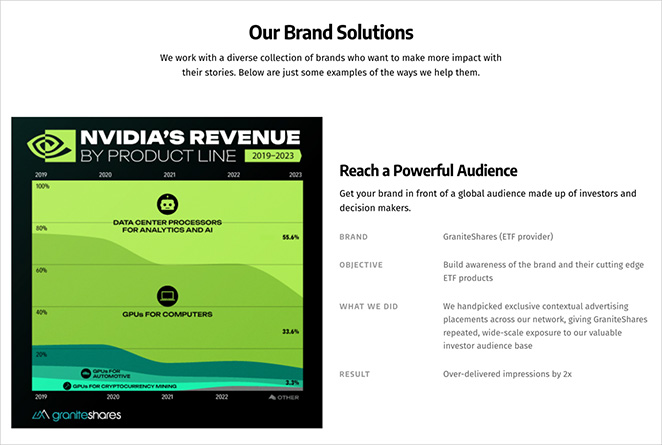
How to Build a Media Kit Page (Without Coding)
While WordPress’s block editor lets you create basic pages, it has some limitations when building a media kit. I found that arranging elements like download buttons, statistics, and contact forms can be tricky with just the default blocks. You often end up with a page that looks too simple or unprofessional.

That’s why I use SeedProd to build media kit and press pages. It’s a popular WordPress page builder that makes creating professional-looking pages much easier. You don’t need any coding knowledge, and you get access to pre-made sections to quickly build out any page.
SeedProd includes features that are perfect for media kits:
- Ready-to-use templates that save you time
- Blocks for displaying statistics and numbers
- Buttons for downloading your logos and photos
- Contact form blocks that look professional
- Mobile-friendly designs that work on all devices
The best part is, you can build your entire page by pointing and clicking. When I switched from the block editor to SeedProd, I cut my page creation time in half and ended up with a much better-looking result.
Step 1. Install and Activate SeedProd
First, you’ll need to get your copy of SeedProd Pro from the official website. While SeedProd has a free version, the Pro version gives you access to more templates and features that will help create a professional media kit.
If you need help installing plugins, see our guide on how to install SeedProd.
Once you’ve installed and activated the plugin, you’ll see a new menu item in your WordPress dashboard called “SeedProd.” Click it to begin setting up the plugin.
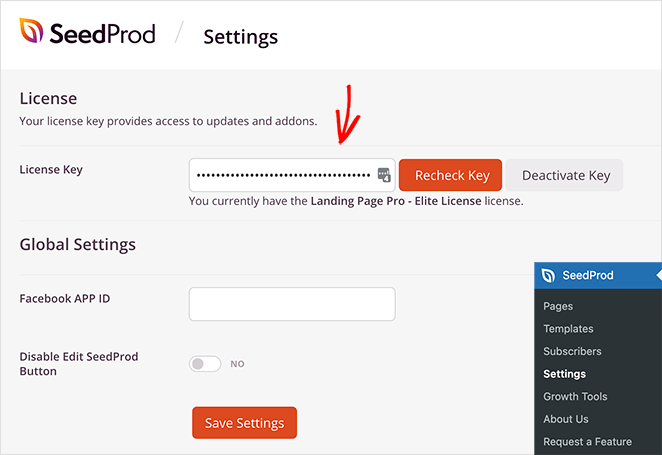
The setup process is quick. Just enter your license key from your SeedProd purchase email, and you’re ready to start building your media kit page.
Step 2. Choose a Media Kit Page Template
Now that SeedProd is installed, let’s pick a template for your page. To get started, go to SeedProd » Landing Pages in your WordPress dashboard and click “Add New Landing Page.”
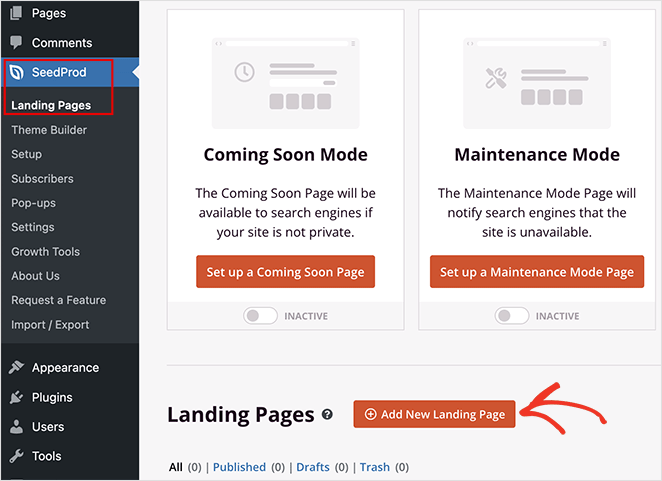
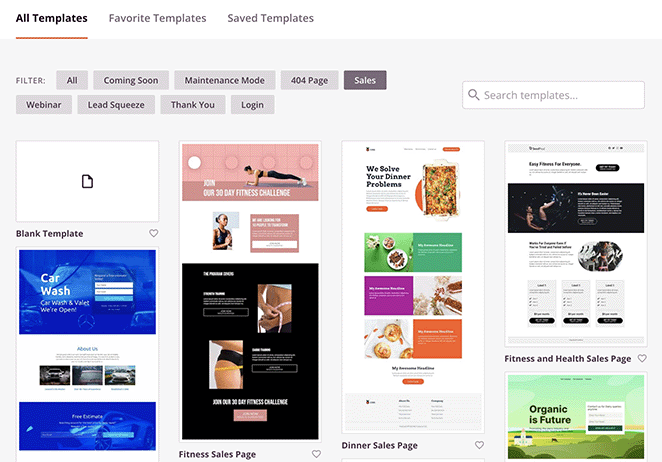
When the landing page template library opens, you’ll see different categories of templates. Look through the “Sales” or “Webinar” templates, since these work well for media kits.
These templates already include sections for important information and downloadable content.
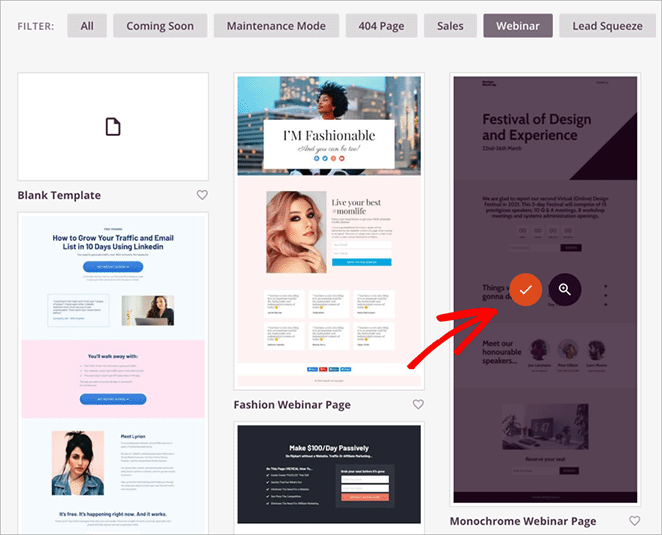
To preview a template, hover over it and click the magnifying glass icon. When you find one you like, click the checkmark to select it.
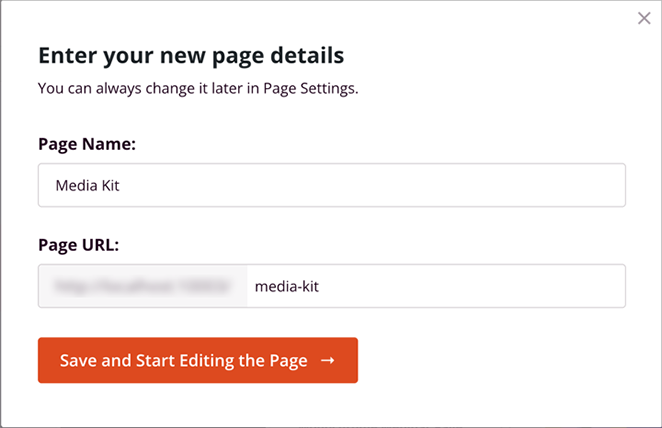
Next, you’ll need to name your page and choose its URL. I recommend using something simple and clear like “Media Kit” or “Press Kit” so visitors can easily find it.
✏️ Note
Don’t worry if the template isn’t exactly what you want. In the next step, I’ll show you how to customize every part of it to match your needs.
Step 3. Customize Your Media Kit Page
When you open SeedProd’s page builder, you’ll see your template preview on the right and your building tools on the left. The interface makes it easy to build your page section by section.
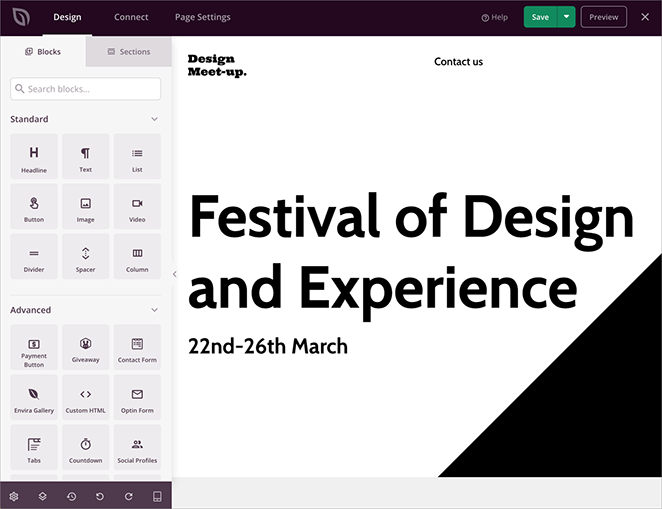
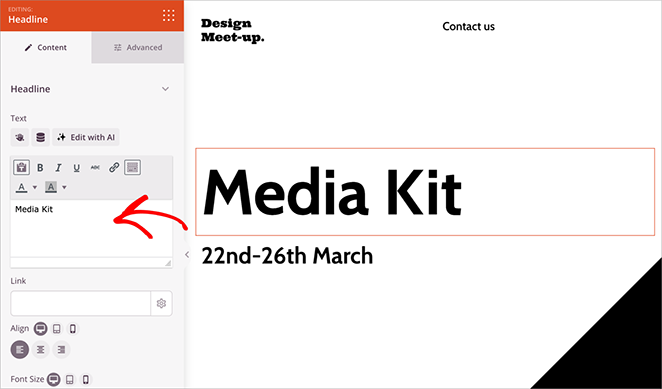
Start by customizing the template’s existing content. Click any element on your page to open its settings in the left panel.
Here you can change text, update images, and adjust the styling to match your brand.
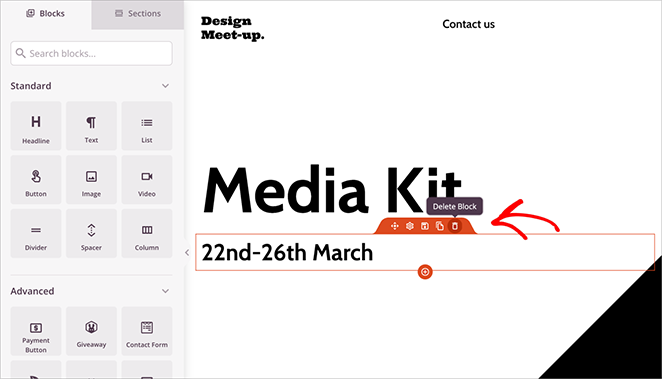
You can also remove parts of the template you don’t need. Just hover over an element and click the trashcan icon.
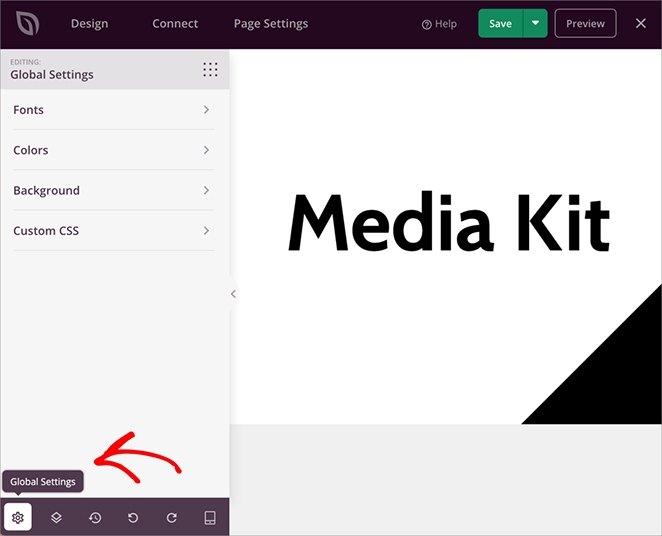
To make page-wide design changes, click the gear icon in the bottom-left corner to open Global Settings.
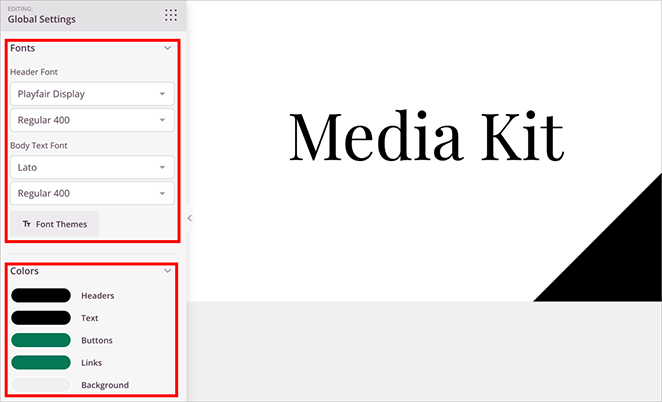
This is where you can set your brand colors and fonts once, saving you time from updating each element individually.
Step 4. Add Essential Media Kit Elements
Now, let’s add all the important sections your media kit needs. I’ll show you how to build each section using SeedProd’s blocks and features.
Company Overview/Mission Statement
Start with your Company Overview section at the top of the page. Add a hero section with your company’s mission statement, followed by key facts about your business.
To create this section, drag a Heading block to your page for your company name.
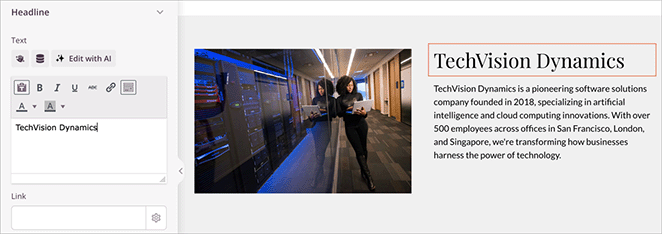
Below that, add a Text block for your mission statement. I like to keep this to 2-3 sentences that explain what makes your business unique.
To add an image, drag an Image block to your page. Click the image placeholder to open the WordPress media library, where you can upload a new image or select an existing one.
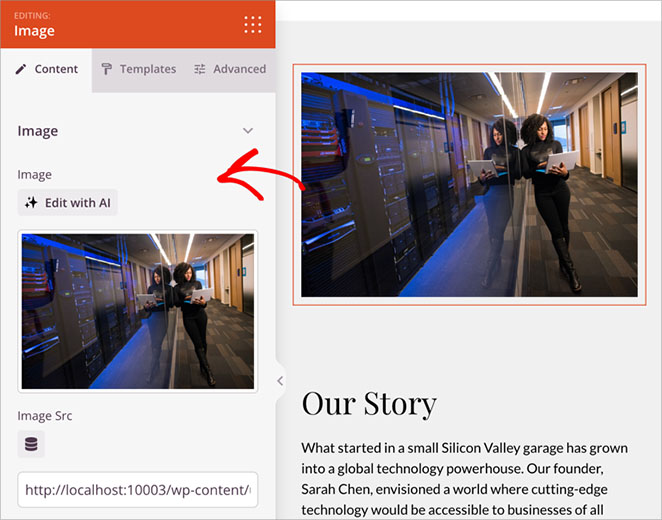
You can adjust the image size and alignment using the settings panel on the left.
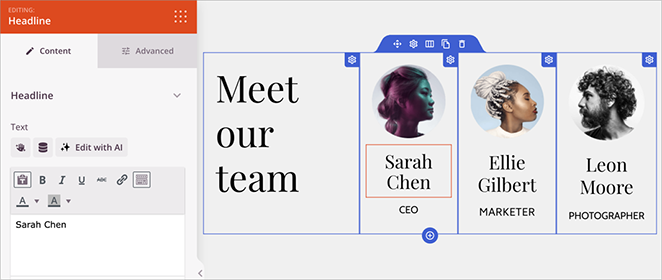
Next, let’s set up the team section. My template already includes a speakers section, which works perfectly for team members.
Just click each image to upload new photos, and update the text blocks with your team members’ names and roles.
✏️ Note
If your template doesn’t have a speakers section, you can use the Team Members block instead. It’s designed specifically for displaying team information.
Statistics and Brand Assets
Now, let’s add your statistics and brand assets. I recommend starting with your website metrics since these are what potential partners often look for first.
For your statistics section, drag a Columns block to your page and set it to four columns. In each column, add a Counter block.
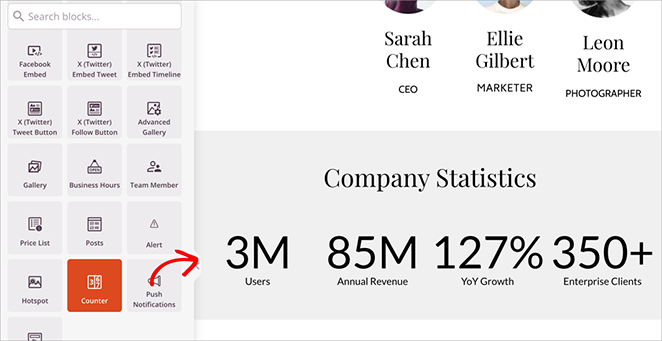
Set each Counter block to show your key metrics, like “50K Monthly Visitors” or “100K Email Subscribers.”
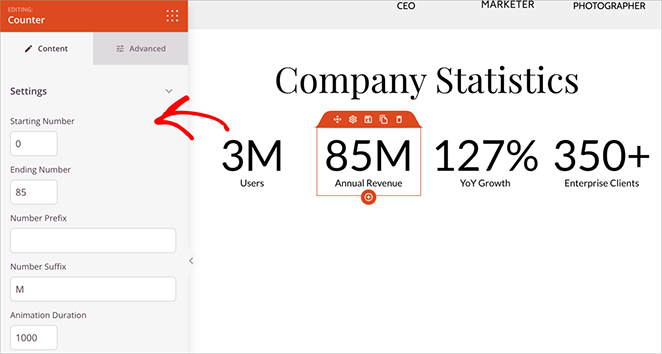
The Counter block automatically animates the numbers when visitors scroll to this section, making your statistics more eye-catching.
For your brand assets section, create a dedicated area for downloadable files. Here, add a Heading block titled “Brand Assets” or “Media Resources.”
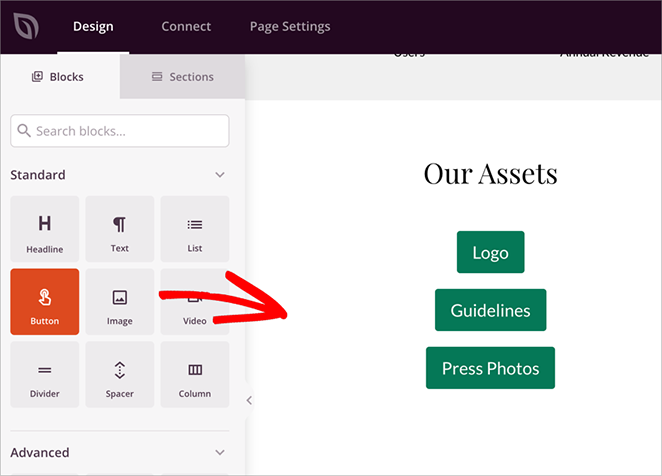
Below this, add buttons for each downloadable item, such as:
- Company Logo (PNG)
- Company Logo (SVG)
- Brand Guidelines (PDF)
- Press Photos (ZIP)
To add download links to your buttons, first upload your files to the WordPress Media Library. Then, click on it to view its details.
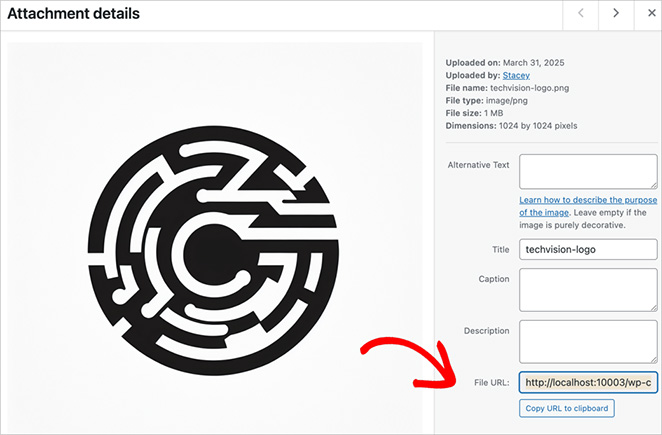
Copy the File URL from the right panel.
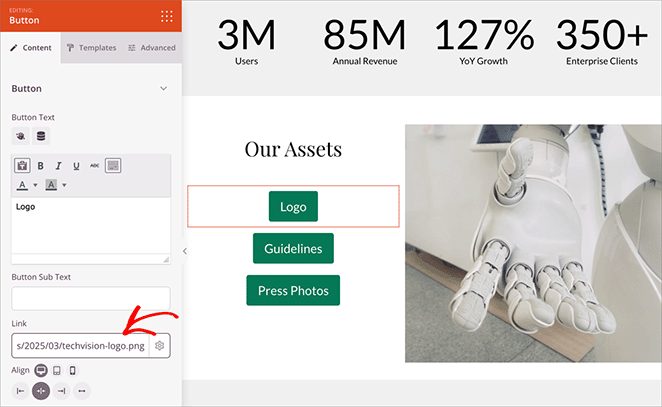
Then, go back to your SeedProd editor, click the Button block, and paste the URL into the Link field.
Advertising and Contact
The final sections of your media kit should include your advertising options and a way for people to contact you.
For your advertising section, start with a Heading block titled “Advertising & Partnerships.”
Then, add a column block and drag over the Pricing Table block to display your different partnership options.
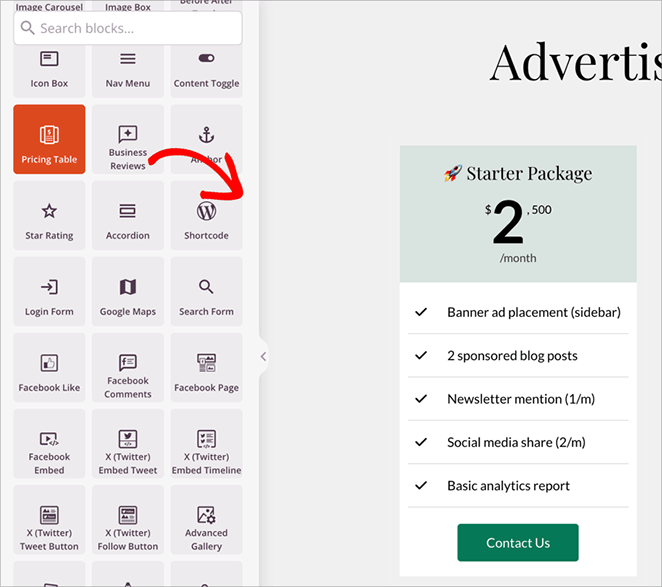
This block is perfect for media kits because it lets you clearly show:
- Different advertising packages
- What’s included in each option
- Pricing details
- Custom call-to-action buttons
The Pricing Table block comes with several options you can easily customize.
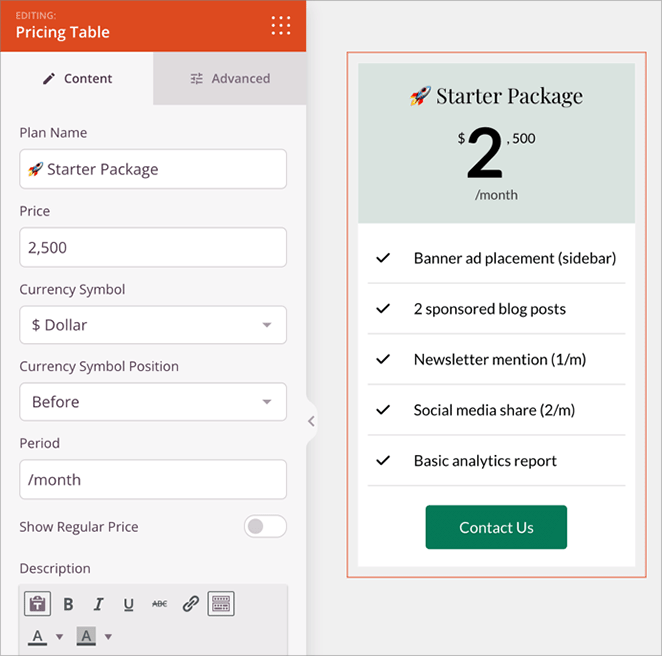
Just click the block to change the package names, features, prices, and button text to match your offerings. For more details, see my guide on how to add a pricing table to WordPress.
Next, let’s add a contact form. SeedProd works seamlessly with WPForms, my favorite WordPress form plugin.
Drag the Contact Form block to your page and select one of your existing forms.
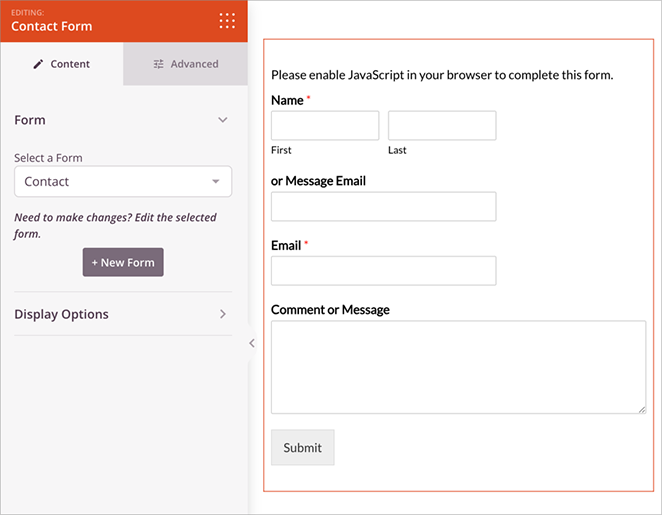
If you haven’t created a form yet, see our guide on how to create a contact form with WPForms.
Step 5. Publish Your Media Kit Page
Before publishing your page, let’s make sure everything looks perfect on all devices.
Click the mobile preview icon at the bottom of your screen to see how your media kit looks on phones and tablets. Sometimes elements that look great on desktop need adjusting for smaller screens.
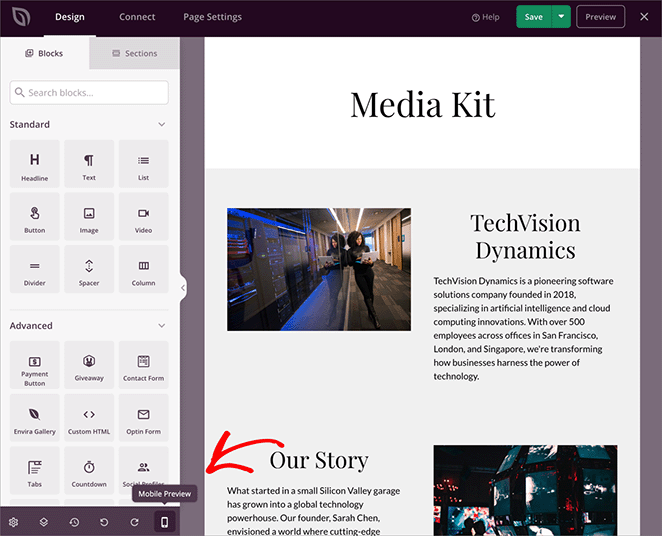
You can make mobile-specific changes right in the preview mode.
Here’s my final checklist before publishing:
- All images are loading correctly
- Download buttons work and link to the right files
- Contact form is working
- Counter animations display properly
- Pricing tables are easy to read
- Text is free from spelling errors
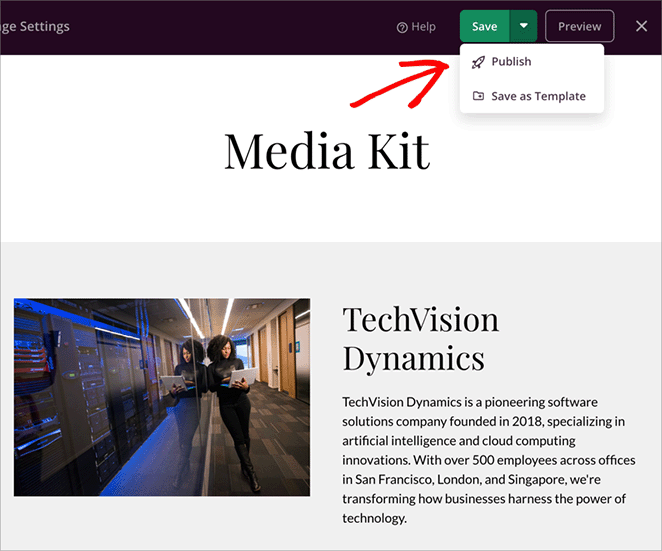
When everything looks good, click the green save button in the top right corner. Then click the arrow next to it and select ‘Publish’ to make your page live.
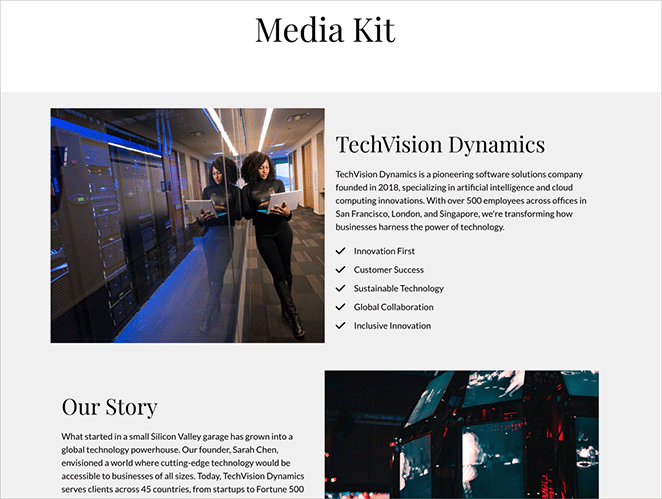
Here is a preview of the media kit page I’ve made in this tutorial:
✏️ Note
After publishing, I recommend adding your media kit page to your website’s main menu or footer navigation so it’s easy to find. You can do this by going to Appearance » Menus in your WordPress dashboard.
Bonus Tips to Optimize Your Media Kit Page
Let me share some tips I’ve learned from creating media kits that actually get results.
Organize Your Content Strategically
Start by keeping your most impressive statistics and achievements “above the fold” – that’s the part of your page visitors see first without scrolling. Next, position your download buttons and contact form near the top too, making them easy to find.
Additionally, break up long sections with subheadings and white space. This makes your media kit easier to scan, which is important since most people skim through pages first.

I love how the Fast Company has used headings and bold typefaces to make their most important stats jump out from the page.
Improve Form Conversions
Moving on to your contact form, it needs to stand out and be easy to use. First, keep it short with just 3-4 fields maximum. Then, use a contrasting color for the submit button so it catches attention.
Finally, add a clear call-to-action above the form, and always include your expected response time.
Speed Up Your Page
When it comes to page speed, large media files can slow down your media kit. To solve this, compress all images before uploading them to WordPress.

After that, use PDF files instead of large image files for downloadable content whenever possible. For more details, see my guide on how to speed up WordPress.
Create Effective Calls-to-Action
As for guiding visitors, every section should lead them toward contacting you. Rather than using generic text like “Contact Us,” try specific phrases such as “Download our brand assets” or “View our partnership options.”

Furthermore, make your buttons descriptive and action-oriented with text like “Schedule a call” or “Get in touch today.”
Keep Your Media Kit Fresh
Finally, focus on keeping your content current. Start by updating your traffic statistics monthly and reviewing team information as needed. Then, refresh case studies and testimonials quarterly to show recent success stories.
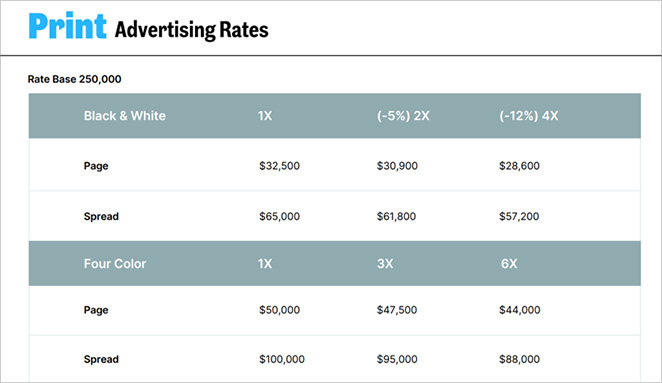
Review pricing and packages annually to ensure they reflect current market rates.
Get Better Partnerships with Your Media Kit
Your media kit is an excellent tool for building partnerships and attracting opportunities. By following this guide, you’ve created a page that looks professional and makes it easy for potential partners to find the information they need.
If you’re ready to dive in, use SeedProd to build your media kit page easily without writing code.
Here are some related guides to help grow your business:
- How to Create a Landing Page in WordPress (Without Code)
- Best WordPress Plugins for Business Websites
- How to Add Google Analytics to WordPress
Thanks for reading! We’d love to hear your thoughts, so please feel free to leave a comment with any questions and feedback.
You can also follow us on YouTube, X (formerly Twitter), and Facebook for more helpful content to grow your business.

