Do you want to learn how to add Google Analytics to WordPress?
Google Analytics, a free service provided by Google, allows you to gain insights into how users find and use your website. This can help you make informed decisions to improve your site and grow your business.
Today, we’ll walk you through a step-by-step guide to integrating GA4 in WordPress. We’ll explore the basics of Google Analytics and how to add it to your WordPress site using MonsterInsights, a popular WordPress plugin.
How to Add Google Analytics to WordPress: Basics
So you want to know how to add Google Analytics to WordPress?
Google Analytics is a powerful tool that provides insights into how visitors interact with your website. It collects and presents a wide range of demographic data, such as where your visitors come from, what devices they use, what pages they visit the most, how long they spend on your site, and much more.
This information is invaluable for improving your site’s user experience, increasing conversions, and growing your business.
To get these insights, you need to add Google Analytics to your website.
You can do this by embedding a small piece of JavaScript code provided by Google into your site with a WordPress code snippet plugin or using Google Tag Manager. Alternatively, you can manually add the code to the functions.php file of your WordPress theme or child theme files.
However, for WordPress users, there’s an easier way: MonsterInsights, the best Google Analytics plugin for WordPress.

This plugin simplifies Google Analytics WordPress integration and enhances your site’s functionality.
MonsterInsights also seamlessly integrates with Google Analytics 4 (GA4), which is now replacing Google’s Universal Analytics.
GA4 provides more detailed and flexible reporting with an emphasis on understanding the customer journey. It also introduces more advanced AI to help anticipate your customers’ future actions.
With MonsterInsights, you can get the best of both worlds by integrating Google Analytics 4 WordPress without the hassle of complex configurations. This allows you to keep up with the latest advances in web analytics while still enjoying the simplicity and ease of use that MonsterInsights offers.
For more information, see our MonsterInsights review.
How To Add Google Analytics To WordPress Using MonsterInsights
Let’s walk through the step-by-step process of how to add Google Analytics to WordPress using MonsterInsights and it’s WordPress GA4 integration.
Step 1. Sign In To Google
For setting up GA4 in WordPress, you’ll first need a Google account. If you don’t already have one, you can create one for free.
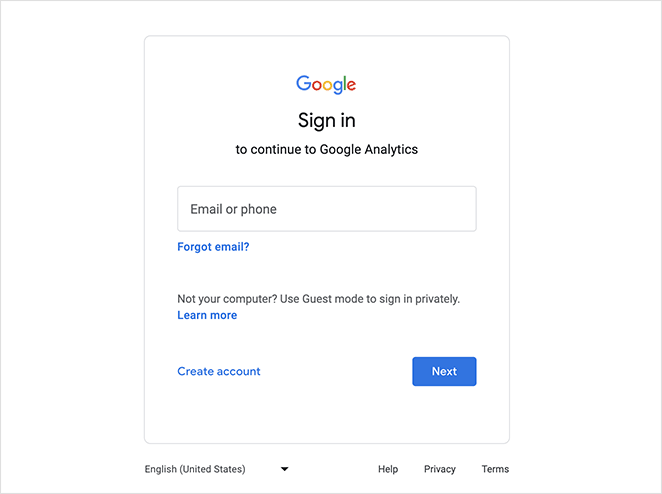
Head to the Google Analytics website and click the “Sign in to Analytics” button in the top right corner.

Now you can log into your existing Google account or sign up for a new one in the following popup.
Step 2. Create a Google Analytics Property
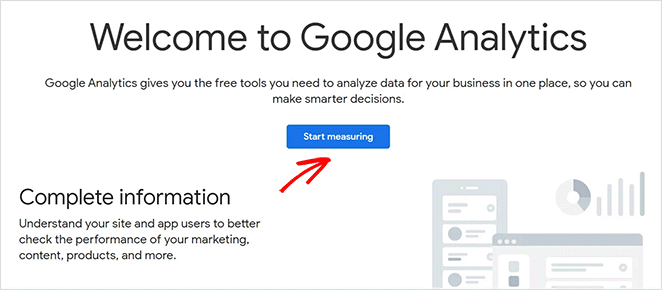
After signing in or signing up for a Google Analytics account, click the Start Measuring button.
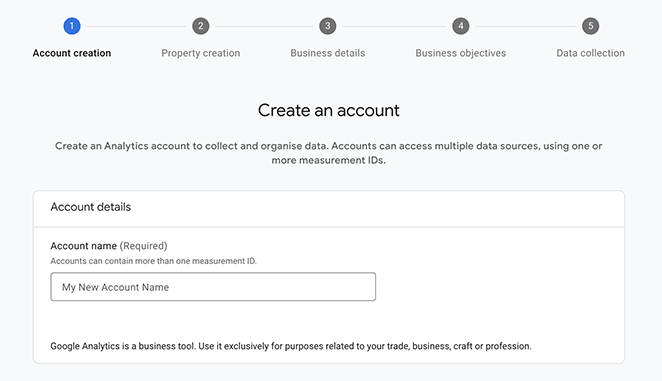
Now you can set up your account by entering an Account Name.
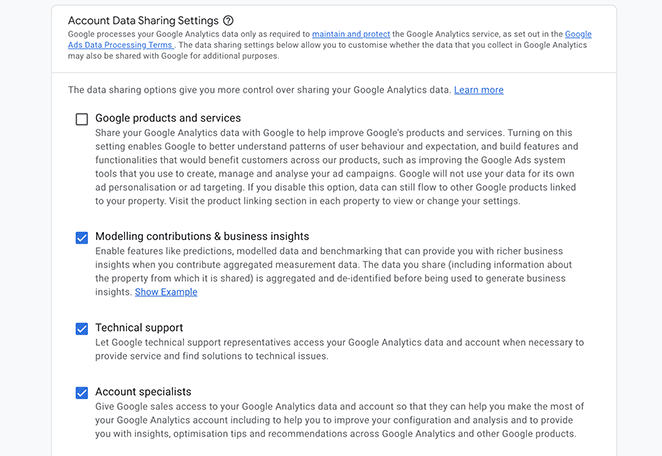
Below are data-sharing settings that you can customize by selecting each checkbox.
Now you’ll head to a new screen where you can create a GA4 property. Enter a property name and confirm details, such as your timezone and currency.
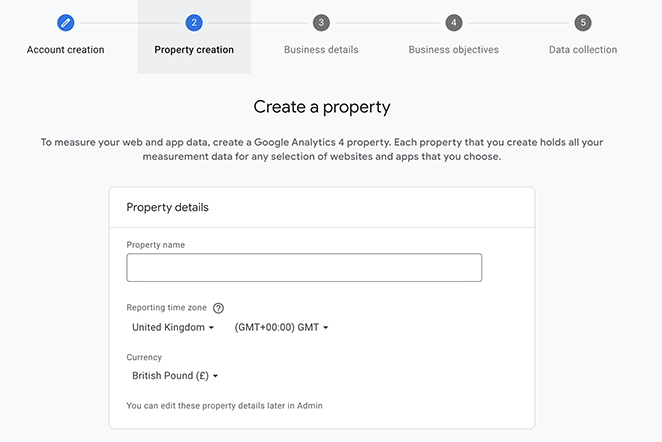
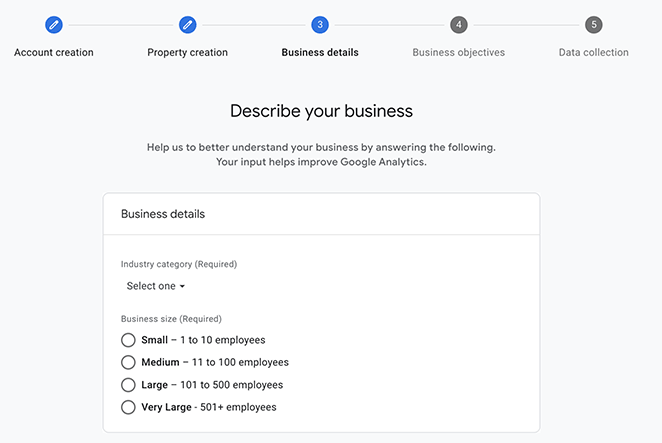
Next, fill in some details about your business. Here, you can choose a business industry category and your business size.
Now let’s choose some business objectives to help you get more personalized reports. There are several to choose from; however, we suggest the “Get Baseline Reports” option because it lets you get all the Google Analytics reports in your account.
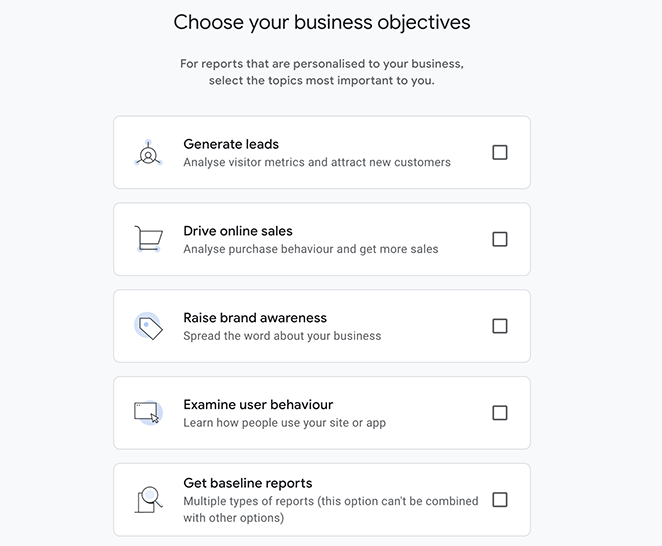
After choosing your objectives, click Continue.
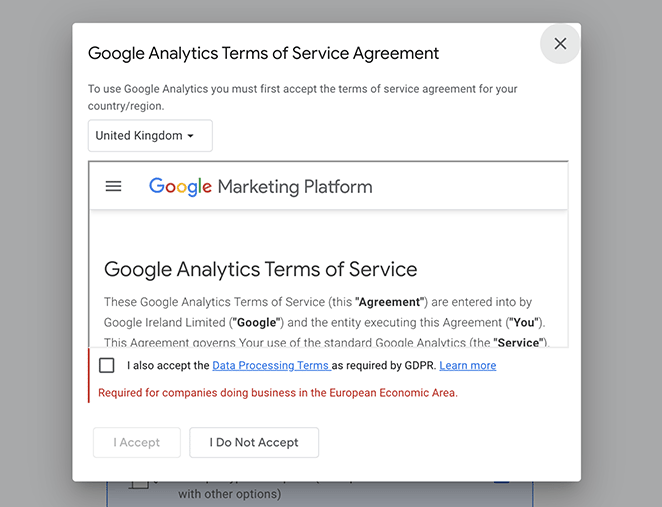
Next, Google will show its terms of service agreement for your country or region. Tick the checkbox to accept the data processing terms and click I Accept.
To set up Google Analytics on your website, you’ll need to choose where you’ll collect data. In your case, you’ll need to select the Web option on the following screen.
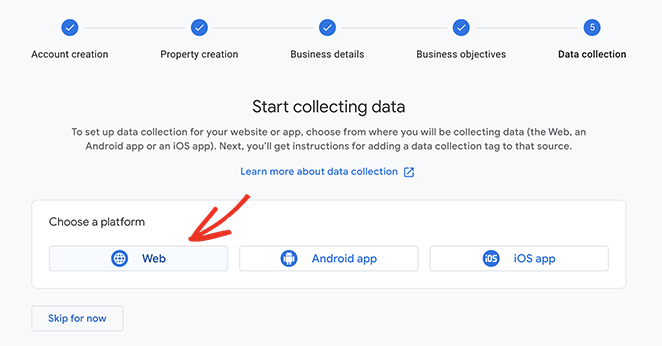
From there, you can set up your website’s data stream. To do this, enter your WordPress website’s URL and name.
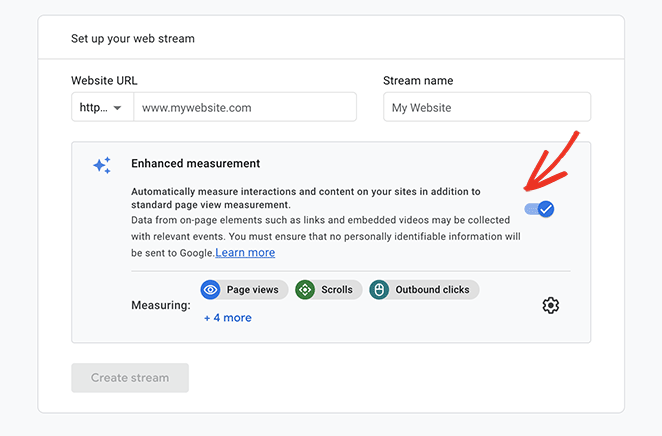
Now, click the switch to turn off Enhanced Measurement. Because we’ll be using MonsterInsights later in this guide, turning this option off avoids duplicate data streams.
Click the Create Stream button to finish setting up your Google Analytics property.
You’ll now see your property information, which includes your tracking ID, stream name, and measurement ID.
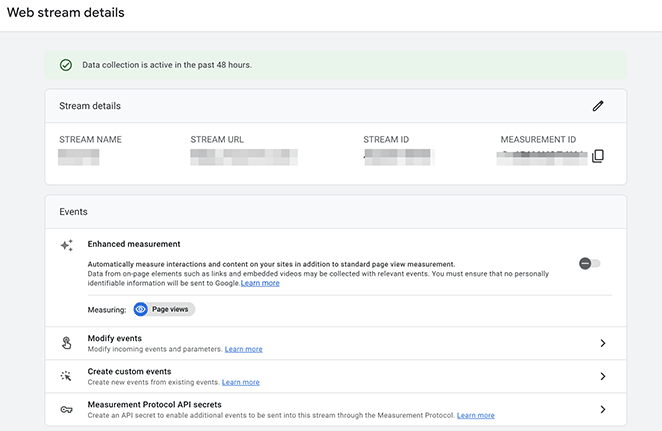
It will also show different methods for adding Google Analytics to your website, such as using Global Site Tag (gtag.js), HTML, and more. However, with MonsterInsights, the best WordPress analytics plugin, you can do this easily without touching any code.
Step 3. Install MonsterInsights
For the next step, log into your WordPress dashboard and install and activate the MonsterInsights WordPress plugin.
To do this, navigate to Plugins » Add New, and search for ‘MonsterInsights.’
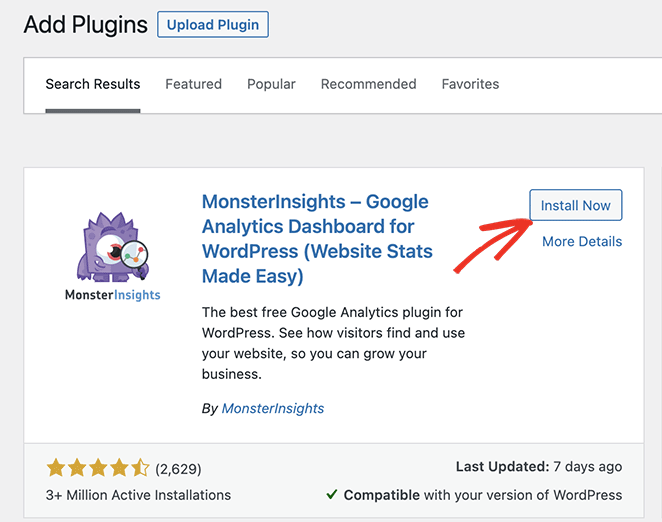
From there, click Install Now and then Activate.
MonsterInsights will automatically redirect you to a welcome screen. From there, you can use the quick WordPress Google Analytics setup wizard without code.
Step 4. Complete the MonsterInsights Setup Guide
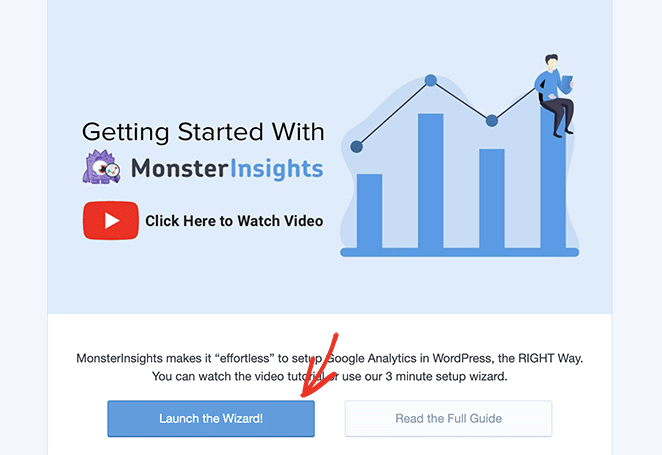
To start using MonsterInsights for WordPress, click the Launch the Wizard button.
Next, choose a category that best represents your business. You can choose between:
- Business Website
- Publisher
- eCommerce
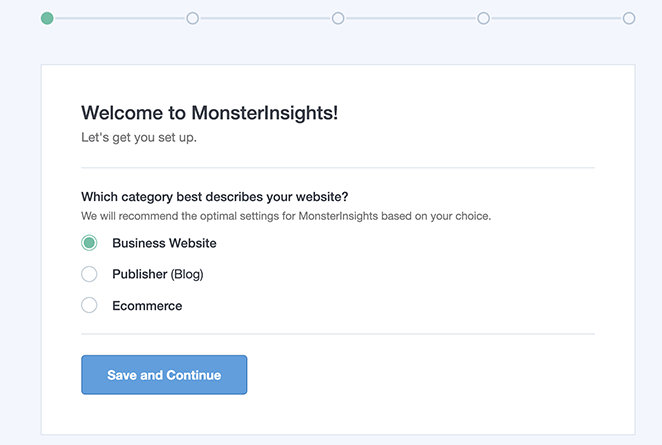
Choose a category, then click Save and Continue.
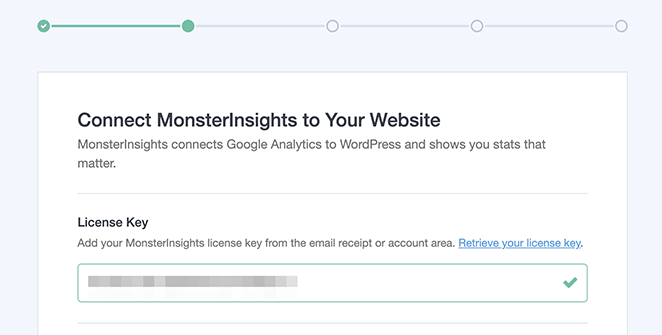
On the next screen, enter your MonsterInsights license key. You can find this information in your MonsterInsights account under the Downloads section.
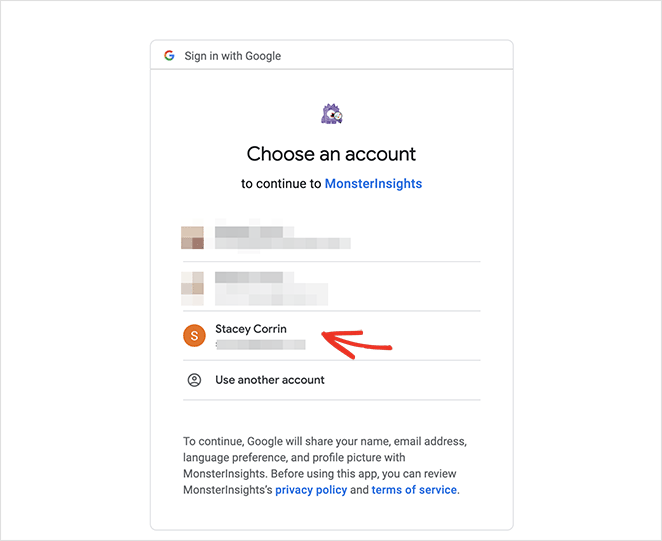
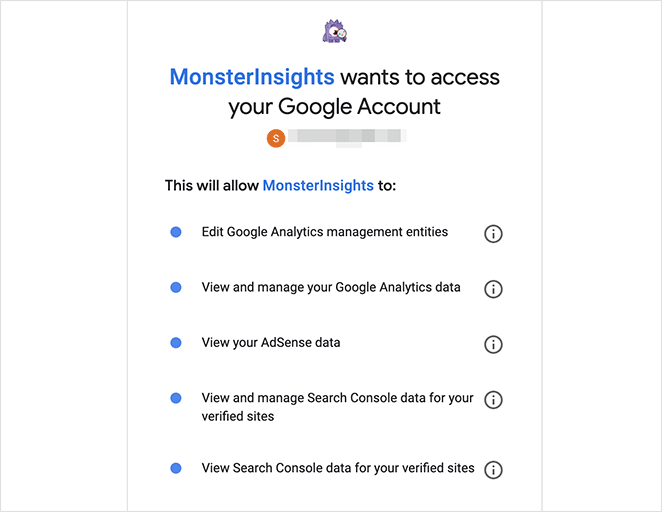
Now click the Connect MonsterInsights button, which takes you to the Google Analytics login screen to select the relevant Google account.
From there, click the toggles to allow MonsterInsights the correct permissions to collect your Analytics data.
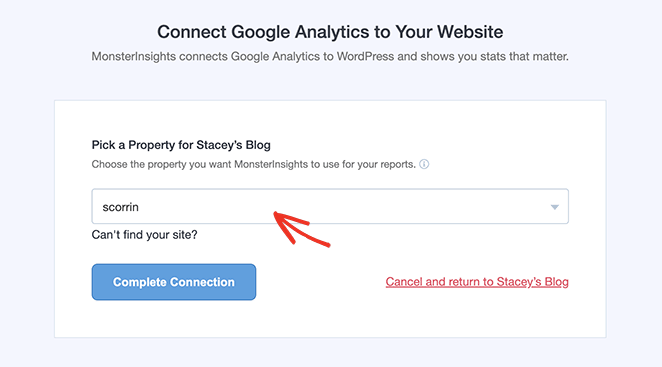
The next screen lets you connect your Google Analytics account to your WordPress website. Simply choose the property you created earlier from the dropdown menu, and click the Complete Connection button.
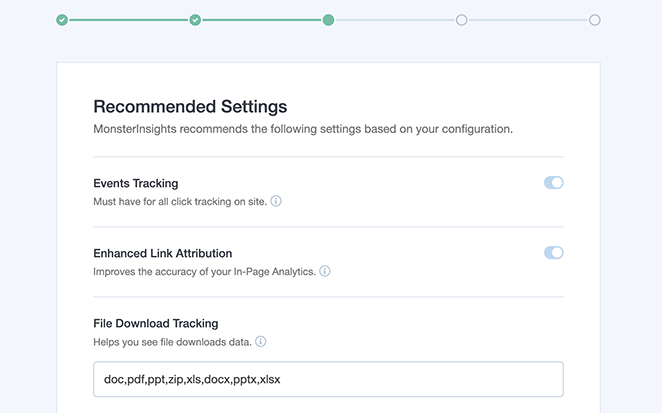
Now you’ll head back to the setup wizard. On this page, you can enable some recommended settings:
- Events Tracking: Enabled by default.
- Enhanced Link Attribution: Enabled by default.
- File Download Tracking: Popular file types (doc, pdf, ppt, zip, xls, docx, pptx, xlsx)
When you scroll down the page, you’ll see other settings for affiliate link tracking, user roles, and automatic updates.
After reviewing these settings, click Save and Continue.
The next screen suggests more helpful tracking options, add-ons, and powerful WordPress plugins, including:
- Advanced reports
- Privacy and Compliance addon
- Conversion tools
- All in One SEO plugin
- WPForms form builder plugin
- eCommerce tracking (Works with WooCommerce and other eCommerce platforms)
- Advanced growth tools
- And more.
Select any resources you want, and MonsterInsights will install them automatically.
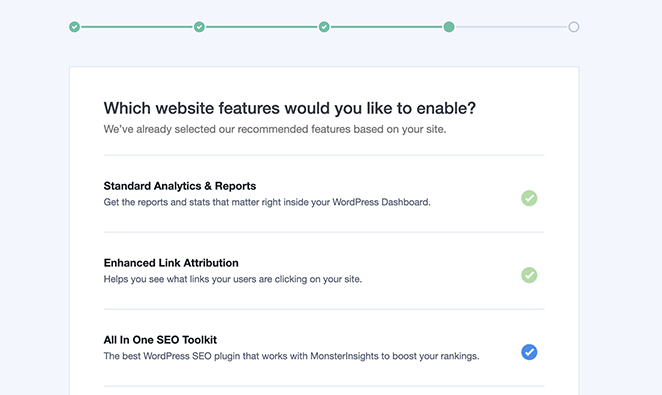
Click Save and Continue to finish the setup wizard.
You’ve now successfully installed Google Analytics in WordPress.
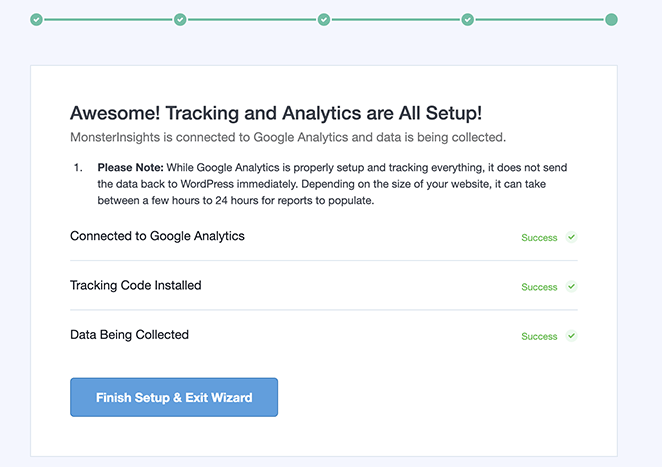
Click the Finish Setup & Exit Wizard button to return to your WordPress admin.
Step 5: View Your Google Analytics Data
After using MonsterInsights to add your Google Analytics tracking code to your website, it will take several hours to start recording data.
After waiting, you can see your Google Analytics data reports in real-time inside your WordPress dashboard. The reports are easy to understand and only include the data you need to make informed decisions.
This removes the need to visit the official Google Analytics dashboard, where the data can confuse beginners.
A quick summary is available via the MonsterInsights dashboard widget.
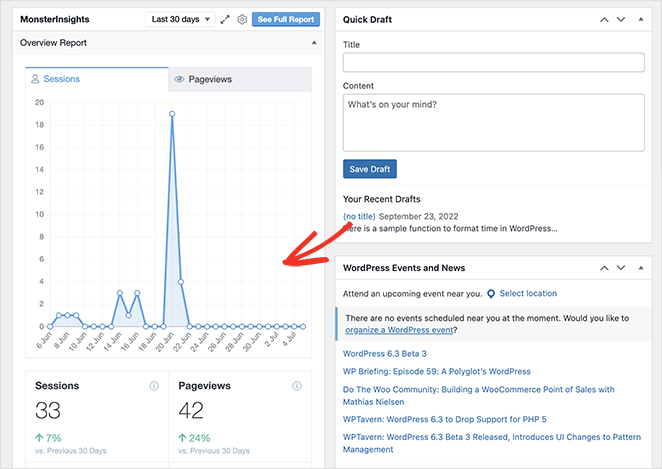
For more detailed reports, visit Insights » Reports from your admin.
The first one you’ll see is the Overview report, which has basic tracking info, such as Sessions, Page Views, Session Duration, Bounce Rate, and Total Users.
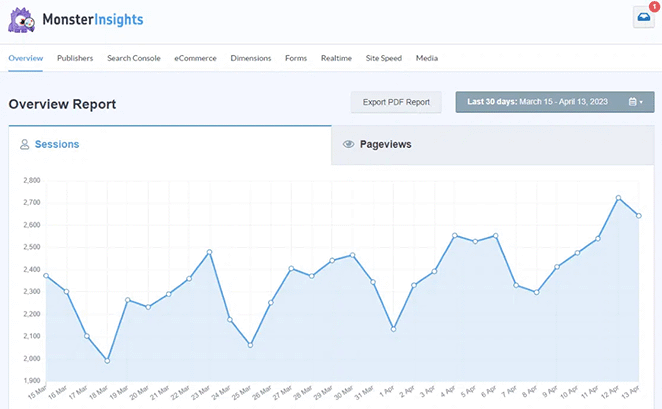
From there, you can click the tabs along the top to see more detailed reports based on the data you’re tracking. Some of the other reports available include:
- Top Landing Pages: A rundown of your WordPress site’s most popular landing pages.
- Link Tracking: The links and buttons on your site that get the most clicks.
- Search Console: The keywords visitors are using to find your website.
- eCommerce Tracking: Data on the products driving the most revenue.
- Form Tracking: Information on which forms get the most submissions and impressions.
- Media Tracking: Your most popular videos with data on how long visitors watch them.
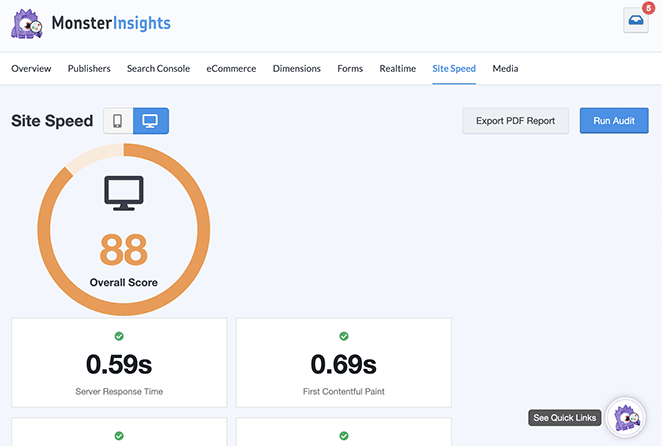
MonsterInsights also has a helpful Site Speed report, which analyzes your current setup and provides suggestions on how to optimize it for the best performance.
How to Add Google Analytics to WordPress FAQs
How to add Google Analytics to WordPress with a plugin?
To add the Google Analytics WordPress plugin, follow these 4 steps:
- Download MonsterInsights
- Create a Google Analytics account or sign in to your existing account
- Install the MonsterInsights plugin via your WordPress dashboard and follow the setup wizard
- Adjust your data retention settings
How to add Google Analytics to WordPress without a plugin?
You can add Google Analytics to WordPress without a plugin, but it requires copying and pasting code. Open your WordPress theme editor and find your parent theme header.php file. Paste your tracking code before the closing </head> bracket and click Update File.
You can also add your tracking code to your functions.php file using WPCode (formerly Insert headers and footers plugin). Simply paste the following PHP code and include your analytics tracking code:
<?php

add_action('wp_head', 'sp_add_googleanalytics');

function

sp_add_googleanalytics() { ?>

// Paste your Google Analytics tracking code here

<?php } ?>
However, using a plugin simplifies the process and provides additional features.
Is Google Analytics free to use?
Yes, Google Analytics has a free version. There is a premium version, Google Analytics 360, for businesses with more extensive needs.
How long does it take for Google Analytics to start showing data?
Google Analytics starts showing data within 24 hours after setup.
In conclusion, Google Analytics is an invaluable tool for any website owner, and adding it to your WordPress site is straightforward using MonsterInsights. We hope this WordPress Google Analytics guide has helped you learn how to add Google Analytics to WordPress so you can gain insights into your audience’s behavior.
You might also like the following helpful guides for your WordPress website:
- 8 Best WordPress Redirect Plugins You Need
- How to Embed Google Maps in WordPress (3 Easy Ways)
- How to Set Up WooCommerce Conversion Tracking for Your Store
Thanks for reading! We’d love to hear your thoughts, so please feel free to leave a comment with any questions and feedback.
You can also follow us on YouTube, X (formerly Twitter), and Facebook for more helpful content to grow your business.

