Want to learn how to add a Facebook Page to WordPress?
Linking your Facebook Page to your WordPress website can boost your online presence, drive more web traffic, and ultimately lead to more conversions.
In this guide, we’ll show you how to add your Facebook Page to WordPress step-by-step.
Why Add Your Facebook Page to WordPress?
Adding your Facebook Page to WordPress is an easy way to connect with visitors. Since it’s a platform they’re familiar with, they’ll find it easier to like, share, and comment on your posts.
Moreover, displaying Facebook content on your site can help in the following ways:
- Unify Your Brand: Consider it a way to keep your online identity consistent. By aligning the look and feel of your site with your Facebook Page, you’re strengthening your brand’s image and increasing its recognition among visitors.
- Keep Your Visitors In The Loop: It’s like having a live newsfeed right on your website. With your Facebook Page added, people popping by your website can effortlessly stay informed about your latest news, events, and content.
- Turbocharge Your SEO: Having integrated social media can give your search engine rankings a significant lift. This can drive more traffic to your website, effectively getting your content in front of more eyeballs.
Given these benefits, it’s clear that adding your Facebook Page to WordPress can be an effective way to enhance your digital footprint.
So, without further ado, let’s dive into the process.
Method 1: Adding Your Facebook Page to WordPress Using SeedProd
One way to add a Facebook Page to WordPress is with a page builder like SeedProd. That way, you can customize other parts of your website without installing extra WordPress plugins.

SeedProd is the best WordPress page builder and website builder with drag-and-drop. It lets you create custom page layouts without the hassle of coding them from scratch.
With its Facebook Page block, you can embed any Facebook Page in WordPress with just a few clicks. It also has handy blocks that allow you to embed a Facebook Like button, Facebook comments, and Facebook posts.
Here are the steps on how to add a Facebook Page to WordPress using SeedProd.
Step 1. Install and Activate SeedProd
First, you’ll need to download the SeedProd plugin and install it on your WordPress site.
For this guide, we’re using SeedProd Pro for its advanced customization features.
If you need help, you can see our documentation on how to install SeedProd and activate your license.
SeedProd offers 2 ways to customize your WordPress site. You can either create a standalone landing page or create a custom WordPress theme using its Theme Builder feature.
For this guide, we’ll use the landing page builder functionality.
Step 2. Choose a Landing Page Template
To create a new landing page, navigate to Landing Pages from your WordPress dashboard and click the Add New Landing Page button.
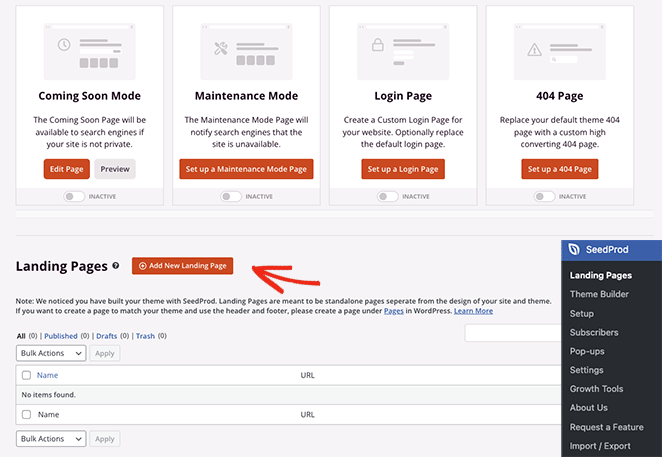
From there, you’ll see hundreds of pre-made landing page templates you can use as a starting point for your design. Each template is 100% mobile-responsive, ensuring your design looks great on mobile devices like smartphones and tablets.

You can filter the templates by clicking the tabs at the top or use the search box to find a design for a specific niche. Once you find one you like, hover over it and click the checkmark icon.
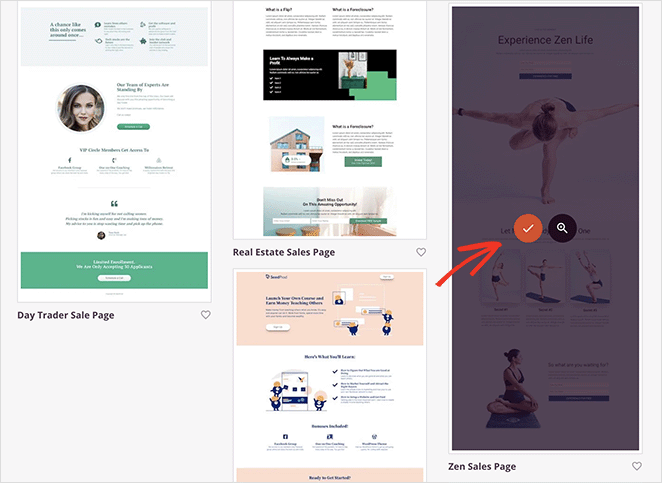
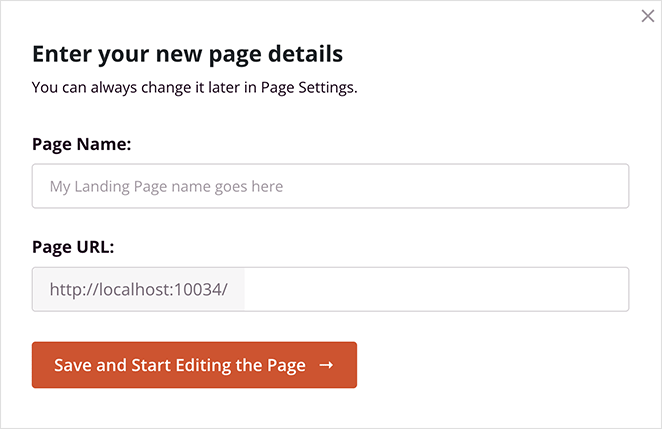
Next, enter a name for your page and click the Save and Start Editing the Page button.
Now, the template will open in SeedProd’s visual editor, where you can start customizing its layout and content without code.
Step 3. Add The Facebook Page Block
SeedProd’s drag-and-drop editor is easy to navigate.
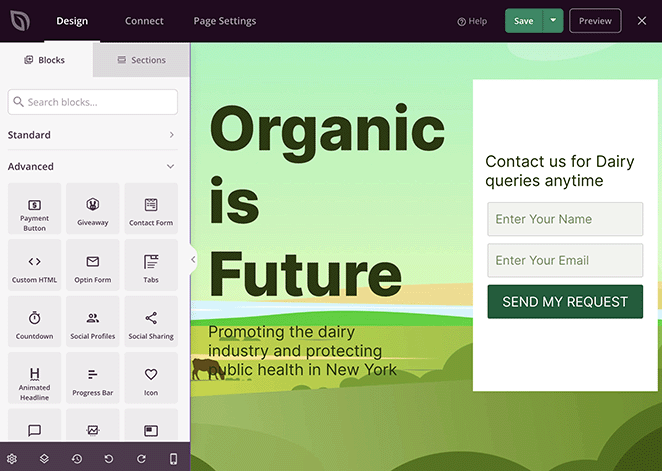
You’ll see a live preview on the right and blocks, sections, and settings on the left. You can drag content elements from the blocks panel onto the preview and edit their settings with a few clicks.
Here’s how to add the Facebook Page block to your landing page:
From the Advanced Blocks panel, scroll down until you see the Facebook Page block. To add it to your page, drag it from the left and drop it onto your preview.
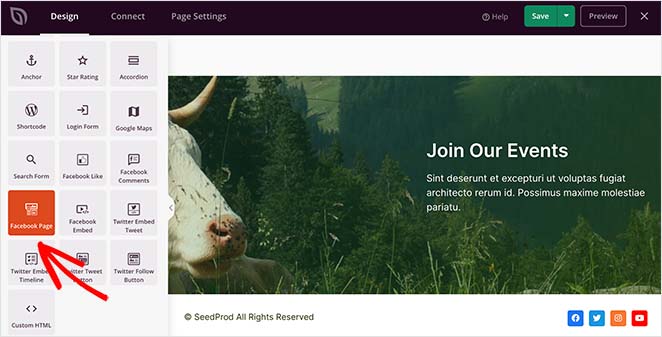
Now, you can click the block to see its customization options and add your Facebook Page URL.
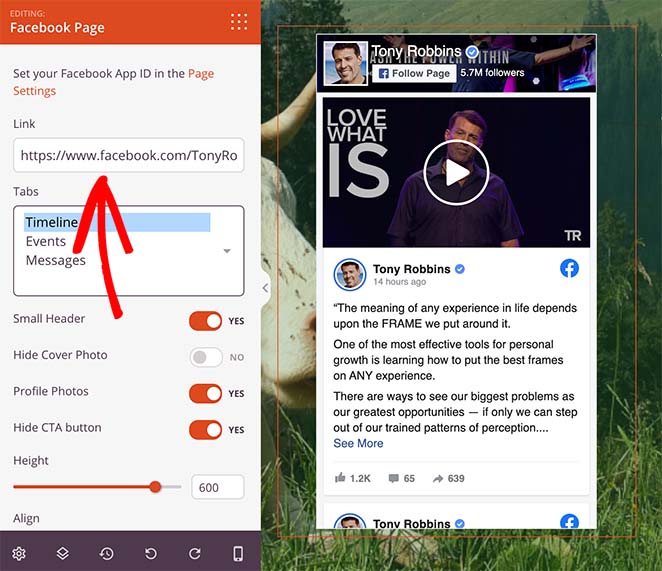
If your page doesn’t show up, you’ll need to click the “Page Settings” link and enter your Facebook App ID information.
Additional Facebook Page block settings include the ability to:
- Enable a small header
- Hide your cover photo
- Show profile photos
- Hide the CTA button
- Change the Facebook widget height
- Adjust the widget alignment
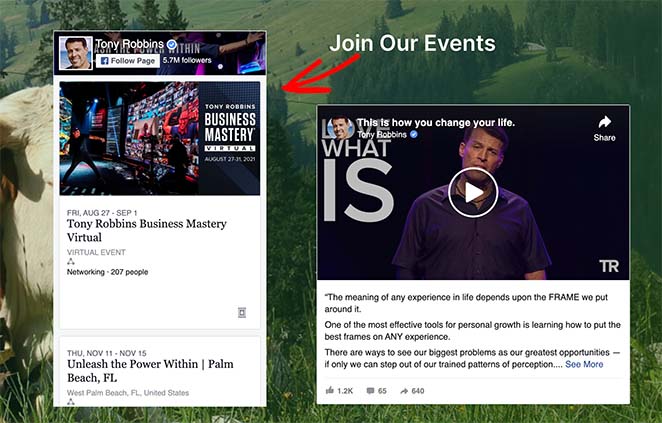
You can even display different types of Facebook feeds, including a timeline, events, and messages.
The great thing about this block is it automatically includes Like and Share buttons so users can easily share your social media content on other platforms.
Step 4. Customize Your WordPress Page
Once your Facebook Page feed is in place, you can continue customizing the rest of your landing page. Some ideas include:
- Adding an opt-in form to collect email addresses
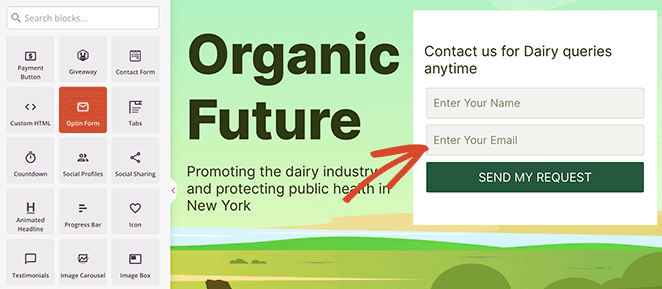
- Including testimonials from happy customers to boost trust
- Adding a button to join your Facebook Group

- Embedding a welcome video to engage first-time visitors
For a full walkthrough on customizing your landing page, see our step-by-step guide on how to create a landing page in WordPress.
Step 5. Save Your Changes
When you’re happy with your page, click the Save and Publish button in the top-right corner of your screen.

Now, you can visit the page to see how it looks.
Method 2: Adding Facebook Page to WordPress Without a Plugin
Now, let’s dive into another effective way of adding a Facebook Page to WordPress – using the Facebook Page Plugin.
This method is also relatively easy but doesn’t offer the same level of customization as you get with a WordPress page builder. It also involves copying and pasting code snippets onto your site.
Step 1. Get the Facebook Page Plugin
To start, visit the Facebook Page Plugin website. This is where you’ll enter details about your page and generate a code to embed on your website.

Step 2. Configure the Facebook Page Plugin
On the plugin page, you’ll see a form where you can enter details about your Facebook Page.

You can paste your Facebook Page URL, enter a custom width and height for the plugin, hide the cover photo, and more.
Step 3. Generate Your Facebook Page Embed Code
After filling in the necessary details, click the Get Code button.

Facebook will now generate a Javascript and iFrame code to paste onto your webpage. In the popup window, choose the iFrame option and copy the embed code.
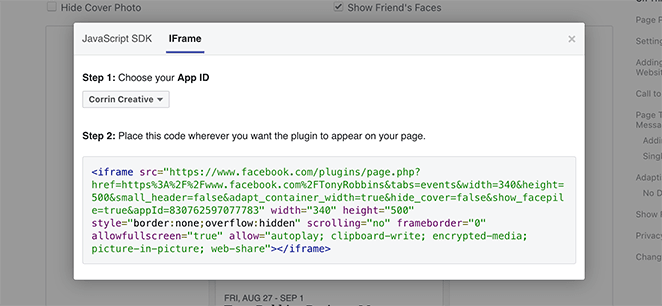
Step 4. Add the Facebook Page Embed Code to WordPress
Now, it’s time to add this code to your WordPress blog. Many sites display their Facebook account page in a new post or sidebar widget, so let’s look at how to do that.
Head to the Appearance tab in your WordPress admin and select Widgets.
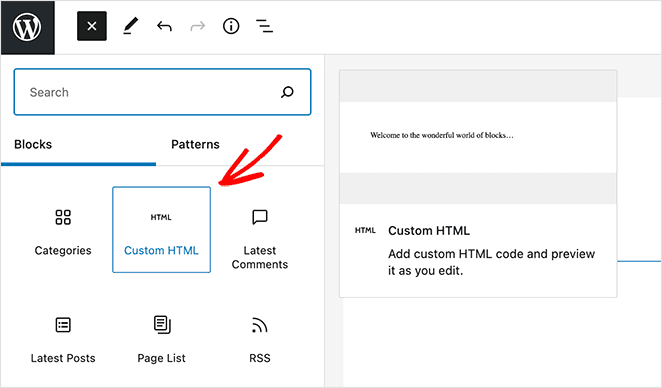
Next, click the plus icon to add a new WordPress block and find the Custom HTML or Text widget. Add this widget to the area where you’d like your FB page to appear.
Finally, copy the HTML code generated by Facebook and paste it into the widget area.
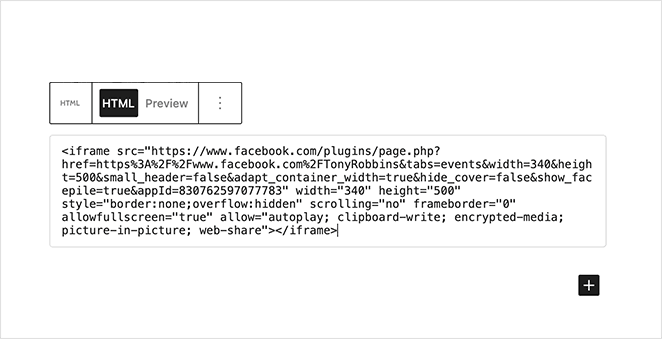
Now go ahead and click the Save button to apply the changes. With that, your Facebook Page should now appear in your WordPress sidebar.
Bonus: Add Your Facebook Page Feed to WordPress
A bonus way to add your Facebook Page feed to a new page or sidebar is with the Smash Balloon plugin.

It offers a suite of powerful WordPress feed plugins that let you embed content from various social media platforms, including Facebook, Twitter (X), Instagram, and YouTube.
With its Facebook Feed plugin, you can display beautiful galleries of Facebook posts without any technical know-how.

For all the steps, see this step-by-step tutorial on how to embed a Facebook feed on your website.
Next, Discover More Ways to Customize Your WordPress Site
We hope this guide has helped you learn how to add a Facebook Page to WordPress. There are so many other ways to customize your WordPress site with SeedProd that we couldn’t possibly list them all in one post.
So here are some of our top WordPress customization guides:
- How to Customize WordPress Menu Styles in 3 Easy Ways
- How to Create a Custom WordPress Author Page (2 Easy Ways)
- How to Create Personalized Landing Pages to Boost Conversions
- How to Embed Facebook Videos in WordPress (3 Easy Ways)
- How to Create Animated Particle.js Backgrounds in WordPress
Thanks for reading! We’d love to hear your thoughts, so please feel free to leave a comment with any questions and feedback.
You can also follow us on YouTube, X (formerly Twitter), and Facebook for more helpful content to grow your business.

