I’ve run into this a lot when creating landing pages or simpler designs. You set up a page, but there’s a sidebar or padding that just won’t go away, and it makes everything feel tight and off-center.
Making the page full width usually fixes it right away. It gives your layout more breathing room and helps your content stand out.
In this guide, I’ll show you how to make a page full width in WordPress, step by step.
Why Make a Page Full Width in WordPress?
Learning how to make a page full width in WordPress is an excellent way to highlight important content. Without sidebars or other distractions, visitors are more likely to focus on the main content. They’re particularly useful for landing pages where you want to guide the user toward a specific call to action (CTA).
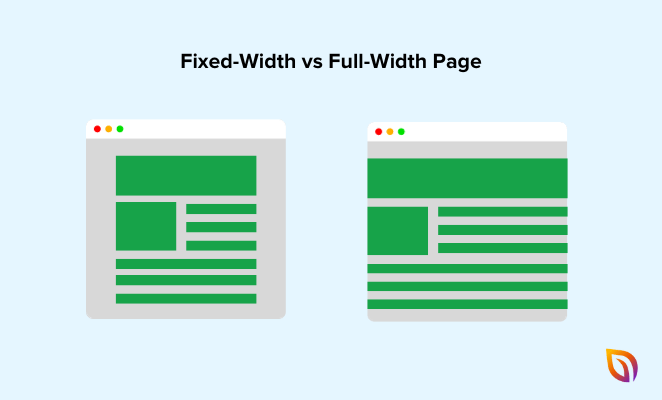
Also, creating a full width page can make your website look modern and visually appealing. With a clean, uncluttered look, your content is instantly more engaging.
Here are a few more reasons to consider a full width layout on your WordPress website:
- Better Mobile Experience: Full width layouts are often more mobile-friendly. They adapt well to smaller screens, providing a better browsing experience for mobile users.
- Versatility: Full width pages are flexible, allowing you to use them for various content types, including portfolios, product showcases, and long-form content.
- Improved User Experience: The additional space allows for a more organized layout, making it easier for visitors to consume your content. This can lead to increased time on the page and lower bounce rates.
- Creative Freedom: A fullwidth layout gives you more creative freedom. You can use the extra space for larger images, embedded videos, or other visual elements that wouldn’t fit well in a more constrained layout.
- Better for SEO: Longer time spent on a page and lower bounce rates can positively impact your SEO. A full width layout that improves user experience can contribute to these metrics.
How to Make a Page Full Width in WordPress: 4 Methods
There are several ways to create full width page layouts in WordPress. You can use a WordPress plugin, write custom CSS and HTML code, or even use a WordPress page builder.
To help you find the best solution, check out the methods we’ll cover in this guide below:
- 1. Create Custom Full Width Pages With SeedProd
- 2. Make a Page Full Width in WordPress With a Plugin
- 3. Use Your Theme’s Full Width Template
- 4. Make a Page Full Width in WordPress Manually
With that said, let’s dive into the first method.
Method 1: Create Custom Full Width Pages With SeedProd
Page builder plugins are an excellent way to add full-with pages to your WordPress site, especially if your WordPress theme doesn’t include a full width page option. They allow you to create and edit full width pages and customize them with a drag-and-drop interface.
Some popular page builders include Thrive Architect, Elementor, and Beaver Builder. For this guide, we’ll be using SeedProd, the best WordPress page builder, because it gives you complete control over the entire layout of your website.

With SeedProd, you can create custom landing pages and customize other elements, including your header, footer, home page, and any other page areas without code. Its drag-and-drop interface is beginner-friendly and works seamlessly with your current theme.
To make a custom full width page with SeedProd, first install and activate the SeedProd plugin on your WordPress website.
If you need help, you can see our documentation on installing SeedProd. It guides you through the activation process and shows you how to activate your license key to unlock additional features.
Note: For this guide, we’re using SeedProd Pro. However, if you want to customize your WooCommerce store, we recommend using SeedProd Elite.
Creating a Landing Page
After activating the plugin, navigate to SeedProd » Landing Pages and click the Add New Landing Page button.
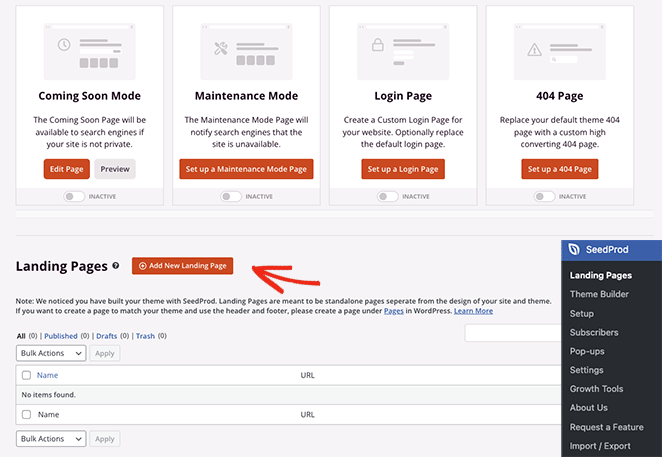
Now, you’ll see the template library where you can choose from over 180+ pre-made landing page templates. Many of these templates include full width options by default, or you can build a custom full width page from scratch.
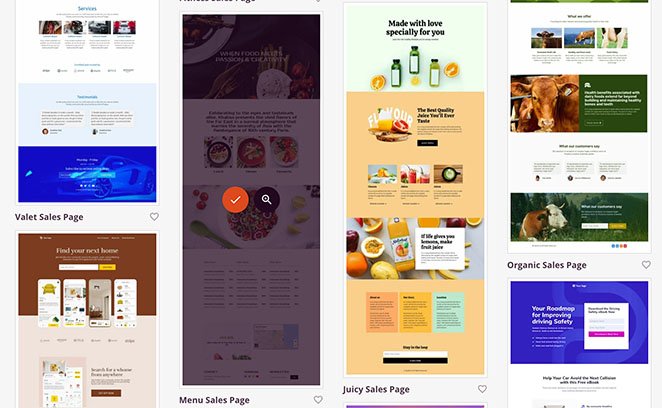
After finding a template you like, click the checkmark icon.
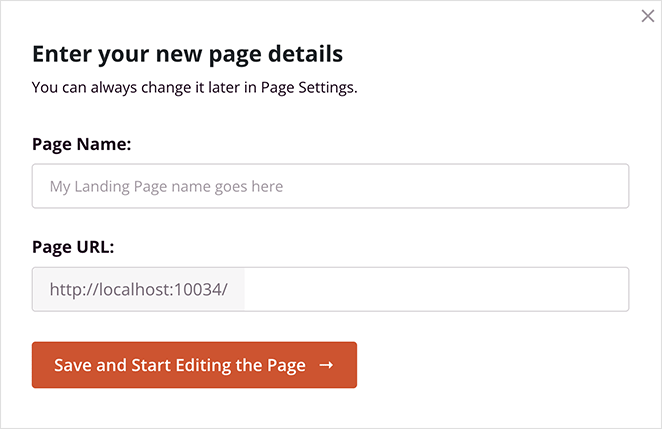
Next, fill in your landing page name and URL information and click the Save and Start Editing the Page button.
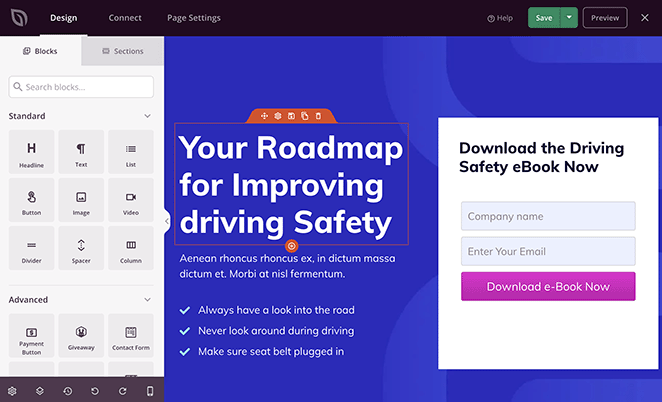
After your new template launches, you’ll see an interface with blocks, sections, and settings on the left and a live preview on the right. You can click anywhere on the preview to select different page elements and edit their settings.
How to Make a Page Full Width with SeedProd
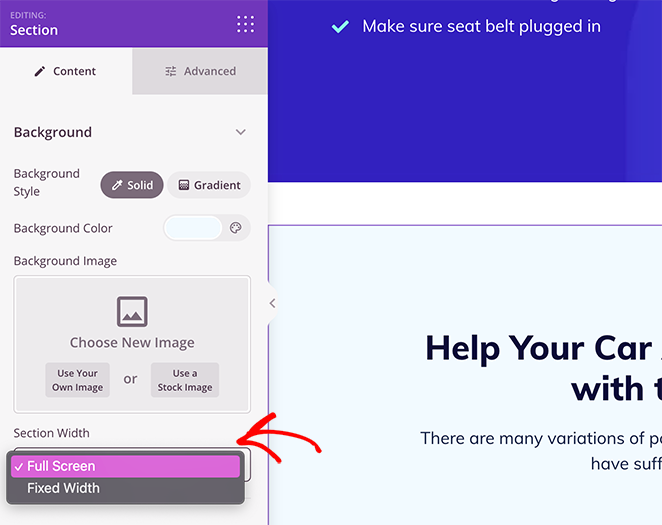
A good example is customizing a template section to make it full width. In the template below, the section is fixed-screen, meaning the content doesn’t span the whole screen.
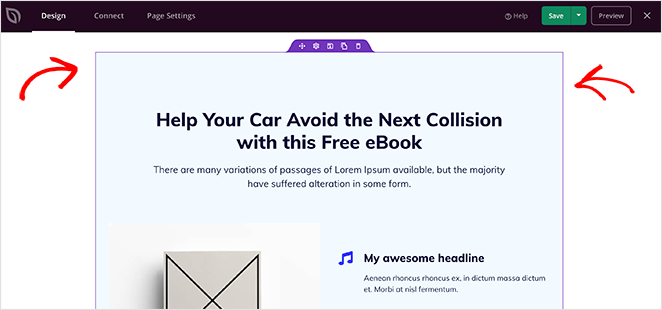
To change this, highlight the section so it has a purple border and open the settings panel. From there, scroll down to the “Section Width” heading and choose full screen from the dropdown menu.
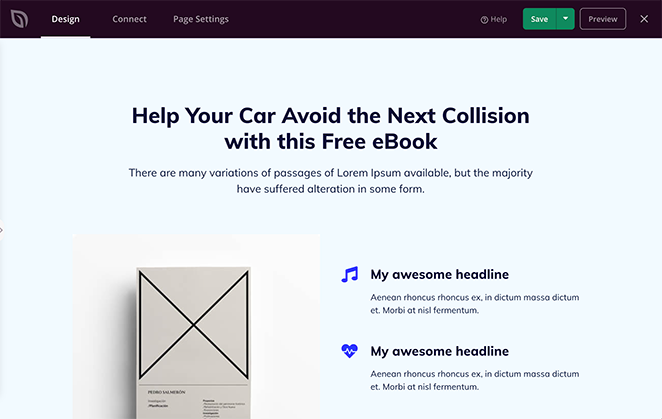
Then when you preview the page, you’ll see that section covering the whole screen.
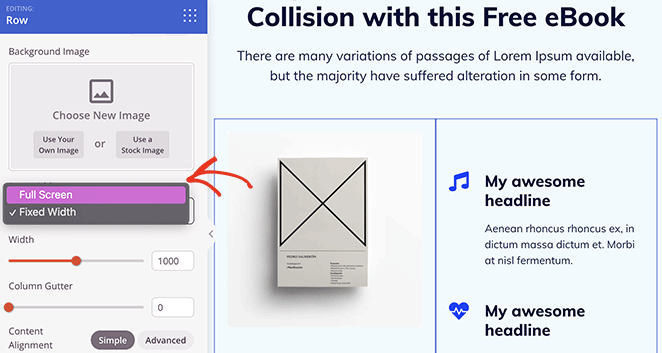
You can continue this process for any other section to make the whole page full width. It’s even possible to make individual rows and columns full width using similar steps.
Remember to save and publish your page when you’ve finished customizing it.
Alongside the landing page builder, SeedProd also includes a drag-and-drop WordPress theme builder. With this feature, you can create a custom WordPress theme without writing any code.
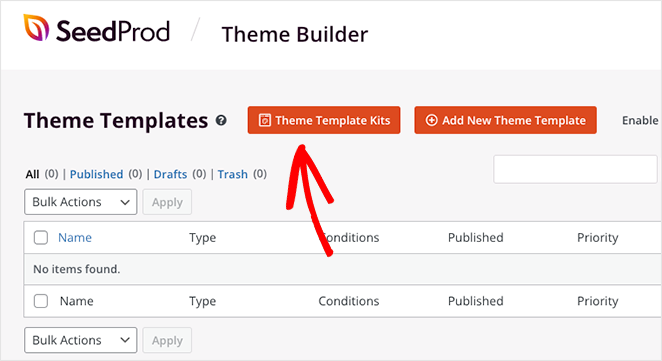
To begin, head to SeedProd » Theme Builder from your WordPress dashboard, then click the Theme Template Kits button to choose from 80+ fully customizable website theme kits.
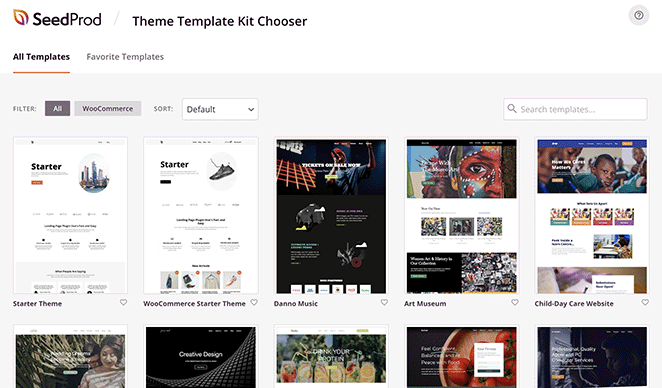
Customizing a theme with SeedProd is similar to the Page Builder feature. Here, just choose a theme file from the list, open it in the page builder, and point and click to make any section full width like before.
The theme builder lets you customize every part of your website, including pages, blog layouts, archives, header, footer, sidebars, WooCommerce pages, and more. Additionally, the customization options include styling for fonts, colors, backgrounds, spacing, and even animations.
For full details, see our guide on how to create a custom WordPress theme.
Method 2: Make a Page Full Width in WordPress With a Plugin
The next method we’ll cover is also straightforward and works with most WordPress plugins, themes, and page builders.
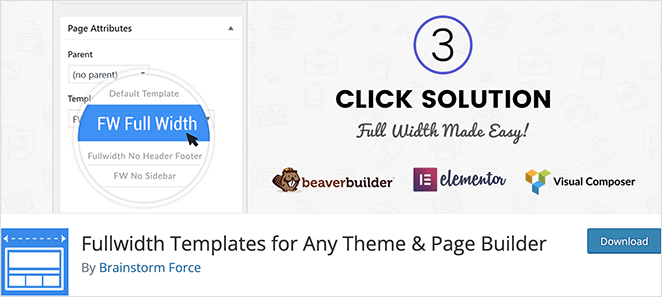
For this, we’ll use the Fullwidth Templates plugin, so download the plugin and install it on your WordPress site.
For help, you can see this guide on how to install a WordPress plugin.
After activating the plugin, it will add three new template file options to the WordPress page editor. You can find them by editing an existing page or adding a new one and finding the “Template” heading in the right-hand panel.
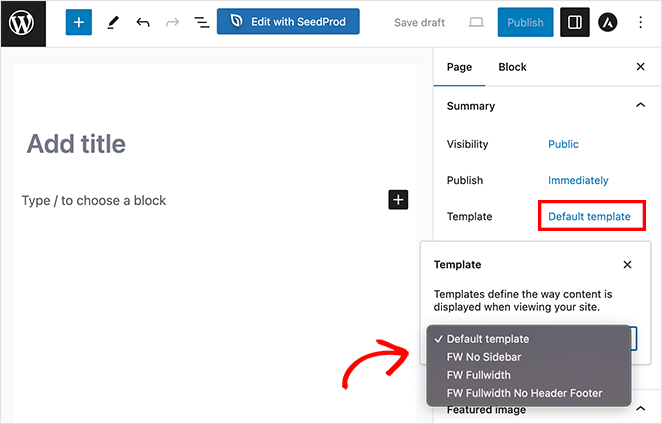
The three templates are as follows:
- FW No Sidebar: This option removes the sidebar from your page, leaving the rest of your content intact.
- FW Fullwidth: This option removes the sidebar, comments, and title and stretches the page layout to the full width.
- FW Fullwidth No Header Footer: This option removes everything that the FW Fullwidth setting does, as well as the header and footer.
The most popular option to use with the WordPress editor is FW No Sidebar because it keeps your page the same but only removes the sidebar.
Ultimately, this plugin makes creating a full width page easy. However, it doesn’t have many customization options, so we recommend using a page builder.
Method 3: Use Your Theme’s Full Width Template
Many of the best WordPress themes already come with a full width page template by default. So, it’s best to use this option if your theme has it.
Typically, you can see if your theme has a full width template by looking at the page attributes section in the WordPress editor.
In this example, we’re using the popular Hestia WordPress theme. As you can see, the template options are under the “Templates” heading in the right-hand panel.
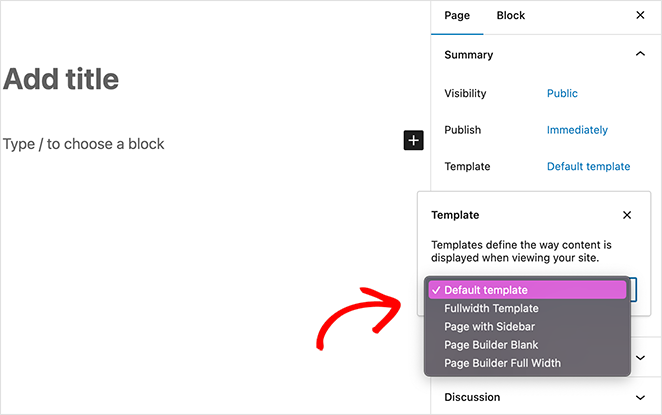
The fullwidth page template options include:
- Fullwidth Template
- Page with Sidebar
- Page Builder Blank
- Page Builder Full Width
The options you see may vary depending on your active WordPress theme. Just choose a template you prefer and save your page to make it full width.
Method 4: Make a Page Full Width in WordPress Manually
One final method for creating full width pages in WordPress involves creating a full width page template yourself. We only recommend this method if nothing else works for you and you’re comfortable editing your WordPress theme files.
Before you start, back up your WordPress site and current theme. This will help you restore your site quickly if anything goes wrong.
Creating a Custom Template
To begin, open a text editor like Notepad and copy and paste the following code into the blank file:
<?php
/*
*
Template Name: Full-Width
*/
get_header(); ?>
Next, save this file with the name full-width.php and change the “Save as type” to “All Files.” This ensures the file won’t automatically save as a .txt file.
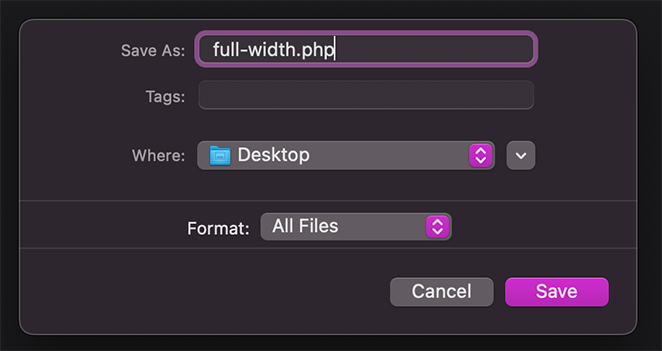
This file will tell WordPress the file name and fetch the header template.
The next step is to edit the content part of the code. So, connect to your website using an FTP client or your web host’s file manager and navigate to /wp-content/themes/your-theme-folder/.
Inside this folder, you’ll need to find the page.php file, which is your theme’s default page template file. Open this file in your text editor and copy all of the code below the get_header() line.
Then paste the code you copied into the full-width.php text file you made earlier.
Remove the Sidebar
In the same full-width.php file, find and delete the following line of code:
<?php get_sidebar(); ?>
This will stop your theme from displaying the sidebar when using the full width template.
You may encounter this code more than once if your theme has multiple sidebars, such as footer widget areas. Decide which sidebars you want to keep, and remove any you don’t need.
If your theme doesn’t display sidebars on pages, you may not find this code in the file at all.
After making your changes, your new full width.php file’s code may look similar to this, although yours may differ depending on your theme options:
<?php
/*
*
Template Name: Full-Width
*/
get_header(); ?>

<div id="primary" class="site-content">
		<div id="content" role="main">

			<?php
			while ( have_posts() ) :
				the_post();
				?>
				<?php get_template_part( 'content', 'page' ); ?>
				<?php comments_template( '', true ); ?>
			<?php endwhile; // End of the loop. ?>

		</div><!-- #content -->
	</div><!-- #primary -->

<?php get_footer(); ?>
Finally, save this file, then upload it to your theme folder using your ftp client.
You’ve now successfully created and uploaded a custom full width page template to your WordPress theme. The next step is to use it to make a full width page.
To do this, go to your WordPress admin and create or edit a new page.
In the “Page” panel on the right, look for “Templates” and click the ‘Template’ dropdown, where you can select your new “Full Width” template.
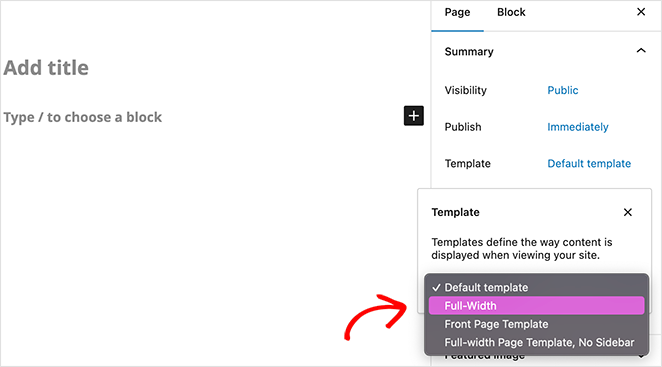
After selecting that template, click Publish or Update to save your changes.
Adding Custom CSS to Make the Page Full Width
When you view the page, you won’t see any sidebars, and the page will display as a single column. In some cases, it may not be full width yet, so you’ll need to add some CSS styling.
To do this, use the Inspect tool to find the CSS classes your theme uses to define the content area. After that, adjust its width to 100% using CSS.
Now you can add the custom CSS code to your theme by visiting Appearance » Customize and clicking the Additional CSS tab at the bottom.
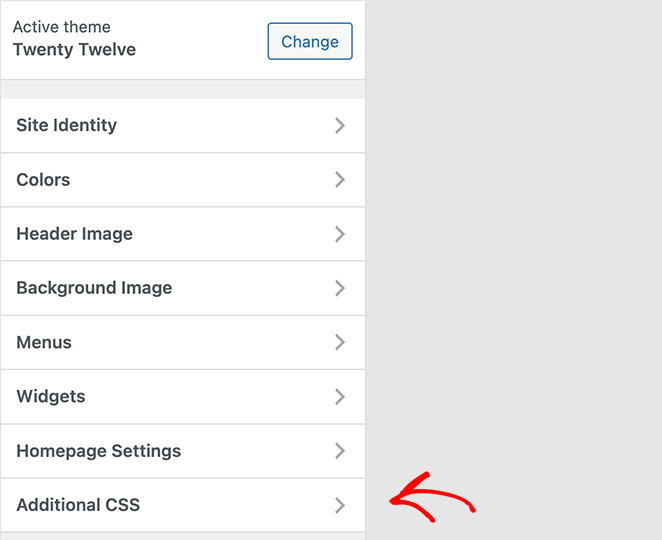
The CSS we used looks like this:
.page-template-full-width .site-content {
width:100%;
}
Here is how our page looks on our demo site using the Twenty Twelve theme.
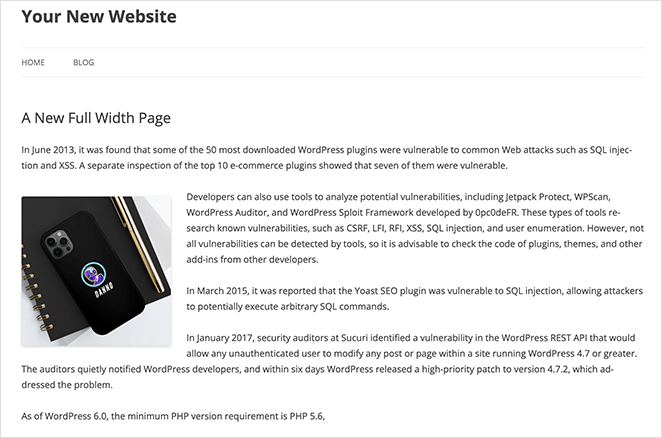
If you need help with this step, you can see this guide on how to add custom CSS in WordPress.
Next, More Ways to Customize Your WordPress Theme
We hope this guide has helped you learn how to make a page full width in WordPress.
For even more helpful WordPress tutorials, check out these top suggestions:
- How to Change Fonts in WordPress Themes (5 Solutions)
- How to Easily Add Font Awesome to Your WordPress Theme
- How to Change WordPress Theme Without Losing Content
- How to Customize WordPress Post Excerpts (Without Code)
- How to Customize Headers in WordPress (4 Simple Ways)
- How to Add a Different Sidebar for Different Pages in WordPress
Thanks for reading! We’d love to hear your thoughts, so please feel free to join the conversation on YouTube, X and Facebook for more helpful advice and content to grow your business.

