Creating an Instagram landing page is an easy way to send Instagram users directly to your website. This can help turn them into leads, subscribers, and paying customers.
In fact, just by adding a link to your Instagram bio, you can see a big difference. Studies show this can increase the number of people coming to your landing page from Instagram by 10-15%. This small change can make a big impact on your online success.
With this in mind, I’ll show you how to create your own Instagram landing page easily on WordPress.
How to Create a Landing Page for Instagram:
Why Should You Create a Landing Page for Instagram?
As I mentioned above, creating a landing page for Instagram is the best way to direct potential customers to your business website.
More importantly, you can only add one clickable link to your Instagram profile. Therefore, any link you add to your bio should be one of your most important assets, i.e., a high-converting landing page.
There are a few types of Instagram landing pages you can create on your website.
First, you can make a link-in bio landing page, similar to LinkTree, where you can add links to blog posts, pages on your website, and links to other social media profiles. The clear benefit of this type of landing page is it helps raise brand awareness and drives traffic to your website.
You can also create a landing page linked to your Instagram ads. For instance, when a user clicks on your ad, they’re taken to a landing page on your website that shows a special offer.
Naturally, this type of landing page is the best way to collect contact information with forms and increase your conversion rate with limited offers.
How to Create an Instagram Landing Page in WordPress
To follow this tutorial, you’ll need several things:
- Domain name
- Website hosting
- Business website
If you already have an established website, you don’t need to worry about this. But if you don’t, you’ll need to create a business website.
We recommend using WordPress to make your site. It’s the most popular website platform and powers nearly 41% of all websites on the internet.
WordPress is free, open-source, and has thousands of pre-built website designs and extensions. It’s highly flexible and works with almost every third-party tool and service available to website owners.
We even use it to run our website!
For help getting set up, follow this step-by-step guide on how to create a WordPress website.
With your website ready, you’ll need to decide which type of Instagram landing page you want to create.
You can follow our guide on how to create a link in bio page, or you can follow the steps below to create a more personalized Instagram landing page on WordPress using a landing page builder. For instance, one that you can link to your advertisements.
Ready? Let’s dive in!
Step 1: Install and Activate SeedProd
For this tutorial, we’re using SeedProd to make an Instagram landing page. SeedProd is one of the best WordPress page builder plugins on the market.

It includes a drag-and-drop visual editor to design your page in real-time. And it has tons of templates and customization options to make your page look exactly how you want.
In addition, you can integrate your page with popular email marketing services to grow your email list. Plus, it works seamlessly with any WordPress theme for a fast and efficient experience.
With that in mind, click here to get started with SeedProd. Then install and activate the plugin on your WordPress website.
Note: there is a free version of SeedProd available, but we’ll use the Pro version for the advanced features we need.
If you need help with this step, you can follow this guide on installing a WordPress plugin.
After installing SeedProd, go to SeedProd » Settings and enter your license key.
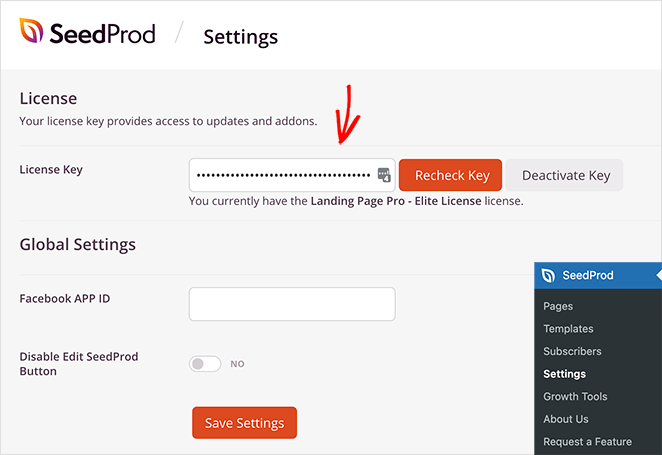
If you don’t have your license key ready, you can find it in the account section of the SeedProd website.
Step 2: Create a New Landing Page
After activating your license key, go to SeedProd » Pages.
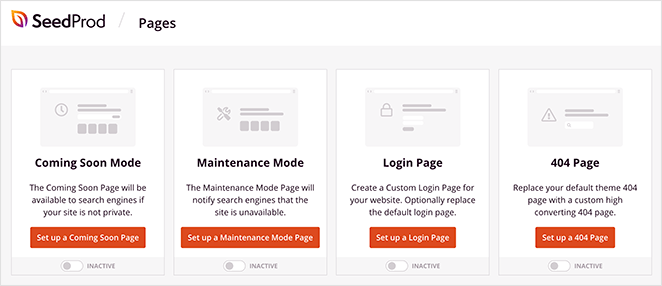
On this page, you can:
- Create and activate a coming soon page
- Activate maintenance mode
- Make a custom 404 page
- Set up a custom WordPress login page
- Create a standalone WordPress landing page
The advantage of SeedProd’s page modes is that it adds extra functionality to your site without installing multiple WordPress plugins.
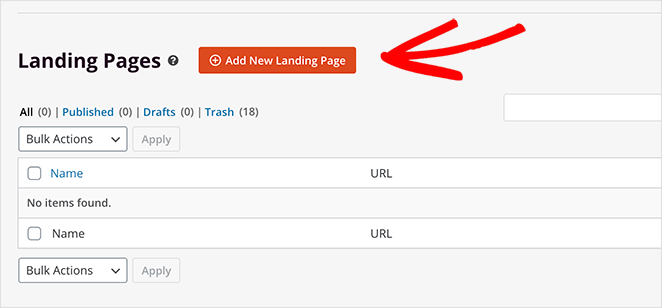
For this guide, we want to create a standalone landing page. To do that, click the Add New Landing Page button.
Step 3: Choose a Landing Page Template
On the following screen, you can choose from hundreds of responsive landing page templates.
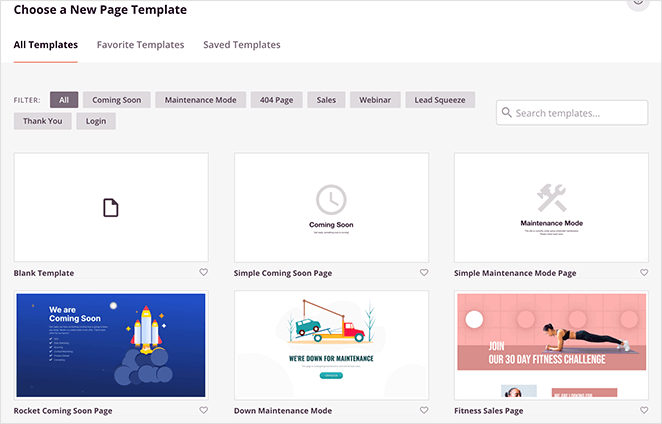
You can filter designs by clicking the tabs along the top, such as:
- All
- Coming Soon
- Maintenance Mode
- 404 Page
- Sales
- Webinar
- Lead Squeeze
- Webinar
- Login
The best approach is to look for a template that closely matches the design you want to achieve. If it’s not a perfect fit, don’t worry; you can easily customize it in the next step.
To show you how easy it is, we’ll start with the Maintenance Page Minimal template.
Go ahead and hover your mouse over the template thumbnail and click the check icon to import it.

Next, you’ll see a visual cue to enter your page name and URL. It’s a good idea to make this something your Instagram fans will recognize easily.
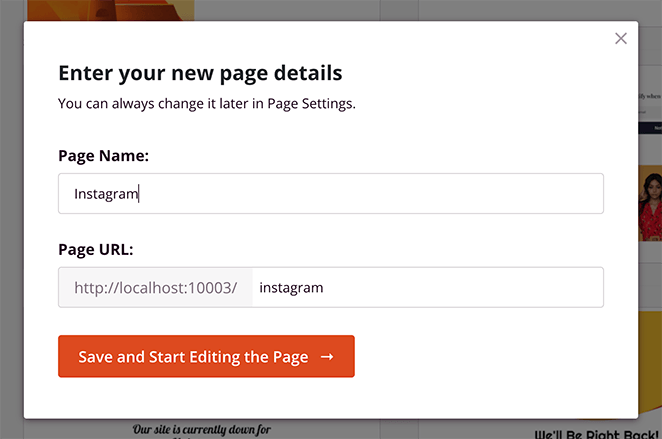
You can then click the Save and Start Editing the Page button to launch your template in the visual editor.
Step 4: Customize Your Landing Page Design
Now, it’s time to start customizing your Instagram page with the drag-and-drop builder.
You’ll see a live preview of your page on the right. To edit the page element, simply click on the item, and an editing menu will appear on the left.
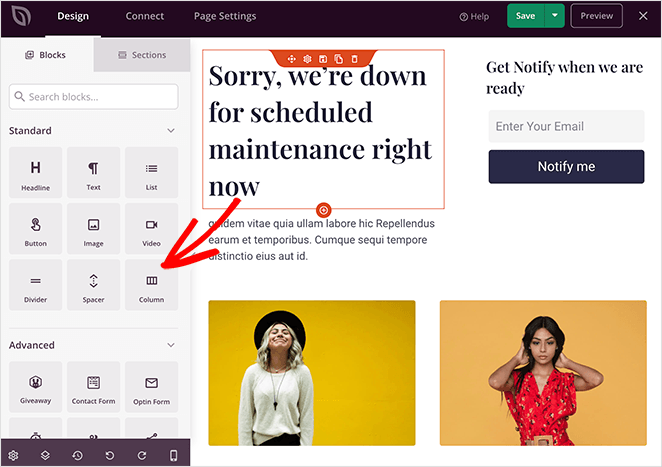
In addition, the left-hand options panel has elements you can drag and drop right onto your landing page design.
Now, let’s add some blocks and customizations to make the template more like an Instagram page.
Editing & Deleting Blocks
First, let’s change the landing page heading, so users know why they’re there and what the page is about.
To do this, click anywhere on the heading text and replace it with your custom message.
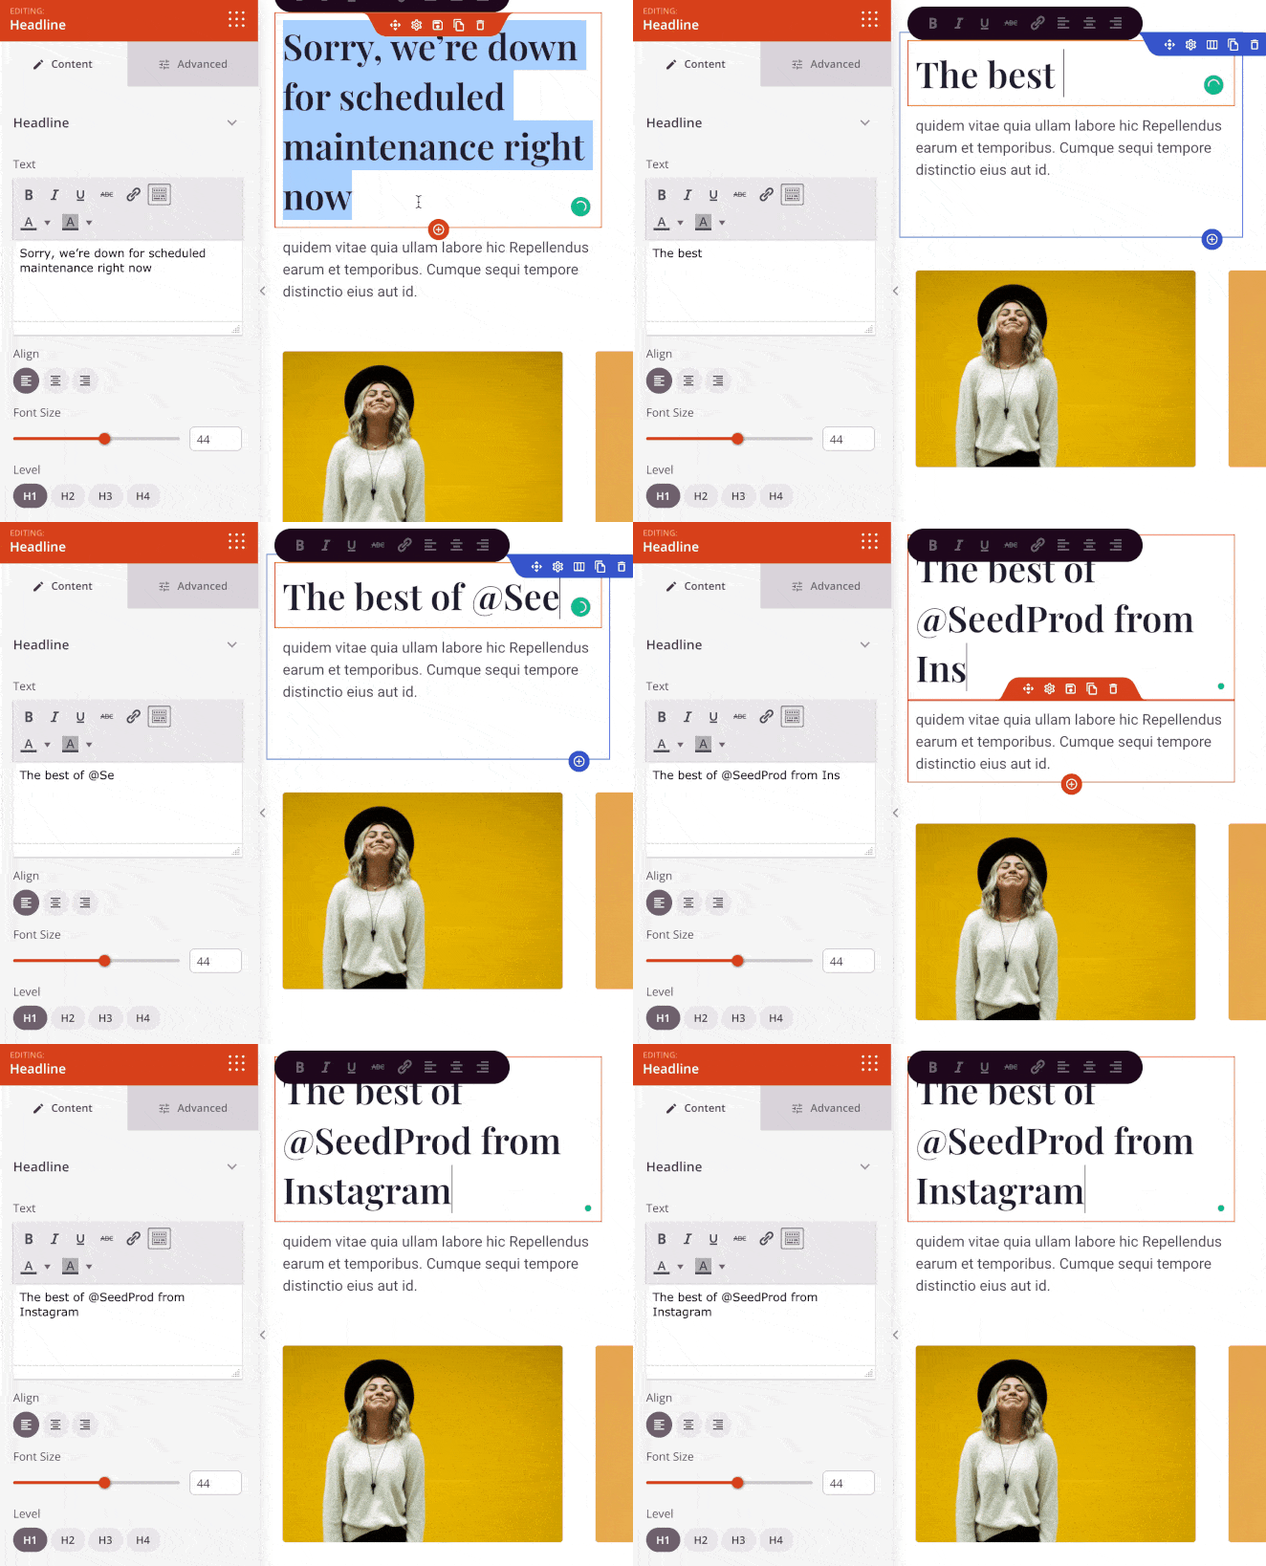
If there are any elements you want to remove, simply hover your mouse over the block and click the trashcan icon.

Uploading Custom Images
Now, let’s replace the default images with some popular posts from your website. All you need to do is click the existing image and delete it using the trashcan icon in the left-hand panel.
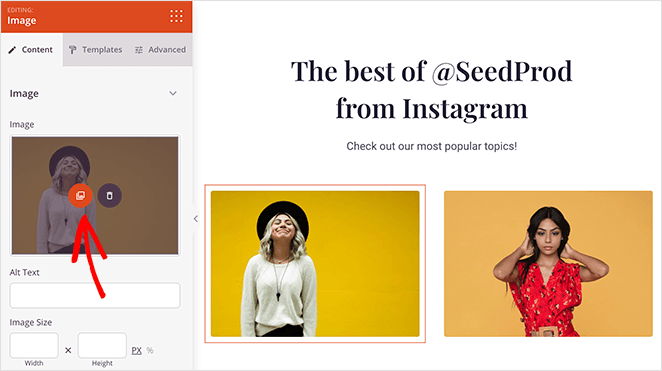
From there, you can click the Use Your Own button to upload an image from your computer or WordPress media library.
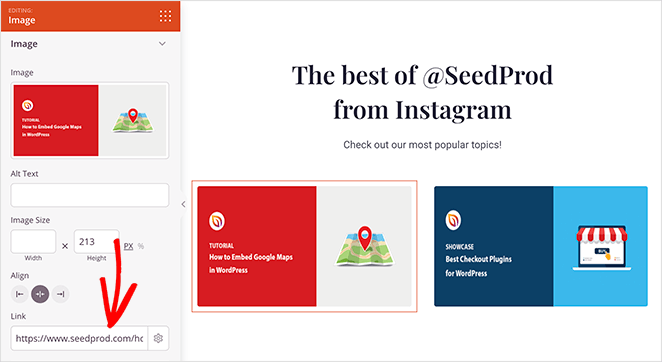
You can add a link in the same image settings panel, so anyone who clicks your image goes directly to the relevant blog post.
Duplicating Page Blocks & Rows
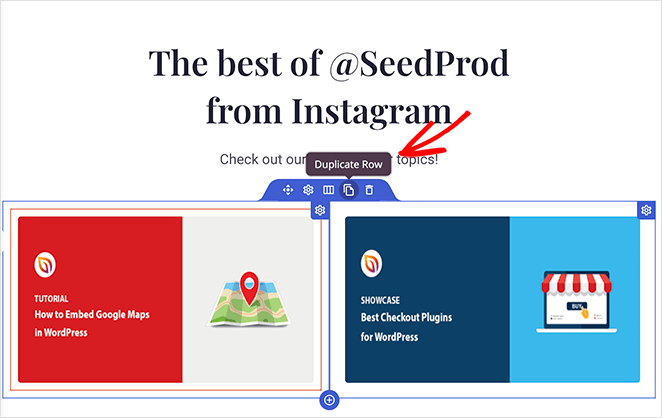
Now, let’s say you want to add another row of images. To do this quickly, you can duplicate the existing row.
Just hover your mouse over the row and click the Duplicate Row icon. Then, simply repeat the process above to add your images and post links.
Adding a Landing Page Opt-in Form
If one of your goals is to collect email addresses from your Instagram fans, you can do this easily with SeedProd’s opt-in form block.
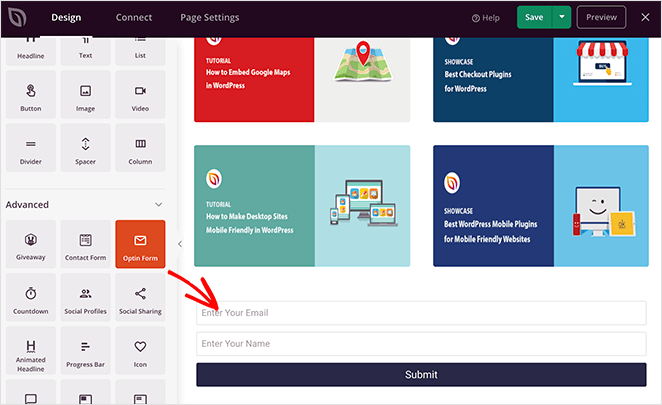
Just drag the block onto your page, and click it to configure your form settings. For instance, you can change your call-to-action button text, colors, form input labels, and more.
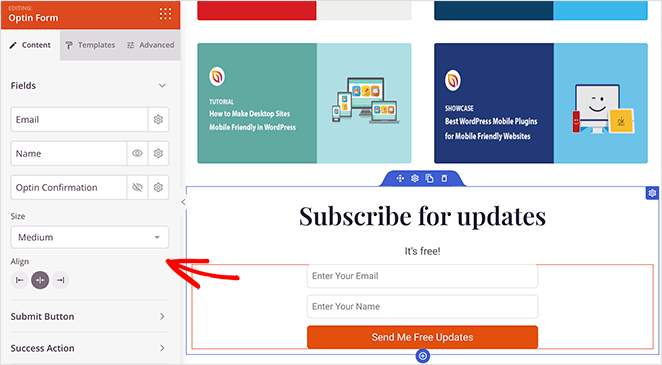
From there, click the Connect tab at the top of the screen to connect to your email marketing service.
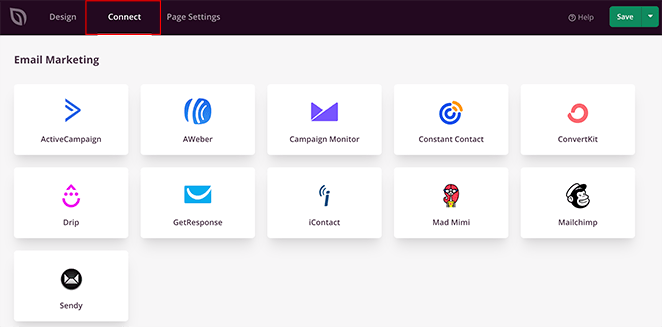
For full instructions on connecting to individual email marketing providers, see our email integration documentation.
Customizing Global Colors, Fonts & Backgrounds
To ensure your page has a consistent look and feel, you can use the Global Settings panel.

Just click the cog icon in the bottom-left corner to see global settings for:
- Fonts
- Colors
- Background
- Custom CSS
For example, in the Fonts section, we changed the default font color to white to stand out against the column background images.

When you’re happy with how your landing page looks, click the green Save button in the top-right corner.

Step 5: Publish Your Instagram Landing Page
Given that most Instagram users browse the platform from a smartphone or tablet, it’s an excellent idea to ensure your page looks good on mobile devices before publishing.
You can do this easily with SeedProd’s live mobile preview feature. Simply click the Mobile Preview icon in the bottom navigation bar.
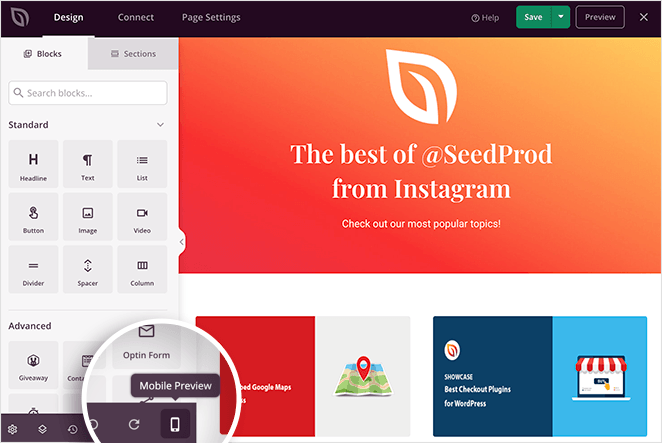
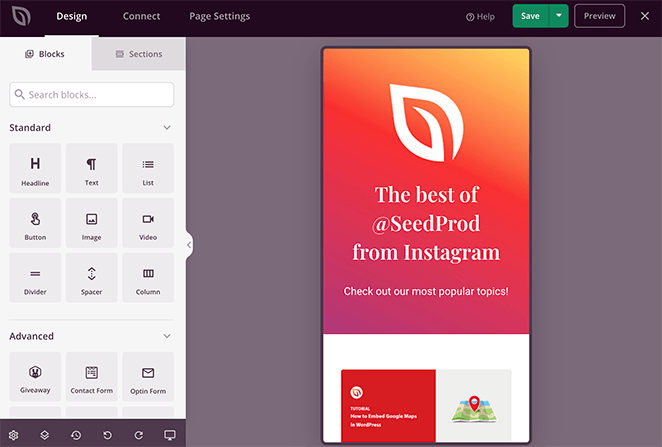
Then you can preview your page on mobile and make any necessary edits.
Finally, save your changes and click the dropdown arrow next to the Save button and click Publish.
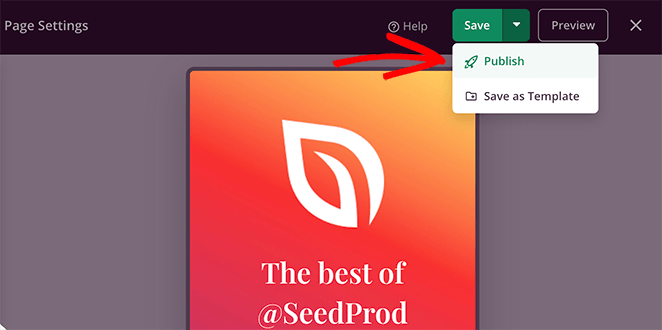
Your Instagram landing page is now live! Click the See Live Page button to preview how it looks.

Now all that’s left is to add your new page’s URL to your Instagram bio or advertisement to start sending targeted traffic to your WordPress site.
Instagram Landing Page Examples
If you’re not sure which type of landing page you should use for Instagram, here are some great examples.
1. Scribd Instagram Ad Landing Page
First is a sponsored Instagram post from Scribd. It features a visually appealing image, with a call to action to subscribe for a 30-day free trial.

When you click the Instagram advertising image, you’ll see a landing page promoting their offer.

The page includes:
- An attention-grabbing hero area
- Multiple free trial call-to-action (CTA) buttons
- Price comparison table
- Testimonials and reviews
- Client logos for social proof
As a result, after the Instagram ad click, users are compelled to sign up for the offer.
2. Wall Street Journal Instagram Landing Page
The Wall Street Journal takes a different approach with its bio link landing page. They use a 3rd-party app to show selected news articles in an Instagram-style layout.
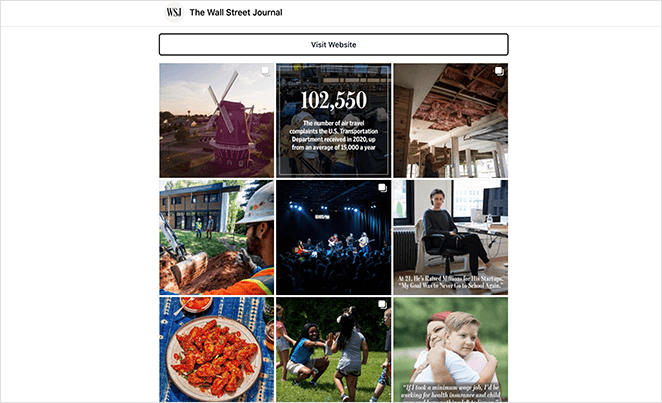
Clicking each image takes you directly to the article on their website. Or you can click the CTA button to go straight to their site.
3. HKT Products Link in Bio Page
If you want to make a typical link in bio page, here’s a simple example from HKT Products. Using 3rd-party link in bio tools, they made a minimalist page that links to different pages on their website.
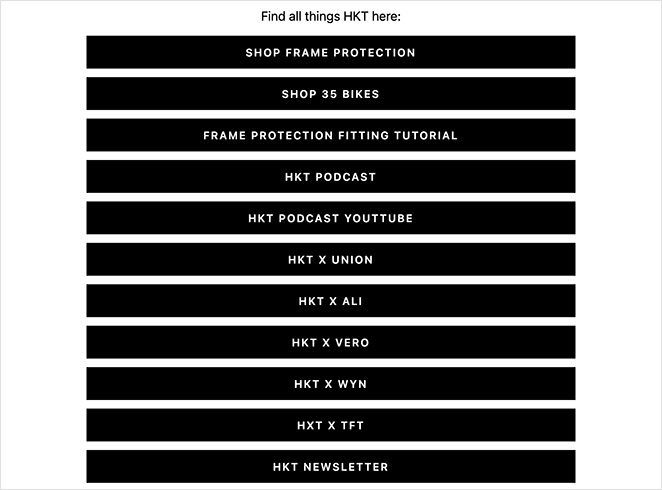
For instance, they link to:
- Individual product pages
- Product tutorials
- Company podcast
- YouTube channel
- Newsletter subscription page
- And more
As a result, they can send their fans to pages specially designed to increase leads, sales, and followers.
4. Etsy Instagram Product Page
Finally, is this Instagram page from Etsy. Again, it’s an entirely different approach to a social media landing page, but the goal is the same – to promote their products.
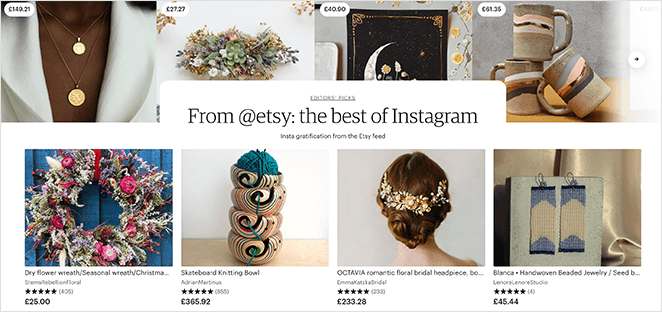
Instead of using a link in bio tool or an Instagram ad, Etsy created a page on their website tailored to their Instagram audience. Here, users can browse popular products curated from its Instagram feed and buy them directly from their site.
Each of the Instagram landing page examples above shows a unique take on how you can drive Instagram traffic to your website.
That’s it!
Frequently Asked Questions
Bonus Social Media Marketing Guides
I hope this guide helped you learn how to create an Instagram landing page in WordPress.
If you need more help growing your business, you’ll find the following social media guides helpful:
- Best Link In Bio Instagram Tools
- Social Media Landing Page Examples to Grow Your Company
- Best Social Media Plugins for WordPress
- How to Add Custom WordPress Social Media Icons to Your Website
- Best Instagram WordPress Plugins to Boost Social Reach
- How to Make Giveaways on Instagram (the Smart Way)
- Social Media Lead Generation Strategies You Need to Try
But if you’re ready to get started with your own Instagram landing page, just click the button below.
Thanks for reading! We’d love to hear your thoughts, so please feel free to leave a comment with any questions and feedback.
You can also follow us on YouTube, X (formerly Twitter), and Facebook for more helpful content to grow your business.

