Do you want to learn how to accept Stripe payments on your WordPress website?
Stripe is a payment processing platform that helps you take online payments for goods and services. It’s also a popular payment method for online stores, blogs, membership sites, and more.
In this guide, we’ll show you how to accept Stripe payments in WordPress step-by-step.
Why Use Stripe to Take Payments in WordPress?
Stripe is a popular payment processor and service provider that makes accepting payments on your online store effortless.
It works seamlessly with any WordPress site, including eCommerce stores, donation websites, and even small business sites taking online transactions. You can set up Stripe to manage recurring payments or let customers pay for one-time purchases with their debit card or credit card information.
That said, a requirement for processing payments with Stripe is that your website must have SSL/HTTPS encryption. That is to ensure your customer’s payment information, like credit card numbers, are secure.
If you need help setting up website security measures, see our tutorial on adding SSL to WordPress.
So, how exactly do you accept Stripe payments in WordPress? While there are many different methods, we’ll focus on the 3 easiest ways to set up Stripe payments for your site below.
Feel free to use any of the links below to find the method you need:
Method 1. Accepting Payments with SeedProd Stripe WordPress Block
For the first method, we’ll use SeedProd’s powerful drag-and-drop page builder to take Stripe payments. With pre-made templates and customizable WordPress blocks, it makes creating any WordPress layout super easy.

It takes zero coding or HTML knowledge to create custom WordPress themes, landing pages, and complete websites with SeedProd. And with its Payment Button block, you won’t need an entire eCommerce site to accept credit card payments with Stripe.
For this guide, we’ll use the SeedProd Pro plan for its advanced features. However, you can also use the Stripe Payment Button with SeedProd Lite – the free version.
Step 1. Install and Activate SeedProd
The first thing you’ll have to do is install and activate the SeedProd plugin. For help with this, see this guide on installing a WordPress plugin.
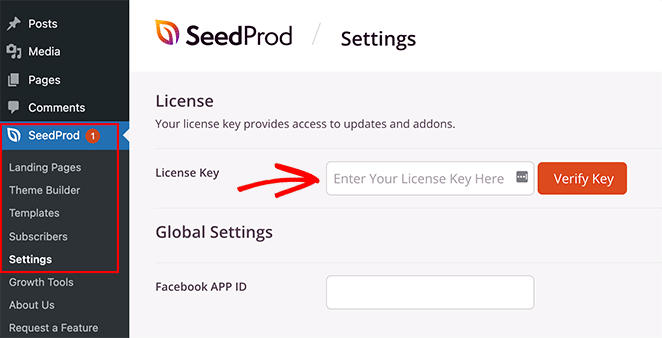
Upon activation, you’ll need to visit the SeedProd » Settings page and enter your license key. You can get the license key from your account area on the SeedProd website.
Step 2. Choose a Template
After verifying your key, you’ll need to create a layout with SeedProd.
You can create a custom WordPress theme with the Theme Builder to replace the theme you’re using. Alternatively, you can set up a standalone landing page with the page builder and continue using your current theme.
For this guide, we’ll use the Landing Page option to show you how you don’t need an entire eCommerce site to add Stripe payment options to WordPress.
So head over to SeedProd » Landing Pages and click the Add New Landing Page button.
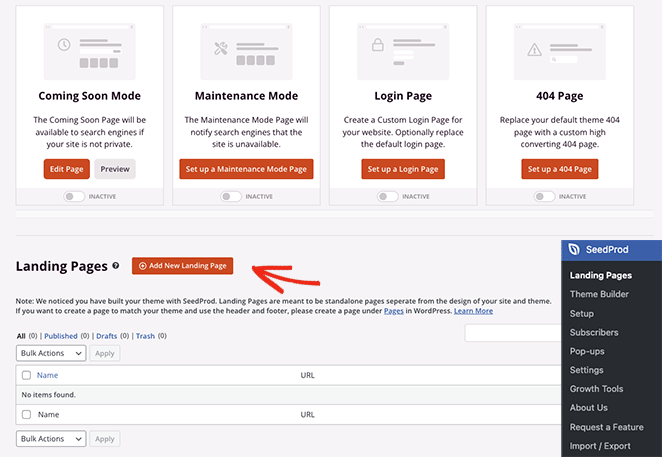
On the next screen, you can click any of the filters to choose a prebuilt landing page template.
When you find a design you like, hover over the thumbnail image and click the checkmark icon.

Now, you’ll see a popup asking for your landing page name and URL.
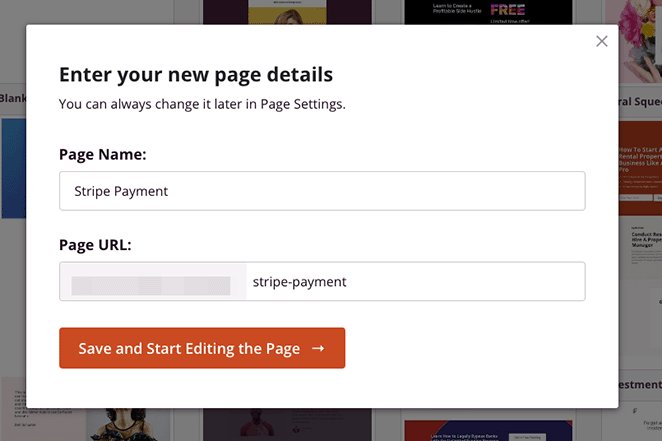
Once you’ve entered this information, click the Save and Start Editing the Page button.
Step 3. Add the Payment Button Block
After launching the template, you’ll see a layout similar to the one below:

It will have blocks and sections on the left and a full live preview on the right, where you can point and click to customize any element.
For example, you can click the logo image and replace it with your own business logo. Or you can change a section’s background color to use your brand colors.

Pro Tip: Click the Save button to save your changes before adding your payment button.
To add a Stripe checkout payment link to your page, search for the Payment Button block and drag it onto your live preview.

From there, click the Connect with Stripe button to link your Stripe.com account to SeedProd. Once the authentication process is complete, you’ll head back to the landing page builder.

Now, you can use the block settings to customize your Stripe Button. For instance, you can edit the button description and text, enter a custom payment price, change the button alignment, adjust the currency from USD to something else, and add button icons.

You can also click the Advanced tab to change your buy now button’s styling, including shadows, button type, margins, colors, and more.

Step 4. Publish Your Changes
When you’re happy with everything, you’re ready to make your payment page live. To do that, click the Save button and select Publish from the dropdown menu.

Now, whenever visitors click the buy now button on your landing page, they’ll see the Stripe checkout process.

Method 2. Taking Payments with WP Simple Pay Purchase Button
Another method for accepting online payments is to use WP Simple Pay. It’s one of the best Stripe payment plugins for WordPress, allowing you to collect payments without building a shopping cart.
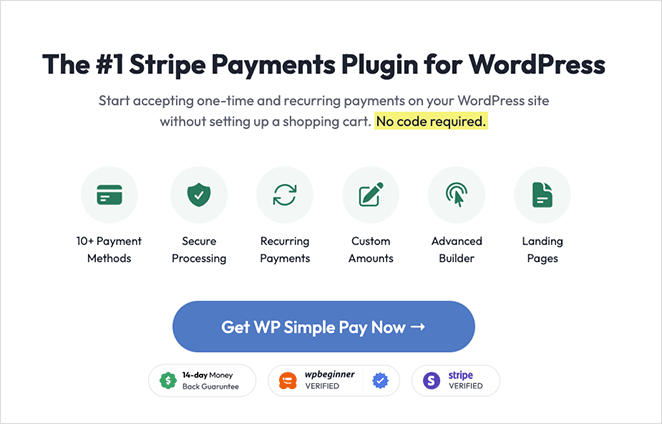
WP Simple Pay is an excellent solution if you don’t need to use a page builder plugin like SeedProd.
For this method, we’ll use the WP Simple Pay pro plan because it lets you display a payment form on your WordPress site. It also offers more payment options and lets shoppers pay once or regularly with recurring payments.
Step 1. Install and Activate WP Simple Pay
To get started, go ahead and install and activate the WP Simple Pay plugin. Upon activation, the plugin will automatically launch its setup wizard, so click the Let’s Get Started button.
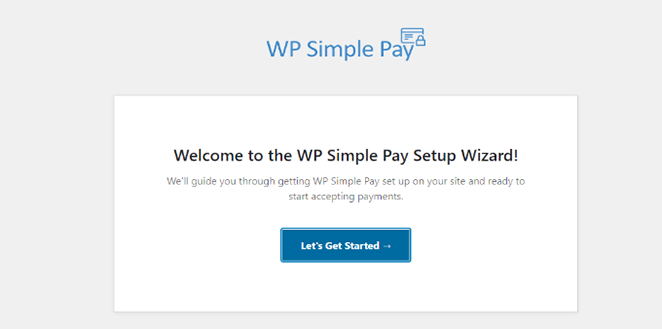
Step 2. Complete the Setup Wizard
Now the setup wizard will ask you to enter your plugin license key. You can find your WP Simple Pay license key under Licenses in your user account area.
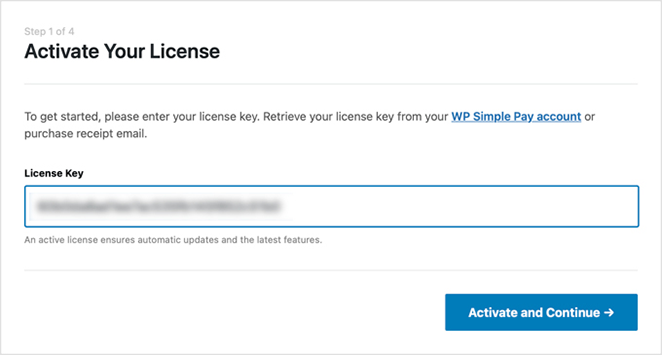
After entering the key, you can click the Activate and Continue button.
The next step is to connect your Stripe account with WP Simple Pay. To do this, click the Connect with Stripe button.
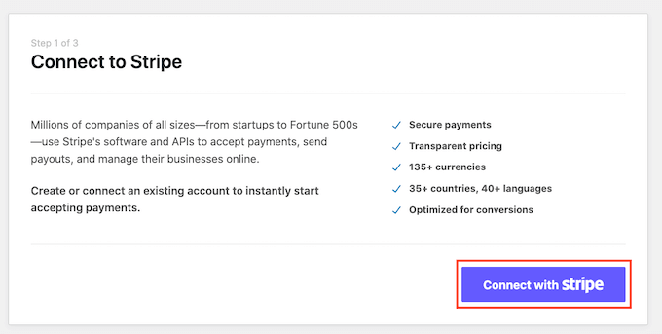
On the next screen, log into your Stripe account and follow the instructions to connect your account with the WP Simple Pay plugin. Afterward, you’ll be redirected back to the setup wizard.
Now, go ahead and type in your email address and choose which email notifications you’d like to receive. For instance, you can get emails for payment receipts, upcoming invoices, and payment notifications.
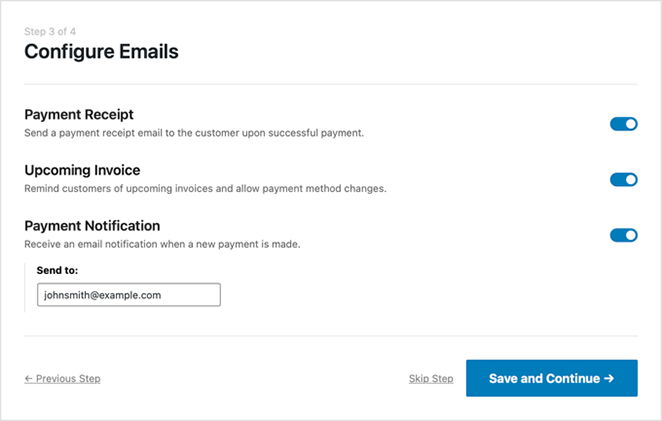
Once you’ve chosen your notifications, click the Save and Continue button.
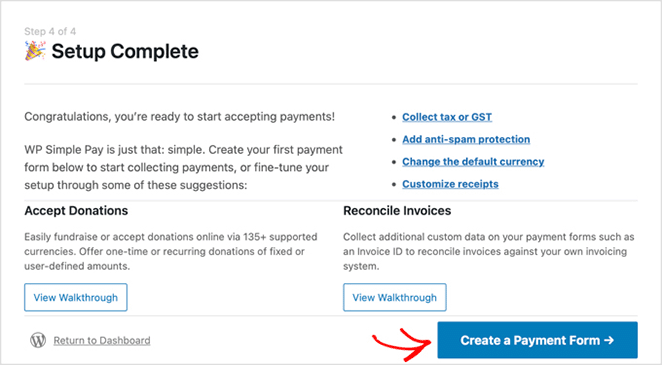
The last step in the setup wizard is to make a payment form. To do that, click the Create a Payment Form button.
Step 3. Create a Payment Form
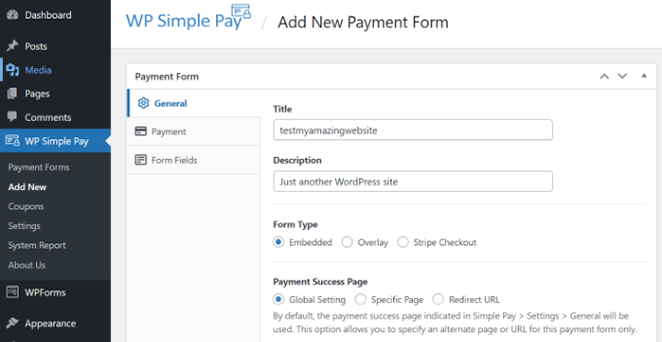
On the following screen, you’ll see several payment form settings.
In the General tab, you can change the form title, description, form type and select options for your payment success page. You can also enable reCAPTCHA to avoid payment spam.
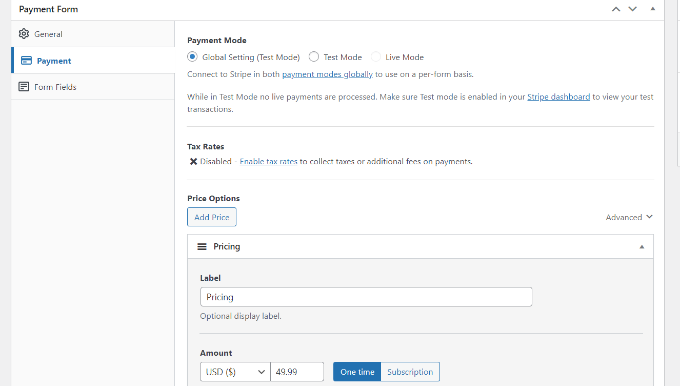
After configuring those settings, you can move to the Payment tab.
In this tab, you can enter your product or service prices. You can also choose from a one-time payment option or recurring subscriptions.
Now, navigate to the Form Fields tab in the form builder. This is where you can add more form fields and change the order they appear.
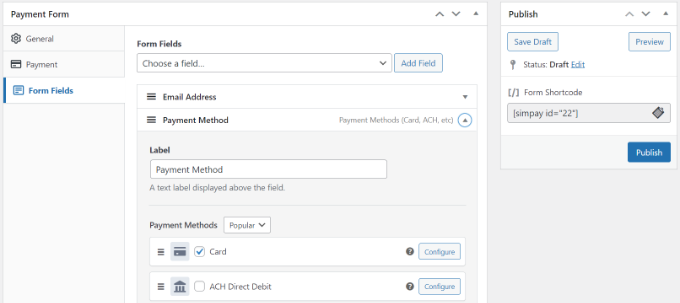
Additionally, you can expand the Payment Method field and choose multiple payment options such as Apple Pay, ACH payments, credit cards, buy now, pay later, and more.
After customizing your payment form, click the Publish button.
Step 4. Add Payment Form to WordPress Page
The next step is to add the payment form to your WordPress site. You can add it anywhere with the WP Simple Pay WordPress block.
To do this, create or edit a WordPress page, then inside the WordPress content editor, click the ‘+’ button and choose the WP Simple Pay block.
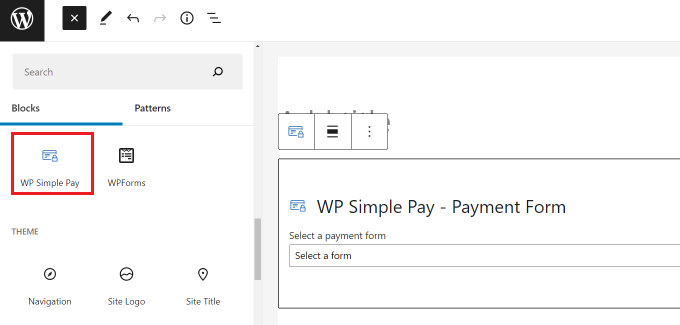
You can then select your form from the dropdown menu in the WP Simple Pay block.
After updating or publishing your page, you can preview your form in action.

Method 3. Using WooCommerce Stripe Payment Gateway
If you have an online store on WordPress using the WooCommerce plugin, you can easily configure it to accept payments with Stripe. Simply follow the instructions below to learn how.
First, install and activate the WooCommerce Stripe Payment Gateway plugin.
Once you’ve activated the plugin, you’ll need to head to the WooCommerce » Settings page and click the Payment tab.
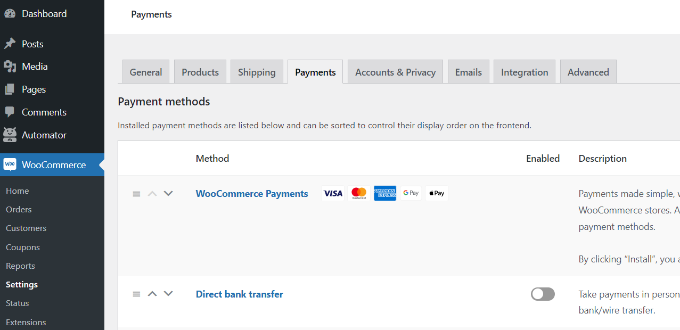
On this screen, you’ll see the different payment solutions you can offer shoppers on your WooCommerce store. The different payment providers and methods include debit and credit cards, Google Pay, PayPal, Apple Pay, direct bank account payouts, and more.
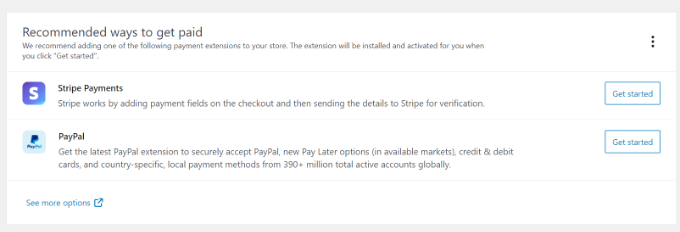
For now, scroll down to the ‘Recommended ways to get paid’ section and click the Get Started button next to the Stripe Payments option.
To accept online payments, you’ll need to link WooCommerce to your Stripe merchant account. Click the Create or Connect an Account button to do so.
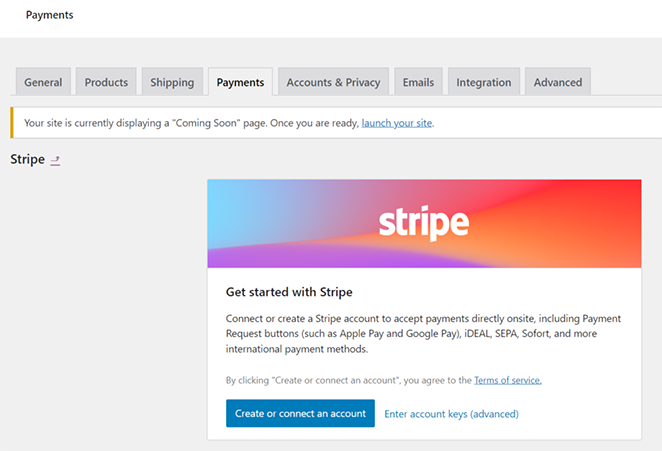
Next, log into your Stripe dashboard and follow the instructions to authorize your account with WooCommerce.
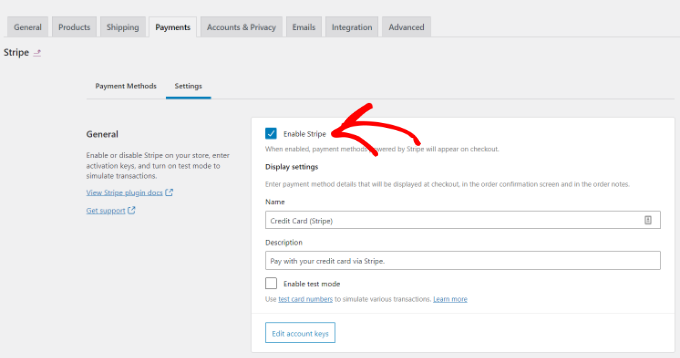
After connecting your Stripe account, you’ll return to the Stripe settings page in WooCommerce. Ensure you check the ‘Enable Stripe’ option on this page, then save your changes.
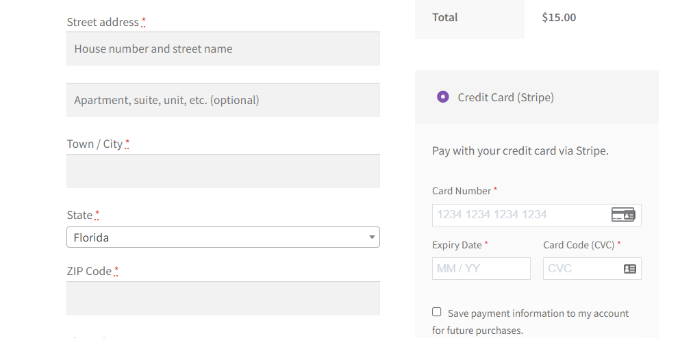
Once that’s done, your website visitors will be able to see a Stripe payment option on the checkout page.
Pro Tip: WooCommerce works seamlessly with SeedProd, allowing you to create a complete WooCommerce store without code.
Frequently Asked Questions
How much are Stripe processing fees?
Stripe charges per transaction, with a base fee of 2.9% + 30 cents for online sales and 2.7% + 5 cents for in-person payments. There’s an additional 1% fee for international transactions and currency conversion.
Is WooCommerce payments better than Stripe?
There’s no clear winner between WooCommerce Payments and Stripe. WooCommerce Payments offers a simpler setup for WooCommerce stores but has limited features. Stripe supports more features and wider global reach, but managing it might require extra setup. Consider your priorities when choosing.
Can I use an existing Stripe account with WooCommerce payments?
No, you cannot directly connect an existing Stripe account to WooCommerce Payments. WooCommerce Payments uses a special Stripe Express account, but you can link it to your existing account during signup. They will still function as separate accounts.
There you have it!
We hope this article has helped you learn how to accept Stripe payments in WordPress. Our favorite way to take Stripe payments is using SeedProd’s Stripe payment button block.
It’s quick and easy and helps you customize your WordPress site without hiring a developer.
You might also like reading the following WordPress guides:
- How to Add Text on an Image in WordPress Easily
- Landing Page vs. Microsite: Which One Is Best?
- 23+ Landing Page Headline Formulas to Boost Conversions
Thanks for reading! We’d love to hear your thoughts, so please feel free to leave a comment with any questions and feedback.
You can also follow us on YouTube, X (formerly Twitter), and Facebook for more helpful content to grow your business.

