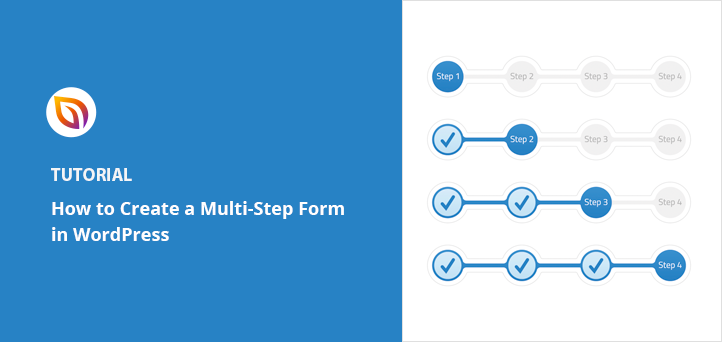
If you want to build clutter-free forms for your website that convert well, multi-page forms are the way forward. Split over multiple pages, they fight form fatigue and increase user engagement. In this article, we’ll show you how to create a multi-step form in WordPress so you can get more conversions.
But first, why use multi-step forms in WordPress?
Why Add a Multi-Step Form in WordPress?
As we mentioned above, multi-step forms are split over several pages. Adding more steps to a form might seem counter-intuitive, but actually, it can increase form conversion rates.
Multi-step forms reduce the friction of users having to make too many choices all at once. Simple options make each step of the form less overwhelming, and progress bars encourage users to continue and complete the form.
Since you’ve laser-focused your form to improve completion rates, you’re less likely to experience form abandonment. And with the use of conditional logic, you can serve different pages to users based on their answers, making it easier to collect only the information you need.
Now that you know why using multi-step forms is great for user experience, let’s move on to creating one in WordPress.
How to Create a Multi-Step Form in WordPress
In this tutorial, we’ll be using WPForms to create multi-part forms in WordPress. WPForms is the best drag-and-drop WordPress form builder plugin. And with over 3 million active installs, it’s the most beginner-friendly tool available.
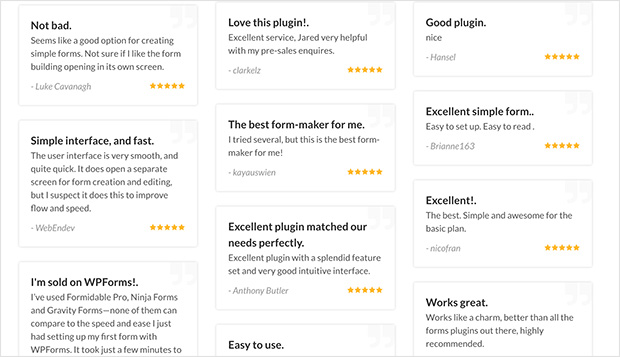
Even better, it has both a free and paid version, but today we’ll be using the Pro version of WPForms to build a multi-page form in WordPress.
Why not check out this in-depth WPForms review for the full details?
So let’s get started with the first step, which is creating a new form.
Step 1: Create a New Form in WordPress
The first thing to do is install and activate the WPForms plugin. If you’re not sure how you can follow this step-by-step guide to installing WordPress plugins for beginners.
With WPForms, you can split any type of form into multiple parts, so let’s go ahead and build a simple contact form.
Head to WPForms » Add New to create a new form and view the available templates.
Then on that screen, give your form a name and choose the Simple Contact Form template.
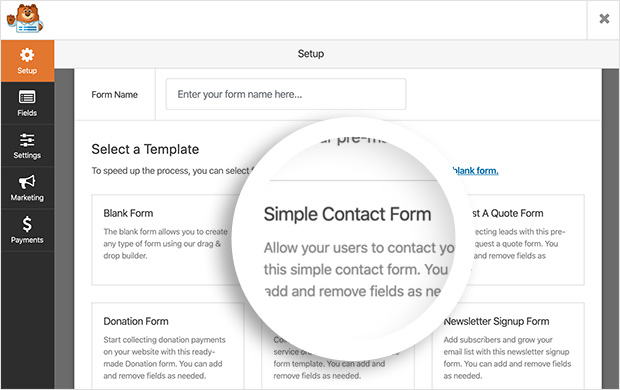
WPForms will now open the template in the drag and drop form builder for you to edit.
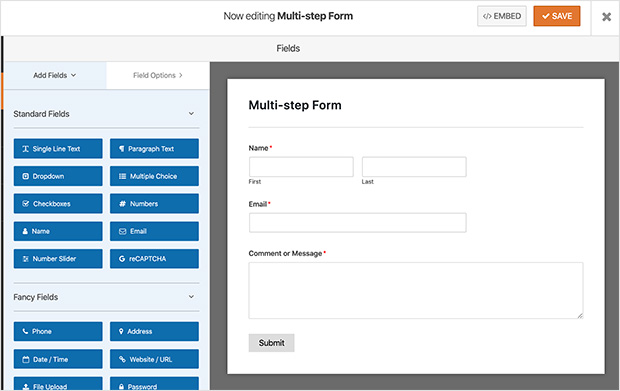
The simple contact form comes with the following fields already added to your form:
- Name
- Comment or Message
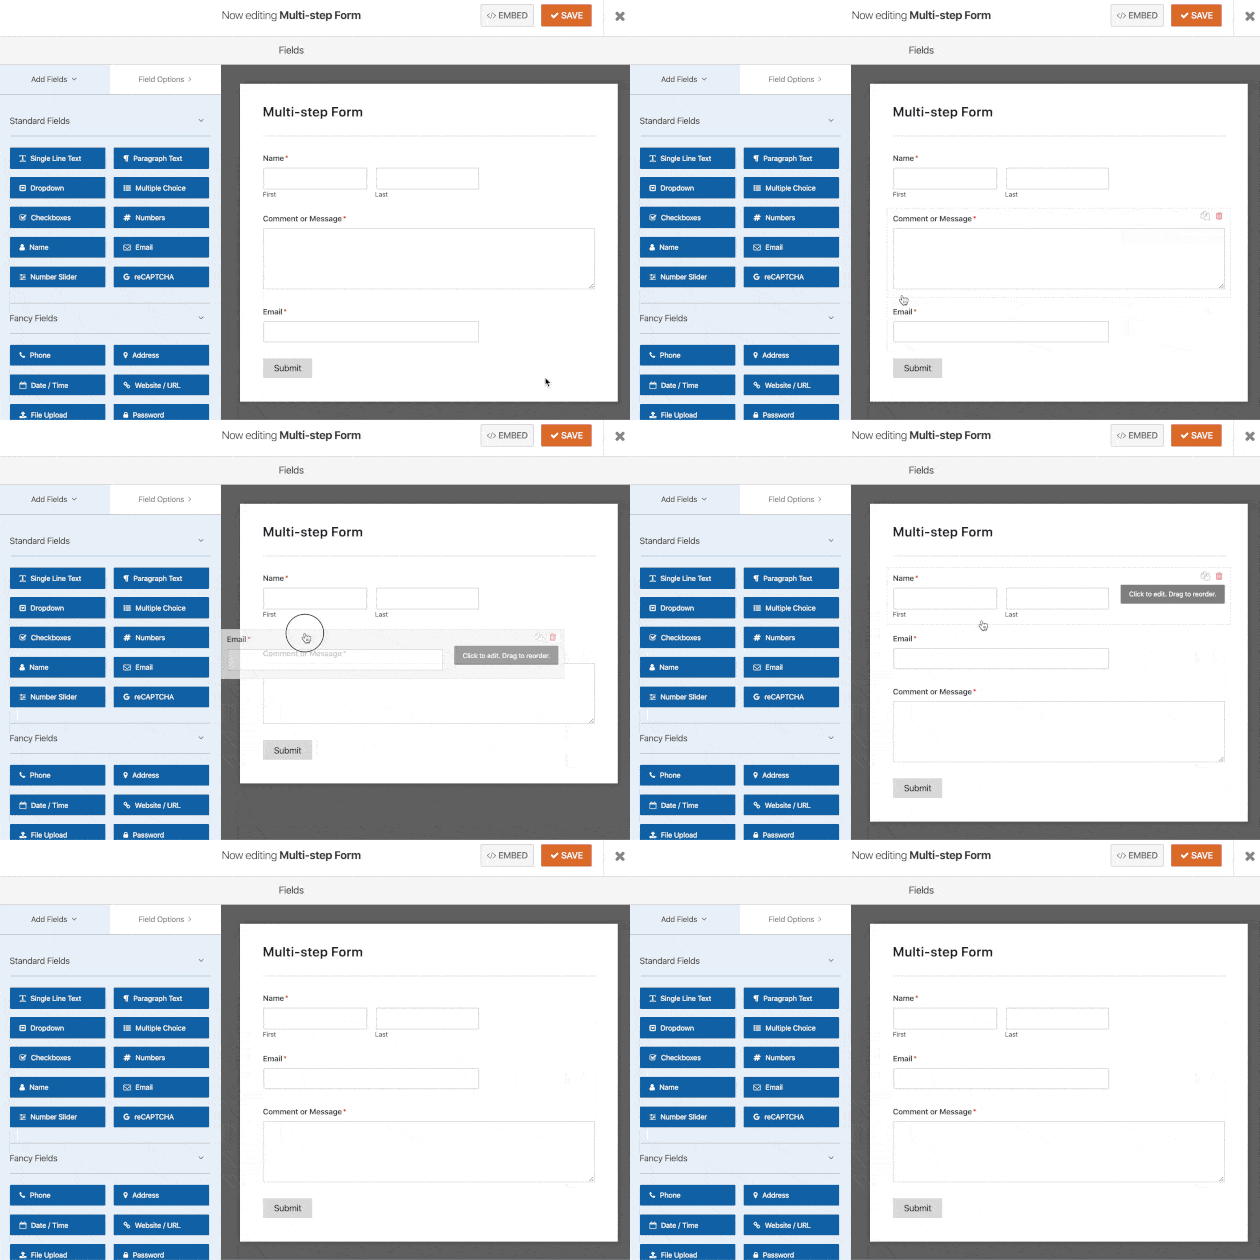
You can also move form fields around and add extra fields by dragging them from the left-hand column to the right-hand column. Simply click any form field to edit the contents and drag it to rearrange its position.
If you’d like to add more than a contact form to your WordPress site, you can also create the following form types with WPForms:
Most of these form types are longer than standard contact forms, so splitting them into multiple steps can improve conversions.
Now you know how to get started, let’s learn how to split your form into parts.
Step 2: Split Your Form into Multiple Parts
Once you’ve customized your form and added the fields you need, add the Page Break field to split your form into different pages.
You can do this by looking under the Fancy Fields heading and dragging the Page Break form field to the right-hand panel.
Then drop the field on your form where you want it to split.
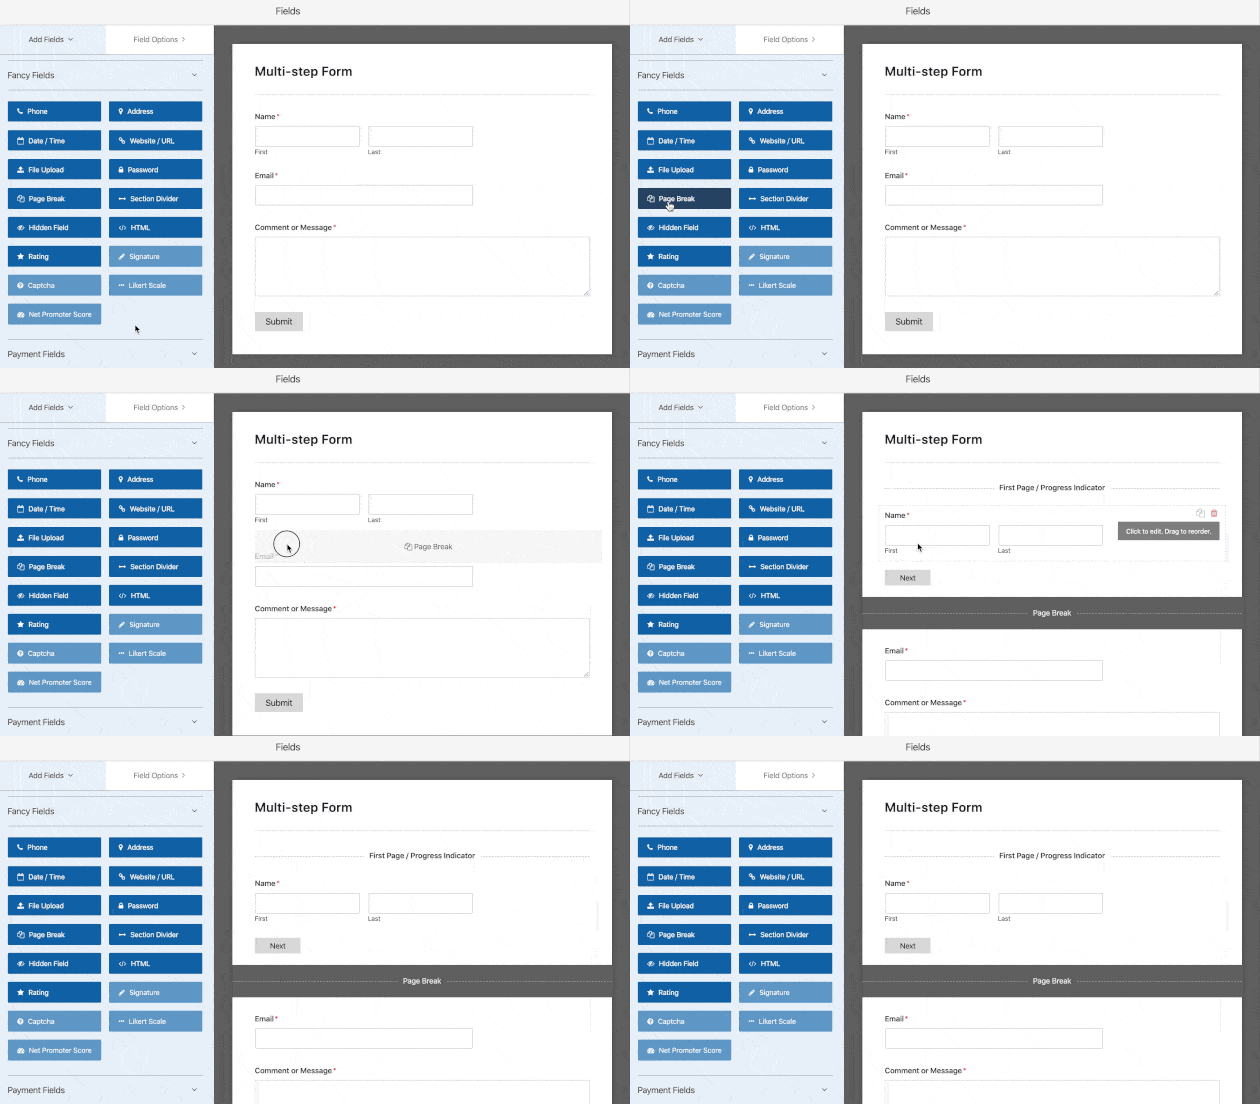
Repeat this for every section where you’d like to split your form into another page. From there, continue to customize your form by adding the fields you need to complete it.
While WPForms lets you add as many forms as you like, it’s crucial to prevent overwhelming users with too much information. Doing so can cause them to abandon your form, which is the opposite of what you want to achieve.
Step 3: Customize Your Form Progress Bar
To increase the flow of your form, you can include a progress bar. A progress bar tells people about the different sections of your form and is a great visual indicator for how much is left to complete.
WPForms comes with 3 different progress indicator bars for multi-step forms which are as follows:
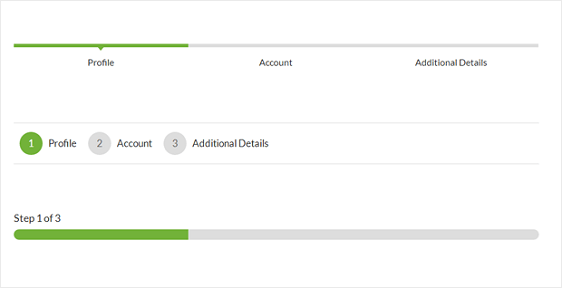
- Connectors – Connecting bars and page titles for each step of your form.
- Circles – Numbered circles and page titles for every form step.
- Progress Bar – Indicator of the user’s progress as they complete form steps.
To change the progress bar and page title for the first page of your multi-page form, click the First Page break field.
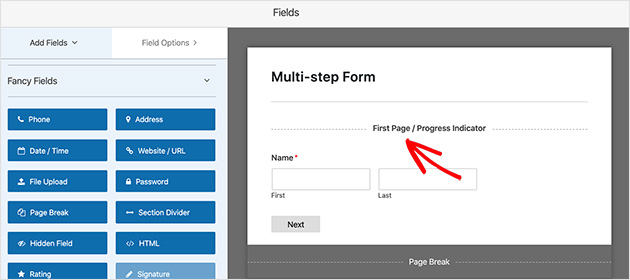
You’ll then see a new panel where you can choose the progress type for your form. In that area, you can also change the color used to highlight the progress indicator if you wish.
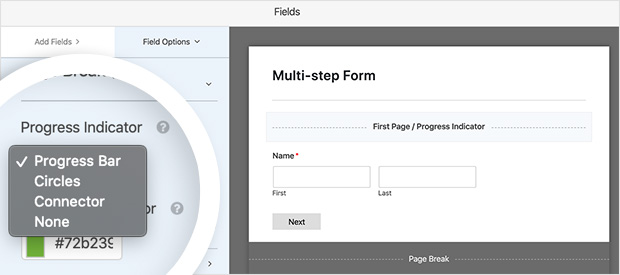
If you select the circles or connectors options, you’re able to change the page title too. Doing so helps users know which part of the form they’re on, so they don’t get lost. But if you’d prefer not to, a standard progress bar will be shown to users to guide them through filling out your form.
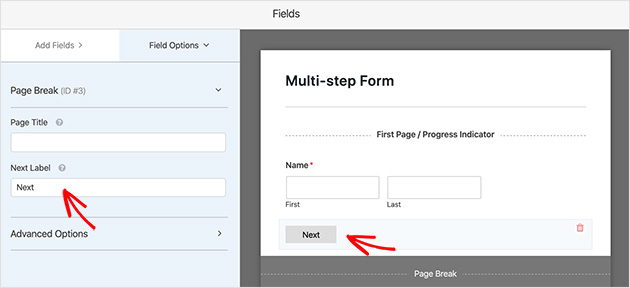
Moving on, you can change the Next Page button and text, which takes users to the next page of your form.
To do this, click the Page Break section you added when building your form.
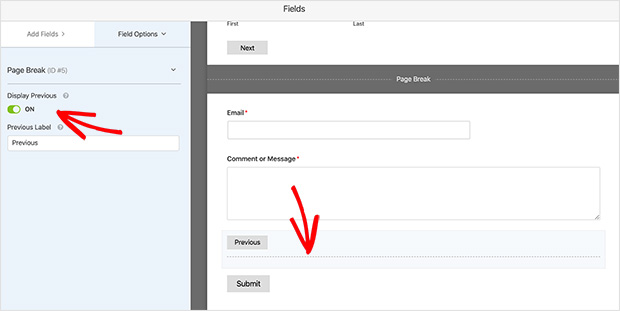
Furthermore, you can add a Previous Page button by clicking the toggle to the On position. That way, users can go back if they forgot to add some information.
Once you’ve finished customizing your progress bar, click Save and move on to the next step.
Step 4: Edit Your Form Settings
Now let’s move on to editing your form settings. To do this, go to Settings » General.

In this section, you can set the following options:
- Form Name – Give your form a new name if you like.
- Form Description – Add a description to your form for reference.
- Submit Button Text – Change the text of your submit button.
- Spam Settings – Enable the anti-spam honeypot option to prevent spammers from sending unwanted submissions.
- GDPR Features – Disable the storing of the information entered in your forms like IP addresses and other sensitive data to comply with GDPR.
When your settings are configured, click Save.
Step 5: Set Your Form Notifications
The notification settings in WPForms, send an email when a form is submitted on your WordPress site.
You can find the notification settings by clicking Settings » Notifications.
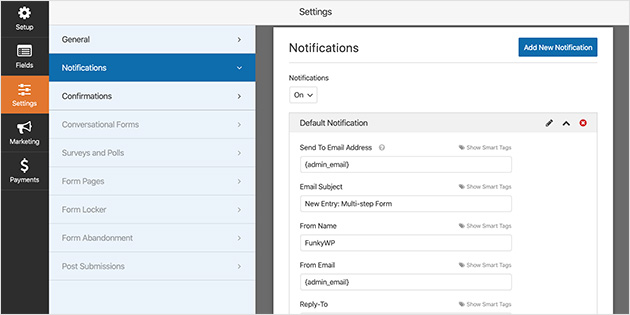
Yet if you don’t disable form notifications, you’ll receive an email for every form submitted on your site.
On the other hand, you can use smart tags to send an email to the people filling in your form. Smart tags are an excellent way to let them know their form has gone through correctly and that you’ve received it.
It’s even better to use that feature on long forms with multiple steps because they may take longer to fill. Plus, it saves users from wandering if everything went through okay. For more help, you can see the documentation on setting up form notifications here.
When you’ve finished setting up your notifications, move on to configuring your form confirmation message.
Step 6: Define Your Form Confirmation Message
Form confirmation messages are brief messages shown to users when they’ve submitted a form on your site. It’s an excellent way to tell people their form is being processed and what steps to take next.
There are 3 confirmation message types in WPForms which include:
- Message – A simple message letting users know their form was submitted.
- Show Page – Send users to a different page, such as a thank you page after submitting their form.
- Go to URL (Redirect) – Send site visitors to a different website after the form submission.
To set up your confirmation message, click Settings » Confirmation.
Then choose the type of message you’d like to show your visitors after completing your form. For this tutorial, we’ll select Message.
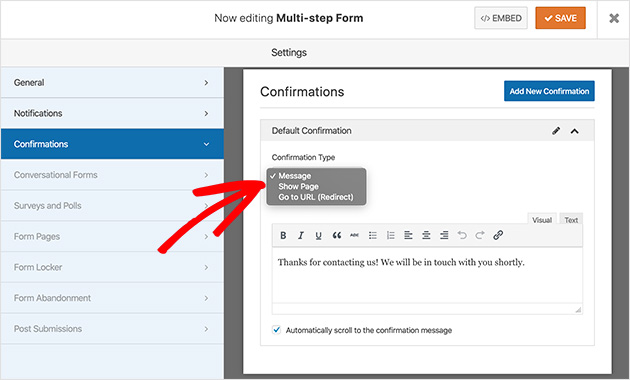
Now customize the message text to suit your needs and click Save when you’re happy.
You’re now ready to add your form to WordPress.
Step 7: Add Your Form to WordPress
Once you’ve created your multi-step form, it’s time to add it to your WordPress site. With WPForms, you can add your form to many areas of your website. This includes your site page or post, your sidebar, and any other widget-ready areas.
Let’s look at how to add your multi-step form to a WordPress page.
To start, go to your WordPress admin area and click Pages » Add New.
Then click the plus icon in the WordPress editor to add a new content block. In the search field, type WPForms to find it easily.
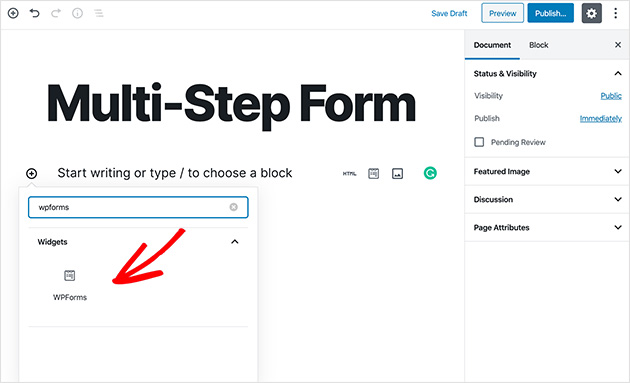
Now click the WPForms block to add it to your page.
When WPForms appears inside your block, click the dropdown arrow to select your multi-step form on the list and insert it into your page.
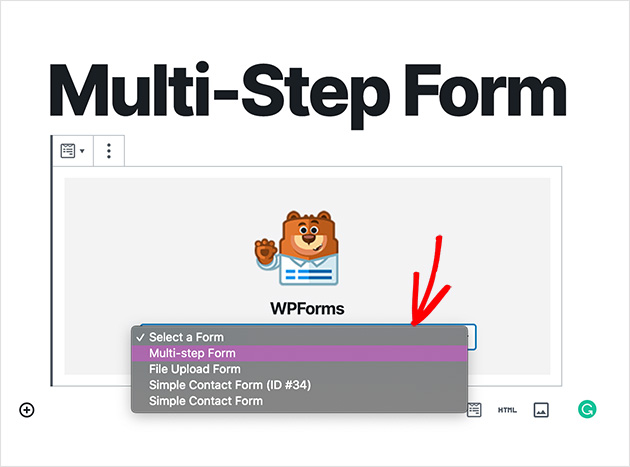
Then click Publish to publish the page in WordPress. Your multi-step form will now appear on your website.
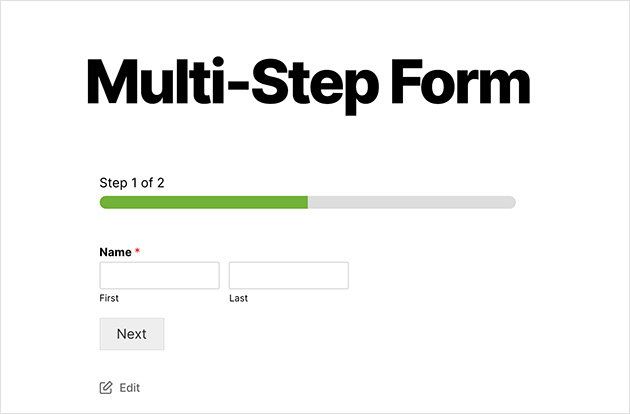
And that’s it! You’ve learned how to create a multi-step form in WordPress so you can start improving user engagement and form conversion rates in no time at all.
If you liked this article, see our showcase of the best WordPress plugins to use your on your site too.
And for more form tutorials, see these articles:
- How to Create a WordPress Form With File Upload
- How to Create a Typeform-Style Form
- How to Create a Contact Form in WordPress
- How to Create an Online Order Form in WordPress
- How to Create a WordPress Event Registration Form
And if you’d like, do follow us on Facebook and Twitter for more helpful tips and tutorials.

