Want to learn how to create tabs in WordPress?
Adding tabs to your WordPress website is an excellent way to organize different types of content and save space on posts and pages.
In this article, we’ll show you how to add tabs in WordPress step-by-step.
What Are Tabs in WordPress?
Tabs are a type of navigation system that organizes content, making it easier for visitors to browse your website. You can add tabs to posts and pages or use a tabs widget for displaying tabbed content in your WordPress sidebar and widget areas.
Why Do You Need Tabbed WordPress Content?
Besides sorting content, tabs make it much easier to keep your website visitors active and engaged. Because tabs group content topics together on one page, users won’t need to click away to other pages, which is ideal for shorter attention spans.
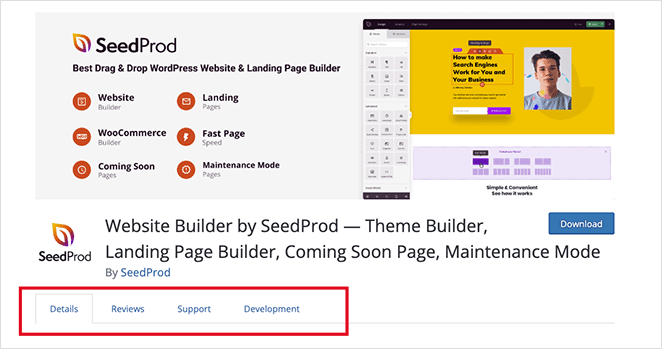
For example, WordPress.org uses tabs on its plugins page to display information like details, reviews, support, and development.
Some other ways to use tabs include:
- In product descriptions to show different product specifications
- In your blog sidebar to filter categories
- On contact pages to sort contact information
Pro Tip: Tabs shouldn’t be confused with accordions. Users click tabs to switch information, whereas accordions expand to reveal information.
Now you know more about how tabs work and why you need them, let’s look at how to add tabs to your WordPress site.
Below we’ll share 2 ways to add tabs to WordPress. First, we’ll use a page builder, then show you how to create tabs with a WordPress plugin.
Let’s get started.
Method 1: How to Make Tabs in WordPress with a Page Builder
For the first method, we’ll use SeedProd, the best WordPress website builder, to add tabbed content to your website.

SeedProd is a powerful drag-and-drop page builder that lets you create flexible WordPress layouts without writing code. With its professional website kits, landing page templates, and live visual editor, you can customize every part of your site and see the changes in real-time.
You can also use SeedProd to:
- Create custom WordPress themes
- Build WooCommerce websites
- Create high-converting landing pages
- Put your site in maintenance mode
- And much more
This page builder also includes highly customizable blocks for enhancing your WordPress design. For example, with the Tabs block, which we’ll use in this guide, you can add multiple tabs to pages with a few clicks.
Follow the steps below to create tabs in WordPress with SeedProd.
Video Tutorial
If you prefer, you can follow the written steps below.
Step 1. Install SeedProd Website Builder
First, you’ll need to head to the SeedProd website and download the plugin. SeedProd does have a free version; however, you’ll need a premium plan to unlock tabs and other blocks.
Once you’ve downloaded the plugin, you’ll need to install and activate it on your WordPress site. You can follow these instructions on installing a WordPress plugin if you’ve never done it before.
After activating the plugin, navigate to SeedProd » Settings and enter your plugin license key.
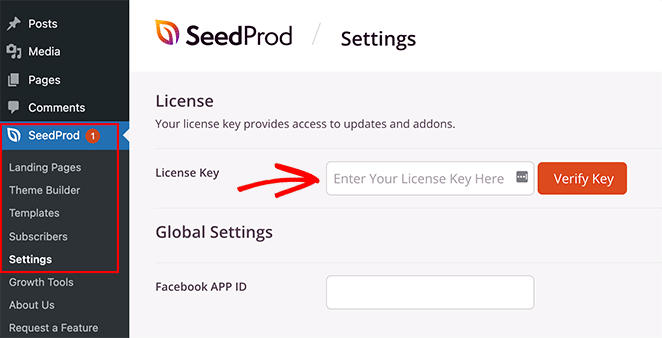
You can find your SeedProd license key in your account dashboard under the Downloads section.
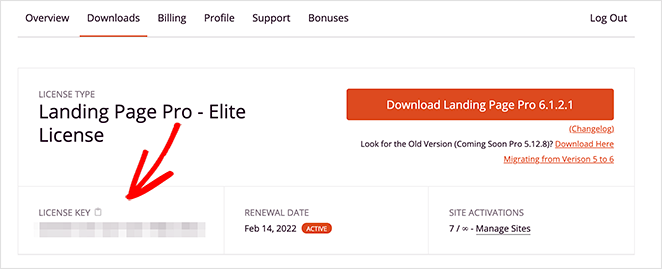
Remember to click the Verify Key button before heading to the next step.
Step 2. Create a WordPress Theme or Landing Page
There are 2 ways to use SeedProd to add tabs to your website:
- Use the Theme Builder to create a custom WordPress theme, and add tabs to any WordPress page.
- Create a standalone landing page with tabbed content using the drag-and-drop page builder.
For this guide, we’ll use the first option because it lets you add tabs to any page you like, including your homepage, WordPress sidebar, header, footer, and anywhere else in your theme.
You can follow this step-by-step guide to create a WordPress theme with SeedProd, then come back here for instructions on adding tabs to your site.
Step 3. Add Tabs to Your WordPress Pages
After building your WordPress theme, you’ll need to decide which pages should have tabbed content. For instance, you could add tabs to your contact page to show different types of contact information or in a custom sidebar for different post categories.
In this example, we’ll add tabs to the about page to show more details, like job vacancies, editorial guidelines, and more.
To do that, go to Pages » All Pages from your WordPress admin and find the page you’d like to edit.
Since you’re using a SeedProd website kit, content pages like the about, contact, and services pages, are created automatically. To open them in the visual editor, click the Edit with SeedProd link.
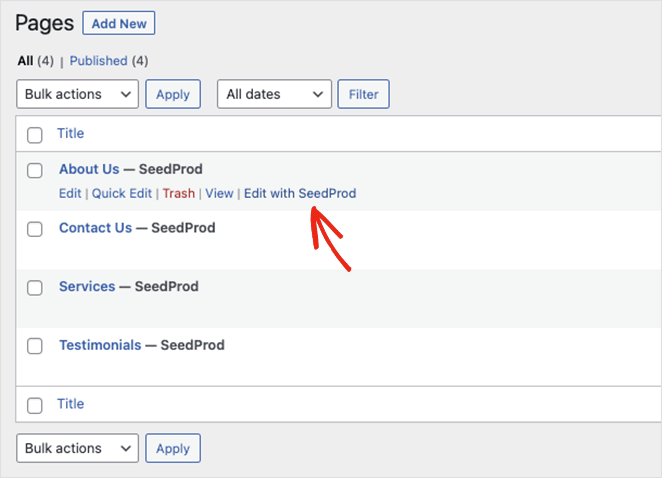
Once your page is open in the page builder, you can use SeedProd’s customization options to make changes. You can click any element to change its contents, colors, styling, and visibility.
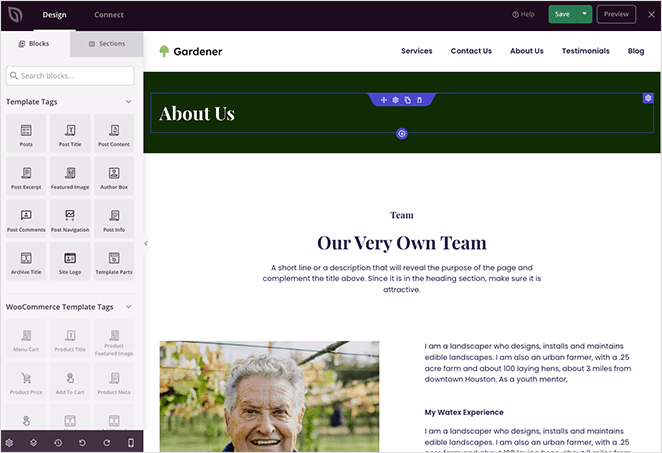
It’s also easy to add more elements to your page by dragging them from the blocks panel and dropping them in place. So let’s do that with SeedProd’s tab block.
First, add a new section to the page to “house” your tabbed content. In our case, we’ll duplicate one of the existing sections and drag it to the bottom of the page.
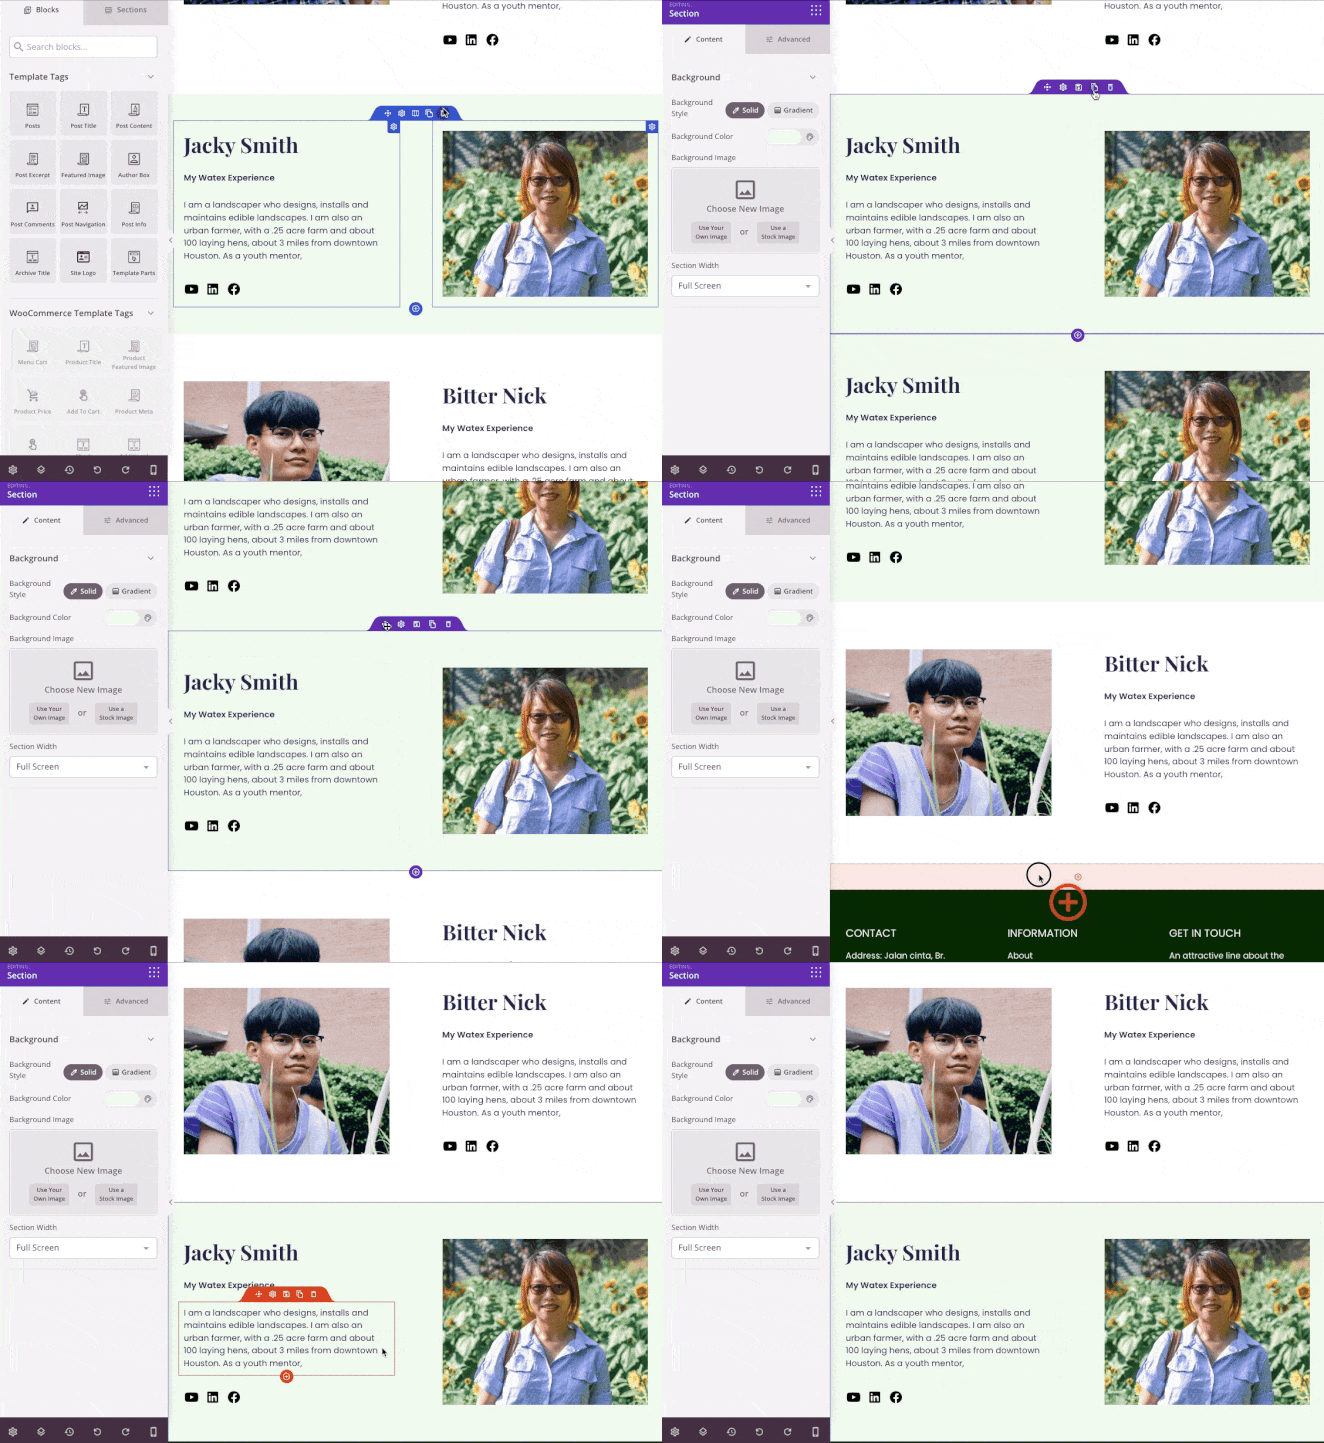
After that, swap out the image with something more relevant and delete any content you no longer need by clicking the trashcan icon.

Now you can look for the Tabs block in the left-hand panel and drag it into the new section on your page.
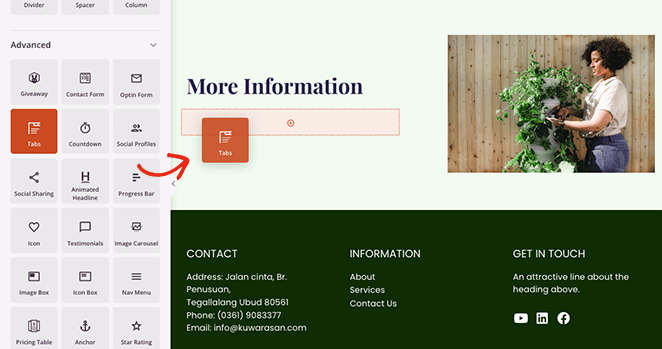
Clicking the block shows its content settings where you can:
- Add multiple tabs
- Show or hide the tab icon
- Change the font size
- Increase or decrease the space between tabs
- Adjust the tab alignment
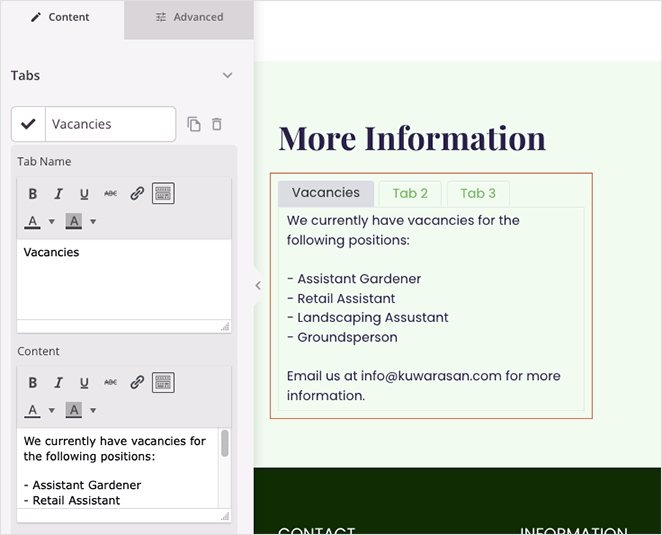
Expanding each tab lets you add a tab title and write your content using a classic editor with ‘what you see is what you get’ (WYSIWYG) settings.
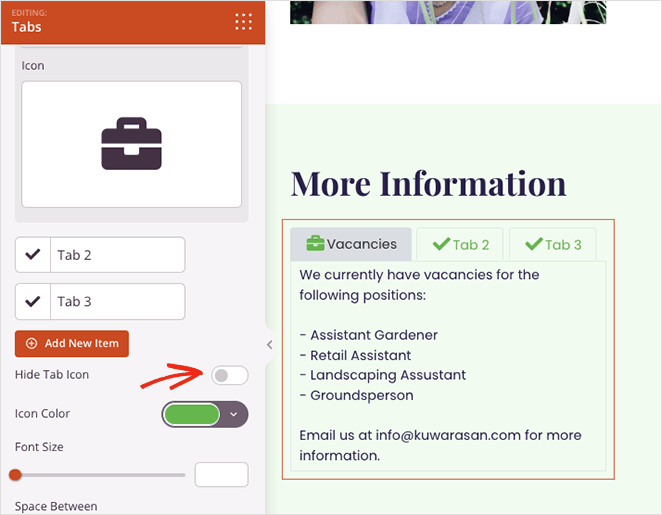
You can also enable a custom icon to add more interest to your tabs and make them stand out. Simply turn the ‘Hide tab icon’ toggle to the ‘Off’ position and choose a custom icon from the Font Awesome library.
Clicking the Advanced tab lets you choose more customization options, including custom background colors, fonts, borders, spacing, and more.
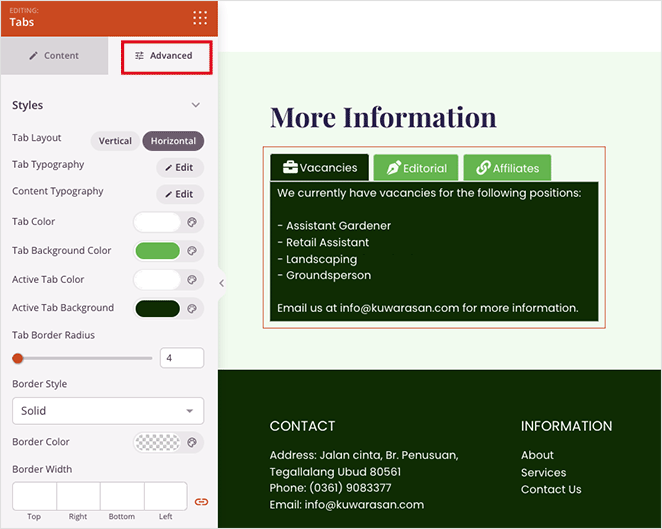
You can also display vertical tabs or a horizontal tab set by clicking either layout option.
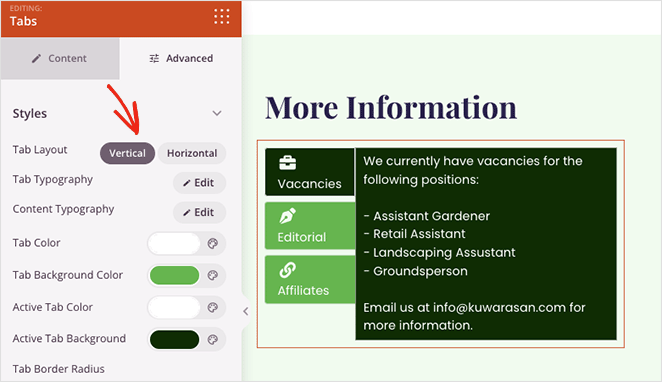
Remember to click the Save button in the top-right corner of the screen to save your changes.
Follow the same steps to add tabs to any other page on your WordPress website, then move on to the next step to make your changes live.
Step 4. Publish Your Tabbed Content
After adding tabs to your various WordPress pages, you’re ready to publish them for your website visitors to see.
To do this, go to the SeedProd » Theme Builder page and switch the ‘Enable SeedProd theme’ toggle to the ‘On’ position.

Now you can preview your pages and see your tabbed content in action.
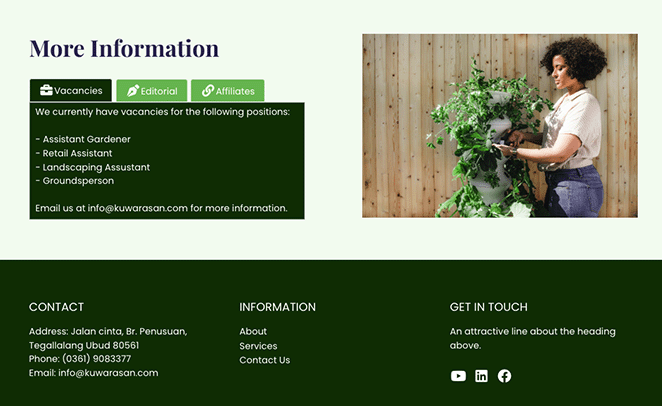
Method 2: How to Add Tabs with a WordPress Plugin
The following method is a good alternative if you don’t want to change your WordPress theme or create a landing page. We’ll use the free Tabs Responsive WordPress plugin to add responsive tabs to your WordPress site.
First, you’ll need to install the Tabs Responsive plugin and activate it from your WordPress admin.
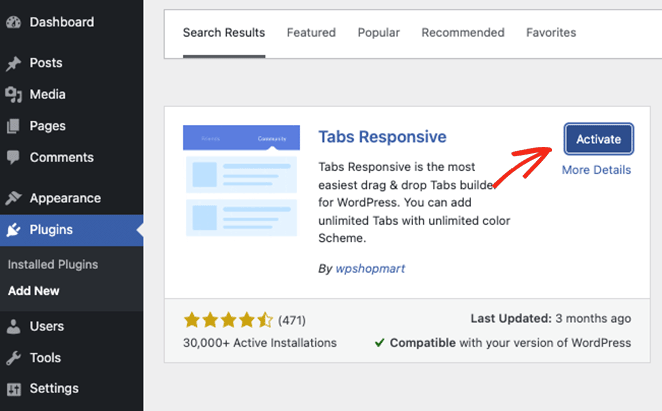
Then, navigate to Tabs Responsive » Add New Tabs and give your tab set a title.
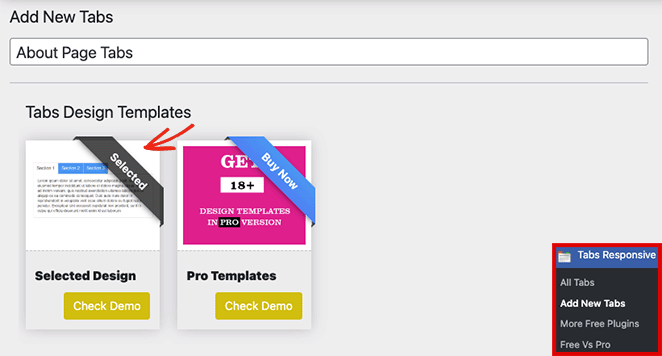
From there, you can select the default template, or if you’re using the Pro version, you can choose from 18+ template styles.
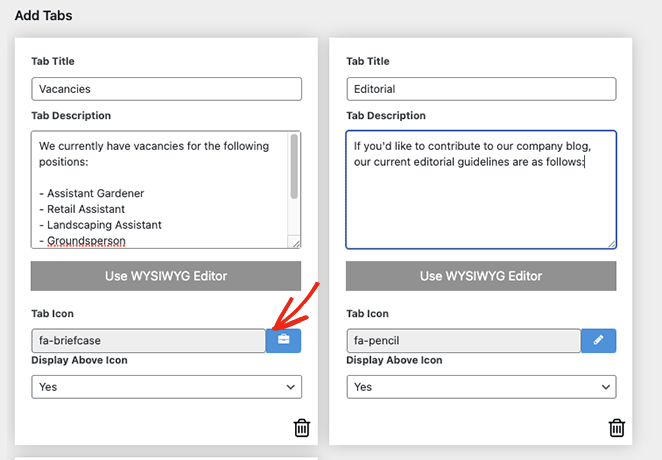
The next step is to add your tabs. You can create as many tabs as you like and include:
- Tab titles
- Tab descriptions
- Tab icons
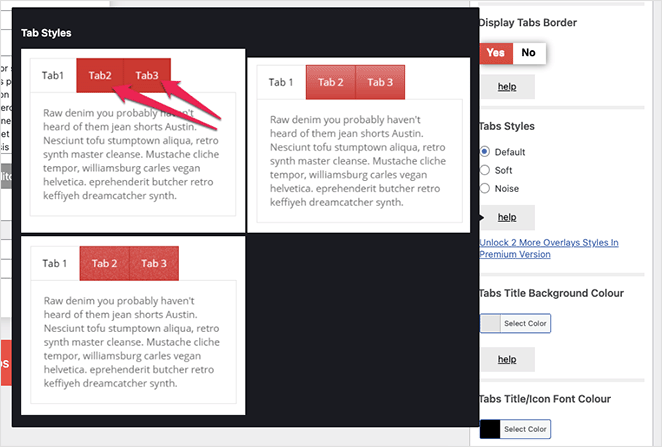
You can also edit the styling of each tab in the right-hand sidebar by choosing custom tab styles, background colors, font colors, and more.
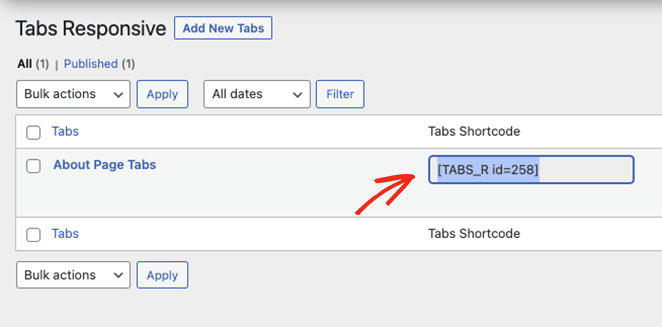
When you’re satisfied with your tabs, copy the tabs shortcode and paste it anywhere in your WordPress theme.
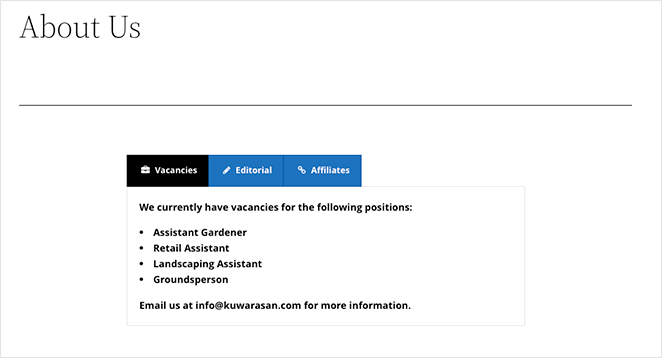
For example, you can paste the shortcode into a WordPress post or page like this:

This is how it will look on the front end of your site:
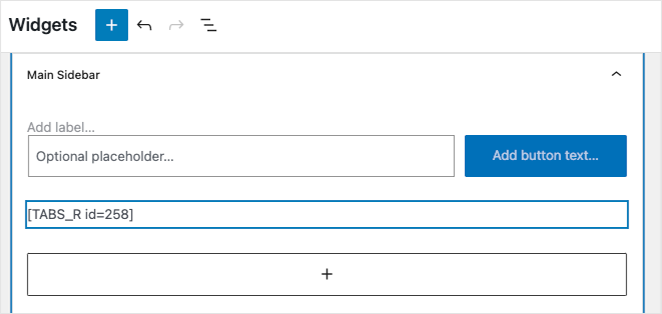
You can also add the tabs shortcode to a widget-ready area, such as your WordPress sidebar or footer widgets, by pasting the shortcode into a paragraph block.
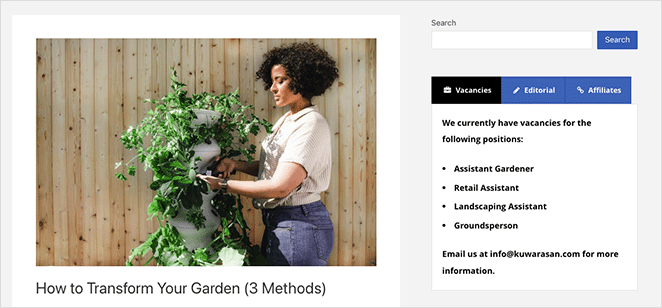
After, you’ll see your tabbed content live in your sidebar areas:
How to Create Tabs in WordPress FAQs
Yes, it is possible to create custom tabbed content without using a plugin. However, it typically requires knowledge of HTML, CSS, and JavaScript. You would need to write the necessary code to implement the tabbed content functionality and style it according to your preferences.
Yes, you can display various types of content within each tab. This can include text, images, videos, tables, forms, or any other HTML-supported content. Most tabbed content plugins offer options to add and format different types of content within each tab.
Yes, tabbed content plugins are typically designed to be responsive and mobile-friendly. They automatically adjust the layout and behavior of the tabs and the tabbed content to ensure optimal viewing and usability on different devices, including smartphones and tablets.
Yes, tabbed content can be an effective way to organize and display product information or pricing plans. You can create tabs for different product features, specifications, pricing tiers, or any other relevant details, allowing users to easily switch between the information they are interested in.
There you have it!
In this tutorial, you’ve learned how to create tabs in WordPress without writing code. Ready to create customizable tabs on your website?
You might also like these other helpful WordPress guides while you’re here:
- How to Create Text Animations in WordPress (Easy Steps)
- How to Create Fancy Section Dividers for WordPress Websites
- How to Add an Author Box in WordPress (Without a Plugin)
Thanks for reading! We’d love to hear your thoughts, so please feel free to leave a comment with any questions and feedback.
You can also follow us on YouTube, X (formerly Twitter), and Facebook for more helpful content to grow your business.

