Are you looking for an easy way to customize your WordPress header?
The WordPress header sits at the top of every page on your website. As such, it plays a vital role in branding your site, helping visitors navigate, and showcasing your most important pages.
But to tailor your header to suit your business needs, you’ll need a way to customize it, which many WordPress themes don’t allow.
This post will show you how to customize headers in WordPress using visual editors and custom code. The easiest option is to use SeedProd with its drag-and-drop theme builder, but we’ll also share several other solutions that work with any theme.
Video Tutorial
What Is the WordPress Header?
The WordPress header is a part of your Website that shows at the top of every page. At the bare minimum, your header will include:
- Site title or logo
- Navigation menu
For example, here is how the header looks on the SeedProd website.

As you can see, it has the SeedProd logo, a navigation menu, and a call-to-action button to get started with SeedProd.
If your website has other needs, you can add extra elements to the header of your WordPress site. Like SeedProd, you could add call-to-action buttons or include a search box, social media icons, and other content.
You can find the details of your WordPress header in the header.php file of your WordPress theme. But we only suggest editing the header.php file if you’re an advanced user and understand what you’re doing.
1. How to Customize Headers in WordPress with SeedProd
If you want complete control over your WordPress header, SeedProd is the best solution. It’s the best WordPress theme builder plugin that allows you to create a custom WordPress theme without writing any code easily.
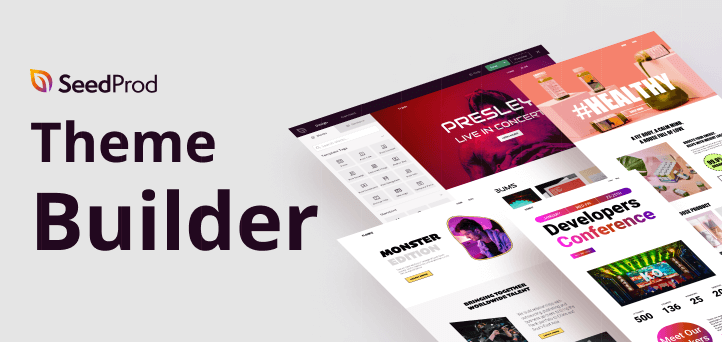
SeedProd is a drag-and-drop WordPress page builder for businesses, bloggers, and website owners. But it also comes with a custom theme designer that allows you to point and click to edit any element.
For instance, creating a custom header for your WordPress website takes just a few clicks, and you can add popular header options with drag-and-drop.
The best thing about SeedProd’s theme builder is that it is theme agnostic. That means it doesn’t rely on your existing WordPress theme for style or functionality, giving you complete freedom and control over your website design.
With that said, here are the steps to customize headers in WordPress with SeedProd.
Step 1. Install The SeedProd Theme Builder Plugin
Setting up the SeedProd theme builder is relatively straightforward since it works with any WordPress website using any theme.
First, install and activate SeedProd on your WordPress site.
For help with this, see this step-by-step guide on how to install a WordPress plugin.
Note: You’ll need at least the Pro or Elite plan to unlock the theme builder.
After activating the plugin, go to the SeedProd » Settings page to enter your plugin license key. You can find this information under your account on the SeedProd website.

Once you enter your license key and click Verify Key, you’re ready to create a custom WordPress header using the SeedProd theme builder.
Step 2. Choose a Starter Theme Template
To make a custom theme header with SeedProd, you’ll first need to create a custom theme. Don’t worry; creating a custom WordPress theme with SeedProd is quite simple.
First, go to the SeedProd » Theme Builder page. You’ll see the list of templates for your current SeedProd custom theme on this page.
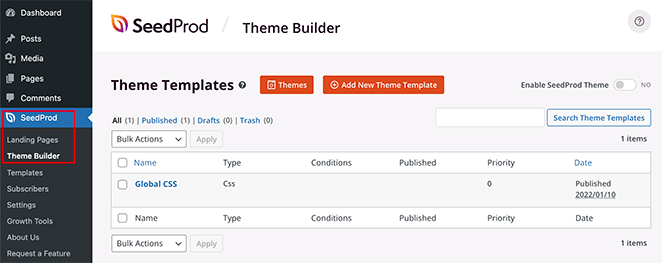
Because we haven’t started yet, we only have a Global CSS template.
To get started, you have two options.
- Use one of the ready-made SeedProd themes as a starting point
- Manually create theme templates from scratch
We suggest starting with an existing theme. Doing so allows SeedProd to generate all the template files automatically. SeedProd’s themes are complete professional-quality themes, which give you a head start in editing the templates to your requirements.
Simply click on the Themes button and choose one of the available themes. There are different themes for different websites, so choose one that best matches your needs.
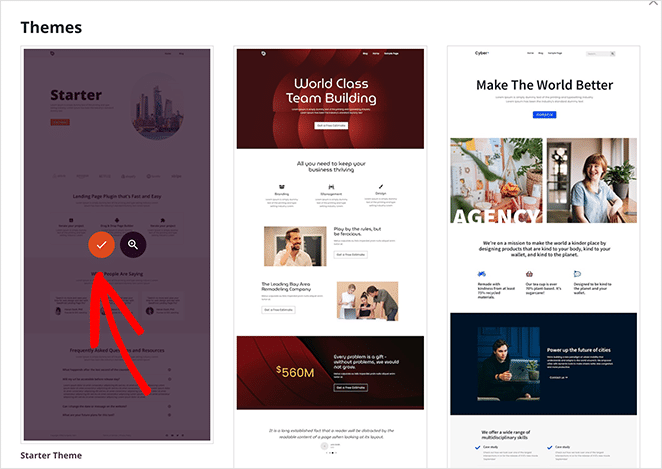
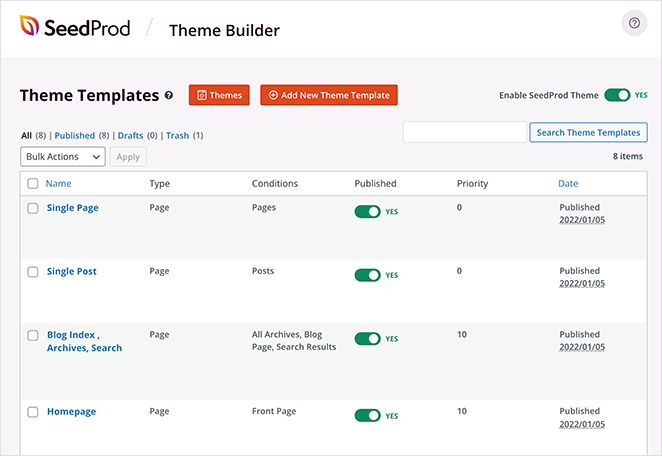
After choosing a theme, SeedProd will automatically create all the theme templates. From there, you can edit each template individually in the drag-and-drop editor.
Step 3. Customize the Header Section
To customize your header with SeedProd, find the Header template and click the Edit Design link.
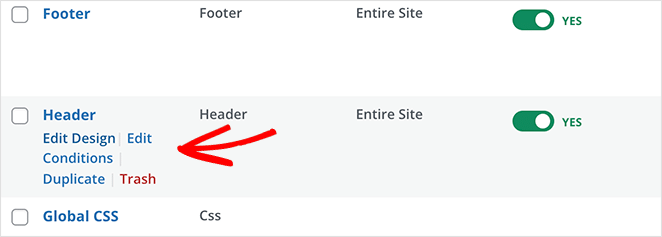
Doing that will launch the template file in SeedProd’s theme builder. You’ll see a live preview of your header template in the right column with an editing panel in the left column.
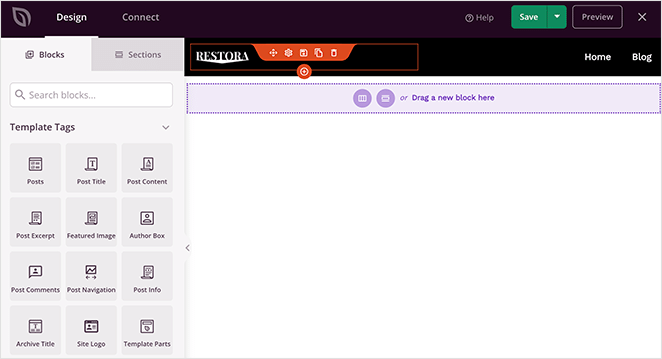
To change an item in your header template file, you can simply point and click to edit it.
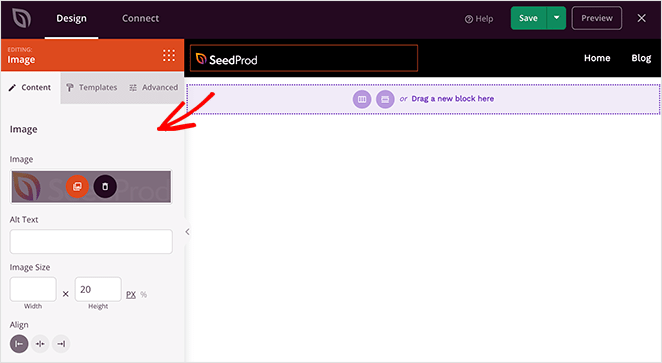
Depending on the item type, you’ll see different editing options in the left column. You’ll be able to change fonts, colors, background, spacing, and more.
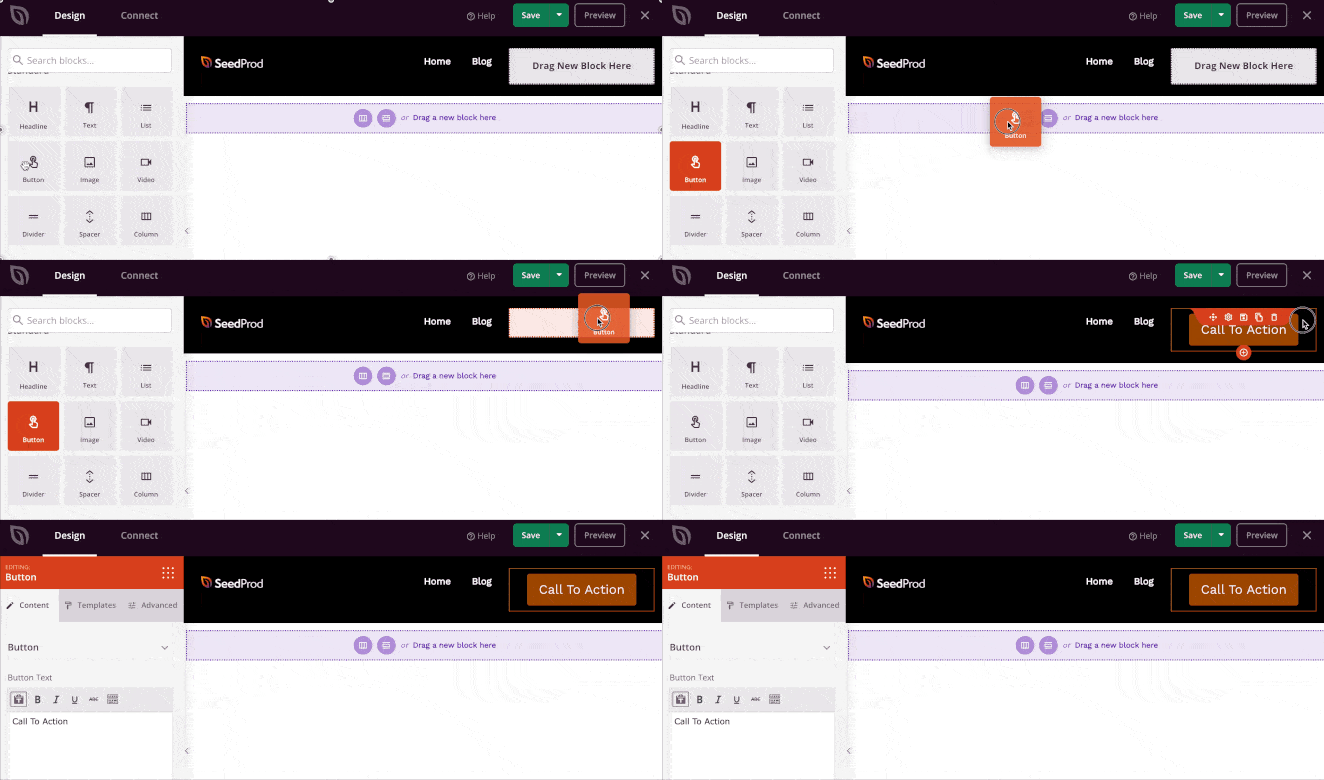
To add custom header items, you can add SeedProd blocks from the left column. It comes with a bunch of block types that you can add to your template:
- Template Tags – Blocks that let you generate theme elements from your WordPress database such as blog posts, comments, featured images, etc.
- Standard Blocks – These are common web design elements that let you add new images, buttons, text, dividers, and more. You can even add a video for more engagement.
- Advanced Blocks – Other advanced blocks allow you to add contact forms, social profiles, sharing buttons, WordPress shortcodes, Google Maps, and more.
- WooCommerce – If you run an online store, you can use WooCommerce blocks in your theme to display products, shopping carts and even create a custom checkout page.
Using Sections to Customize your WordPress Header
Apart from blocks, you can also add complete sections to your theme’s header template.
Simply switch to the Sections tab under the Design panel.
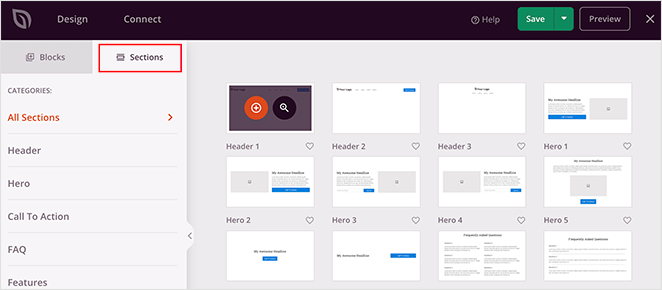
Sections are groups of blocks for different areas of your website design. For instance, you can find ready-to-use sections for your header, footer, calls to action, features, and more.
Simply click on a header section to add it to your theme template and edit it to your requirements.
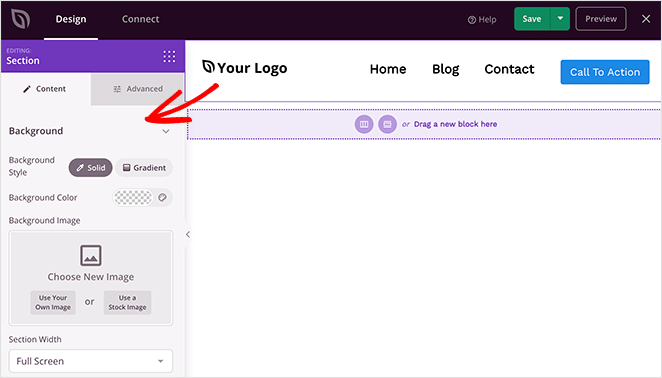
When you’re happy with how your header looks, click the Save button in the top-right corner.
Now repeat this process for the other templates in your theme to create a completely custom WordPress theme.
Step 4. Publish Your Custom WordPress Header
When you’re satisfied with your custom WordPress header, the final step is to activate it on your WordPress site.
In SeedProd, you can apply your custom WordPress header with a simple switch.
Simply go to the SeedProd » Theme Builder page and toggle the switch next to the ‘Enable SeedProd Theme’ option to ‘Yes’.

SeedProd will now replace your existing design with the new WordPress theme and header.
Now you can visit your website to see your custom WordPress header in action.

Creating Multiple Custom Headers with SeedProd
Now that you have a custom WordPress header, you can still tweak it, but you can also create multiple headers for different sections of your website.
For instance, you may want to add a new header template to your theme that only shows on specific categories.
To do that, simply create a new template and change the display conditions to suit your needs.
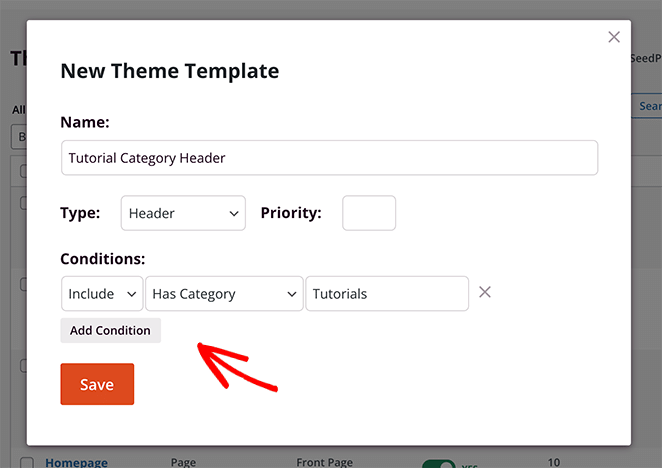
Using SeedProd’s beginner-friendly drag-and-drop theme builder, you can easily create any type of custom layout your website needs.
While SeedProd’s visual editor offers the easiest way to customize your header, there are also other tactics that you can use.
Keep reading for some of the most popular solutions.
2. Edit WordPress Headers with Theme Customizer
Most WordPress themes give you some control over your site’s header in the native WordPress Customizer. It may not give you a vast level of detail, but you will get some options to control how your header looks and functions.
The available options depend on your theme, but you can usually open them in the theme customizer and edit them easily.
To do that, go to Appearance » Customize from your WordPress admin area. Then click the Site Identity heading from the list in the left column.
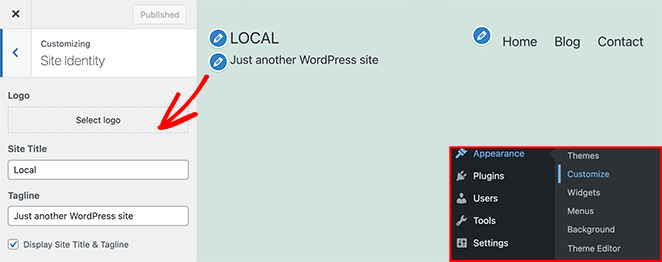
For example, in the Twenty Twenty-One default theme, the Site Identity option allows you to customize your:
- Logo
- Site Title
- Tagline
You can then click the Menus heading and change your navigation menu’s layout.
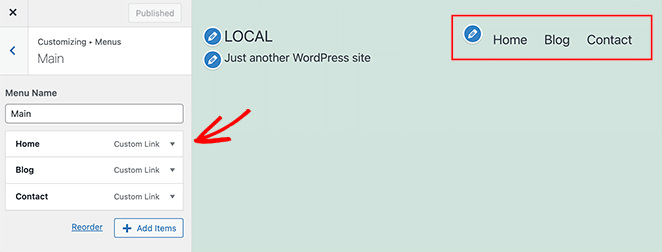
If you need more help with this method, you can consult the documentation for your WordPress theme.
Note: In the example above we were using the Twenty Twenty-One default WordPress Theme. If you’re using the Twenty Twenty-Two theme, the customizer will be called ‘Editor’. You can find it by going to Appearance » Editor.
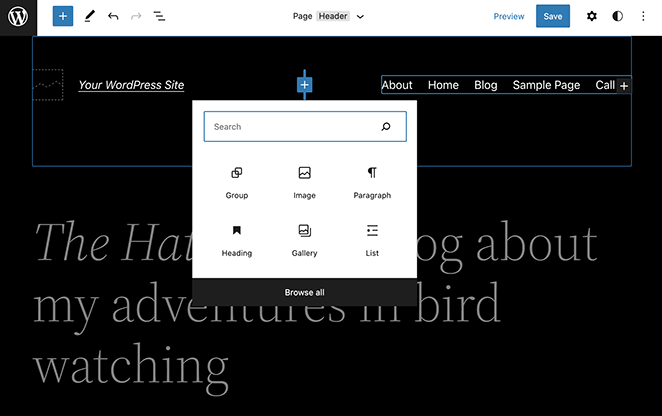
With the new WordPress Editor, you can customize your header with the block editor like any other post or page. It doesn’t offer as many customization features as SeedProd, but it lets you adapt the layout quickly.
3. Customize Headers in WordPress with Header Plugin
Another easy way to edit the header in WordPress is with a simple header plugin. This is a good option if you’re not comfortable editing your theme header file directly.
While there are hundreds of plugins to choose from, the free Insert Headers and Footers plugin is the most popular option.
After activating the plugin on your website, you can find it under Settings » Insert Headers and Footers.
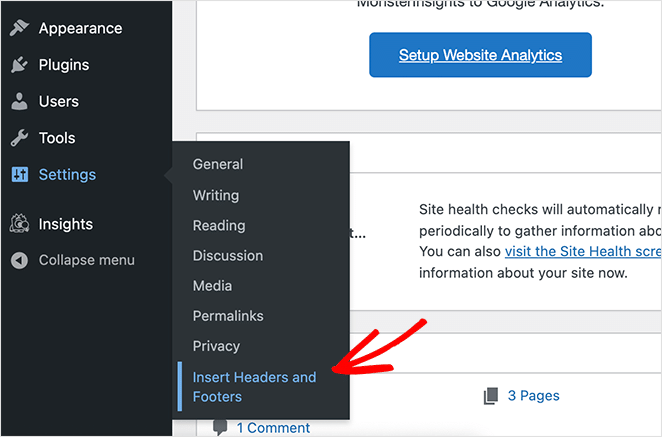
From there, you can paste any code you want to add or remove from your website’s header.
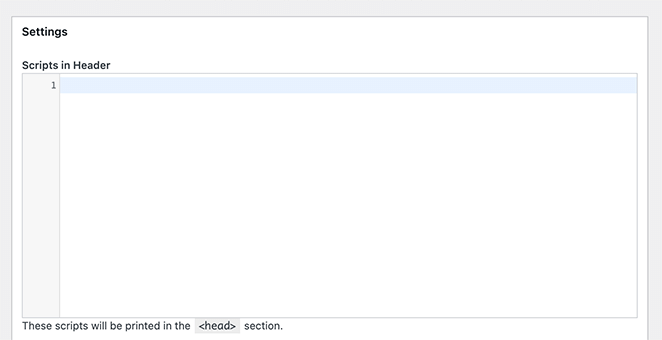
Any scripts you add in this area are automatically added to your WordPress site’s header tag. Just remember to click the Save button to store your changes.
4. Customize WordPress Header Code (Advanced)
If you’re an advanced user, you can customize headers in WordPress by using your own custom code. You’ll need working knowledge of HTML, PHP, and CSS for this method, so it’s unsuitable for non-techy users.
To edit your header’s code, go to Appearance » Theme Editor and open the Style.css file.
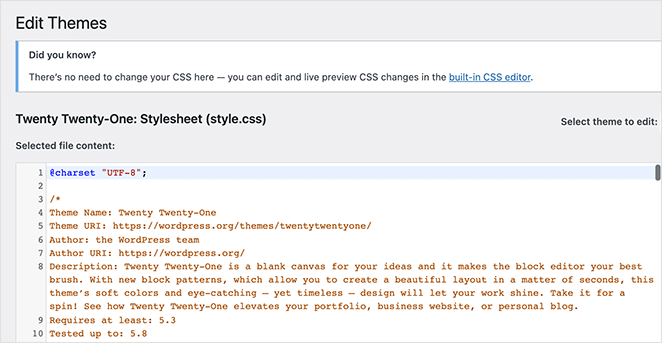
From there, you can scroll down to the Site Header section and add or remove code to customize the styling.
You can also make changes to your header.php file. However, this code deals with functions rather than styling.
Most people who want to customize their headers are more interested in updating their sites’ look than what happens behind the scenes. So you’ll likely focus most of your attention on your header’s CSS.
WordPress Header Frequently Asked Questions
To make your header responsive in WordPress, ensure that you are using a responsive theme, which should automatically adjust the header layout for different screen sizes. SeedProd’s header builder is responsive by default, for example.
If your theme isn’t responsive, consider using CSS media queries to modify the header’s layout and style for different devices.
Yes, you can add a search bar to your WordPress header. Many themes come with built-in support for a search bar in the header. With SeedProd, you can drag and drop the Search Form block to your header to add search functionality.
Customize Your WordPress Header Today
We hope this article helped you learn how to edit headers in WordPress.
The easiest way to get complete control over your header is with SeedProd. It offers a visual, drag-and-drop header builder, you don’t need to edit any code or theme files directly, and you can customize your header from right inside the WordPress dashboard.
You might also like this guide on how to edit the footer in WordPress.
Thanks for reading! We’d love to hear your thoughts, so please feel free to leave a comment with any questions and feedback.
You can also follow us on YouTube, X (formerly Twitter), and Facebook for more helpful content to grow your business.

