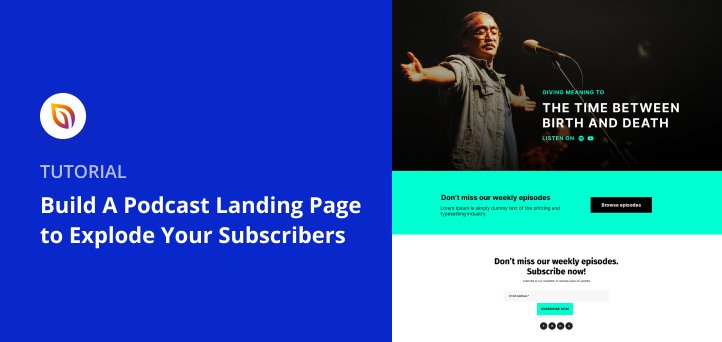
Do you want to create a podcast landing page?
Podcast pages are an excellent way to promote your podcast episodes and encourage more people to subscribe to your show. But creating this type of page in WordPress isn’t easy without the right tools.
So in this article, we’ll show you how to build a podcast landing page, the easy way, with SeedProd.
What Is a Podcast Landing Page?
First, let us explain what a podcast page is.
In short, a podcast landing page is a standalone web page you can use to grow your email list and increase your podcast subscribers. Unlike a podcast website, which tells people all about your show, a landing page is designed to convert your listeners into leads.
It does this by persuading visitors to take action after landing on your page. Often, many podcast owners do this with an incentive.
For instance, you could offer listeners:
- A discount on branded merchandise
- Entry into an online contest
- Free guides or checklists
- A shoutout on your next show
But the key thing to remember is to focus on a single goal for each page. Otherwise, your message isn’t as persuasive, and you won’t get the kind of results you want.
What to Include in Your Podcast Landing Page
So what should you include on a podcast page to attract more potential listeners? The answer largely depends on the goal you want to achieve.
That said, the best podcast landing pages include the following essential elements:
- Headline – This is where you’ll grab people’s attention, making them want to find out more. So keep your headline short and include the value you offer listeners.
- Description – Your description gives visitors just enough information to keep them moving down your page. Use this area to provide key details you know they’ll want to learn and avoid anything that doesn’t move visitors towards your goal.
- Latest Episodes – Including some of your latest episodes on your page is a great way to give visitors a taste of what they can expect.
- Subscribe Button – Your call to action button or subscribe link is probably the most vital element on the page. This is where visitors can click to subscribe to your podcast on their favorite listening platforms.
- Social Proof – Nothing convinces people to act more than recommendations from their peers. That’s why you should always include some form of social proof, like positive reviews, to persuade your audience to subscribe.
- Newsletter Form – Many podcast owners send a regular newsletter with news, updates, and special offers. As such, it’s a smart move to include a signup form to collect email addresses and add them to your list.
- Social Media Buttons – If part of your podcast promotion strategy is to grow your social media followers, you can include social profile icons to encourage visitors to check out your other channels.
Now that you know what to include on your page, let’s dive into the tutorial. This is where you’ll learn the steps to build a successful podcast landing page in WordPress.
How to Create a Podcast Landing Page in WordPress
For this step-by-step tutorial, we’ll use SeedProd to create a landing page.
SeedProd is the best drag-and-drop WordPress page builder, with everything you need to create high-converting landing pages fast. For instance, you can choose from hundreds of responsive landing page templates and customize them in the easy visual editor – no coding required.
You can also boost your leads and conversions with targeted landing page elements, such as:
- Optin forms
- Giveaway widgets
- Contact forms
- Testimonials
- Social media embeds
- Pricing tables
And many more landing page blocks.
On top of that, you can connect your page easily to your email marketing service with premium integrations like GetResponse, Mailchimp, and Constant Contact.
You’ll also find that SeedProd works seamlessly with any WordPress theme, so you won’t face any compatibility issues or loading speed problems.
With all that in mind, here are the steps to create your podcast landing page with SeedProd in WordPress.
1. Install and Activate SeedProd
The first step is to get SeedProd and download the plugin to your computer. So click here to get started with SeedProd.
Note: SeedProd offers a free version where you can create a free landing page. However, in this guide, we’ll use SeedProd Pro for advanced blocks and integrations.
After downloading SeedProd, you’ll need to install and activate it on your WordPress website. If you need help with this, check out this guide for installing a WordPress plugin.
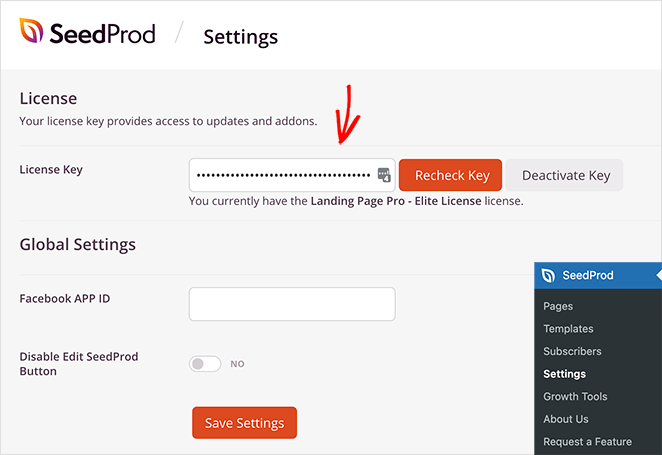
With the plugin activated, navigate to SeedProd » Settings from your WordPress dashboard and enter your SeedProd license key. You can find the license key in your account dashboard on the SeedProd website.
Next, head to SeedProd » Pages for an overview of SeedProd’s landing page dashboard.
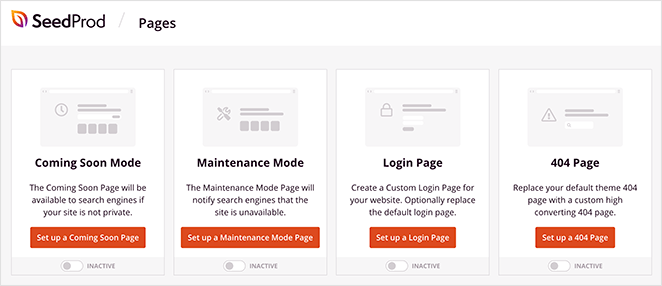
Along the top of the page are several page modes you can activate with a single click. For example, you can:
- Activate coming soon mode to show an under construction message when launching a new site.
- Enable maintenance mode when you’re making changes and performing updates on your website.
- Turn on a custom 404 page to redirect visitors after facing a broken page or link.
- Activate a custom WordPress login page to replace the default WordPress login screen.
This may seem like a lot at first, but should you ever need these features, SeedProd has them built-in. As a result, you won’t need to install any extra WordPress plugins.
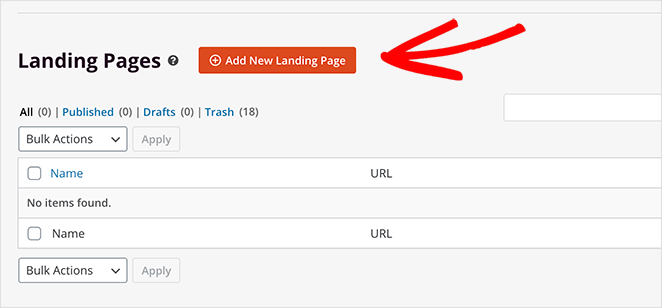
Below the page modes area is the section we need to create your podcast page. So click the Add New Landing Page button to get started.
2. Create a New Landing Page
After clicking the Add New Landing Page button, you’ll see SeedProd’s library of landing page templates. These designs are 100% mobile responsive, so they’ll adapt perfectly to any device or screen size.
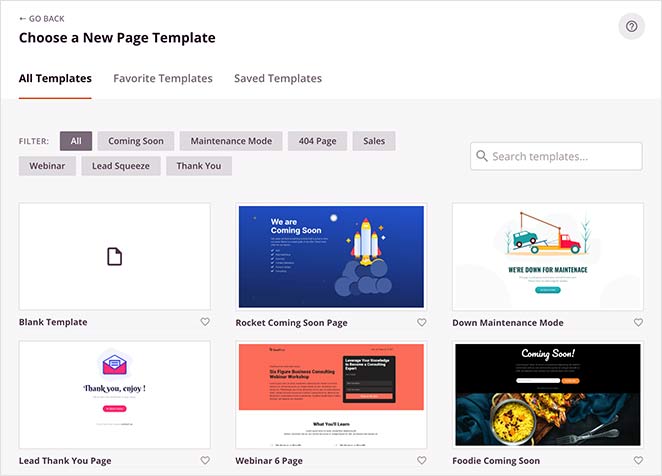
Click any of the tabs to filter the designs by goal. Or, if you like, you can enter a word or phrase into the search box to find what you’re looking for.
Once you’ve found a design that closely resembles what you need, hover your mouse over the design and click the checkmark icon to launch it.
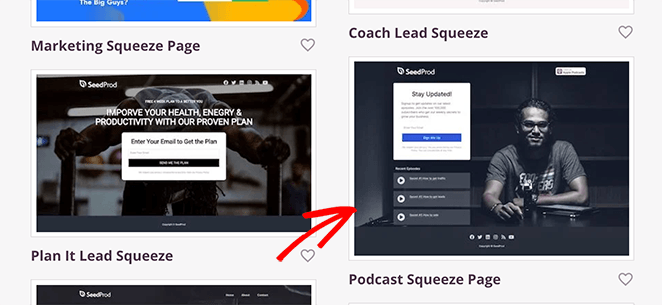
For this guide, we chose the Podcast Squeeze Page template.
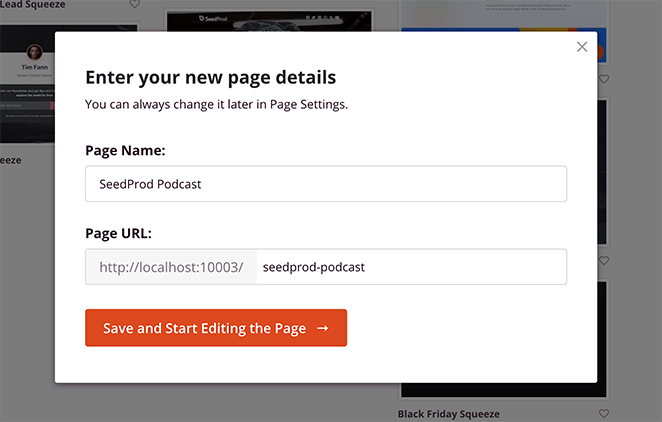
After choosing your template, a popup appears where you can enter your landing page name and URL. From there, click the Save and Start Editing the Page button to launch your design in SeedProd’s visual editor.
3. Customize Your Landing Page Design
SeedProd’s drag-and-drop page builder has 2 columns, making it super easy to navigate and use.
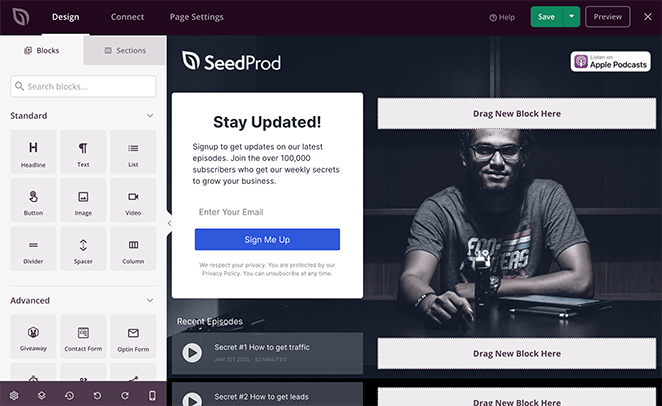
For example, on the left-hand side are blocks and columns to create and customize the structure of your page. And on the right is a live preview that allows you to see the changes you make in real-time.
Because of this straightforward layout, it’s easy to see how your page will look without switching between your WordPress dashboard and the front end of your website.
Now that you know where everything is, let’s start customizing your podcast page, starting with your header area.
Creating a Custom Podcast Header Area
First, we’ll replace the default logo with our podcast’s custom logo. To do that, click it on your live preview so it shows an orange border.
As soon as you click that element, the image settings panel opens on the left. Here you can delete the existing logo by clicking the trashcan icon.
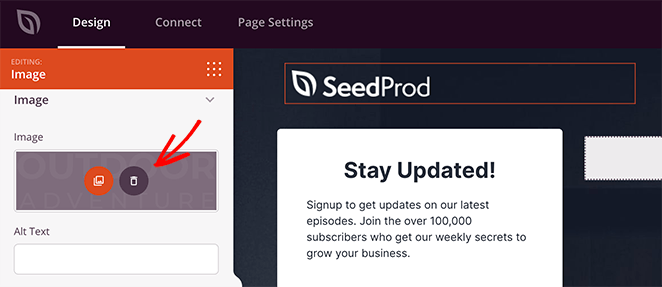
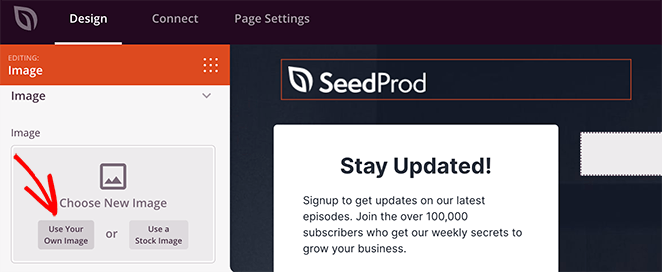
Now let’s upload a new logo by clicking the Use Your Own Image button. This allows you to choose a logo from your computer or your WordPress media library.
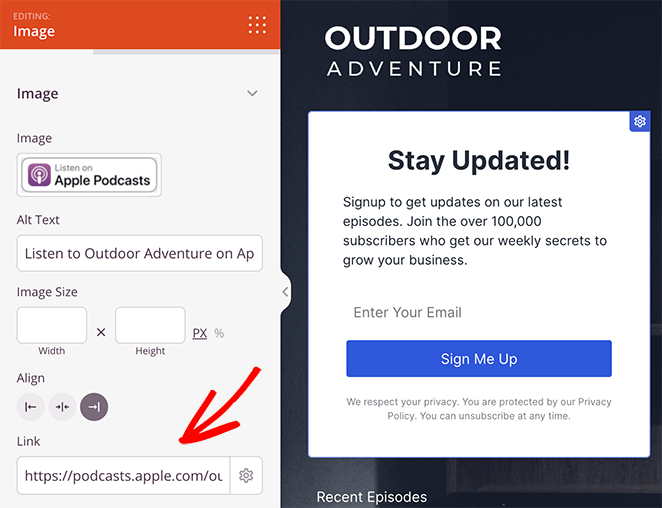
From there, you can adjust the settings by:
- Adding some image alt text
- Changing the image size and alignment
- Adding a custom image link
- And more.
For instance, you can click the Listen on Apple Podcasts image and enter your Apple Podcast URL for users to subscribe and listen to the podcast.
Adding an About Section
Now let’s tell your visitors more about your podcast. One of the easiest ways to do this is to use one of SeedProd’s ready-made landing page sections.
Sections are a collection of pre-styled blocks you can add to your page with a single click. That way, you won’t need to start from scratch to add more information to your design.
To find them, click the Sections tab in the left-hand panel.
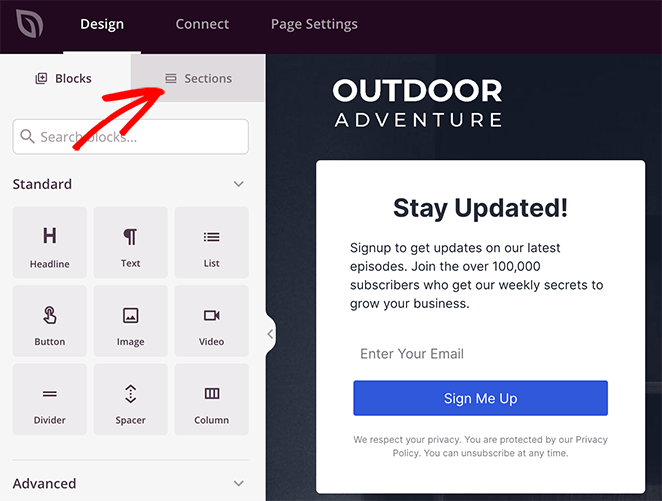
On the following screen, click the Hero heading to show a selection of pre-made Hero designs. Adding one to your page is easy.
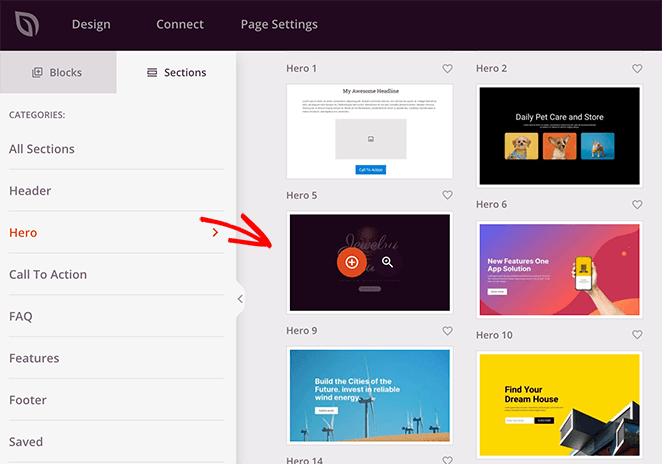
Just hover your mouse over a design you like, and click the plus icon.
By default, a section is added to the end of your page. To move it quickly, click the Layout Navigation icon in the bottom toolbar.
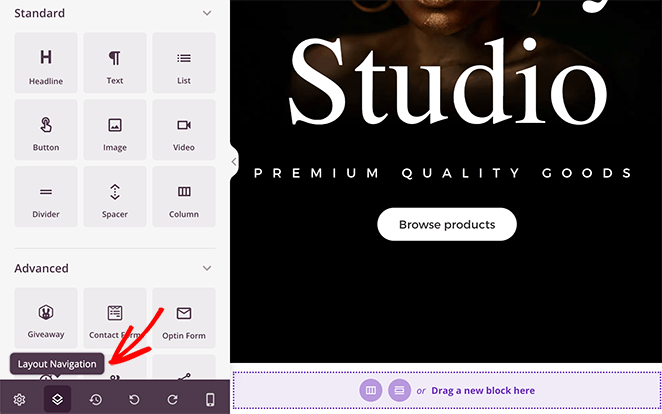
This opens a panel where you can quickly find different sections on your page and re-organize them without scrolling through your entire design.
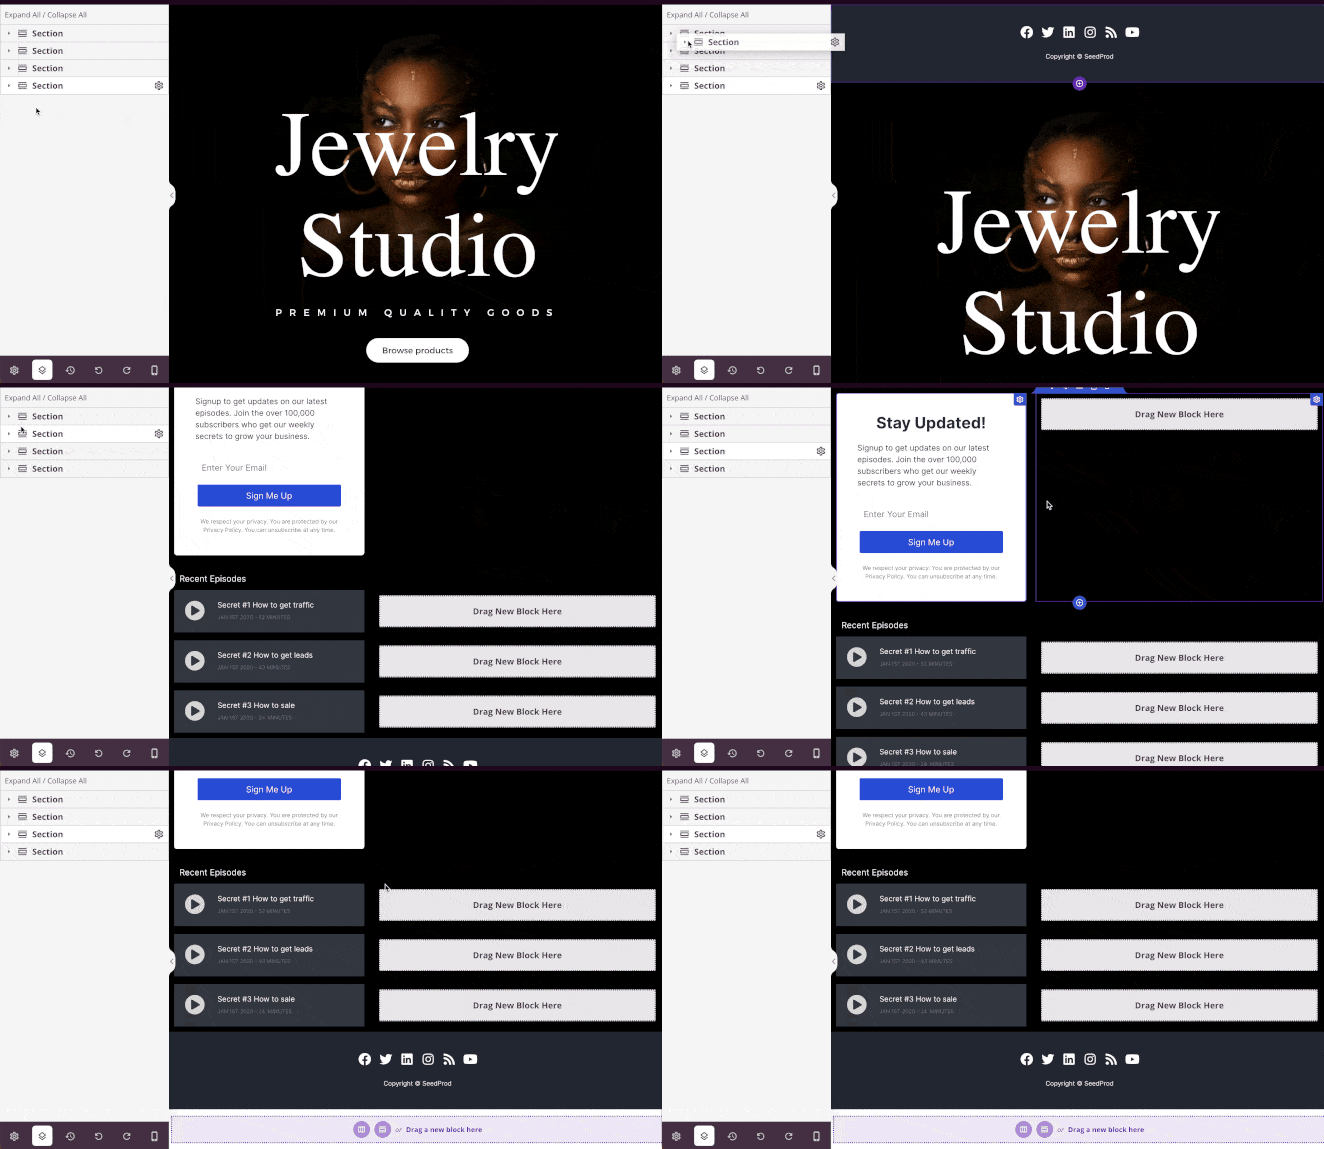
For instance, we used this option to move the Hero section beneath our landing page header.
You can customize the hero section the same way we did earlier by choosing a different image and changing the headline and description.
This is also an excellent place to add a call-to-action button to subscribe to your podcast. Since the section we chose has a CTA button built into the design, it’s easy to customize it to your needs.
Just click the block on your preview, enter some custom text, and add a link to your podcast hosting.
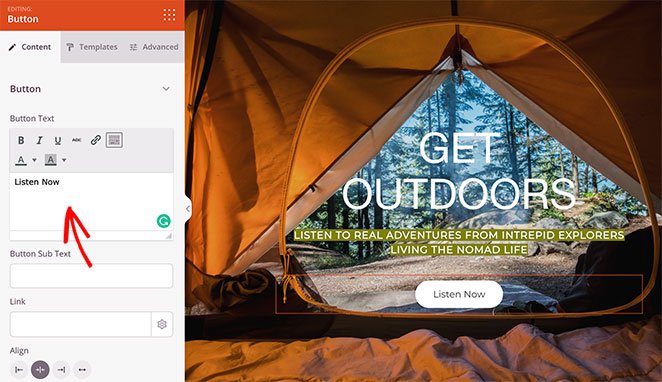
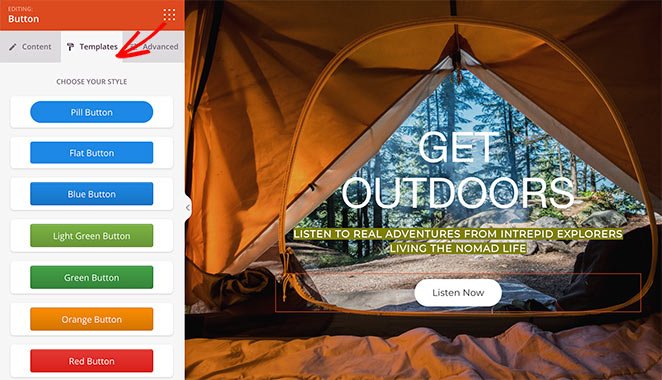
In addition, you can easily change the button style by clicking the Templates tab. In this panel, you can choose from several premade CTA designs, saving you the trouble of customizing them yourself.
Showcasing Your Latest Episodes
Now we’ll show you how to add your latest podcast episodes to your landing page. You can do this in several ways, but we think the easiest way is to use one of SeedProd’s image boxes.
Luckily this template has that block built into the design. So all you have to do is click the image to add your episode URL and enter a custom heading.
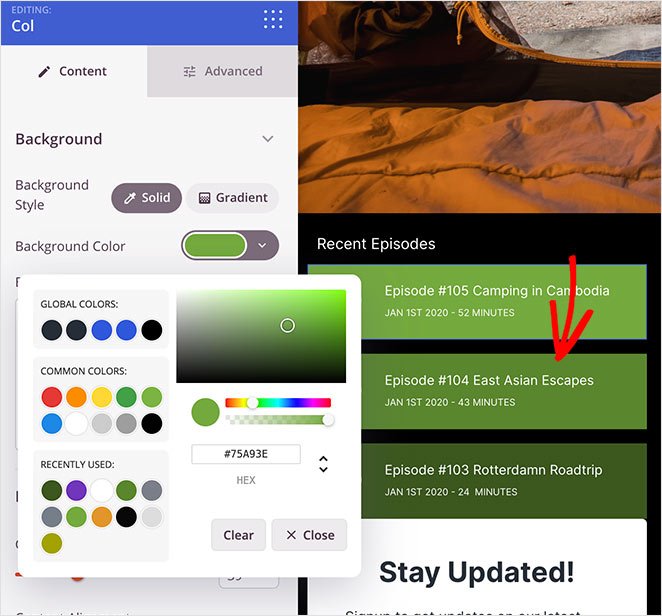
Then, in the column settings, you can customize the colors to add more interest to your page.
Adding Reviews and Social Proof
As mentioned earlier, social proof goes a long way in convincing your audience to take action and hit that subscribe button. And with SeedProd’s testimonial blocks and sections, it’s easier than ever to include them on your podcast page.
Before we show you how to do it, let’s make some space by deleting the newsletter subscription form.
Remember: your landing page should focus on one goal, so removing the subscription form helps focus people’s attention.
To remove the newsletter section, hover your mouse over the entire column. Then click the trashcan icon to delete it from your design.
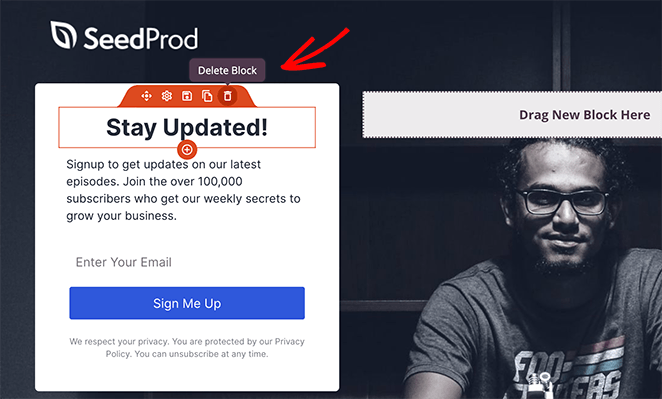
In that section’s place, we’ll choose a pre-made testimonial section from SeedProd’s section library. So, click the Sections tab, select the Testimonial heading, and choose a design you like.
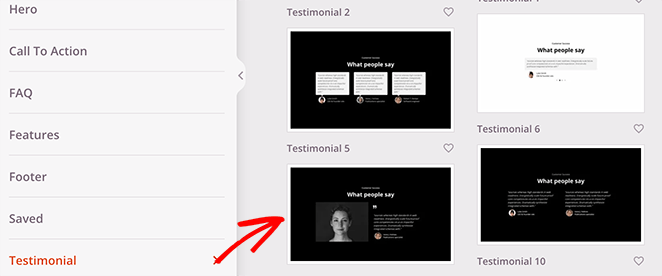
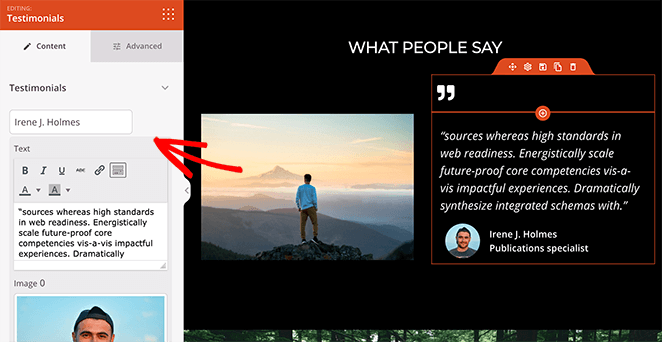
Like the Hero section, you’ll need to rearrange this section so it sits before your landing page footer. Then, you can click different areas of the section to add your content.
For example, you can click the testimonial area and add multiple reviews with images. You can even turn it into a sliding testimonial carousel to fit more reviews in a small space.
Highlighting a Final Call To Action
By now, there’s a lot of content on your page, but it doesn’t hurt to remind visitors why they came in the first place. In fact, adding more than one CTA on your landing page is a great way to persuade users to act at different points in the decision process.
As before, we’ll use another SeedProd section to add a final CTA to our podcast landing page. This time, we’ll choose a Call To Action section and customize it to highlight different social and podcast platforms.
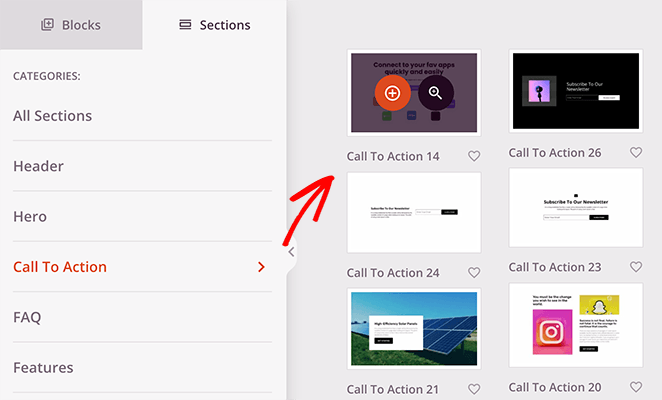
In our example, we removed the default section image and customized the button to match the other CTA button.
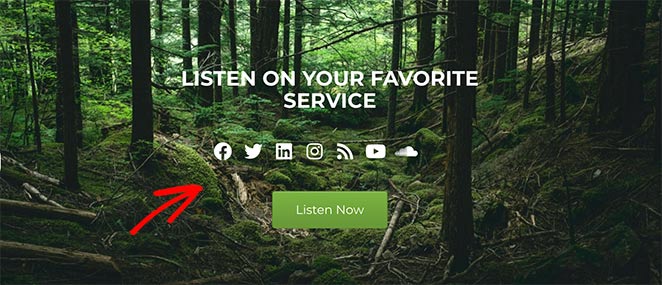
We then took the social icons block from the landing page footer and added it to the CTA area. That way, visitors can check out the different social media platforms for your podcast.
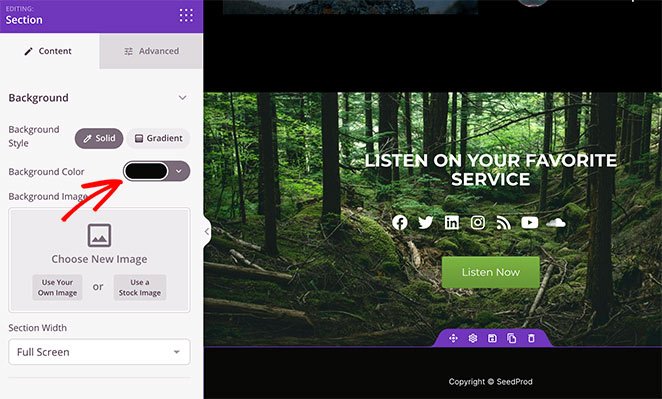
Now all that’s left is to customize your footer area so it matches the rest of your page.
On our page, we simply changed the background color. But you can use this area to add contact details, social trust badges, or even relevant news.
4. Configure Your Page Settings
After finishing the design of your podcast page, it’s time to configure a few settings. First, if your goal is to grow your email list, you should connect with your email provider.
Click the Connect tab at the top of your page builder, and choose from many popular email marketing services available.
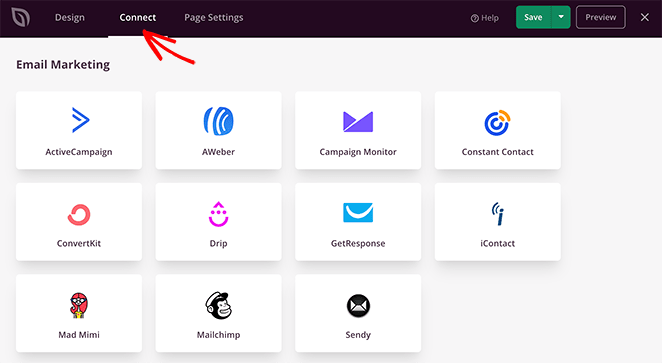
To connect your list, just choose your preferred email service, click Connect and follow the instructions. For specific instructions on integrating each email marketing service, see our email integration documentation.
After connecting your email list, click the Page Settings tab at the top of your screen.

On this page, you can edit your General settings, connect an SEO and Analytics plugin, and even set up custom tracking codes.
Additionally, the Custom Domain section lets you connect your podcast page to any domain name you like.
This is great if you manage multiple websites but don’t want to install WordPress on each domain. Instead, you can simply point your landing page to a different domain easily.
5. Publish Your Podcast Landing Page in WordPress
Before making your page live, you should test it on different screen sizes to ensure it displays properly. Luckily, you can preview your site on mobile with SeedProd easily.
Just click the Design tab and select the mobile icon at the bottom of your screen.
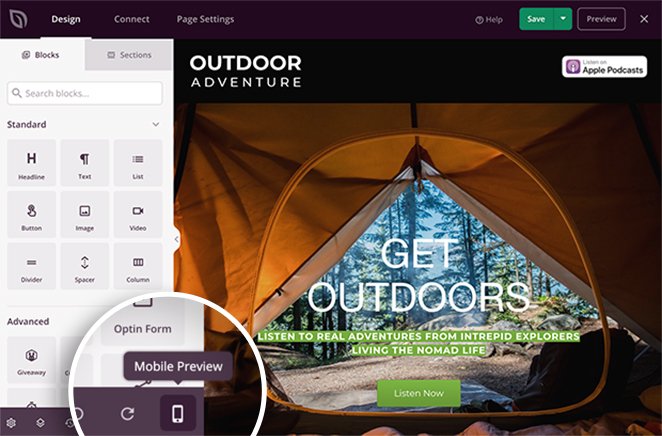
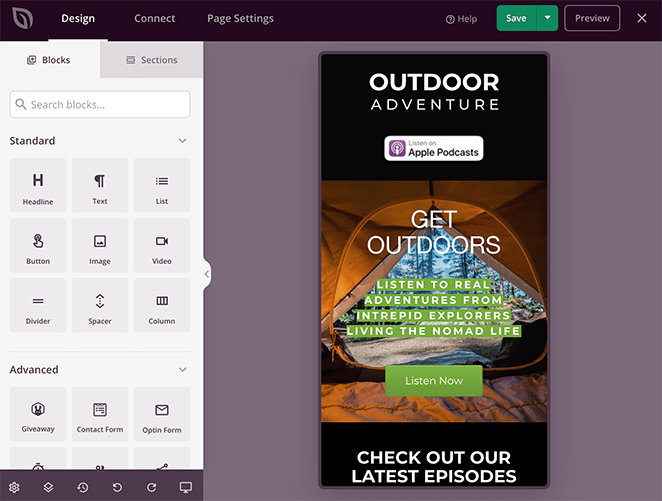
This displays a mobile preview of your page. If anything doesn’t look right, click anywhere on your preview to adjust the design.
Now let’s go ahead and publish your design. To do this, click the dropdown arrow next to the save button and click Publish.
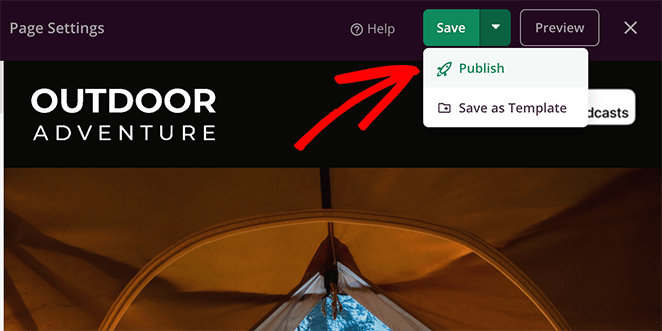
You can then click the See Live Page button to see how it looks. Great work; you now have a custom-designed podcast landing page.
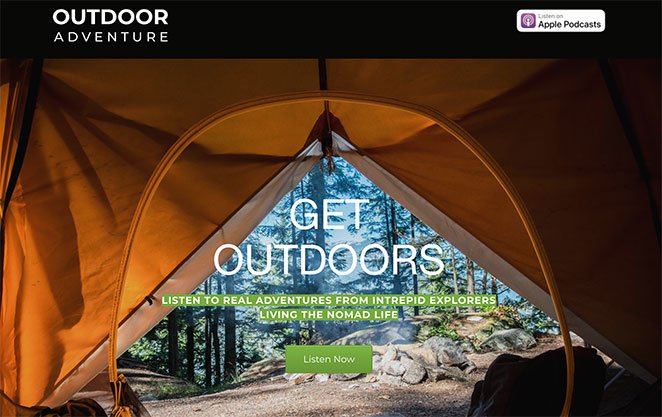
And there you have it!
You now know how to create a podcast landing page in WordPress. While you’re here, you might also like this guide on how to make a desktop website mobile-friendly.
And if you liked this article, please follow us on YouTube, Twitter, and Facebook for more helpful content to grow your business.

