Are you looking for an easy way to password protect a WordPress site?
While WordPress is a highly secure platform, you may want to add an extra layer of security to your site by password protecting it. Password protection can be helpful for sites still in development or with sensitive information you want to keep hidden from the public.
In this ultimate guide, we’ll explore how to password protect your WordPress site in different scenarios.
Benefits of Password Protecting Your WordPress Website
Password protecting a WordPress site has the following benefits for website owners:
- Enhanced security
- Control over access
- Privacy of sensitive information
- Flexibility in site development
Password protection adds extra security to your website, making it more difficult for unauthorized users to gain access. With password protection, you have complete control over who can access your site, which is useful for sites that contain sensitive information.
Protecting your site with a password also lets you develop it in private before making it live to the public. As a result, visitors won’t see a potentially broken site, which can harm the user experience.
As you can see, securing your site with a password can help ensure the safety and privacy of your website and its content.
With that said, let’s look at the different ways to password protect a WordPress site.
Simply click any of the links below to choose the method you need:
- 1. Hide Your Site for a Long Time with a Password
- 2. Temporarily Password Protect WordPress Site
- 3. WordPress Password Protect Pages, Posts, and Products
- 4. Password Protect WordPress Site Categories
- 5. Password Protect Part of a WordPress Post
- 6. Password Protect WooCommerce
- 7. Password Protect WordPress Forms
- 8. Password Protect a Membership Site
- 9. Hide Password Protected Page from Google
1. Hide Your Site for a Long Time with a Password
One of the most popular reasons to password protect a WordPress site is to hide it when it’s still under construction. In this situation, you’re likely working on the website design, building specific pages, and fine-tuning the site’s functionality. Since you won’t want website visitors to see a broken site, it makes sense to hide your WordPress site until it’s ready behind a coming soon page.
Coming soon pages are temporary pages that replace your entire WordPress site with a landing page. It’s a simple page that usually has a message telling visitors your site is launching soon.

Many website owners add other features to a coming soon page, like a sign-up form or a call-to-action (CTA) button to collect email addresses. That way, you can grow your email list before your site goes live.
But how exactly do you hide your entire website with a coming soon page?
The best solution is to use a WordPress page builder like SeedProd that has coming soon pages built into the plugin settings.
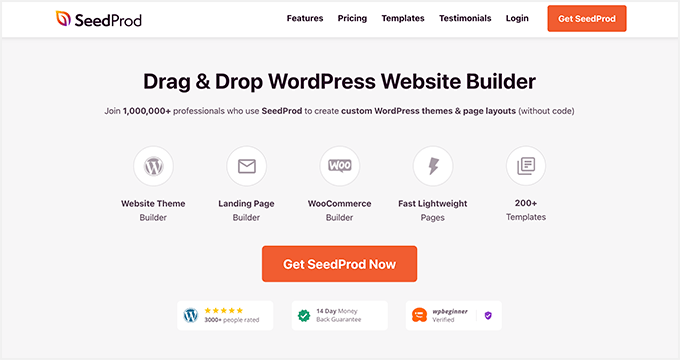
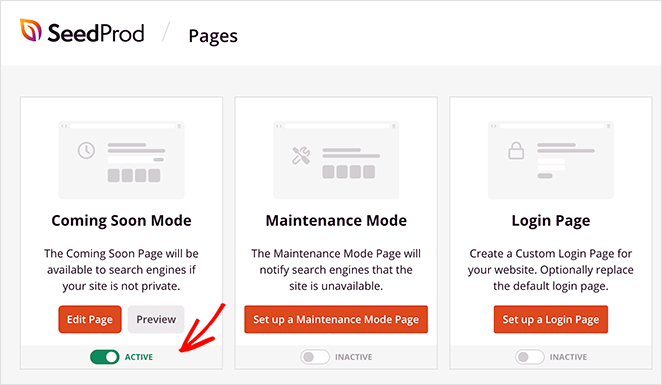
In fact, SeedProd is one of the most popular ways to add a coming soon page to your WordPress site. With its Coming Soon Mode feature, you can build and edit your landing page without touching a single line of code.
The drag-and-drop builder offers a fully visual interface where you can see the changes you make in real-time. That means you can customize your password protected page with the following:
- Email opt-in forms to collect email addresses before going live
- Timers counting down to when your site launches
- Social media widgets for visitors to follow you for updates
- And more.

Here are some coming soon page examples showing how many other brands use them.
You can even add a password form so people with specific user roles can bypass the coming soon page. That way, logged-in users can access your whole site and continue their work.
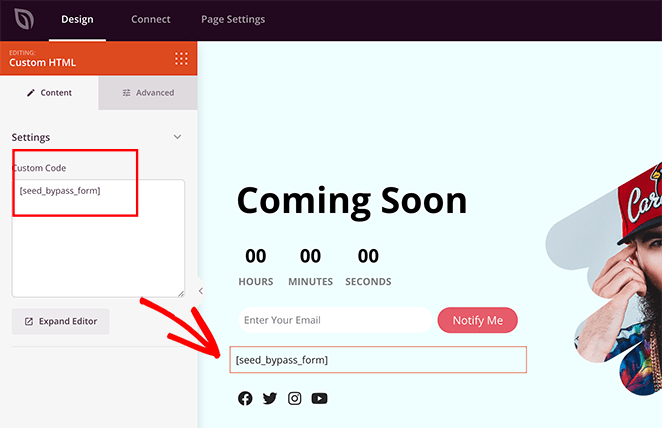
Furthermore, adding a coming soon page to WordPress is a great way to give your new site a head-start with its search engine optimization (SEO). Since search engines like Google can crawl your page, it can start indexing your site to appear in search results.
That means free organic traffic before your site is live!
To help you get started with this, see our step-by-step guide on how to password protect a WordPress site while under development.
Pro tip: You can also use SeedProd to customize your homepage, create a custom WordPress theme, and much more.
2. Temporarily Password Protect WordPress Site
Sometimes, you may only want to hide your WordPress site temporarily. It could be when you’re updating a WordPress plugin, changing your WordPress theme, or fixing a few bugs.
Still, you don’t want website visitors to see errors when they browse your site. So, in this situation, it’s best to display a maintenance page.
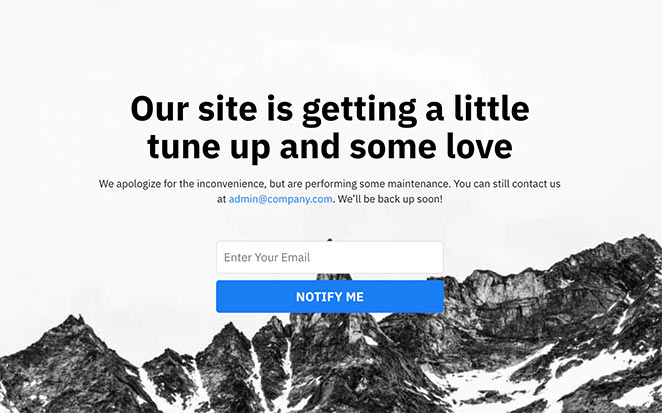
Like coming soon pages, a maintenance page tells visitors your site is down for maintenance. However, instead of letting search engines index your site, it notifies them that it’s temporarily unavailable.
This is good news because Google bots will skip over indexing your site until you remove the maintenance message. As a result, you won’t face any penalties for having broken links.
Our favorite way to add a maintenance page to WordPress is, again, with SeedProd. Its built-in maintenance mode lets you create a custom maintenance page and turn it on and off with a single click.
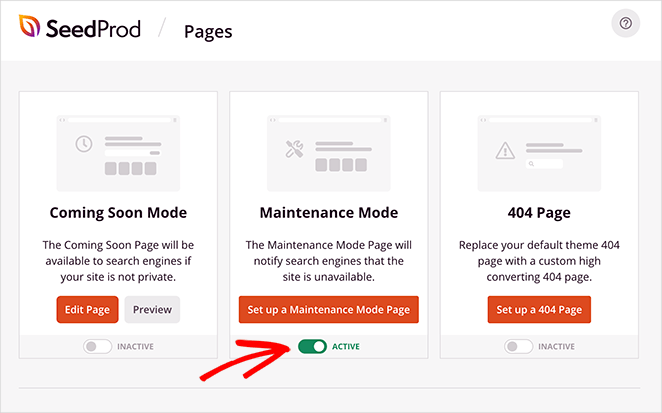
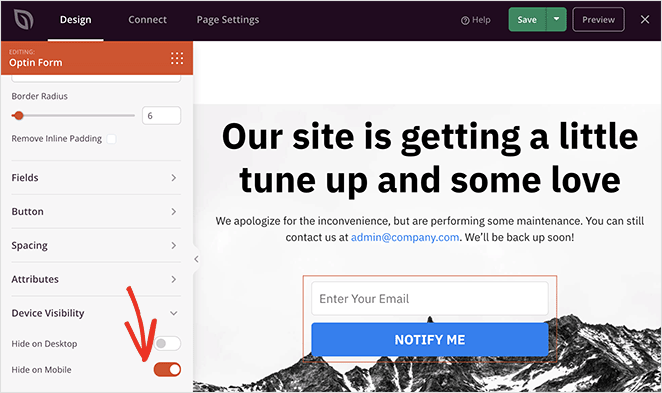
To make building your page faster, SeedProd has a library of professional maintenance page templates that you can customize with its visual editor. It even offers visibility options, allowing you to tweak and hide certain elements on mobile screens so your page looks good on different devices.
Plus, getting started is super easy when you follow this tutorial on how to put WordPress in maintenance mode.
3. WordPress Password Protect Pages, Posts, and Products
So far, we’ve covered hiding your site when it’s under construction and temporarily unavailable. But what if you want to password protect single pages in WordPress?
Maybe you have a membership site with single posts you only want subscribers to access. Or, you may have product pages that you only want to show to V.I.Ps.
In this situation, you can use the default WordPress password protection feature. It helps restrict access to WordPress posts, pages, and even products if you have a WooCommerce store.
Follow these steps in WordPress to password protect pages, single posts, and WooCommerce products:
First, log into your WordPress admin, and from the WordPress dashboard, go to one of the following menus, depending on the type of content you want to restrict:
- Posts » All Posts
- Pages » All Pages
- Products » All Products
Now click edit to open the content in the WordPress editor, then find the ‘Summary’ heading in the right-hand sidebar.
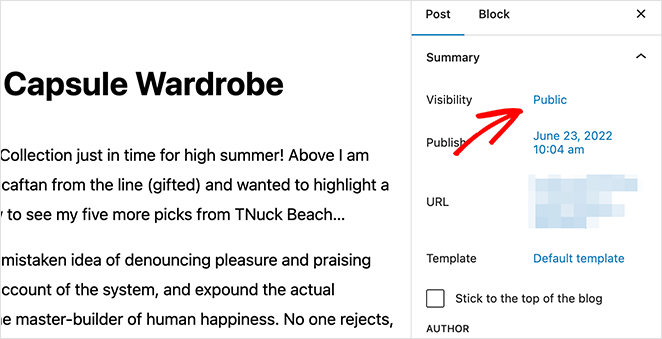
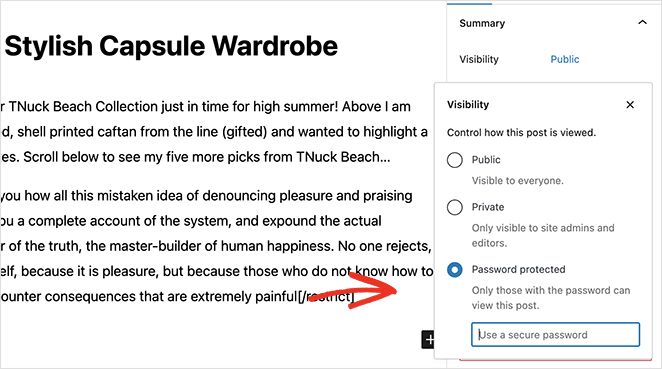
In this panel, look for the ‘Visibility’ label and click Public. This will open a popup menu with different visibility options.
Choose the ‘Password protected’ option and enter a single password. From there, you can click the Update button to save your changes.
Now, anyone trying to view that specific post, page, or product will have to enter the correct password.
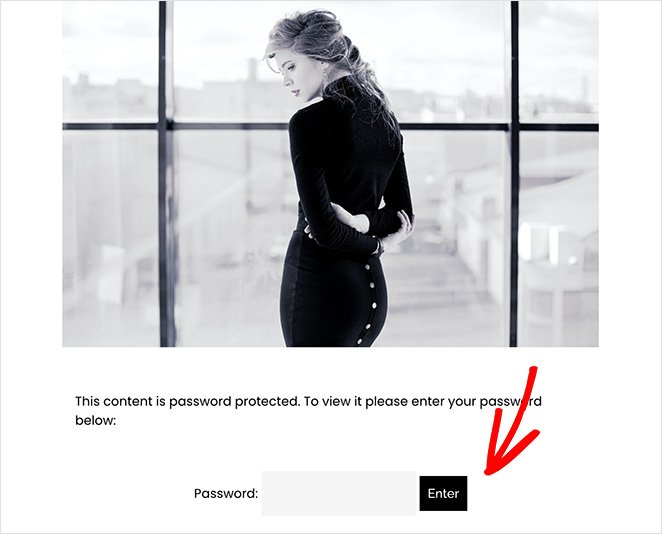
The only pitfall of using WordPress to password protect this content is you can’t easily customize it. Luckily, you can use SeedProd to customize a specific password protected page in WordPress.
All you have to do is create and edit a coming soon page, then visit the Page Settings tab. Here, you can click on the Access Controls tab and paste the URLs of your password protected content.
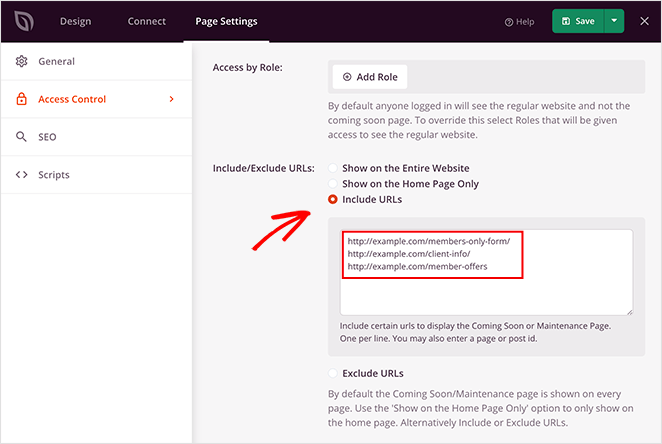
On the same page, you can also let visitors from certain IP addresses bypass your Coming Soon page. That way, you can still share your project’s progress with clients and other users who need access.
For all the steps, you can see our tutorial on how to customize a password protected page in WordPress.
4. Password Protect WordPress Site Categories
We’ve covered several methods so far, but one thing we haven’t talked about is WordPress categories. What if there’s a category on your WordPress site that you want to hide from specific users?
In that case, you can use SeedProd’s Access Controls, and the process is super easy.
First, follow the steps in this guide to password protect a specific WordPress page. Then, from the SeedProd Settings Page tab, click the Include URLs toggle and enter the URLs for your protected categories.
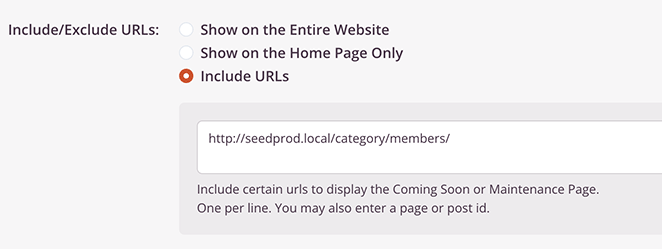
Once you save your changes, anyone visiting that specific WordPress category will see your custom landing page.
5. Password Protect Part of a WordPress Post
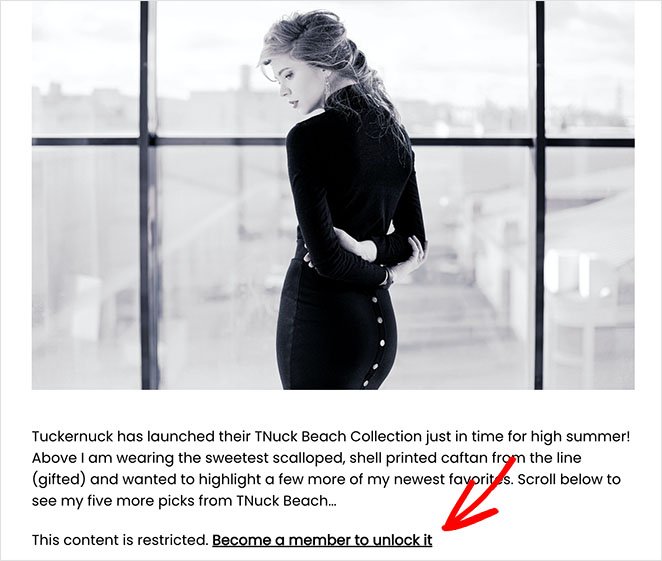
In addition to the solutions above, you can protect parts of your WordPress posts from users without the right permissions.
You can do this with a plugin like Restrict Content Pro, which lets you control which users can access your protected posts and how much restricted content you want to show to other users. It’s a lot like a membership site with several subscription levels and works on all kinds of content, including custom post types, pages, and more.
To set this up, first install and activate the Restrict Content Pro WordPress plugin. After activating it, go to Restrict » Settings to configure the plugin.
When you scroll down the settings page, you’ll see an area for entering a message users will see if they don’t have permission to view your protected content.
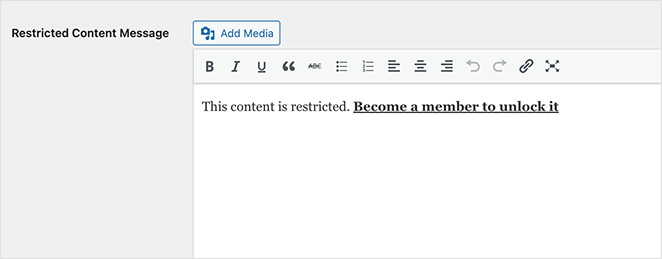
Once you’ve entered your message, click the Save Options button to store your settings.
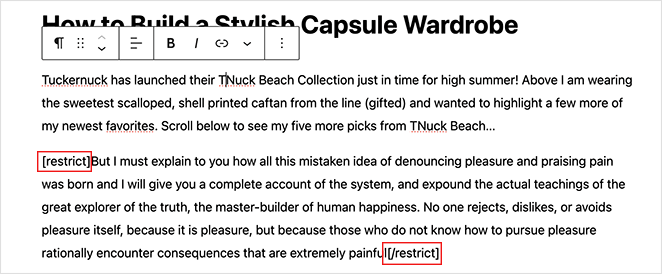
Now, you can create a new post or edit one you want to protect. Simply write the content you wish to display, then wrap the rest of the content you want to hide between the [restrict] [/restrict] shortcode tags.
You don’t need to change the post visibility options to password protected for this method. Instead, just click the checkbox for who is allowed to see your content in the ‘Restrict this content’ panel under the post editor.
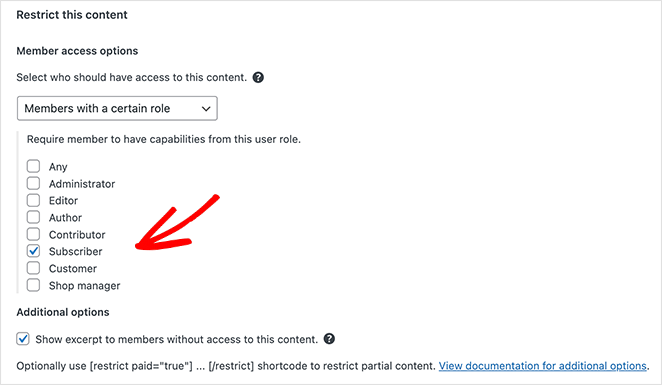
After saving your changes, anyone trying to view this post will see the message you entered on the settings page.
6. Password Protect WooCommerce
Earlier in this guide, we mentioned protecting your WooCommerce products with a password. However, some website owners may want to take their entire WooCommerce site down for maintenance or show a coming soon page before they launch their store.
For SeedProd users, this is fantastic news because you can do both without installing any more WordPress plugins. Its built-in page modes work seamlessly with WooCommerce, giving you complete control over access to your online store.

Here are some step-by-step instructions on how to create a WooCommerce coming soon page. But if you only need to take your shop down temporarily, you can follow this guide on how to put WooCommerce in maintenance mode.
7. Password Protect WordPress Forms
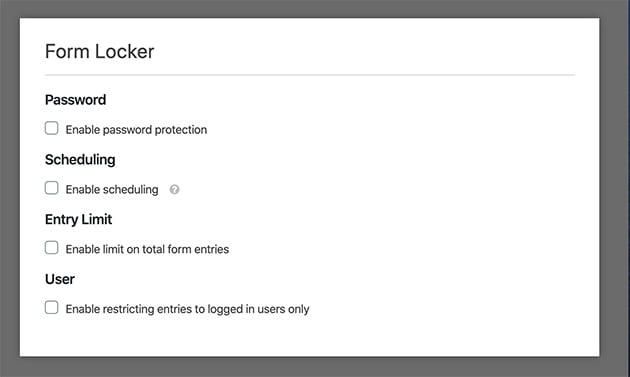
Did you know you can also password protect your online forms in WordPress? With the Form Locker addon from WPForms, the best WordPress contact form plugin, you can add a password to any form, helping you protect your site from spam form submissions.
You can also protect your forms by:
- Closing form submissions on a specific date or time
- Restricting form access to members
- Limiting the number of form submissions per user
- Limiting users to a single form entry
What’s more, WPForms is beginner-friendly, so you won’t need knowledge of CSS, HTML, or PHP to get up and running. Simply check out their step-by-step tutorial on how to password protect WordPress forms.
8. Password Protect a Membership Site
If you’re running a membership site, you’ll want to restrict some, if not all, of your content to members only.
You can do this easily with MemberPress, one of the best WordPress membership plugins.

MemberPress allows you to create various membership levels, each with different access rules. This means only certain types of members can consume that particular content.
You can create rules based on different criteria like posts, pages, categories, or tags.
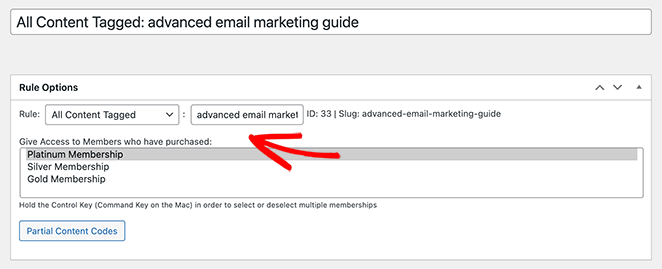
To view your protected content, members will have to log in with their membership details or register. You can add sign-up and registration forms using the MemberPress login form block.
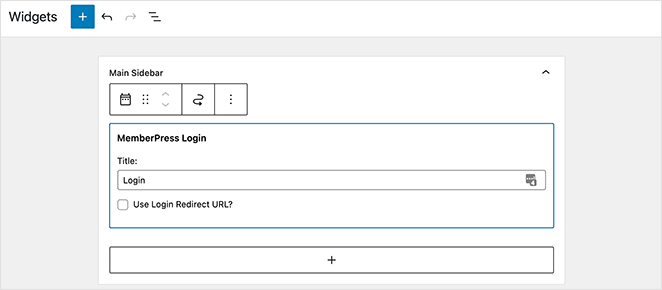
See our guide on how to create a membership website for a full walkthrough.
9. Hide Password Protected Page from Google
The final method in this post will cover hiding password protected pages on your site from Google. Doing this will stop search engines from crawling and indexing that page so it won’t appear in search results.
The easiest way to do this is with a WordPress SEO plugin, and our favorite is All in One SEO. You can get the free plugin from the WordPress plugin repository, but on SeedProd, we use AIOSEO Pro for its advanced SEO features.
Once this plugin is active on your website, you can visit the page you want to hide and find the Advanced SEO Settings panel.
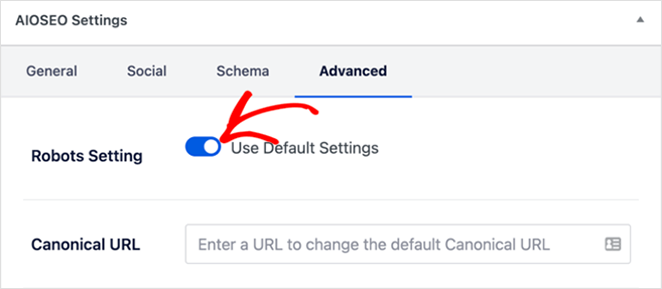
From there, you’ll need to set the ‘Use Default Settings’ toggle to the off position, then click the ‘No Index’ checkbox beneath it.
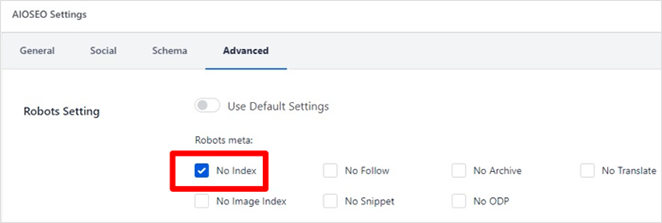
After saving your changes, All in One SEO will insert a line of code that prevents search engines from crawling and indexing that page.
If you need a more detailed guide, you can see their WordPress tutorial on how to hide a page in WordPress.
Next Steps: Create a Custom WordPress Login Page
We hope this ultimate guide has helped you learn how to password protect your WordPress site. Why not take it further and make your site more welcoming for registered users?
Simply follow our guide on how to create a custom WordPress login page for the easy steps. You may also like our list of the best web hosting services to improve your site’s uptime and performance.
Thanks for reading! We’d love to hear your thoughts, so please feel free to leave a comment with any questions and feedback.
You can also follow us on YouTube, X (formerly Twitter), and Facebook for more helpful content to grow your business.

