Do you want to create a Kickstarter landing page for your next crowdfunding campaign?
Kickstarter helps small businesses with fundraising, similar to other crowdfunding sites like Indiegogo. One of the key elements to a successful Kickstarter campaign is an eye-catching landing page that captures the attention and interest of potential backers.
In this guide, we’ll show you how to create a Kickstarter landing page using WordPress. By the end, you’ll have the best landing page to help potential backers pay attention and turn your crowdfunding project into a reality.
Before we dive into creating a Kickstarter pre-launch page, let’s take a moment to understand what it actually is.
What Is a Kickstarter Landing Page?
A Kickstarter pre-launch landing page is the virtual home for your campaign. It’s the web page where potential backers can learn about your project, see your rewards, join your waitlist, and ultimately decide whether to back it.
Your Kickstarter page is a persuasive tool that communicates the value and excitement of your project, highlighting its unique features and benefits. A well-designed landing page captivates visitors, ignites their curiosity, and motivates them to help you reach your funding goal.
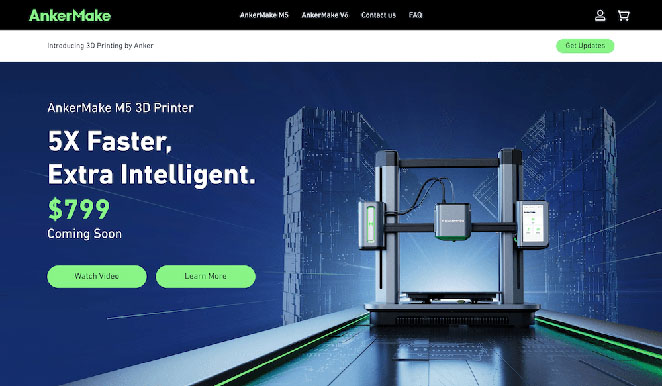
Here’s a Kickstarter landing page example to show you what we mean:
What Should a Kickstarter Landing Page Include?
To create an effective Kickstarter landing page, there are several key elements to include:
- Compelling Headline: Your headline should be attention-grabbing and concise, immediately conveying the essence of your project.
- Project Description: Provide a clear description of your project, explaining its purpose, goals, potential launch date, and how it solves a problem or fulfills a need.
- Engaging Visuals: Use high-quality images, videos, and graphics representing your project.
- Rewards and Tiers: Outline the different pledge levels and rewards backers can choose.
- Social Proof: Include testimonials, reviews, or endorsements from individuals or publications that validate the quality and credibility of your project.
- Progress and Updates: Show your progress and any significant milestones achieved.
- Call-to-Action: Place a prominent and compelling call-to-action button, popup, email signup opt-in, or link that directs visitors to back your project.
- Social Sharing Buttons: Embed social media sharing buttons to make it easy for visitors to share your Kickstarter with their networks.
- Contact Information: Provide contact information, including email or a contact form, so visitors can reach out with questions, concerns, or collaboration opportunities.
- FAQs and Support: Anticipate and address common questions and concerns through a dedicated Frequently Asked Questions (FAQ) section.
Now that we understand what a Kickstarter landing page is, let’s jump into the steps to create one using WordPress. By the end, you’ll have a landing page fit for crowdfunding success.
How Do I Create a Kickstarter Landing Page?
During the pre-launch phase of your Kickstarter project, you can use Kickstarter’s platform to create a project coming soon page. However, their built-in pages’ features and customization options are limited, making it difficult to include the essential elements mentioned above.
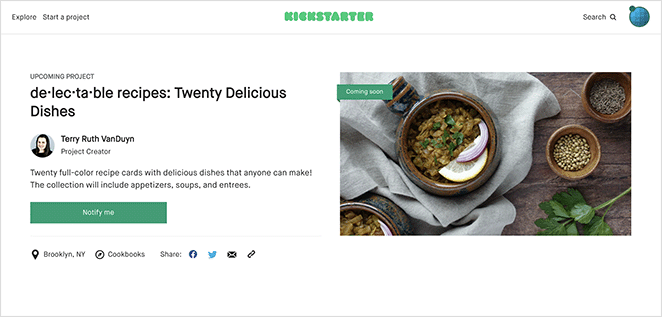
Instead, we recommend creating a Kickstarter landing page on your project website. That way, you can control its overall design and functionality.
For WordPress website owners, the easiest way to make a Kickstarter landing page is by using a page builder plugin.
In this guide, we’ll use SeedProd, the best WordPress page builder with over 1 million users. It lets you create high-converting WordPress pages easily without code.

In under 30 minutes, you can create a landing page for your Kickstarter campaign and include everything you need to attract backers. You also won’t need to start from scratch. SeedProd has hundreds of pre-made landing page templates, ready for you to customize with its visual drag-and-drop builder.
Follow the steps below to see how easy it is to make a Kickstarter landing page in WordPress using SeedProd.
Step 1. Install and Activate SeedProd
The first step is to install and activate the SeedProd plugin on your WordPress website.
If you need help getting started, you can see our documentation on how to install SeedProd.
Note: For this guide, we’ll use the Pro version of SeedProd for its advanced features.
Step 2. Choose a Landing Page Template
After activating SeedProd, navigate to SeedProd » Landing Pages from your WordPress dashboard. On this page, scroll past the page modes section and click the Add New Landing Page button.
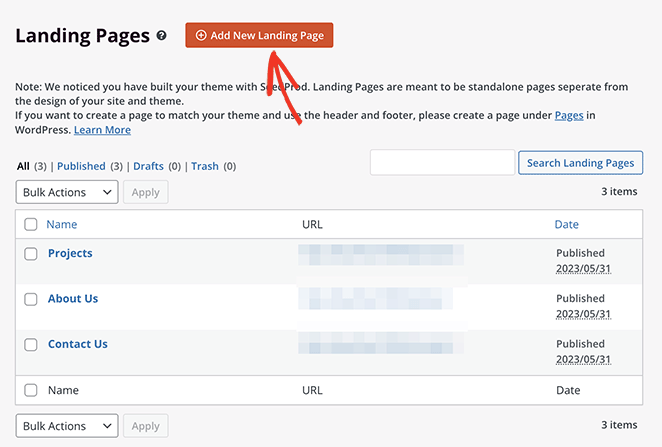
This opens SeedProds’ template library, where you can choose a design that suits the style and theme of your Kickstarter campaign.
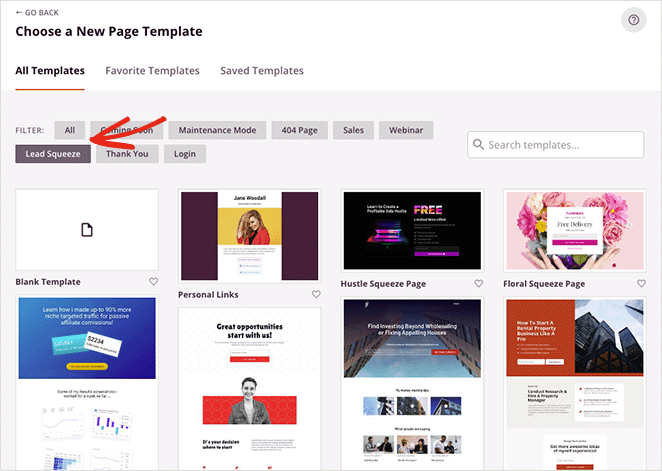
Since hundreds of templates are available, it’s best to click the filters along the top. That way, you can narrow down your search by goal, such as:
- Coming Soon
- Maintenance Mode
- 404 Page
- Sales
- Webinar
- Lead Squeeze
- Thank You
- Login
After finding a template you like, hover over it and click the checkmark icon.
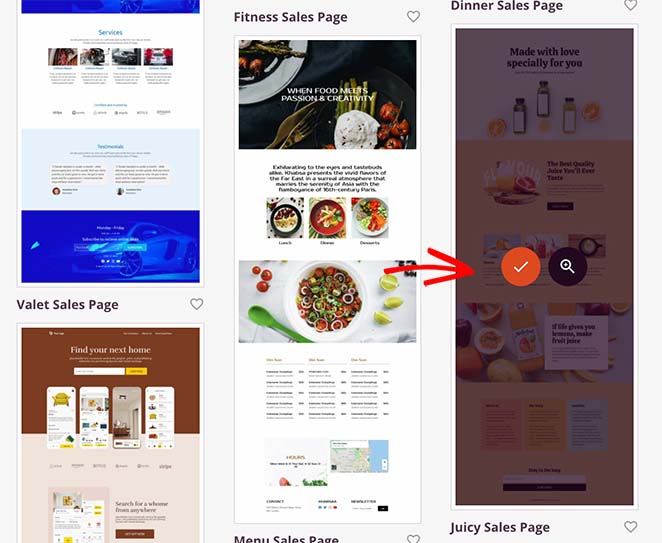
For this guide, we’ll use the Juicy Sales Page.
Next, fill in your landing name, URL and click the Save and Start Editing the Page button.
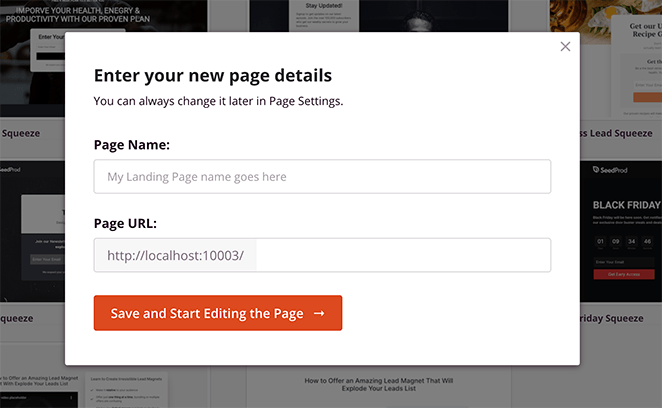
Now you’ll head to SeedProd’s page builder, where you can customize your Kickstarter project page.
Step 3. Customize Your Landing Page for Kickstarter
Navigating the landing page builder is super easy. On the left are blocks, sections, and settings that you can drag and drop onto your design. Then on the right is a live preview that updates in real time.
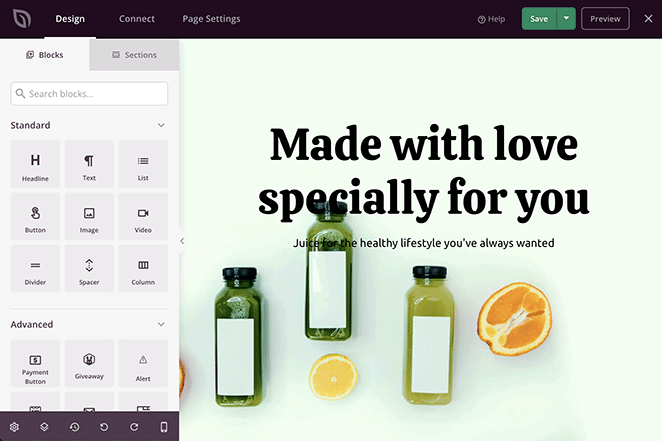
You can click anywhere on the preview to customize your template and add information about your Kickstarter project. For example, clicking the headline lets you change it and adjust its styling.

Selecting a section allows you to edit the background image, its position, and overlay styling.
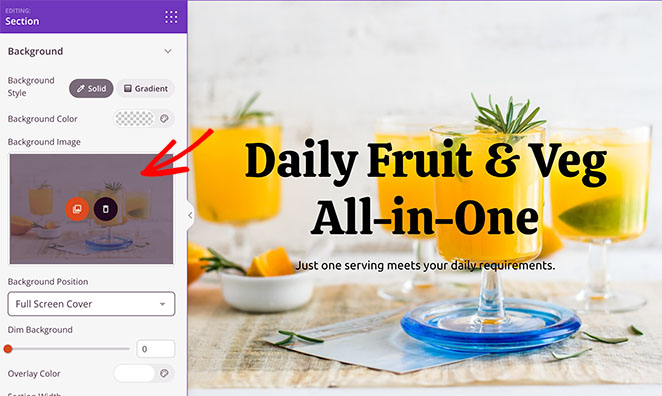
Adding Your Project Details
Now let’s move on to adding more information about your Kickstarter campaign. Customize the next sections of your template to include your project story and explain why your project is worth backing.
If your template has text sections with demo content, you can edit these with content about your product. It’s also worth adding a call-to-action button for users to click through to your Kickstarter page.
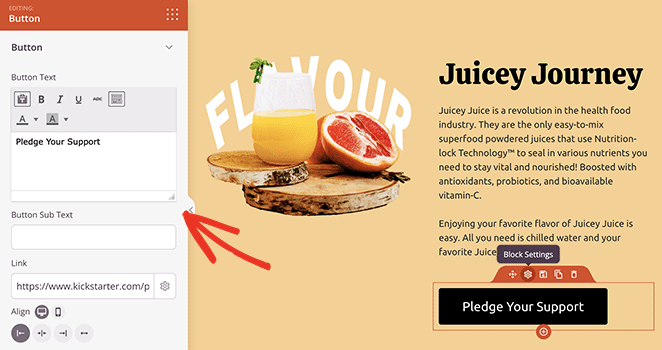
SeedProd’s Button block is ideal for this. It includes space to add button sub-text, icons, styling options, and a URL field. You can use this field to link to your project on Kickstarter.
Including Testimonials
A good Kickstarter campaign uses social proof to increase trust and show credibility. With SeedProd, you can add testimonials to your campaign page using the Testimonials block.
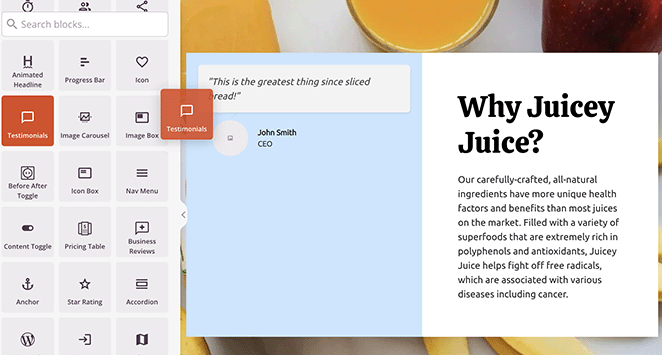
Simply drag the block from the left-hand panel and drop it onto your design.
From there, you can include multiple testimonials, add reviewer headshots, adjust the styling, and even activate a testimonial carousel.
Additionally, you can drag over the social media sharing block to prompt users to share your project with friends.
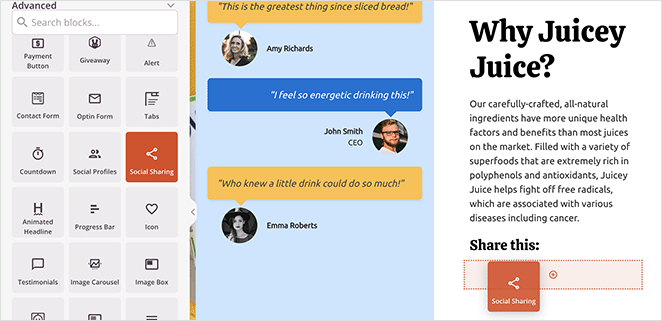
In the block settings, there are share buttons for all the major social media networks, including Facebook, Twitter, LinkedIn, and Pinterest.
Adding Pledge Rewards
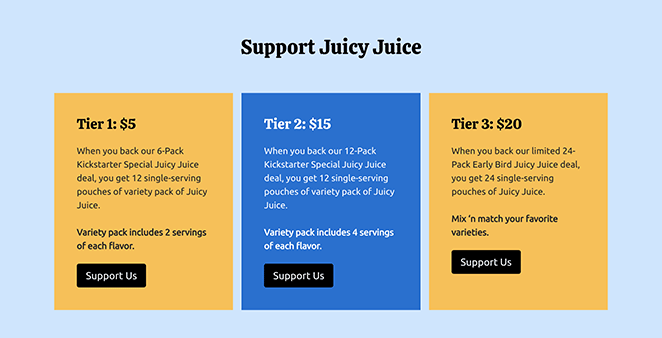
Pledge rewards are how you’ll incentivize users to back your Kickstarter. You can build an attractive reward section on your landing page using a combination of columns, rows, and blocks.
The template we’re using already has a handy column section in place. All you need to do is swap out the content with your own reward tiers.
Here we’ve added an extra heading and CTA buttons for each pledge amount to incite action.
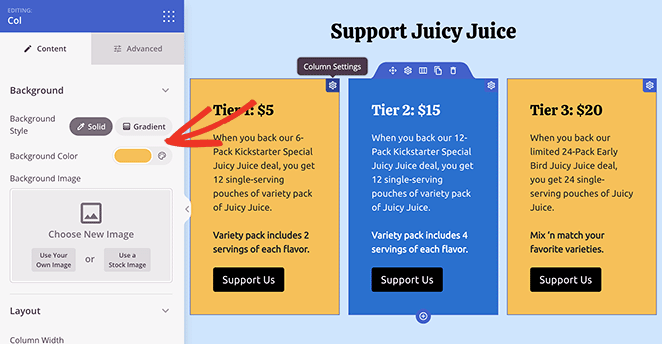
To customize the column colors as above, simply click the gear icon for each column and use the color picker to choose a new background color.
Addressing Frequently Asked Questions
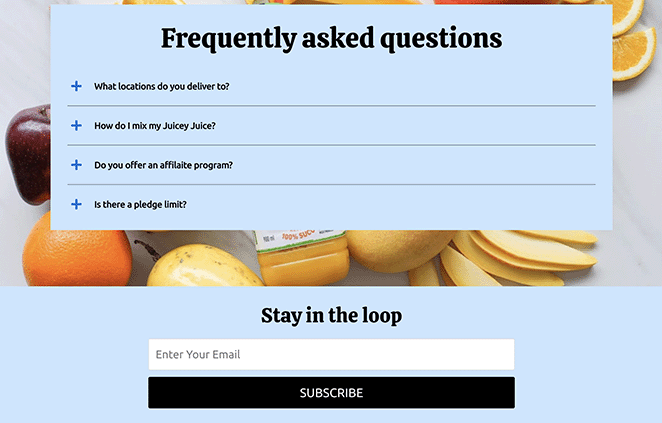
To avoid pledge hesitation, it’s helpful to address common questions that potential backers have about your Kickstarter project. In SeedProd, you can easily add a ready-made FAQ section by navigating to the Sections tab.
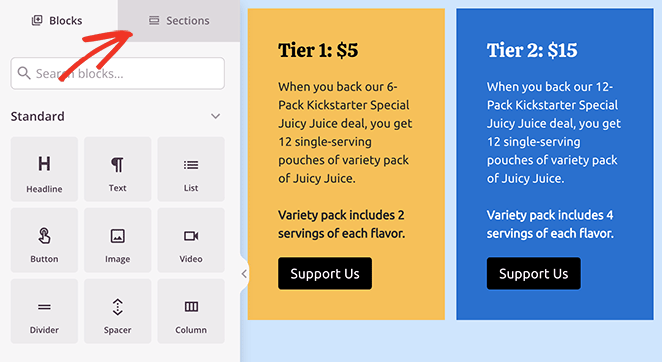
From there, find the FAQ heading and choose a pre-made FAQ section by clicking the plus icon.
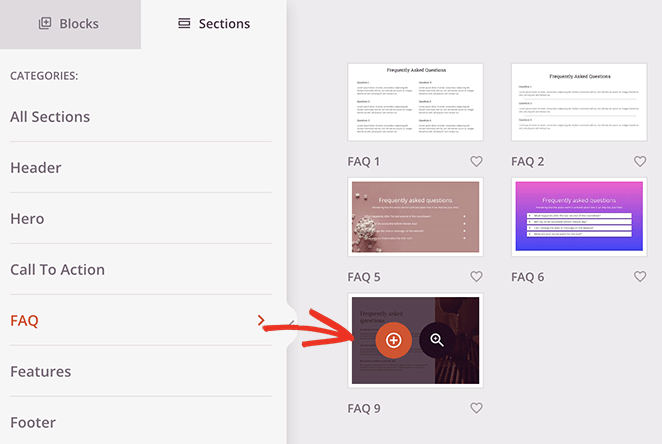
SeedProd automatically adds new sections to the bottom of your landing page design. To move it, simply click the Move icon and drag the section to the best spot.
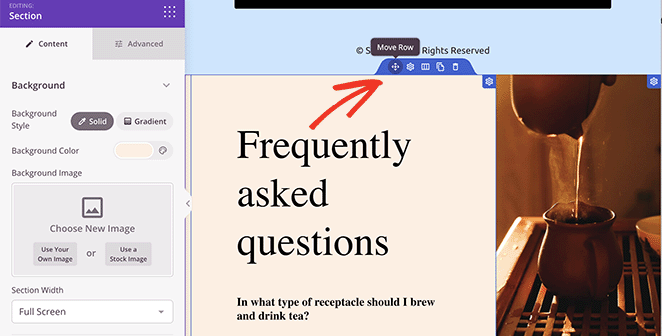
After, you can customize the section like any other element on your page. For example, you can replace the text blocks with SeedProd’s Accordion block to take up less space.
This means readers can show or hide the most relevant questions for their needs.
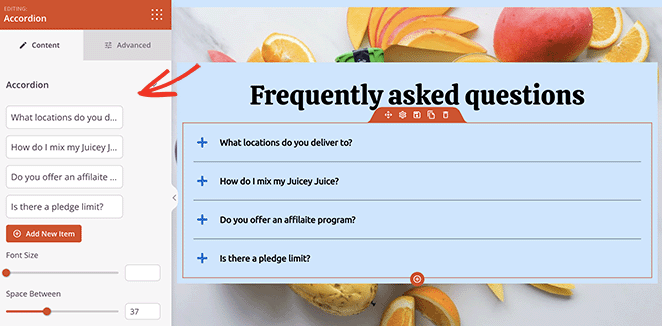
Continue customizing your Kickstarter landing page until it covers all the essential points mentioned earlier in this guide. Remember to click the Save button to store your changes.
Adding a Click to Subscribe Button for Push Notifications
Want to keep your supporters updated with the latest news, even if they’re not on your website? Push Notifications are the perfect solution.
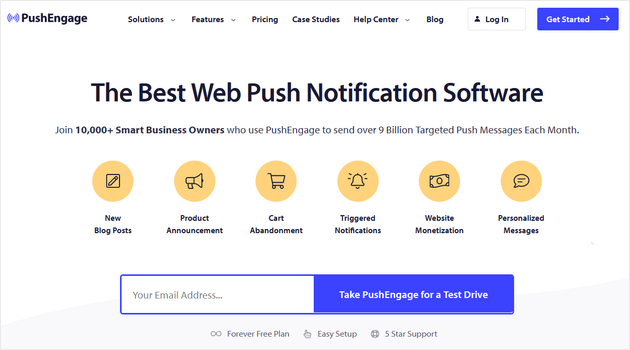
With PushEngage, the best push notification software, you can add a click-to-subscribe link to your Kickstarter page, and it works seamlessly with SeedProd.
Note: You’ll need to be comfortable with copying and pasting code snippets for this step.
To get started, drag the Custom HTML block onto your landing page design.
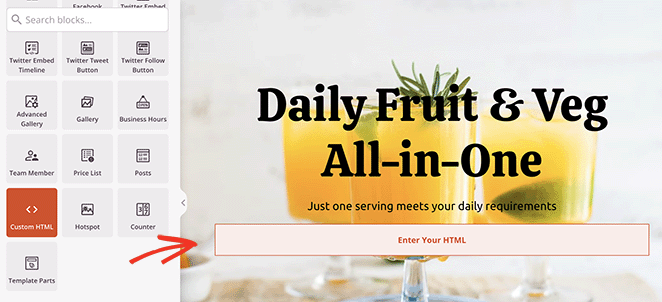
Next, open the block settings and paste in the following code snippet to style your button:
<button onclick="subscribeOnClickButton()" style="border: none; padding-left: 5%; padding-right:5%; text-align: center; display: inline-block; color: blue;">Get Updates via Push Notifications</button>You can edit this code to make a button style that matches your page design.
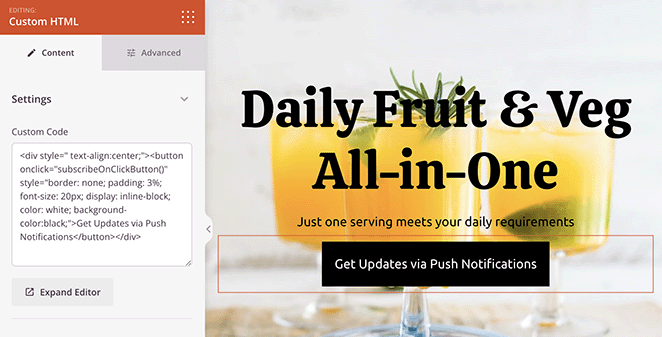
Once you’ve done that, go to the PushEngage website and create an account.
Then, from your PushEngage dashboard, navigate to Site Settings » Site Details and click the Click Here for Setup Instructions button.
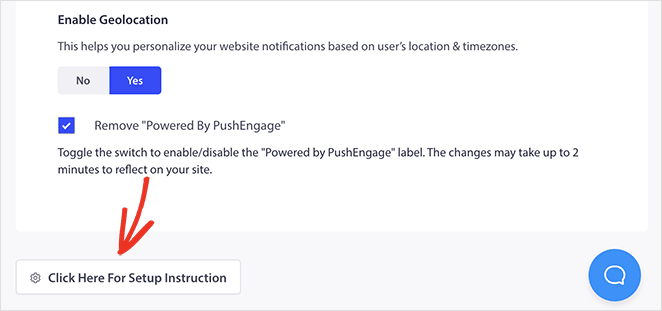
On the next page, click the Under Any Site option, and you’ll see your installation code.
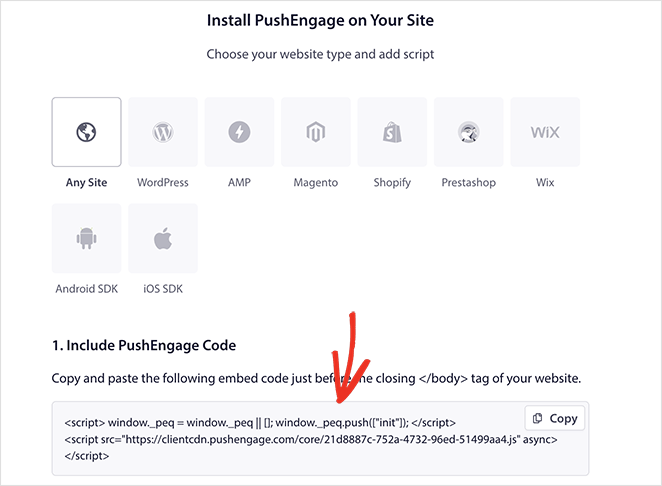
Now add the following snippet to that code:
<script> window._peq = window._peq || [];</script> <script>
function subscribeOnClickButton(){
window._peq.push(['subscribe',{}.pe,function(res){
if(res.statuscode==1)
{
// Code to return response
console.log(res);
}
}]);
}
</script>
The final code you see should look similar to the example below (please do not copy this example):
<script src="https://clientcdn.pushengage.com/core/02a6e92667ae2279fcba8932356c1d93.js" async></script>
<script> window._peq = window._peq || [];</script> <script>
function subscribeOnClickButton(){
window._peq.push(['subscribe',{}.pe,function(res){
if(res.statuscode==1)
{
// Code to return response
console.log(res);
}
}]);
}
</script>
When you have your final code, go back to your Kickstarter page and paste it into your Custom HTML block.
When you publish the page, users will be able to click this button to subscribe to push notifications.

Step 4. Connect Your Email Marketing Service
Building an email list of interested backers is crucial for the success of your Kickstarter campaign. To do this, integrate your landing page with an email marketing service like Mailchimp or ConvertKit. This will allow you to collect email addresses and automatically add them to your email list for future communication.
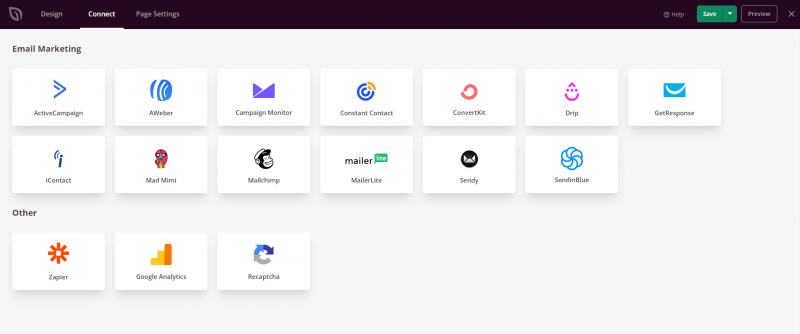
You can do this by clicking the Connect tab at the top, then choosing your preferred email service from the list. See our email integration documentation for full details on setting up your favorite email provider.
Step 5. Configure Your Landing Page Settings
To optimize your Kickstarter landing page for search engines and improve its visibility, configure important settings by clicking the Page Settings tab.
Here, you can use All in One SEO, the best WordPress SEO plugin, to add a meta title, meta description, and more to help search engines understand the content of your page.
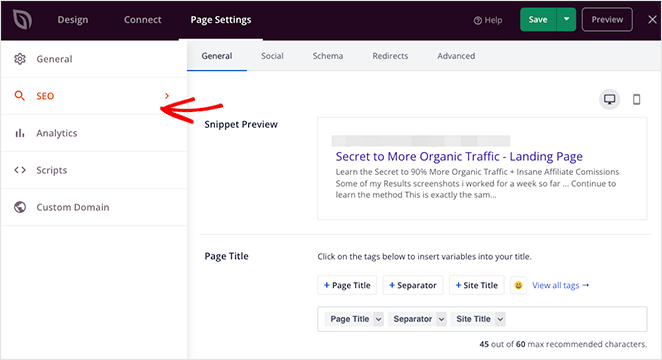
You can also configure other settings, such as adding tracking scripts for Google Analytics or choosing a custom domain name for your page.
Step 6. Publish Your Kickstarter Landing Page
Once you’ve finished customizing and configuring your landing page, it’s time to publish it. SeedProd makes it simple to preview your page and ensure everything looks perfect before making it live.
Simply click the mobile icon in the bottom settings panel to preview your page on mobile devices.
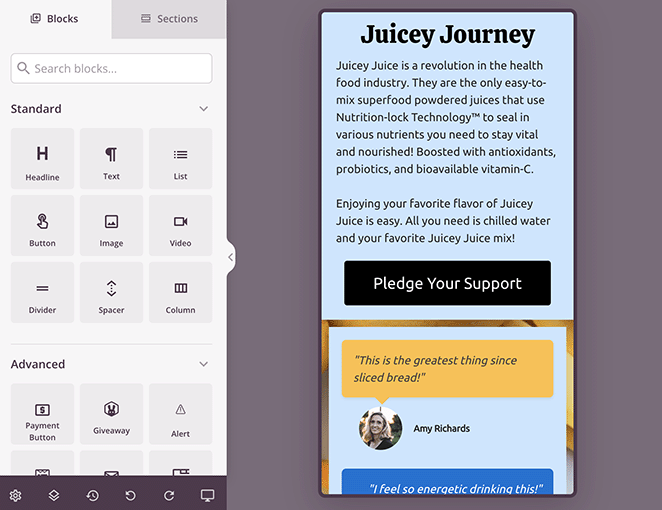
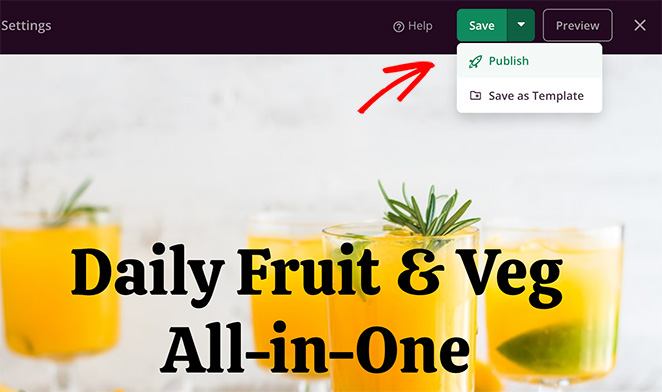
Once you’re satisfied, hit the Publish button, and your Kickstarter landing page will be live and ready to attract backers!
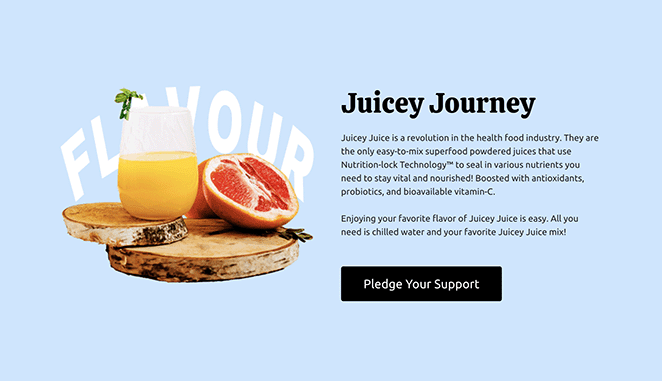
Here is a preview of the Kickstarter landing page we made in this guide.


Kickstarter Landing Page Frequently Asked Questions
How can I make my Kickstarter landing page stand out?
To make your Kickstarter landing page stand out, focus on creating a visually appealing design, craft compelling copy, and showcase high-quality visuals of your project. Use clear and concise language to communicate the benefits of backing your project and highlight any unique features or rewards.
Yes! Including a video on your Kickstarter landing page can significantly increase engagement and conversion rates. Embed a video that explains your project, showcases its potential, and connects with potential backers emotionally. Keep it concise, informative, and compelling.
How important is mobile optimization for my Kickstarter landing page?
Mobile optimization is crucial for your Kickstarter landing page, as a significant portion of internet traffic comes from mobile devices. Ensure that your landing page is responsive and looks great on different screen sizes. Test your landing page on various devices to ensure a seamless user experience.
Should I include social media sharing buttons on my Kickstarter landing page?
Absolutely! Including social media sharing buttons encourages visitors to share your Kickstarter campaign with their networks, extending its reach and increasing the chances of attracting more backers. Make it easy for visitors to share your landing page on platforms like Facebook, Twitter, Instagram, and LinkedIn.
Next Steps
We hope this guide has helped you learn how to create a Kickstarter landing page in WordPress.
Ready to dive and make the best crowdfunding page for your new project?
Here’s some further reading we think you’ll find helpful in your business journey:
- How to make a price list in WordPress
- How to create a landing page with a payment gateway
- How to create a Facebook Ads landing page
- How to build a podcast landing page
Thanks for reading! We’d love to hear your thoughts, so please feel free to leave a comment with any questions and feedback.
You can also follow us on YouTube, X (formerly Twitter), and Facebook for more helpful content to grow your business.

