With travel spending expected to reach a staggering $8.6 trillion, the demand for captivating travel content is skyrocketing. This means there’s never been a better time to learn how to start a travel blog and make money sharing your passion with the world.
Whether you dream of becoming a digital nomad or simply funding your next big adventure, this guide will show you how to create a successful and profitable travel blog, even if you’re starting from scratch.
How to Start a Travel Blog and Make Money
- Step 1: Choose a Profitable Niche & Blog Name
- Step 2: Choose the Right Platform
- Step 3: Install WordPress
- Step 4: Choose a Theme for Your Travel Blog
- Step 5: Add Content to Your Travel Blog
- Step 6: Generate Content Ideas for Your Travel Blog
- Step 7: Drive Traffic to Your Travel Blog
- Step 8: Monetize Your Travel Blog
Step 1: Choose a Profitable Niche & Blog Name
A successful travel blog starts with choosing an interesting niche to write about. Focusing on one niche will help you become an expert and attract a dedicated audience.
This is important for travel bloggers because it helps you stand out. In fact, 59% of travel bloggers have more than one blog. That’s probably because they want to explore different niches.
Some popular travel niches include:
- Budget Backpacking: Helping people travel the world without going broke.
- Luxury Travel: Fancy hotels, incredible food, and bucket-list experiences.
- Solo Female Travel: For women who want to explore the world on their own.
- Adventure Travel: Exciting activities and off-the-beaten-path destinations.
- Family-Friendly Adventures: Helping families create unforgettable travel memories.
Choosing the right niche can also impact your blog’s growth and money-making potential.
“I did exactly that with Day Out in England, and within four months qualified for MediaVine. It’s been 14 months now and…the site brings in a decent income every month.”
Victoria Philpott
Along with your niche, it’s crucial to choose a blog name to match. Your name should be short, easy to remember, and relevant to your niche.
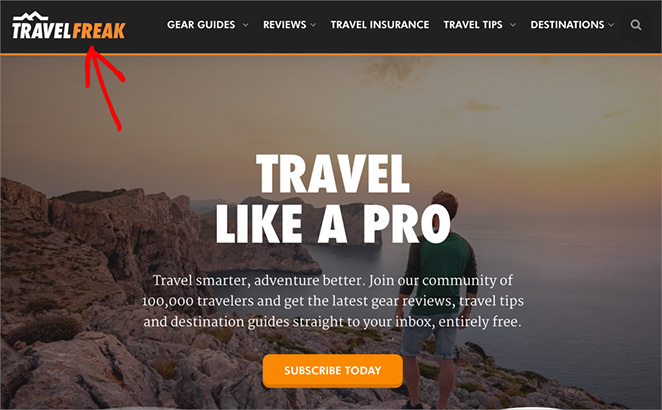
For example, “One Bag, One World” works well for the solo female travel niche.
However, something like “My Single Life & Other Adventures” is too broad and doesn’t focus on travel as the primary theme. It might also attract an audience interested in dating advice rather than travel inspiration.
Pro Tip: Before you fall in love with a name, make sure the domain name is available (what readers will type into their address bar to find your blog). You can use sites like Nameboy to generate and search for domain names.
Step 2: Choose the Right Platform
You’ve chosen a travel niche and a catchy blog name. Now, it’s time to choose the blogging platform on which to build your blog.
Lots of new bloggers make the mistake of going with a free platform. That might seem easier at first, but you have way less control. Imagine being unable to change your blog’s design the way you want or even being limited in how you can earn money.
WordPress.org (sometimes called “self-hosted WordPress”) is the way to go when it comes to blogging. It’s like owning your own home – you can decorate, renovate, and customize everything exactly how you like it.
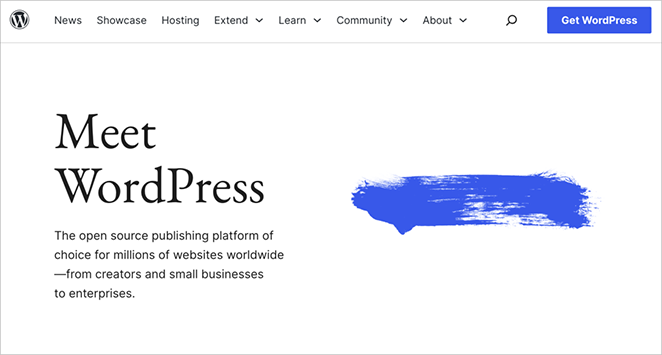
Now, you shouldn’t confuse this with WordPress.com, which is a hosting platform. I know having two WordPress versions is a little confusing. Here’s an easy way to remember it:
- WordPress.org: This is like buying a plot of land and building your dream house. You get to make all the decisions.
- WordPress.com: This is like renting an apartment. It’s cheaper and easier upfront, but you have to follow the landlord’s rules and might not have as much space to grow.
WordPress.org is always my first choice when building a blog for its flexibility. But that’s not all you’ll need to set up your travel blog.
You’ll also need:
- Domain Name: What people type into their browser to find you.
- Web Hosting: A service that stores all your blog’s files and ensures people can access it online.
If you’re feeling a little overwhelmed, don’t worry. I recommend Bluehost to all new bloggers because they make getting started easy and affordable.
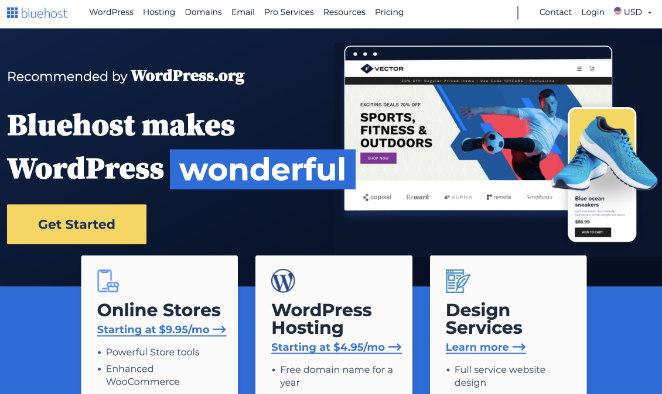
Granted, there are many other popular hosting services. But I chose Bluehost because:
- It’s an officially recommended WordPress hosting provider.
- You get a free domain name for the first year.
- They have amazing discounts for first-time customers.
- Their customer support team is available 24/7.
Click here to sign up for a Bluehost account.
Note: At SeedProd, we believe in being honest and upfront. If you sign up with Bluehost using our referral link, we’ll earn a small commission at no extra cost to you. We would get this commission for recommending any WordPress hosting company, but we only recommend products we use and believe add value to our readers.

After visiting the Bluehost website, click the ‘Get Started Now’ button and select the plan that you want.
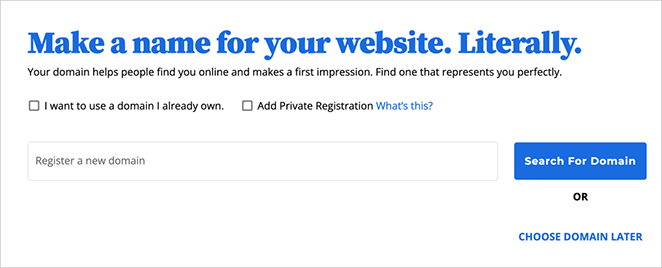
Next, you’ll need to enter the domain name for your travel blog. Remember, you chose this in the first step of this guide.
On the next screen, finalize your package details.
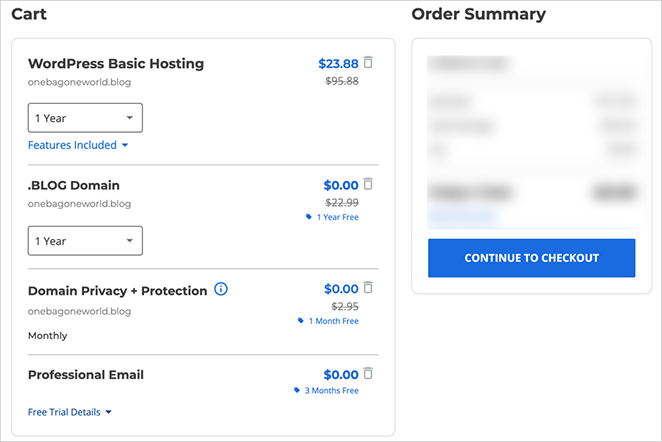
You may see optional extras like domain privacy protection, backups, security, and more. For simplicity, I don’t recommend getting these right away. You can always add them to your plan later if you need them.
Finally, enter your details and payment information and finish the purchase.
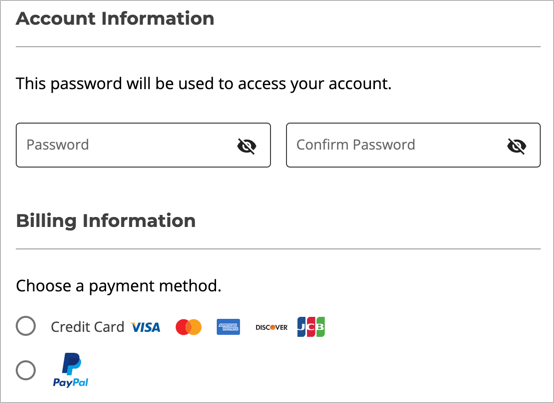
You’ll then get an email with instructions on how to log in to your web hosting control panel (cPanel).
Step 3: Install WordPress
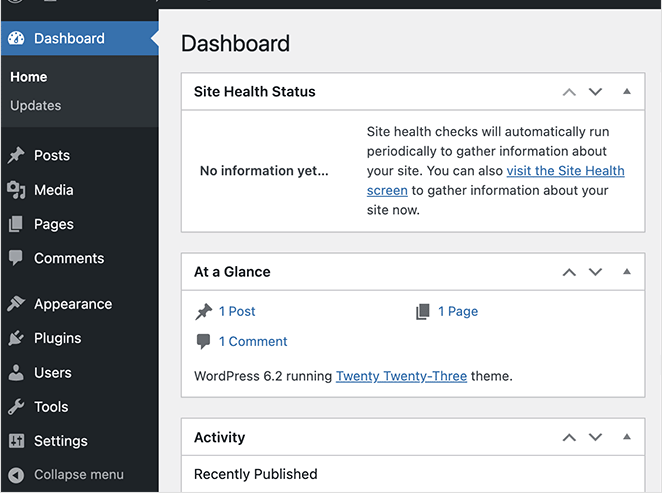
With your Bluehost account set up, the next step is usually installing WordPress. But remember how user-friendly I said Bluehost is? Well, they’ve already installed WordPress for you.
You can access your hosting control panel by clicking the link in the email you received after signing up.
Then, just click the ‘Edit Site’ button to enter your WordPress dashboard.
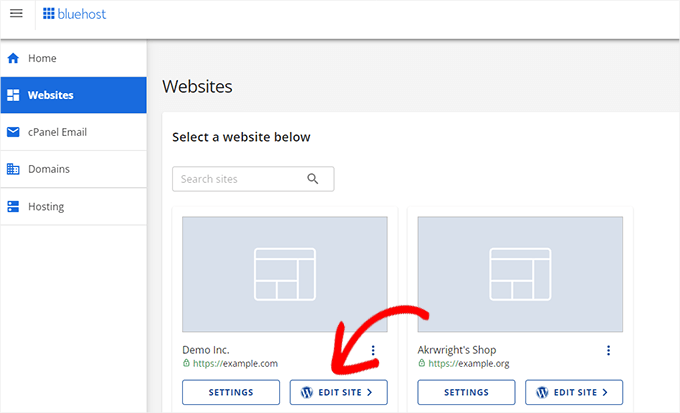
Your WordPress dashboard is where you’ll create your blog posts, customize the design, and manage your site’s settings.
Step 4: Choose a Theme for Your Travel Blog
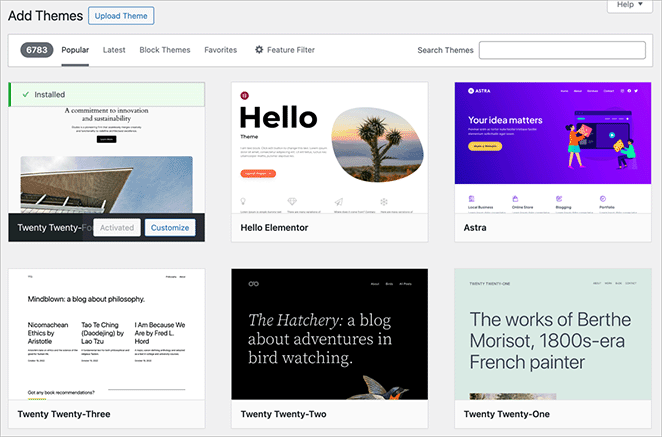
You’ve installed WordPress, which means it’s time to make your travel blog look good. This is where WordPress themes come in.
Think of a theme as a template that determines the overall design of your blog. Themes control layout, colors, fonts, and how your content is presented.
Now, WordPress has a large selection of free themes, which are fine to use when you’re first starting. Just be aware that free themes often lack the flexibility and features of paid themes.
You can also use paid themes, which are sometimes referred to as premium themes. They offer more advanced customization options, better performance, and developer support.
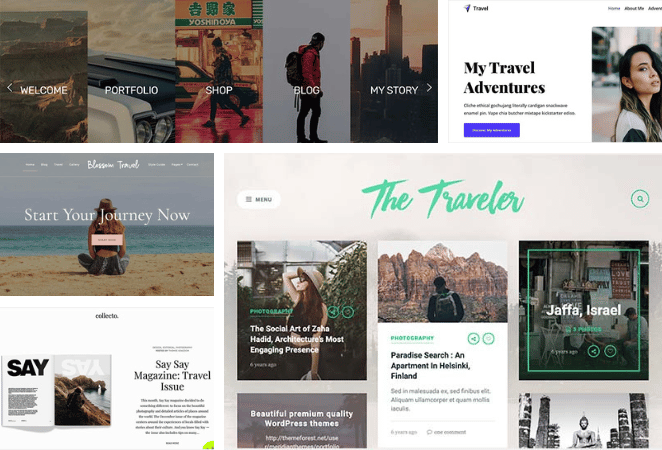
A paid theme is a good investment if you need a specific look or functionality for your travel blog.
Here are some factors to consider when selecting a theme for your travel blog:
- Clean and Visually Appealing: Your blog should be easy to read and visually appealing, effectively showcasing your travel photos.
- Mobile-Friendly: Make sure your theme looks good on all devices, not just desktop computers.
- Easy Navigation: Your blog should be easy to navigate so visitors can find what they want.
- Fast Loading Speed: Website loading speed is important for user experience and search engine optimization (SEO). Pick a theme that’s optimized for speed.
To help you out, here are my recommendations for the best WordPress themes for any website.
If you want something unique, you can build a custom theme using SeedProd. Its drag-and-drop theme builder allows for more design control without needing to code.

SeedProd offers pre-built templates suitable for travel blogs, so you don’t have to start from scratch. You can adjust colors, fonts, layouts, and other design elements while ensuring your blog looks good on all devices.
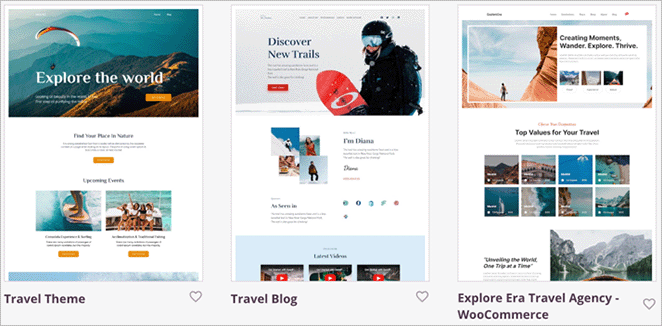
For a complete walkthrough, please see our guide on how to create a custom WordPress theme using SeedProd.
Alternatively, launch a custom website in seconds using SeedProd’s AI website builder. Simply provide a brief description of your site, and it will generate a fully custom theme, helping you save time and get online faster.
Step 5: Add Content to Your Travel Blog
With your travel blog set up, it’s time to add content. This is what will draw readers to your site.
WordPress uses two main content types: posts and pages.
Posts are individual blog entries, often about specific trips or experiences. They appear in reverse chronological order on your blog’s main page.

Pages are for more static content like your About page, Contact information, or a Privacy Policy.
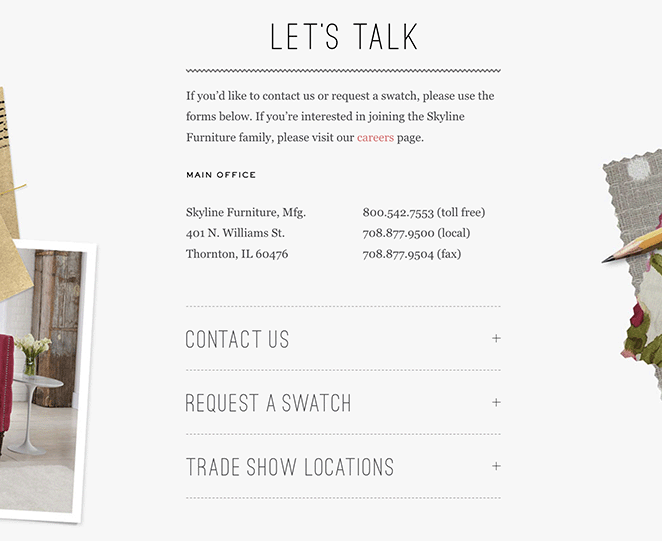
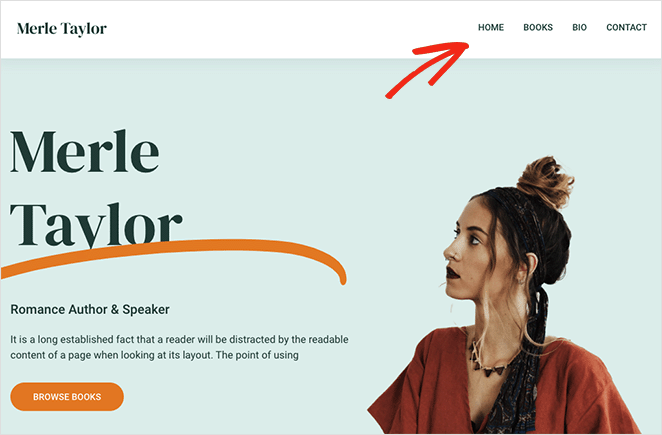
They are not displayed in chronological order and often have a fixed position on your site’s menu.
Creating Important Travel Blog Pages
Before writing your first blog post, I recommend creating important static pages to give your site some structure:
- Home: This is usually the first page visitors see. Keep it concise, introducing yourself and the purpose of your travel blog.
- About: Provide some background about yourself and your travel experience. Explain why you started a blog and what readers can expect to find on your site.
- Contact: Make it easy for people to contact you, whether through a contact form or by displaying your email address.
- Privacy Policy: A Privacy Policy is a legal requirement, especially if you collect user data or use advertising on your blog.
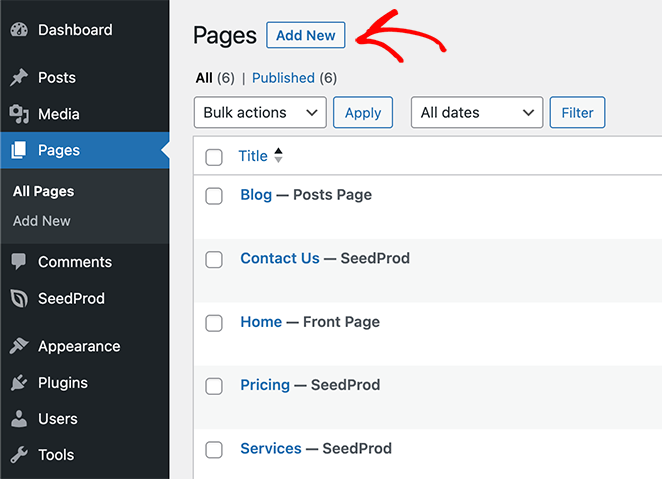
Creating a page in WordPress is simple. Go to Pages » Add New from your WordPress dashboard and enter your information using the easy WordPress blocks.
You can also use a page builder plugin like SeedProd to create custom page layouts.
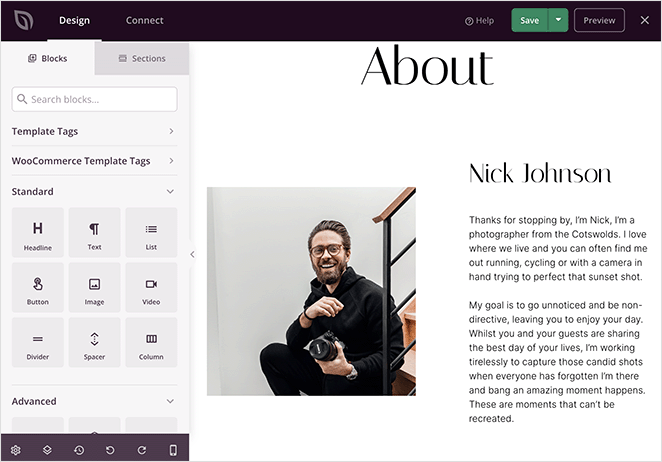
It offers more customization options than the typical WordPress block editor and is just as easy to use. For the steps, see our guide on how to create a custom page in WordPress.
Creating Travel Blog Posts
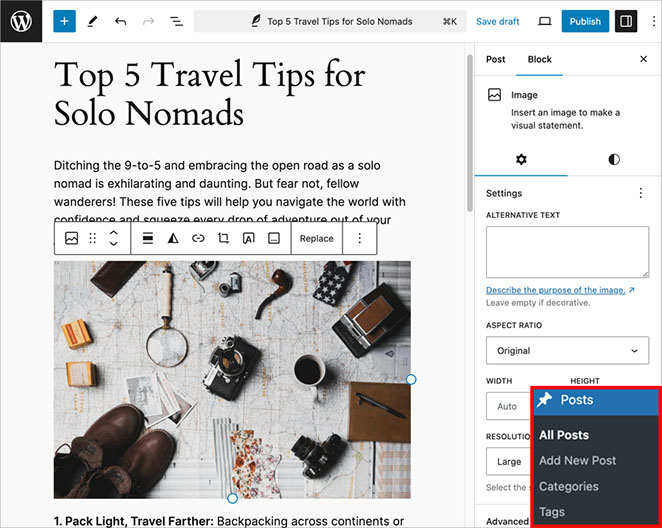
To write a blog post, go to your WordPress dashboard and click on Posts » Add New.
From here, you can use the WordPress content editor to format your text, add images, headings, and much more.
Beyond standard blog posts, you can:
- Write Travel Guides: Detailed articles with itineraries, tips, and recommendations for specific places.
- Create Photo Essays: Tell a visual story through high-quality images.
- Post Videos: Videos offer a more engaging way to share your experiences.
- Add Audio: Consider starting a podcast with travel-related content.
Pro Tip: Use a plugin like Envira Gallery to create attractive image galleries for your blog posts.
Step 6: Generate Content Ideas for Your Travel Blog
Now that your blog is set up, you need to create content that will attract readers. So, what makes good travel blog content?
The answer to that question varies depending on the reader. In my experience, the solution is to write engaging, informative, and helpful content.
Write in a way that’s interesting and easy to read, using personal stories and a conversational tone. Also provide valuable information that helps readers plan trips, such as travel tips, itineraries, and honest reviews.
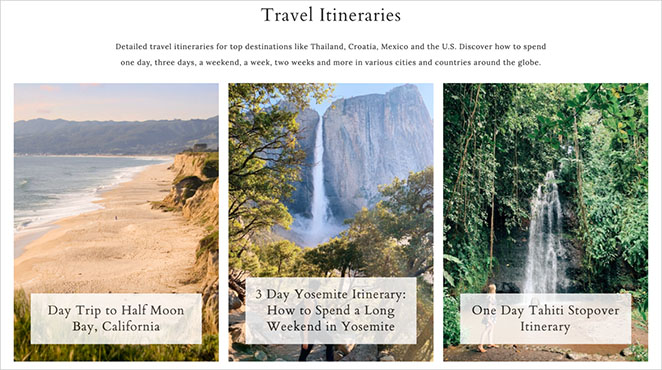
I also recommend offering practical advice, answering common travel questions, and solving travel challenges.
If you’re struggling to come up with ideas:
- Think about your past trips – the highlights, challenges, and lessons learned.
- Run polls on social media or email to find out what interests your readers.
- Look at what other successful travel bloggers are doing for inspiration, but don’t copy their content.
Travel Blog Examples
Here are a few well-established travel blogs for inspiration:
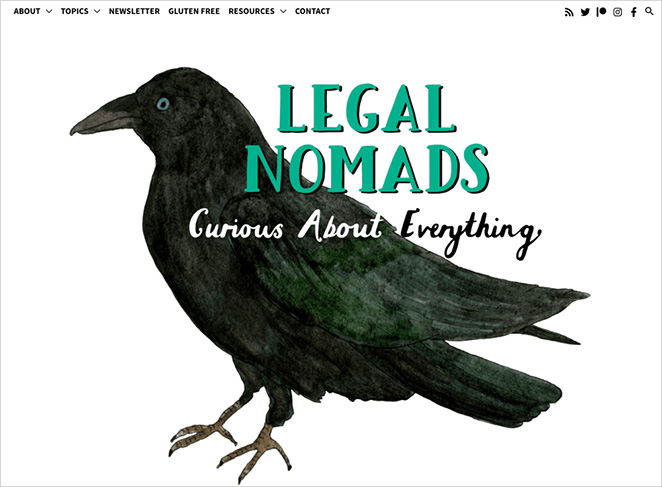
Jodi Ettenberg’s blog features thoughtful writing on travel, culture, and personal experiences.
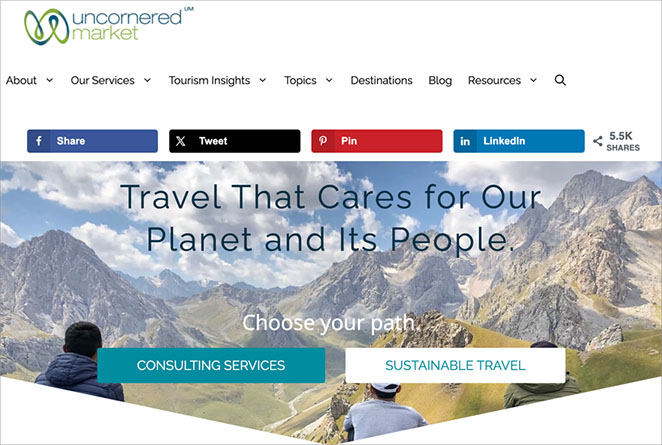
This blog, by Daniel Noll and Audrey Scott, showcases stunning photography from off-the-beaten-path destinations.
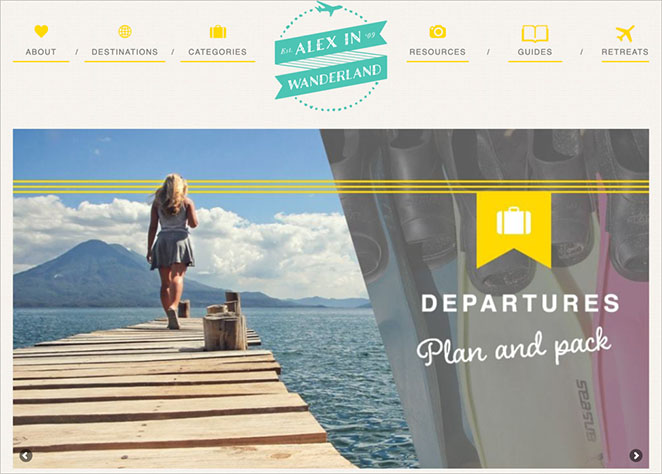
Alex Baackes focuses on solo female travel, offering relatable stories and stylish photography.

Matt Kepnes teaches readers how to travel the world affordably.
Keep a regular posting schedule, whether weekly or a few times a month. Consistency helps build an audience and keeps readers engaged.
Orbit Media reports that the average blog post takes 3 hours and 51 minutes to write. But don’t let this overwhelm you.
Yes, writing quality content takes time. However, focusing on producing well-written and informative posts provides the kind of value your readers need to keep coming back.
Step 7: Drive Traffic to Your Travel Blog
Creating content is only half the battle. You also need to attract readers to your travel blog. Here are some ways to drive traffic to your site:
1. Optimize Your Blog for Search Engines
SEO helps your blog rank higher in search results on platforms like Google. When someone searches for travel-related information, SEO helps ensure your blog appears in the results.
While WordPress is generally SEO-friendly, I always recommend that new blogs install a WordPress SEO plugin like All in One SEO (AIOSEO).
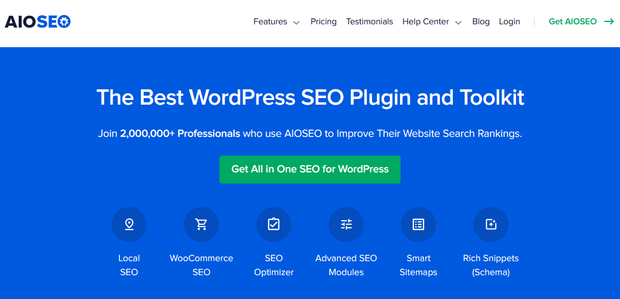
AIOSEO has a complete set of SEO tools to help grow your travel blog. You can easily optimize your blog keywords, meta descriptions, title tags, and more.
For a deeper understanding of SEO, please refer to our WordPress Search Engine Optimization guide.
2. Improve Your Blog Speed and Performance
A slow-loading travel blog can provide a poor user experience and cause readers to leave and never return. It also affects your blog’s search rankings since Google considers speed among its top ranking factors.
To check your website speed, hop over to IsItWP’s free website speed test tool. It pinpoints any speed issues and offers suggestions on how to fix them.

To improve your blog’s speed, use a content delivery network (CDN). A CDN is like having post offices in different locations so your content can be delivered to readers faster, no matter where they are. This means your blog loads more quickly for everyone, regardless of location.
If you really want to speed up your website, a caching plugin like WP Rocket can help.
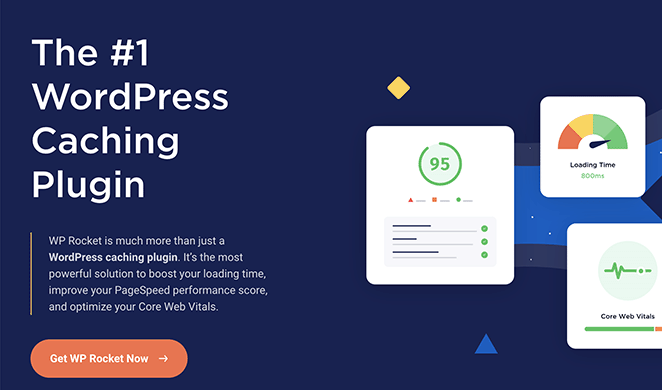
It handles a lot of technical optimization behind the scenes, from caching your pages to making those stunning travel photos load faster.
To learn more about speeding up your travel blog and keeping your readers happy, check out our comprehensive guide on how to speed up your WordPress website.
3. Build a Loyal Community
Encouraging readers to return to your blog is essential for its growth. One effective way to do this is by building a community.
An email list helps you stay connected with your audience. By collecting email addresses, you can send out newsletters with blog updates, exclusive content, and promotions.
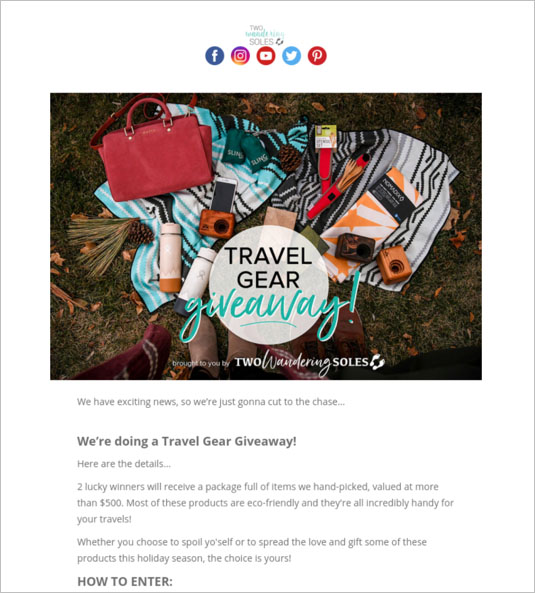
Consider using an email marketing service like Constant Contact to manage your subscribers and send emails.
To encourage visitors to sign up for your email list, I recommend using a tool like OptinMonster. It allows you to create pop-up forms and boxes on your website that encourage subscriptions.
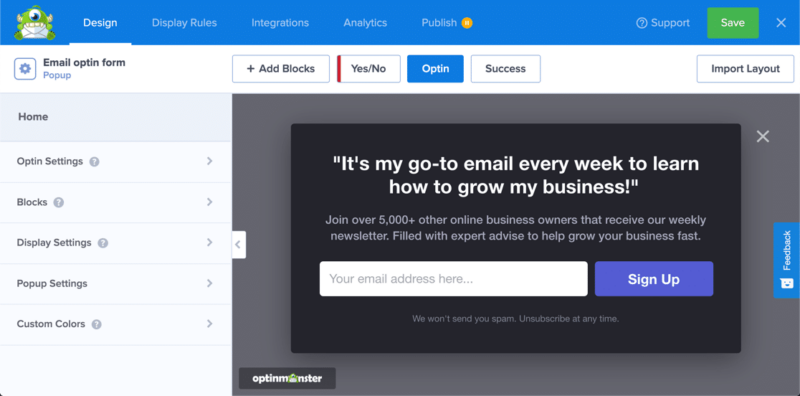
I particularly like its Exit Intent feature, which lets you display a popup form right when users are about to leave your website. In fact, Bonjour Lisbonne used this feature to double its email subscribers.
4. Track Your Blog Statistics
I knew nothing about statistics when I started blogging over ten years ago. I guessed what my visitors enjoyed reading.
I also didn’t know that you can get precise data about what your visitors like with Google Analytics.
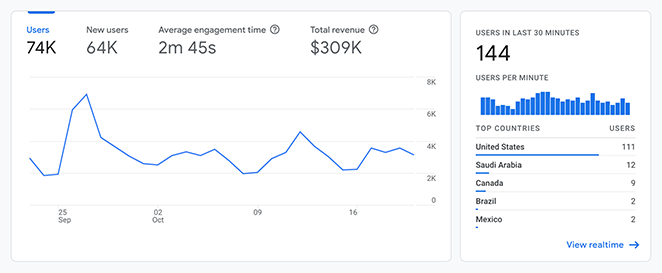
After setting it up, you can see:
- How many people visit your blog.
- Where your traffic comes from (search engines, social media, other websites).
- Which blog posts and pages are most popular.
- How long people spend on your site.
This data helps you make informed decisions about the type of content to create and which areas of your blog need improvement.
If you’re unfamiliar with Google Analytics, this guide can help you get started: How to Add Google Analytics to WordPress.
5. Create a YouTube Channel
Did you know that 92% of bloggers use social media to drive traffic to their content? Platforms like YouTube are a goldmine for reaching a wider audience interested in travel.
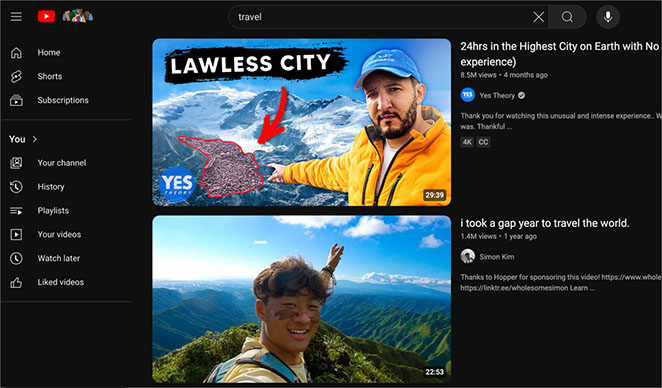
Consider creating a YouTube channel as an extension of your travel blog. Here’s why:
- Many travel enthusiasts turn to YouTube for inspiration and information.
- Video content is more captivating than text alone. In fact, the average video retention rate is around 54%. Share your experiences, showcase destinations, and connect with viewers through visually appealing content.
- You can embed YouTube videos into relevant blog posts to keep visitors engaged and drive traffic back to your site.
You don’t need to be a professional videographer to get started. Begin with simple videos and experiment with different styles to find what works best for you.
Step 8: Monetize Your Travel Blog
Traveling is expensive, but for some successful bloggers, it’s their full-time job. So, how do they actually make money?
Let’s explore some ways travel blogs generate income so you can start earning from your adventures, too:
1. Brand Sponsorships
Sponsorships are often the most glamorous perk for popular travel bloggers. Hotels, airlines, cruise lines, tour companies, and even tourism boards are willing to pay to be featured on blogs with a large, engaged audience.
Once your blog has a consistent flow of readers, you can start reaching out to companies for potential partnerships. In exchange for free stays, complimentary flights, or a flat fee, you’ll typically write about their services on your blog. Companies might also reach out to you to publish sponsored posts.
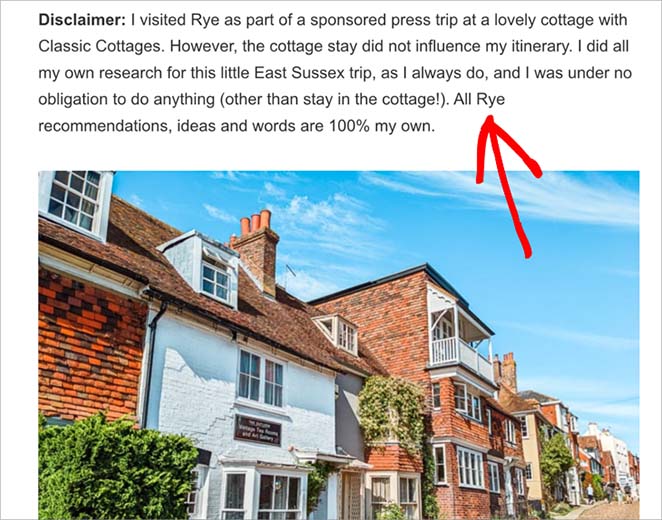
If you’re unsure who to contact, look at what other travel bloggers are doing. See which brands sponsor them, or reach out to hotels and airlines in destinations you’re interested in featuring.
While sponsorships are exciting, they might not be enough to sustain a full-time income when you’re just starting. That’s why I recommend checking out the following other tips.
2. Display and Text Advertisements
Most popular blogs, including travel blogs, rely on advertisements as a key revenue stream. The most common way to get started is through Google AdSense.
Google AdSense is like a middleman between bloggers and advertisers. Advertisers pay Google to display their ads, and Google, in turn, pays you a portion of that revenue when people click those ads on your blog.
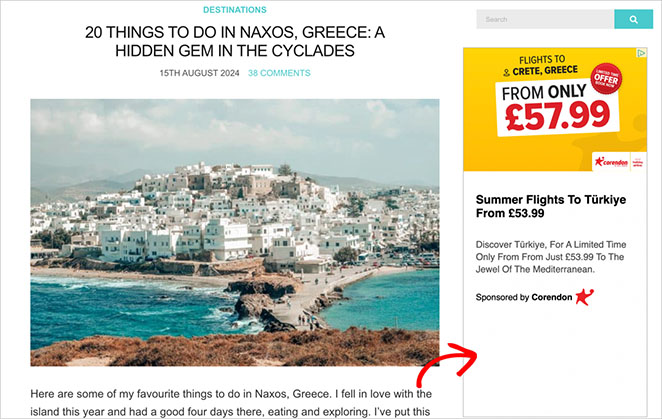
If you’re looking for alternatives to AdSense, consider platforms like Media.net and Mediavine. However, these often have stricter traffic requirements (meaning you need more readers to qualify), a lower revenue share for publishers, and a smaller pool of advertisers than AdSense.
3. Affiliate Marketing
Affiliate marketing is like recommending products you love to a friend – except you get a small commission if they purchase through your recommendation. It’s a win-win: Your readers discover useful products, and you earn a little something for sharing.
To make money with affiliate marketing, find travel-related products and brands with affiliate programs, such as backpack manufacturers, travel insurance companies, tour operators, or even travel gear companies.
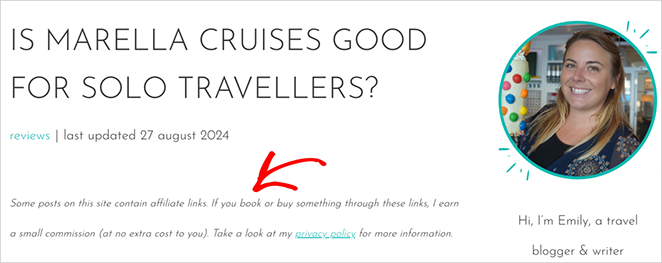
The biggest player in the game is Amazon Affiliates, with a massive selection of travel-related products: gadgets, accessories, luggage, clothing, electronics, and more.
You can also explore affiliate programs directly through travel companies like Booking.com, Expedia, and TripAdvisor.
4. Become a YouTube Travel Vlogger
As I’ve mentioned, YouTube offers tons of opportunities for travel bloggers. Since videos are super engaging (and, let’s face it, more fun to watch than reading sometimes), brands and advertisers are willing to invest in YouTube promotions.

While YouTube’s advertising program can generate some revenue, building a strong YouTube presence can also help you connect with brands for potential sponsorships. Plus, you’ll grow your audience and gain new followers.
Frequently Asked Questions About Starting a Travel Blog
Still have some questions about diving into the world of travel blogging? You’re not alone! Here are answers to some questions aspiring bloggers often ask:
What is a travel blog?
A travel blog is a website or section focusing on travel experiences, advice, and stories. It’s a place to share your adventures, inspire others to explore the world, and even earn income.
Do travel blogs make money?
Yes, travel blogs can generate income! You can monetize your blog through various methods, including:
- Sponsorships: Partnering with brands to promote their products or services.
- Advertisements: Displaying ads on your blog through platforms like Google AdSense.
- Affiliate marketing: Earning commissions for recommending travel-related products.
- YouTube monetization: Generating revenue through ads on your travel videos.
How much do travel blogs make?
The income potential for travel blogs varies widely. It depends on audience size, engagement, niche, monetization strategies, and consistency. While some travel bloggers earn a modest side income, others have turned their blogs into successful full-time businesses.
How to start a travel blog for free?
While starting a fully-featured travel blog for free has drawbacks (like limited customization and control), you can get started on free platforms like WordPress.com or Blogger. Remember that these options might restrict your monetization options and long-term growth potential.
I recommend investing in a custom domain name and hosting (which can be quite affordable) for a more professional and scalable blog.
Start Your Travel Blog and Make Money Today
Starting a travel blog is an exciting way to share your passion for exploration, connect with fellow travel enthusiasts, and potentially even earn an income. But remember, building a successful blog takes time, dedication, and a sprinkle of wanderlust.
Need a little extra help along the way? I’ve got you covered with these blogging resources:
- Best WordPress Blog Plugins for Easy Blog Management
- How to Make Your Blog Look Like a Website
- How to Create a Blog Page on WordPress
- How to Start Building an Email List to Grow Your Business
- How to Promote Your Blog: A Beginner’s Guide
To make the whole process of creating and customizing a travel blog easy, choose SeedProd. Build your travel blog in minutes without touching a single line of code.
Thanks for reading! We’d love to hear your thoughts, so please feel free to leave a comment with any questions and feedback.
You can also follow us on YouTube, X (formerly Twitter), and Facebook for more helpful content to grow your business.


