Do you want to learn how to make a one page website in WordPress?
One page websites only use a single webpage with a simple, modern design. That way, users can see all the information they need on one page without clicking away.
In this article, we’ll show you how to make a one page website in WordPress step-by-step.
Why Make a One Page Website?
If you look at most websites, they have one thing in common – they typically include page navigation, which sends users to other pages on the site, such as:
- Homepage
- About page
- Contact page
A navigation menu is a great solution for larger businesses or companies with a lot of information. But smaller brands may not need all that space to explain their products or services.
Moreover, a one page web design takes the information from a standard multi-page website and reduces it to a single page. It does that by adding distinct sections that appear as you scroll through the page.
There are several benefits to creating this type of website:
- Users can navigate your site more easily
- Your call-to-action is seen quicker
- It’s easier to optimize single web pages for mobile
- One page websites are easier to maintain
More importantly, since all your traffic goes to one page, your single-page site should see much higher conversion rates.
Naturally, large and complex businesses will struggle to fit all their information on a one page WordPress design. But if you’re running a small business site, a portfolio, or a simple storefront, this type of website is an excellent choice.
What to Include in Your One Page WordPress Site
Since your WordPress site has only a single page, you need to consider what you want to include. Your job is to provide everything your audience needs to learn about your business without cluttering the design or overwhelming visitors.
Simply put, everything you include on your single-page website should be there for a reason.
Here’s a general idea of what you should include on your one page WordPress site:
- Branding elements like your logo and tagline to make your site recognizable.
- An about section explaining who you are and what you do.
- A list of the products or services you offer.
- Reviews or testimonials to show social proof and build trust.
- A prominent call-to-action, compelling users to learn more, sign up, or purchase.
- Links to your social media profiles.
- Contact information so users can get in touch.
The order you display those details on your page is just as important.
The best practice is to add your CTA higher up on your page because it’s the most important element. Your contact details and social links should go near the bottom of your site.
Think about what you want your audience to see first and arrange your page accordingly.
How to Make One Page Website in WordPress
With the above in mind, you can follow the steps below to learn how to make a one page website in WordPress:
Step 1. Set Up WordPress Hosting and Domain
Before building your one page website, you first need to purchase a domain name and web hosting. A domain name is your website’s address on the internet while hosting is the home that stores your website’s files.
Many hosting companies include a free domain name as part of their hosting plans. For example, Bluehost’s WordPress hosting offers a free domain name for a year on every plan.

Bluehost’s small business plan also includes:
- Unlimited websites
- Unlimited storage
- Free CDN
- Free SSL certificate
The pricing is around $5 per month.
When you consider that Bluehost is also an official WordPress recommended hosting partner, they’re an excellent first choice for your business website. That said, you can shop around by checking out these best WordPress hosting providers.
Alongside your domain and hosting, you’ll also need to choose a WordPress theme to get started.
Most companies look for modern single-page themes to create their site. But for this tutorial, we’ll be using a website builder, so you won’t need a special one page WordPress theme.
Instead, we recommend using a fast and optimized theme to house your website. For instance, you could use one of WordPress’s official default themes or choose from these popular WordPress themes.
Just remember the design or theme options aren’t important. You’re looking for clean code and fast speeds to keep your website optimized.
If you need any help with setting up your site, check out this ultimate guide on how to make a website.
We’re going to recreate the Apple Plug one page site in this tutorial.
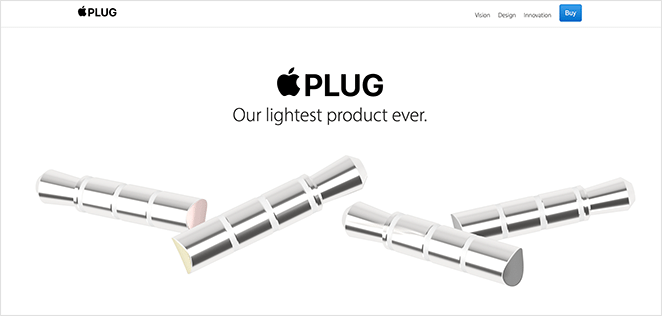
This site is a parody of an Apple product by Nicer, a company that builds apps for leading companies.
All we’ll use to create this site is a single, powerful WordPress plugin.

SeedProd is one of the best WordPress website builders on the market. It includes a powerful drag-and-drop editor and WordPress theme builder that allows you to create, customize, and launch any layout without writing code.
SeedProd is super-easy to use (even for beginners). Setting up your site is as easy as pointing, clicking, and seeing the changes happen automatically in real-time.
Step 2. Install SeedProd Website Builder
First, you’ll need to download the SeedProd website builder plugin and install and activate it on your WordPress site.
Note: SeedProd offers a free version, but we’ll be using SeedProd Pro for the Theme Builder features for this tutorial.
You can follow this guide for installing a WordPress plugin if you need help.
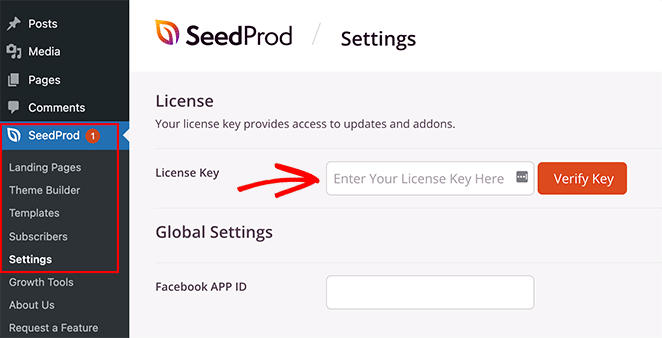
After activating SeedProd, head to SeedProd » Settings from your WordPress dashboard and enter your license key. You can find this information on your account page on the SeedProd website.
Step 3. Create Your Website Template
To make a custom one page website with SeedProd, you’ll first need to create a custom template. Don’t worry; creating a custom template with SeedProd is quite simple.
First, go to the SeedProd » Theme Builder page.
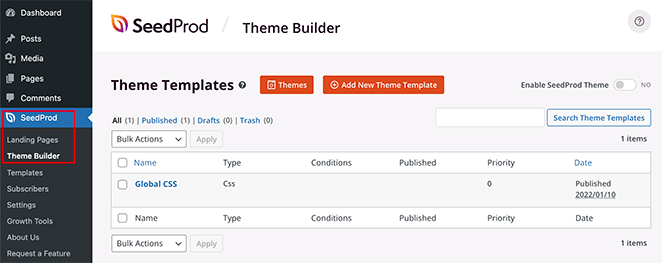
Typically, you’ll see the list of templates for your current SeedProd theme on this page. Since we haven’t made one yet, all you’ll see is the Global CSS template.
We typically suggest starting with one of SeedProd’s premade themes when building a website. But because we want to recreate the Apple Plug parody site, we’ll start from scratch.
To do that, click the Add New Theme Template button.
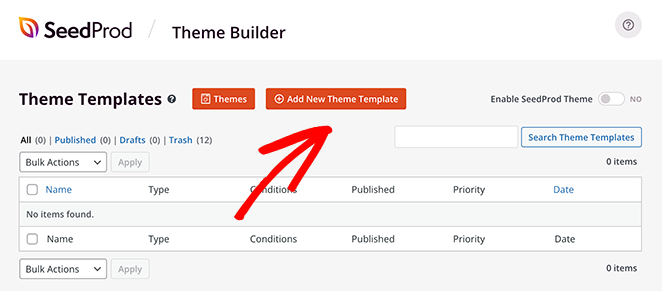
Then in the overlay window, give the template a name, and choose Custom Page from the “Type” dropdown menu. From there, click the Add Condition button and select the “Entire Site” option.
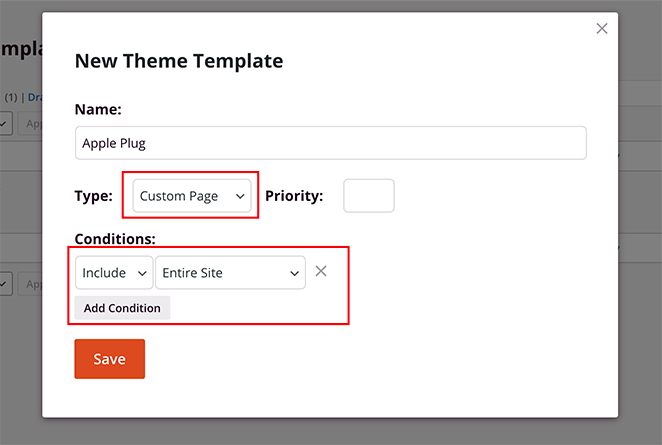
Those settings will ensure the page that you create with SeedProd will display everywhere on your website.
After creating your template, it will open in SeedProd’s drag-and-drop page builder, where you can customize the layout, design, and add your custom content.
Step 4. Customize Your One Page Website
In SeedProd’s drag-and-drop page builder, you’ll see a preview of your website on the right and an editing panel on the left.
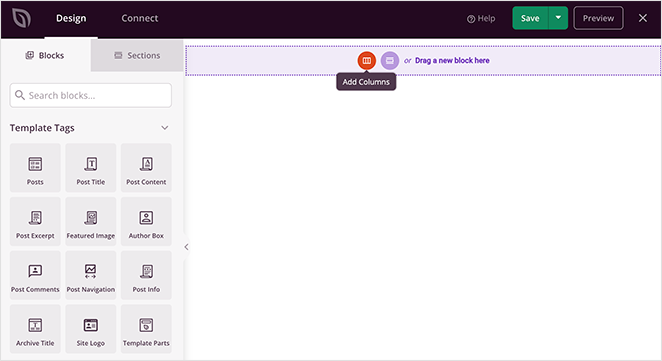
Creating a One Page Website Header
To start building your website, you’ll first need to add a new section. To do that, click the add columns icon and click a layout.
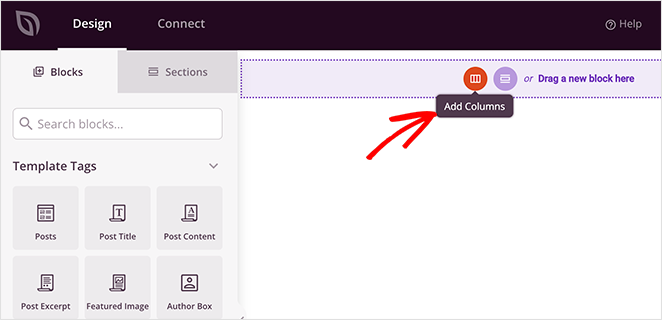
Since the Apple Plug website has a 3 column website header, we’ll choose the 3 column layout.
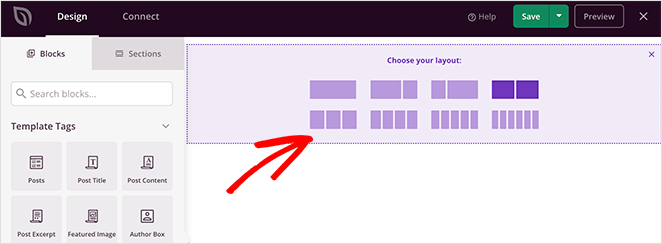
Next, drag the Image block from the left panel onto your new column like this:
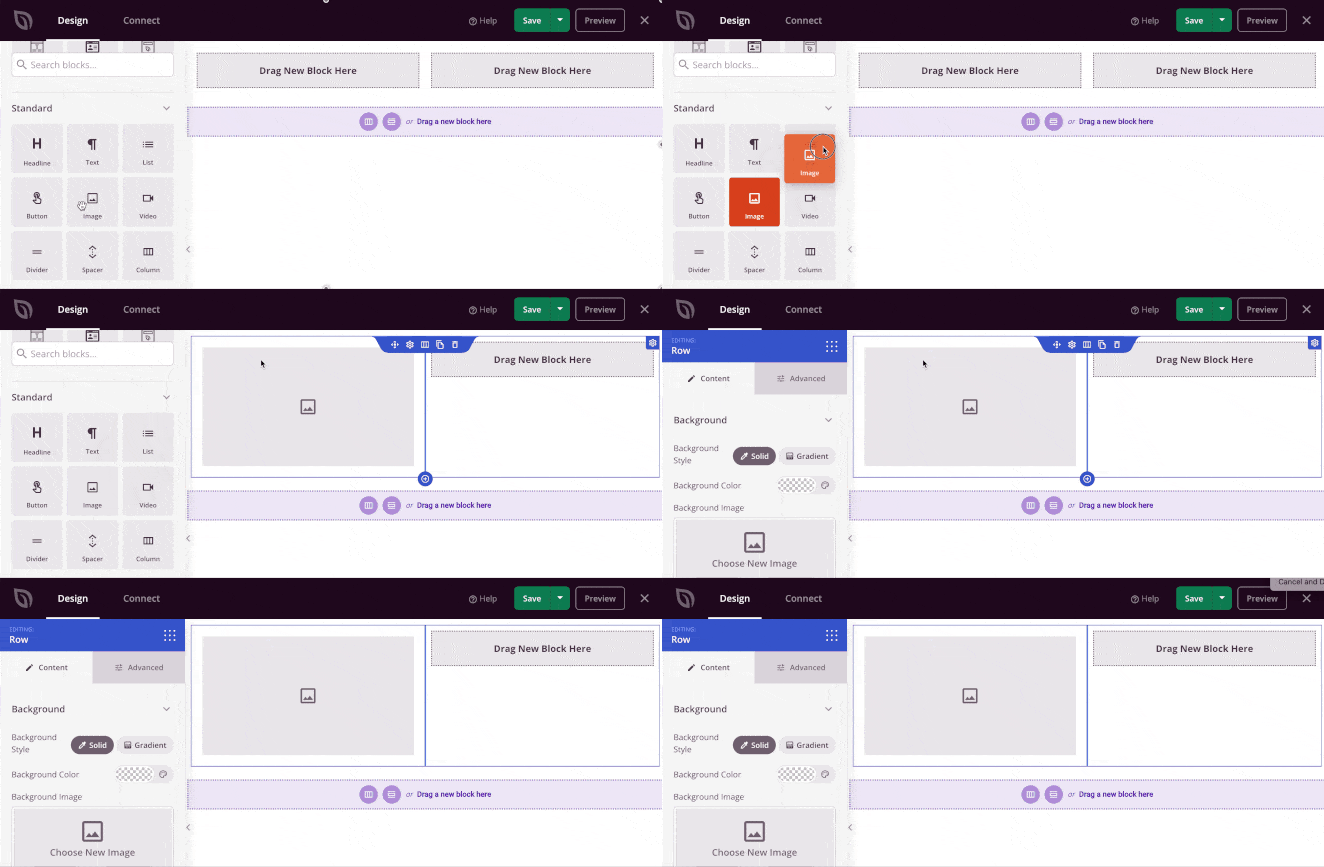
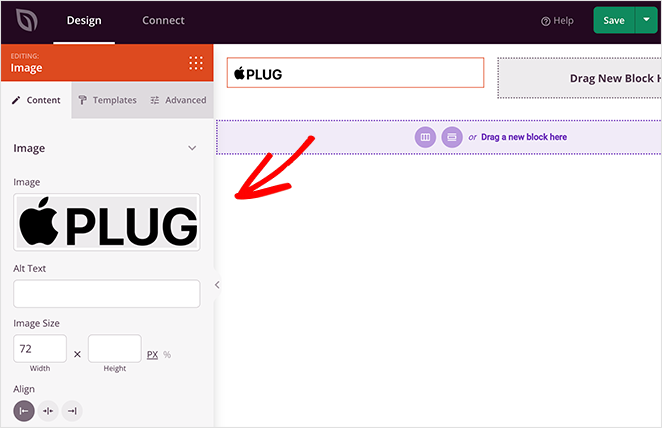
Now you can click the image block and upload a logo from your media library or computer. After uploading your logo, you can change its size, alignment and add a link by clicking the options in the settings panel.
Now let’s recreate the menu items. We’ll use SeedProd’s Nav Menu block for this, so drag it to the second column and add each menu item in the settings panel.
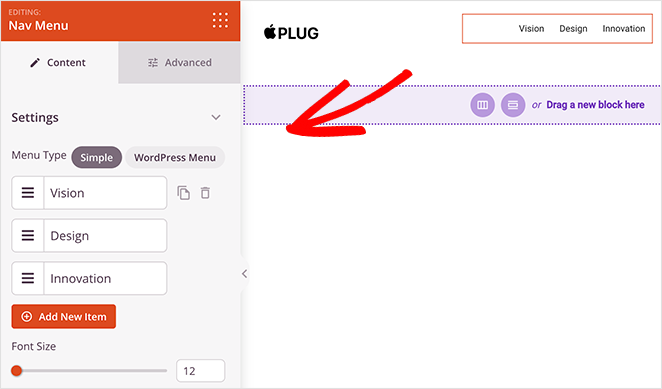
You’ll want to use the “Simple” Menu type for this design because we’ll be adding anchor links later, which allow users to jump to different sections of the page.
The last step for this section is to add a “Buy button”. You can do that by dragging the Button block from the left-hand panel and dropping it into your final column.
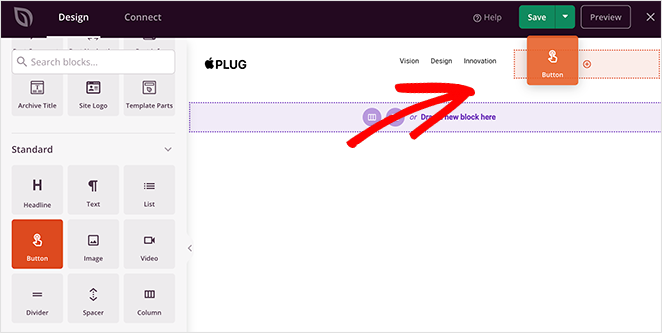
From there, you can link the button to your checkout page. Then in the “Advanced” tab, you can customize your button color, spacing, and border by pointing and clicking.
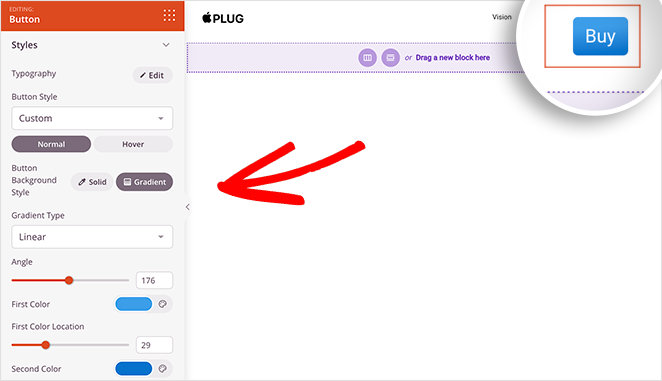
When you’re happy with the header of your one page site, click Save.
Adding Different Content Sections
When you look at the example we’re re-creating, you’ll see that the page has 7 different sections:
- Hero
- Vison
- Design
- Innovation
- Materials
- Features
- Call to Action
Each section explains a different aspect of the product without taking up too much space. It also helps readers flow through the page until they hit the call to action.
Creating each section is easy with SeedProd.
First, add a new single-column section as you did with the header area. Then drag over an Image block and upload your logo once more.
Next, you’ll need to add SeedProd’s Headline block. This block allows you to set your headline level from H1 to H6. You can also click the “Advanced” tab to customize the font, colors, and spacing.
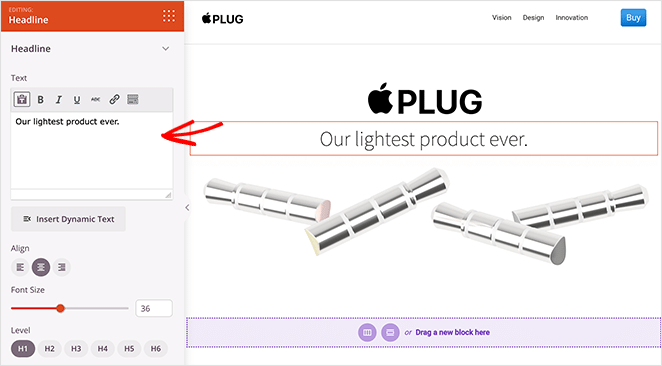
Repeat this step for each section of your one page website. For example, the following section requires a 2 column layout, two headline blocks, an image block, and a simple text block.
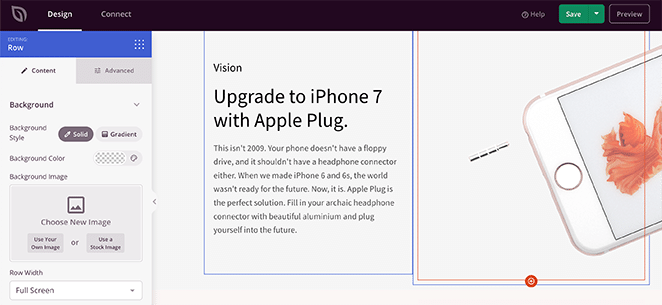
The following 2 sections are the same. You can duplicate your first section and change the contents to make things easier. To do that, hover over a section and click the duplicate icon.
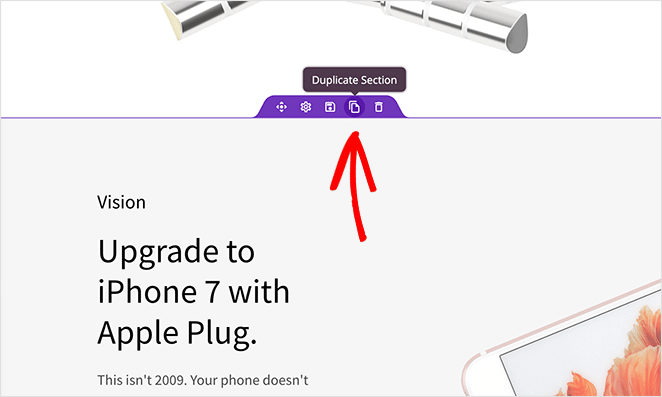
Your new section will appear right below the original.
Adding Anchor Links
Most one page websites use anchor links to help readers navigate instead of a typical navigation menu. That way, users can jump to the section that interests them the most.
Adding anchor links with SeedProd is easy. All you need to do is find the Anchor block and drag it to the section you want to link to.
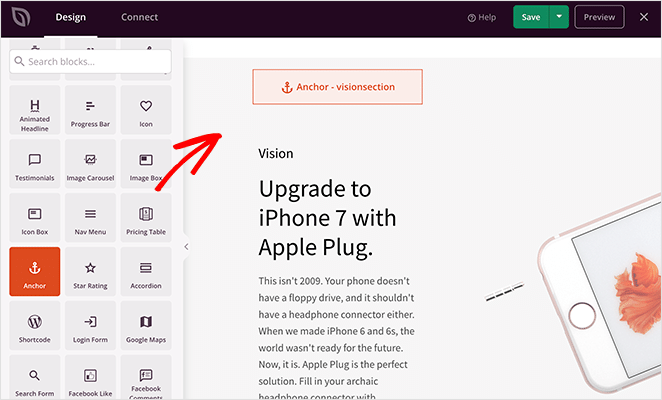
Then in the settings panel, give your anchor a name.
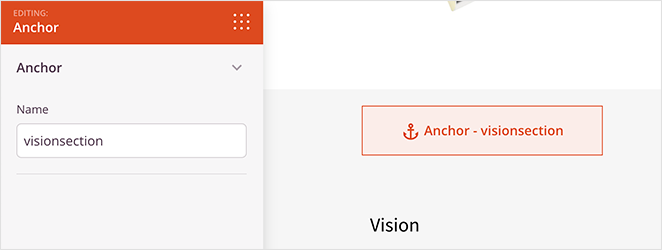
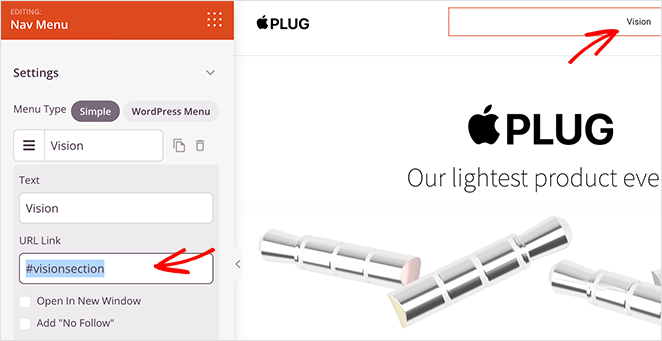
Now let’s link the section to a menu item. To do that, click a menu item, and in the “URL Link” field, type the hashtag symbol and the name of your anchor. In our case, that would be #visionsection.
Remember to save your changes before moving on.
Adding a Signup Form
The final section of this single-page website is the call-to-action area. Because this website is a parody, it needs a way to stay in touch with visitors who want to learn more.
The easiest way to do that is with SeedProd’s optin form block. It adds a customizable form to your site where users can enter their email addresses to receive updates and notifications.
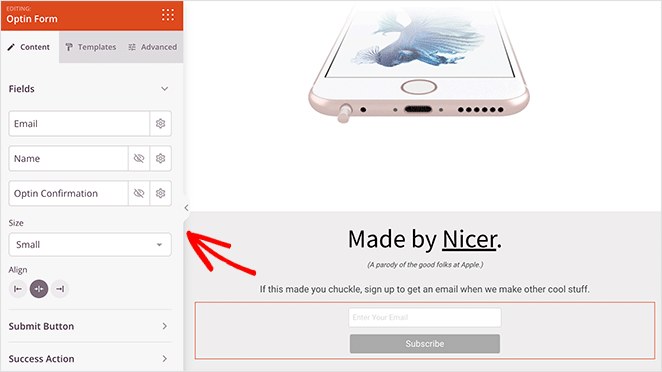
You can customize the form fields, buttons, colors, spacing, and more with a few clicks.
Some other crucial elements you can add to your one page site with SeedProd, include:
- Social profile icons to grow your social media followers
- Testimonials to boost trust and credibility
- Countdown timers to create urgency
- Add to cart buttons to direct users to your WooCommerce checkout
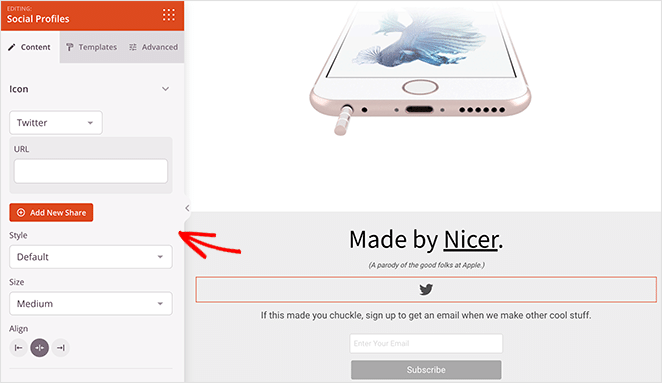
The options are endless, and it takes no time at all to get your site looking how you want.
When you’re happy with how your site looks, click the save button in the top-right corner of your screen.
Step 5. Connect Your Email Marketing Service
The next step is to connect to your email marketing service. This is a good idea if you plan on collecting email addresses from your site to build your email list.
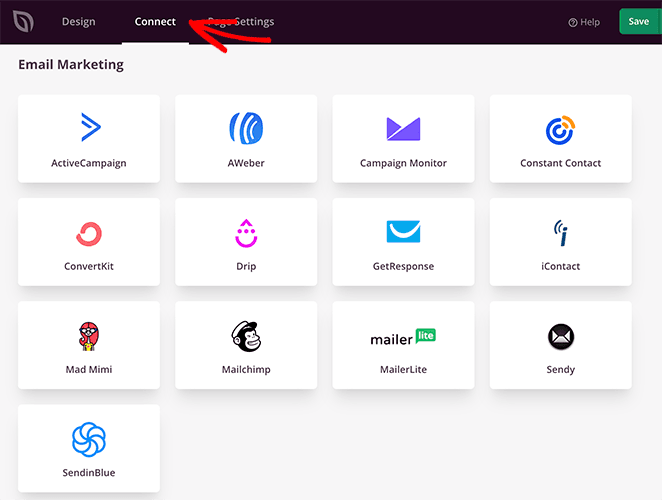
Click the Connect tab at the top of your page builder, and choose from the many email services available. Select your preferred email service, click Connect, and follow the instructions to connect your email list.
See our email integration documentation for specific instructions on integrating each email marketing service.
Step 6. Publish Your One Page Website
Now you’re ready to make your new website live. To do that, exit the builder and head back to the Theme Builder dashboard.

From there, turn the Enable SeedProd Theme toggle to the On position.
You can now visit your website homepage and see your one page website in action.
Here is the original again:

Then here is the website we recreated with SeedProd:
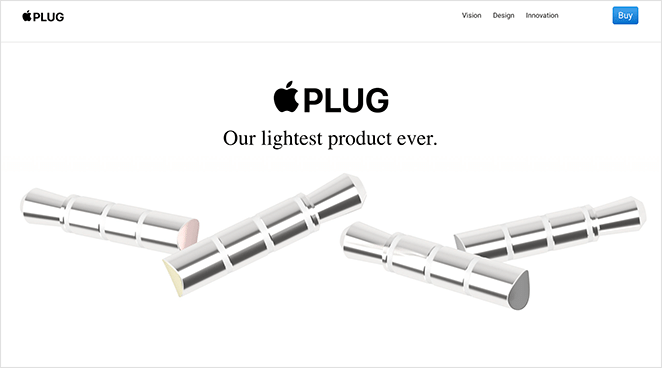
Great work; you’ve now made a website just like the original example. Wasn’t it easy?
You now know how to make a one page website in WordPress with SeedProd. The great thing about SeedProd is you can make so many different types of layouts without touching a single line of code.
Are you ready to create a custom one-page website?
If you’re not ready to make your site visible to the public yet, check out this guide on creating a coming soon page in WordPress.
If you liked this article, please follow us on YouTube, Twitter, and Facebook for more helpful content to grow your business.


