Do you want to make a lead capture landing page for your WordPress website?
With a successful lead capture page, you can skyrocket your email list and transform interested website visitors into leads and paying customers. You might think making this type of page is difficult without hiring a developer. But with the right tools, it’s surprisingly easy.
In this article, we’ll show you how to create a lead capture page in WordPress easily.
How to Create a Lead Capture Page in WordPress:
Before we start, let’s answer the question, “What is a lead capture page?”.
What Is a Lead Capture Page?
A lead capture page is a type of website landing page that usually includes an optimized optin form. This form allows you to collect the email addresses of your website visitors in exchange for an offer.
Once users have joined as email subscribers, it’s easier to nurture leads down your marketing funnel and increase conversion rates.
For your page to be successful, it needs to offer visitors something valuable in return for handing over their email addresses. Plus, getting the right balance between the “ask,” the form fields you use, and the “reward,” the offer you’re promoting, is crucial.
Your form shouldn’t ask for more contact information than you need, for instance, an email address. Otherwise, you risk scaring visitors away on their first interaction with your page.
Bottom line: Lead capture pages are important for your business because they help you collect valuable information from visitors, allowing you to nurture them into paying customers.
What to Include on Your Lead Capture Page
When making a lead capture landing page, you should include the following page elements:
- Headline: Use an attention-grabbing headline to encourage users to stay on your page. The best approach is to use your unique selling point in your headline.
- Call to Action button (CTA): Your CTA button color should contrast with your page. You should also personalize the button copy to make it more actionable. For instance, use “Send me my eBook” instead of “Download eBook.”
- Lead capture form: Your lead capture form should only include form fields for the information you need. It should also be easy to navigate.
- Images: Use eye-catching photography of your offer or custom graphics. If you’re offering an ebook, use a photo of the book or a headshot if you’re promoting a webinar.
- Copy: Your landing page copy should clearly explain your offer. Consider teasing the information bit by bit to encourage users to keep reading, leaving no other option but to convert.
- Testimonials: Using positive customer reviews on your landing page helps potential customers see your product or service’s value.
- Trust seals: Trust seals are ideal to use on eCommerce lead capture pages. For example, PayPal and SSL logos are both trust seals. They work by reassuring visitors that their payment information will be kept secure.
You might also like these landing page best practices for tips on getting started.
Now that you know what to include in a lead page, let’s look at how to create one in WordPress.
How to Create a Lead Capture Page for your Website
When creating a lead capture page for WordPress sites, you have several options.
You can either:
- Hire a developer to create the landing page
- Ask an in-house team member to make the page
- Build the page yourself with a page builder plugin
Hiring an outside developer can be expensive, and you won’t have the advantage of managing and optimizing your page from within your business. Asking an in-house team member to build the page for you can put a burden on their time with the amount of coding needed and connections to third-party marketing software.
Creating a lead capture landing page with a WordPress page builder plugin, like SeedProd, is much more cost-effective. Not only will you have complete control over your page, but you also won’t need any coding or design experience.

You can build your pages faster with SeedProd’s pre-made landing page templates. Every template is optimized for generating leads and is completely customizable with the visual drag-and-drop page editor.
While there are several other page builders to choose from, SeedProd is our favorite choice for building a lead capture page and is what we’ll use for this guide. However, here’s a quick comparison of the different page builder options so you can decide for yourself:
| Feature | SeedProd | Elementor Pro | Others |
|---|---|---|---|
| Focus | Easy lead capture pages | Flexible website & landing pages | Landing pages & features |
| Ease | Beginner-friendly | Moderate learning | Varied (some easy, some complex) |
| Price | Affordable | Mid-range | Varied (SeedProd usually cheaper) |
| Lead tools | Built-in, good selection | Add-ons needed | Varied (most offer some) |
| Integrations | Main tools covered | Wider range | Varied (SeedProd covers common ones) |
To create a successful lead capture page in WordPress with SeedProd, follow these steps.
If you’d prefer to read the written instructions, follow the steps below.
Step 1. Install SeedProd Landing Page Builder
First, click here to get started with SeedProd and download the plugin to your computer. Then, if you need help, follow these instructions for installing a WordPress plugin.
After installing and activating SeedProd, you’ll see a page asking you to validate your SeedProd license key. This key will be sent to your registered email address after purchasing the plugin.

Copy the license key and paste it into the blank field on your screen. Then, go ahead and click the Verify Key button.
After verifying your license key, scroll down the page and click the Create Your First Page button.
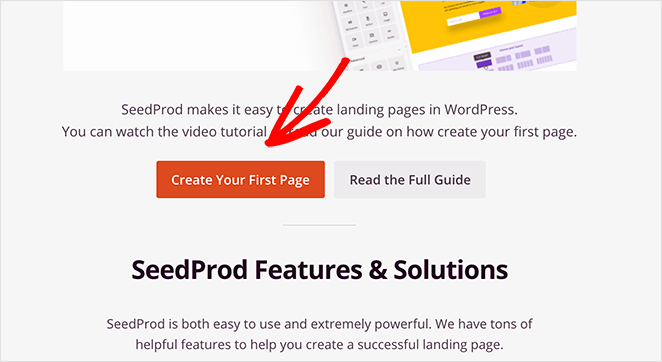
This will redirect you to the SeedProd landing page dashboard, where you can begin creating your lead capture page.
Step 2. Create a New Lead Capture Page
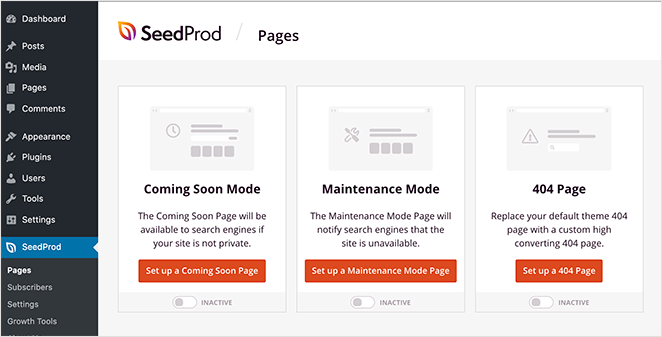
On the SeedProd landing page dashboard, you’ll see 3 different options along the top:
- Coming Soon Mode – To add a coming soon page to your website.
- Maintenance Mode – For putting your website in maintenance mode.
- 404 Page – To display a 404 error page on your website.
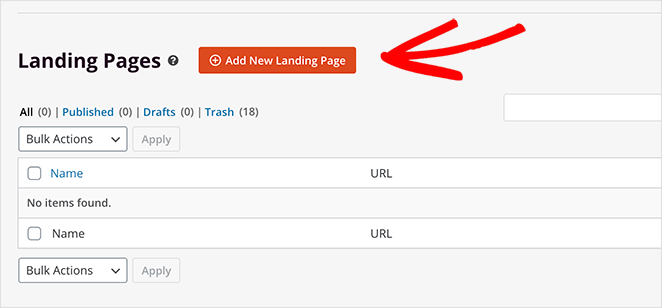
Under that section, you’ll see an area that lists all of your recently created landing pages. To get started, click the Create New Landing Page button.
After clicking the button, you’ll see the landing page template library. All of the SeedProd landing page templates are professionally designed and can be customized in real time with the drag-and-drop page builder.
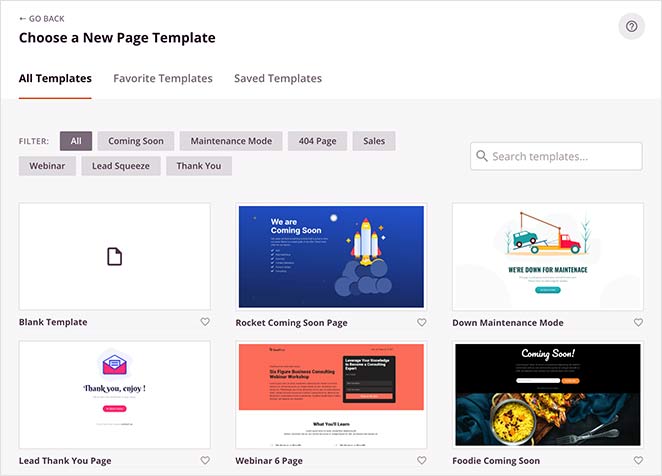
You can filter the templates by clicking one of the following options at the top.
Click the Lead Squeeze filter to view the different lead capture page templates, then choose a template that closely matches how you want your page to look.
Related: 11 High-Converting Squeeze Page Examples to Boost Your List
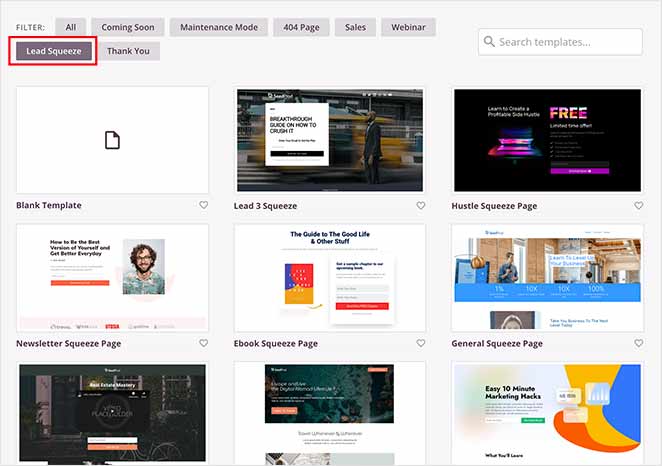
Don’t worry if you can’t find the perfect template. You can easily add and remove page elements and customize the template in the visual page builder.
To choose and launch the template, hover your mouse over the template thumbnail and click the tick icon.
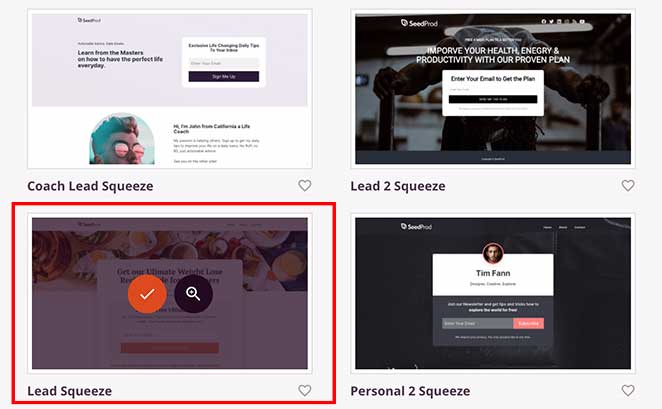
For this tutorial, we chose the Lead Squeeze template.
After clicking the tick icon, a window will appear asking you to give the page a name and URL. This can be anything you like, and you can change the details later. Then click the Save and Start Editing the Page button.
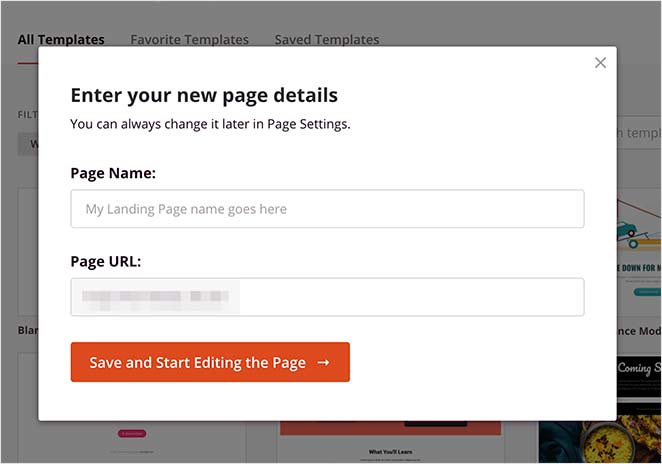
Your landing page will now open in the SeedProd drag-and-drop page builder, where you can make changes in real-time with no coding required.
Step 3. Add Your Lead Capture Page Content
Before diving into the design, decide on the best type of form for your lead capture page’s goals. Here are some common options:
- Contact Forms: Gather basic information like name, email, and any inquiries.
- Opt-in Forms: Designed for collecting email addresses in exchange for resources (eBooks, discounts, newsletters).
- Webinar Registration Forms: Allow visitors to sign up for webinars, often including additional fields for relevant details.
SeedProd makes it easy to create any of these form types right in the drag-and-drop page builder, giving you complete customization over the design and functionality of your lead capture page.
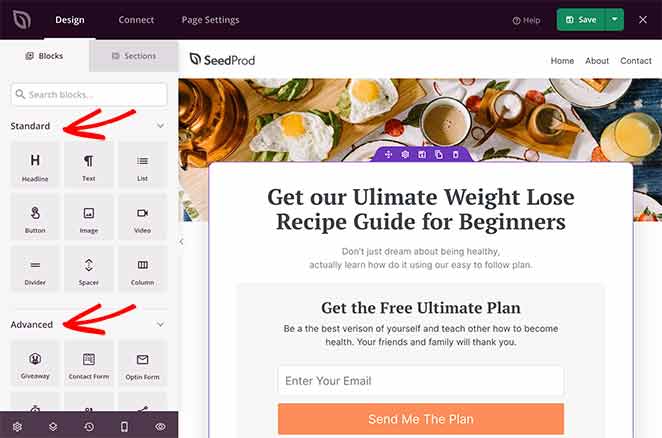
On the left side of your screen are the different landing page blocks. These are page elements that you can drag onto your landing page to add new content.
SeedProd’s landing page blocks are divided into 2 different sections: Standard and Advanced.
Standard blocks include everything you need to change your page’s overall design. For instance, you can add images, videos, buttons, columns, headlines, text, spacers, and more.
The Advanced blocks are focused on helping you generate leads for your business. For instance, you can use the giveaway block to run a RafflePress giveaway on your landing page. Giveaways are an excellent way to raise brand awareness, grow your email list, and generate leads.
Other advanced blocks include contact forms, optin forms, countdown timers, social profiles, anchor links, social media sharing buttons, star ratings, and more.
Adding a block to your lead capture page is as simple as dragging one from the left-hand panel and dropping it onto your page.
For example, you might want to add a star rating to the template’s testimonial area to show visitors how other customers value your product or service.
To do that, click the Star Rating block in the left panel and drag it onto the testimonial section.
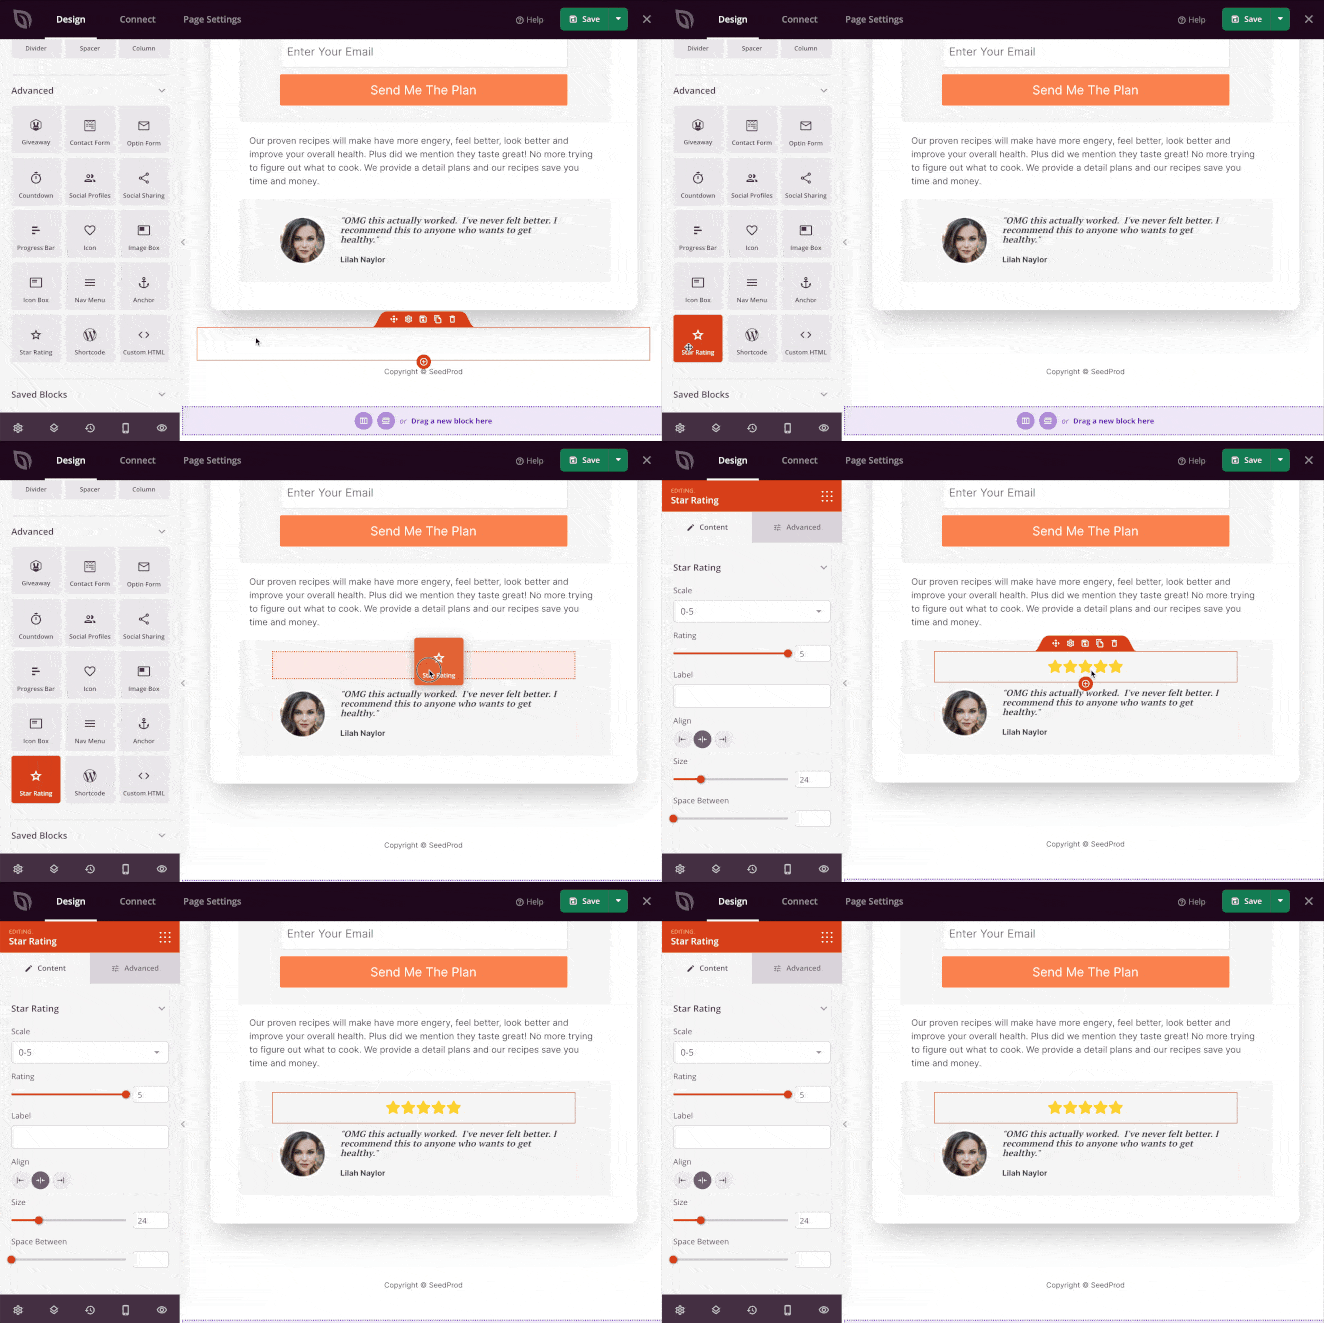
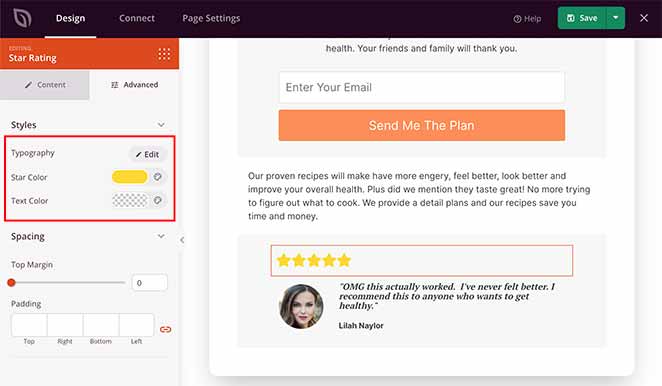
You can then click the block to change the star rating scale, label, size, and alignment. Then, in the Advanced tab, you can change the font, spacing, and colors.
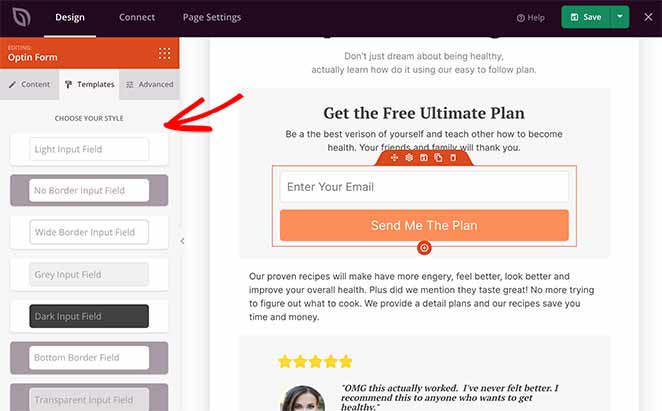
As mentioned earlier, many of SeedProds’ landing page blocks come with pre-made templates, making it easier to pick different styles.
For instance, clicking the optin form block on your page shows you the different customization options for that block. Then, if you click the Templates tab, you can choose from several pre-made field styles.
Along with page blocks, there’s also a tab for page Sections. Clicking this tab shows various pre-made page sections you can add to your page with a single click. This saves you from having to build whole page sections block by block.
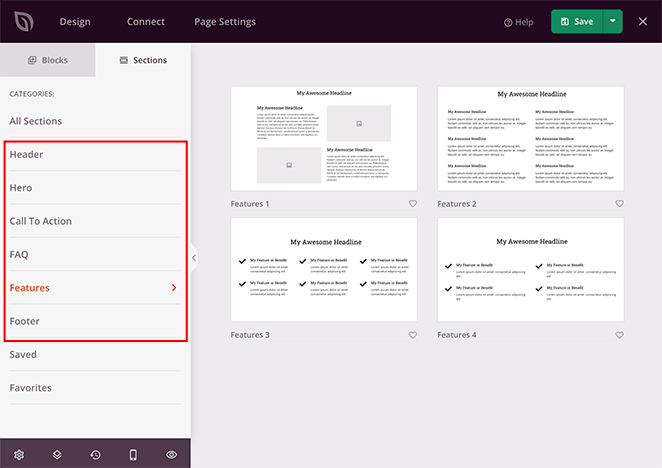
There are different section designs for your page…
- Header
- Hero
- Call to Action
- FAQ
- Features
- Footer
Click any section to add it to your lead capture landing page automatically.
In the following example, we added a Features section, which can help visitors learn more about your offer.
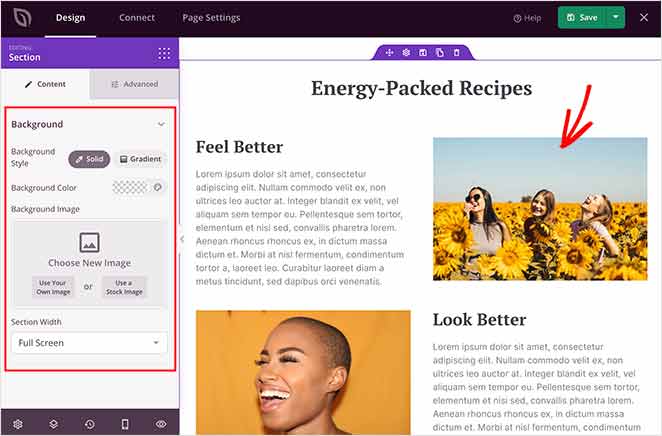
While adding content to your page, make sure you click the green Save button periodically to preserve your changes.
When you’ve finished adding content to your lead capture page, you can move on to customizing the look and feel to match your brand.
Step 4. Customize Your Lead Capture Page
Customizing the look and style of your lead capture landing page is super easy. Just click the gear icon in the bottom-left corner to view your global page settings.
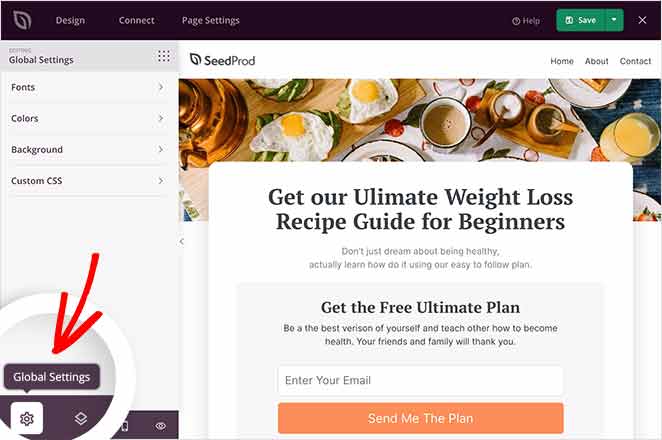
In this area, you can change your global page fonts and colors, upload a new background image, and add custom CSS.
Let’s start by changing the background image. First, click the Background tab to see all the options.
Here, you can set the background as a solid color or gradient or upload a new image. You can also use a video as your background or create a background slideshow by toggling the options on.
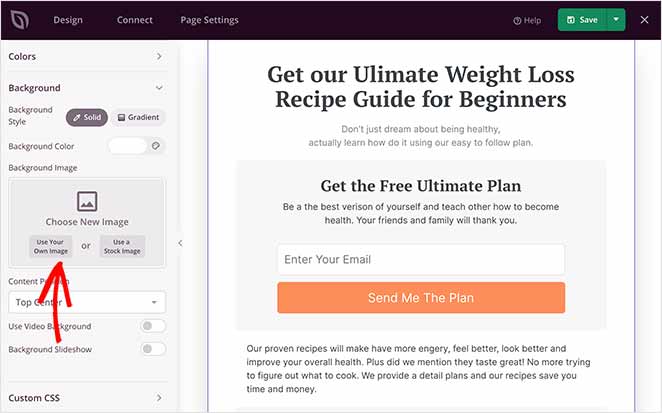
To upload a background image, navigate to the Background Image heading and click Use Your Own Image. You can then choose an image from your WordPress media library or upload one from your computer.
Now, let’s look at how to change your landing page colors. Click the Colors tab to see the different options. Here, you can change the global color options for your header, text, buttons, links, and more.
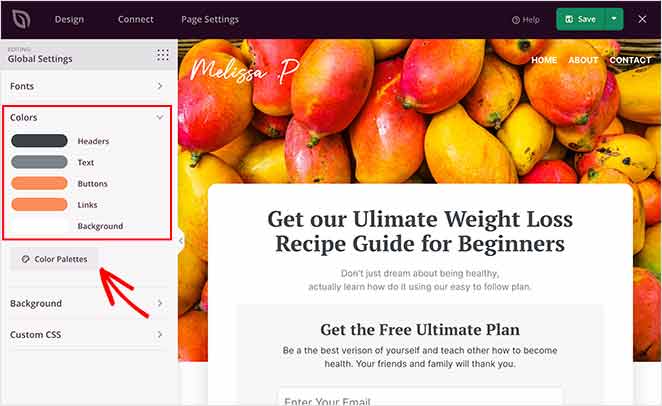
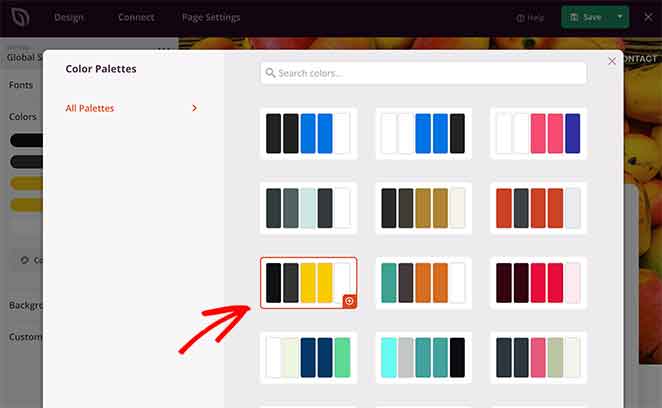
If you prefer, you can click the Color Palettes button and choose from various pre-made color combinations and implement them with a single click.
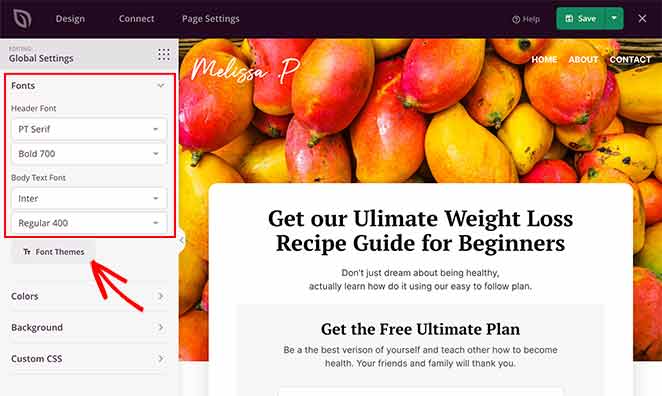
You can follow the same approach to change your global page fonts. Just click the Fonts tab and select from hundreds of Google web fonts and weights for your header and body text.
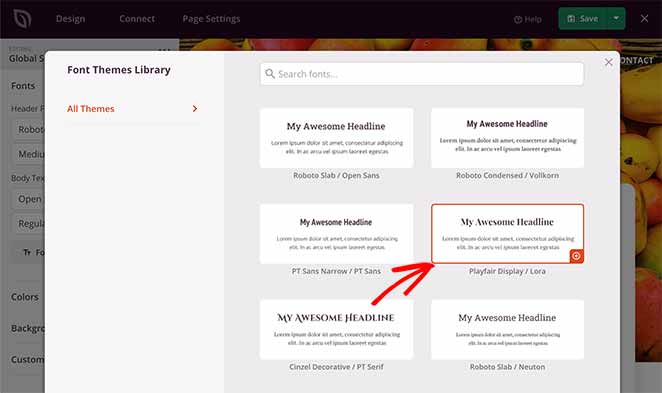
It’s also possible to click the Font Themes button to view various font combinations and preview what they’ll look like on your page.
When you’re happy with your landing page customizations, click the Save button to preserve your changes. You can then move on to connecting your email list.
Step 5. Connect Your Email List
If you want to grow your email list and manage the new leads you receive, you’ll need to connect your email marketing service to your lead capture page. Doing this with SeedProd is incredibly easy, as it integrates with many of the most popular email marketing services.
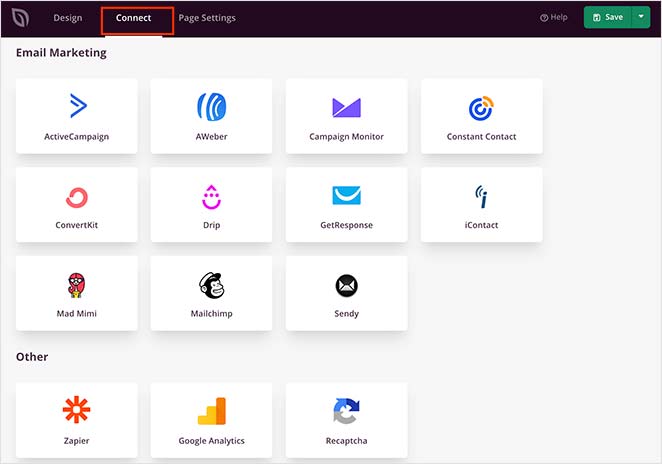
First, click the Connect tab at the top of the page builder. This will show you all the different email providers you can connect with your page.
To connect your email marketing service, simply find it in the list and click Connect New Account.
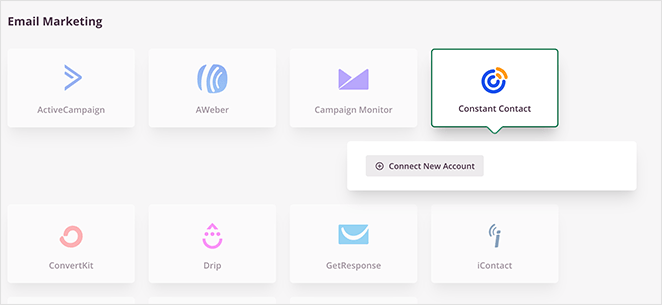
Then, follow the on-screen instructions to link your service and authorize your account.
For the full instructions for integrating specific email providers, see the SeedProd integration documentation.
On the same page, you can also connect to Google Analytics to track your page performance, Recaptcha for spam prevention, and integrate with thousands of third-party apps via Zapier.
Step 6. Configure Your Page Settings
The next step is to configure your landing page settings, so go ahead and click the Page Settings tab.
You can edit your general page settings on this page, such as the page title, URL, and published status. You can also enable Isolation Mode, which only loads the elements needed to render your landing page, preventing any WordPress theme or plugin conflicts.

If your business website uses an analytics plugin like MonsterInsights, and an SEO plugin, you can also configure their settings via this page by clicking the relevant tabs.
Then in the Scripts section, you can insert header, body, and footer scripts. This is particularly useful if you wish to use retargeting on your landing page or add your Facebook tracking pixel.
Remember to click Save before moving on to the final step.
Step 7. Publish Your Lead Capture Page
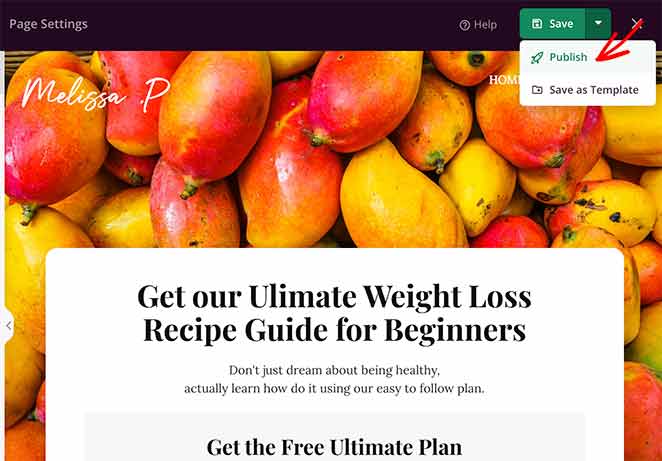
Now it’s time to make your page live and publish it on your WordPress website. To do that, click the downwards arrow next to the green Save button and click Publish.
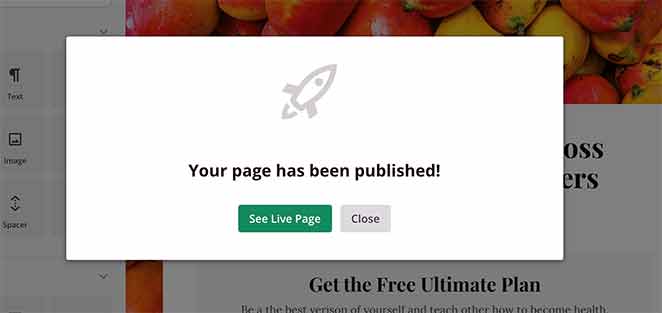
An overlay will appear telling you that your page has been published. Now, you can click the See Live Page button to see how it looks.
Congratulations!

You now know how to create a lead capture page in WordPress.
Building landing pages in WordPress with SeedProd is super-easy. With pre-made landing page templates, the lightning-fast visual builder, and tons of customization options, creating any page is a breeze.
SeedProd helps you generate leads, boost sales, and grow your business with no coding required.
For more help growing your WordPress website, check out the following guides:
- 7 Best WordPress Banner Plugins to Boost Leads
- How to Make a 404 Page in WordPress That Generates Leads
- 7 Request a Demo Landing Page Examples Proven to Boost Leads
- 10 Best SaaS Landing Page Examples for More Leads
If you liked this article, then please follow us on Twitter and Facebook for more useful business growing tips and tutorials.

