Do you want to embed a WordPress image carousel on your website?
In my 10+ years of working with WordPress, I’ve found that image carousels are a visually striking way to enhance engagement on any website. But it’s often hard to find a WordPress carousel plugin that’s both powerful and easy to use if you’re a beginner.
In this article, I’ll show you how to create an image carousel on your WordPress website easily. You’ll see how to make a responsive image carousel, a simple slider, or a full product gallery depending on what you need.
🧠 Quick Summary: How to Create a WordPress Image Carousel
- Use SeedProd 🧩 – Add carousels to any page using the Image Carousel block
- Try Jetpack 📸 – Enable full-screen gallery carousels in posts and pages
- Add Product Carousels 🛒 – Use a free plugin to create WooCommerce image sliders
How to Create Image Carousels for Custom WordPress Pages

SeedProd is the best WordPress website builder, with over 1 million users. It includes a built-in WordPress carousel plugin that makes it easy to add image sliders without code. With its drag-and-drop page builder, you can add multiple image carousels and sliders to any page of your site without coding.
You can also use SeedProd to:
- Create a custom WordPress theme
- Grow your email list with opt-in forms
- Show your physical location with Google Maps
- Create urgency using countdown timers
- Boost engagement with social media embeds
- Draw attention with animated headlines
- Engage visitors with video embeds
- Build trust and credibility with testimonials
With this in mind, let’s look at how to add an image carousel to your website using SeedProd.
Step 1: Install and Activate the SeedProd Plugin
The first step is to download a copy of the SeedProd plugin. While SeedProd has a free version for creating simple landing pages, we’ll use the Pro version to access all of the advanced features.
Next, upload, install, and activate the plugin on your WordPress website. If you need help with this, follow these instructions for installing a WordPress plugin.
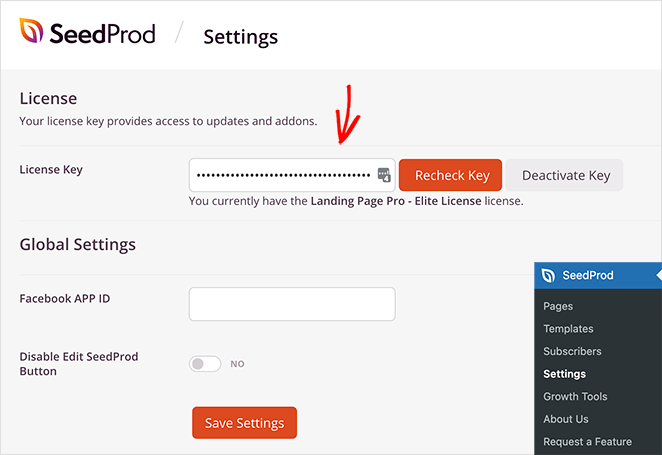
After activating the plugin, head to SeedProd » Settings, where you can enter your SeedProd license key. You can find your license key in your SeedProd account area in the Downloads section.
Step 2: Create a WordPress Landing Page
The next step is to navigate to SeedProd » Pages to create a new landing page.
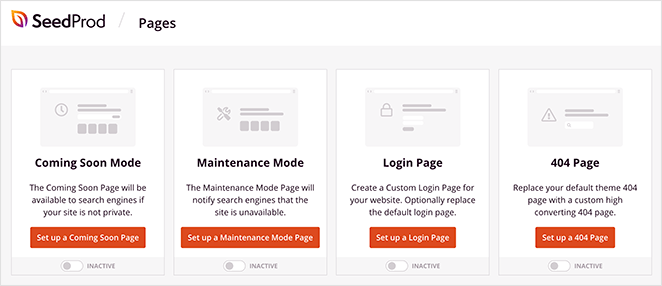
At the top of this page are 4 different page modes you can activate with a single click, including:
- Coming soon – Enable a coming soon page to tell visitors (and Google) about your new website.
- Maintenance mode – Let visitors know you’re temporarily down for maintenance.
- Login – Activate and create a custom WordPress login page.
- 404 – Enable a custom 404 error page on your WordPress site.
Under the page mode section, you’ll see any landing page you create with the SeedProd plugin. You can make as many custom WordPress pages as you like.
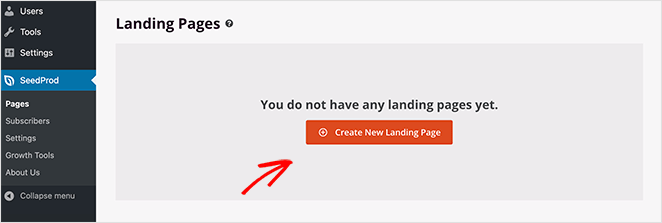
Click the Create New Landing Page button to make a new page. Doing so shows SeedProd’s library of responsive landing page templates.
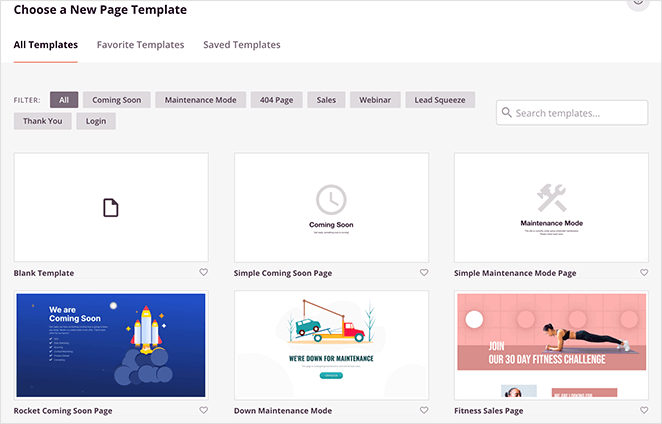
You can choose any landing page design you like, but we suggest picking a template that is close to how you want your page to look. That way, you won’t need to make too many changes.
For this post, I used the Travel Webinar Page template, which you can find by clicking the Webinar tab at the top of the screen.
To choose this template, hover your mouse over the thumbnail and click the orange tick icon.

Next, you’ll see a popup where you can add a page name. The page name won’t appear on your landing page design, but it does set your page’s URL. So, choose a name that makes sense to your visitors when they visit your page.
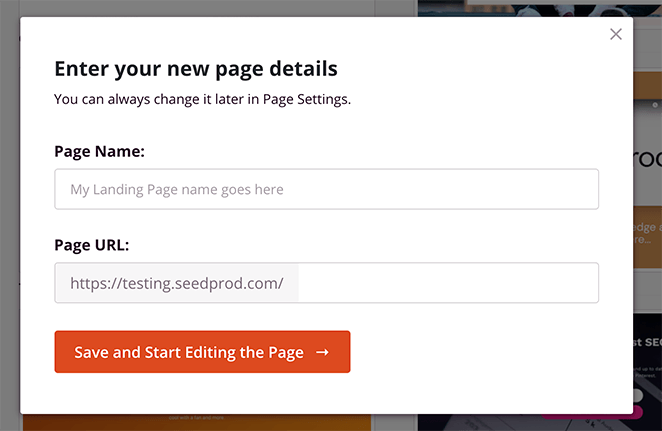
Now click the Save and Start Editing the Page button.
Step 3: Customize Your Landing Page Content
After launching your template, you’ll see SeedProd’s page builder screen. With the drag-and-drop interface, you can edit every part of your template.
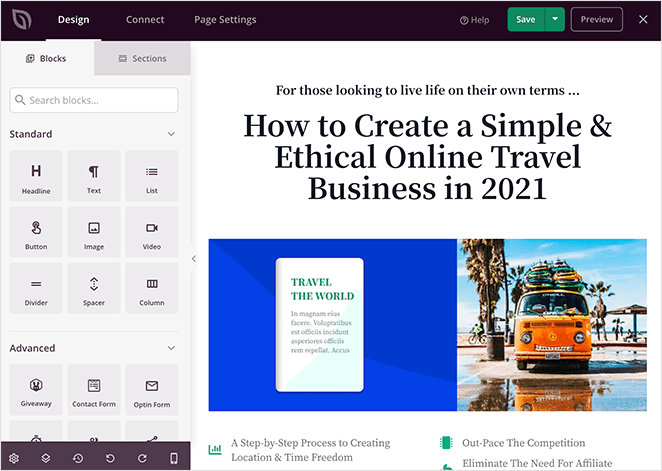
The left-hand sidebar has a wide selection of blocks that you can drag and drop onto your page. Once a block is on your page, you can click it to show the content, templates, and advanced customization settings.
For example, if you want to add your logo to your landing page, just drag the Image block from the left-hand panel and drop it onto your page.

From there, you can upload a new image or choose a logo from your WordPress media library. You can also adjust the size and alignment and add a link.
If you want to customize your page’s colors, fonts, and backgrounds, it’s just as easy. From the bottom-left area of your page builder, click the gear icon to show the Global Settings panel and customization options.
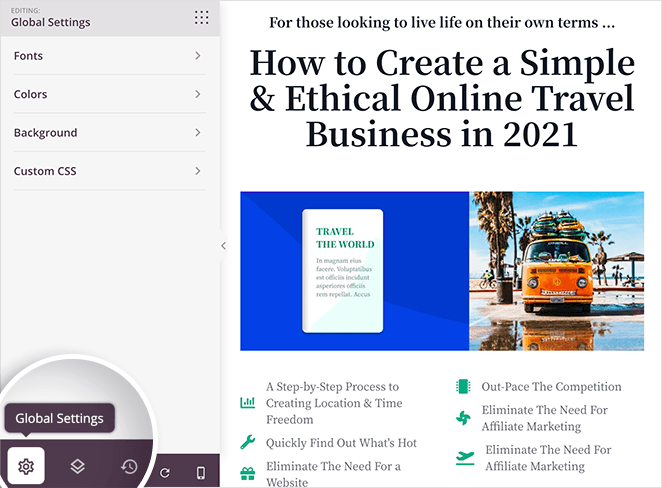
You can click the Fonts, Colors, or Background tabs to customize your landing page. For example, if you click the Background tab, you can upload a custom background image or change the gradient or color overlay.
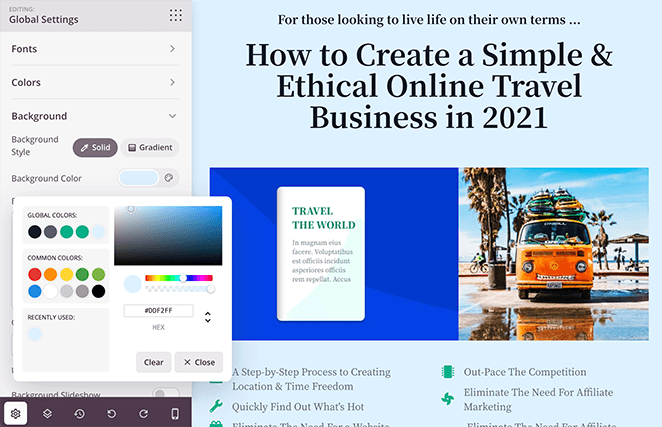
You also have the option to use a video background or a background slideshow.
Step 4: Add the WordPress Image Carousel Block
But the reason why you’re here is to add a carousel to your page easily. To do this, you can use SeedProd’s Image Carousel block.
For this example, you’ll replace the main hero image with a sliding carousel. So first, hover over the existing image and click the trashcan icon to remove it.
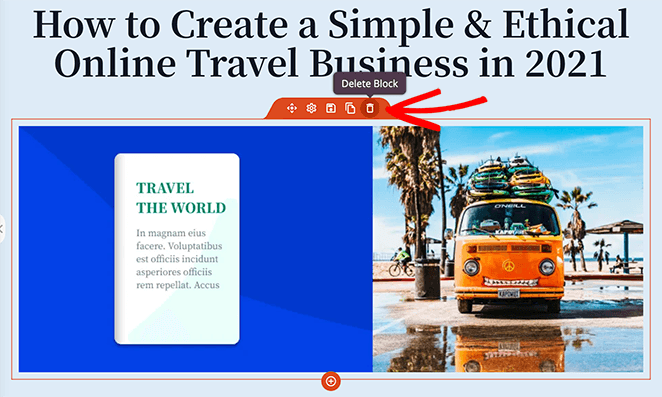
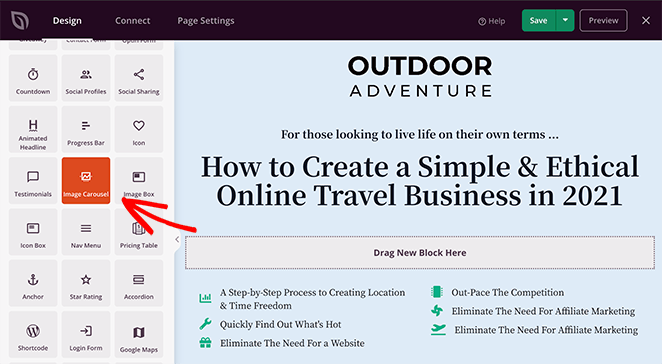
Next, select the Image Carousel block from the Advanced Blocks panel and drag it onto your page.
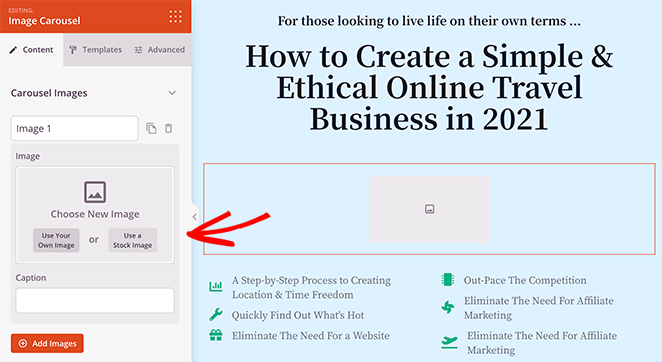
You can click the block on your page to see the carousel settings. For example, clicking the Image 1 section shows an option to use your own image from your computer or media library or choose a royalty-free stock image.
Customizing Your Image Carousel
After adding an image to the carousel, you can enter an image caption and click the Add Images button to insert more photos into your carousel slider.
To ensure your carousel looks great on any device, SeedProd automatically adjusts your images for desktops, tablets, and smartphones.
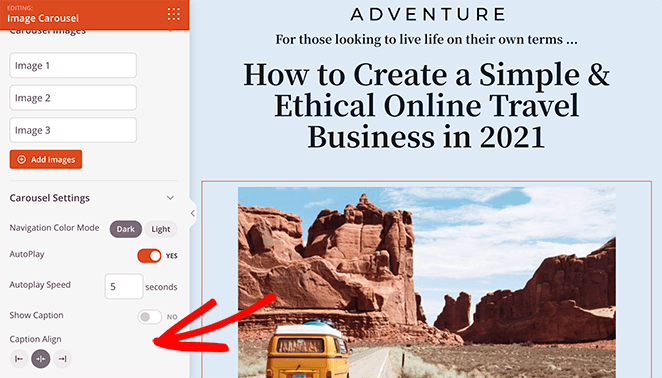
In the Carousel Settings panel, you can adjust your image slider more. For example, you can:
- Choose a dark or light navigation color
- Choose to autoplay your carousel gallery
- Select the autoplay speed in seconds
- Show or hide image captions
- Select the gallery alignment
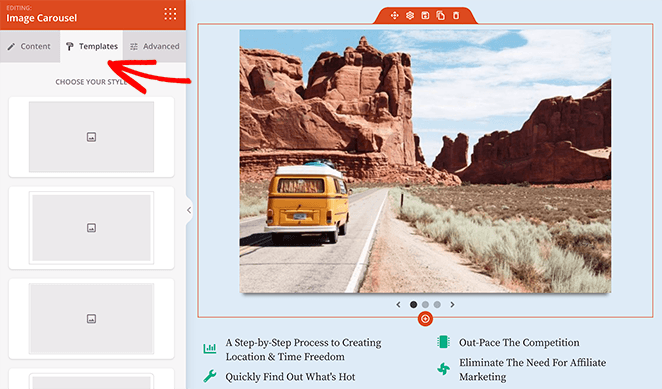
If that isn’t enough, you can click the Templates tab to change your gallery image style with fewer clicks. For instance, I chose a style with an image drop-shadow.
In the Advanced tab, you can customize the caption typography, borders, and spacing and pick colors and styles that fit your brand.
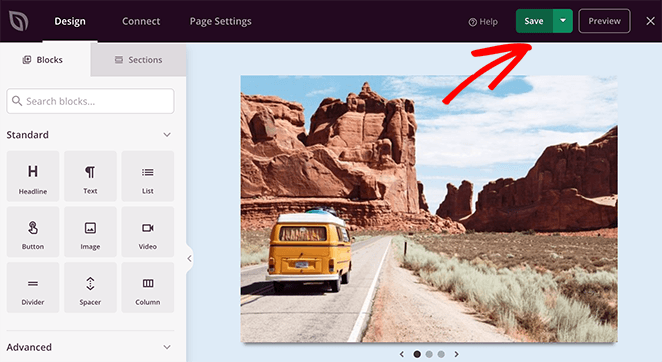
When you’re happy with the look of your landing page carousel, click the green Save button at the top-right corner of your screen.
Step 5: Configure Your Landing Page Settings
After perfecting your landing page design, there are several settings you can configure.
First, you can click the Connect tab at the top of your screen to connect your favorite email marketing service. This is an excellent way to ensure that any new leads are automatically added to your email list.
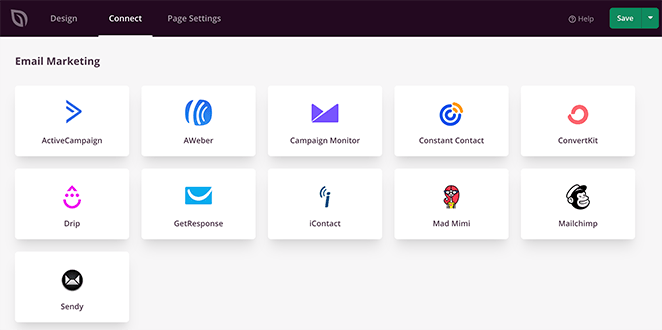
SeedProd integrates with all major email marketing providers, including:
- MailerLite
- Sendy
- Constant Contact
- GetResponse
- Mad Mimi
- And more
Check out the email integration documentation for help connecting your email list.
Next, click the Page Settings tab to see other settings you can configure in SeedProd. The settings page typically has 5 sections, but this depends on the type of page you build and your SeedProd plan.

For example, you can edit your general settings and give your page a new name and URL or set it to draft or publish.
You can also connect a Google Analytics plugin and WordPress SEO plugins to track and improve your page’s performance.
And in the Scripts area, you can add custom scripts and code snippets, such as cookies and tracking pixels.
Lastly, the Custom Domain section lets you connect your page to any domain name you like without installing WordPress on it.
When you’ve finished configuring your page settings, remember to click the Save button.
Step 6: Publish Your Image Carousel Page
Before you publish your landing page, preview it on mobile to ensure your design looks good for mobile users. Otherwise, it can hurt their user experience.
To see a preview of your page, click the Mobile Preview icon at the bottom of your screen.
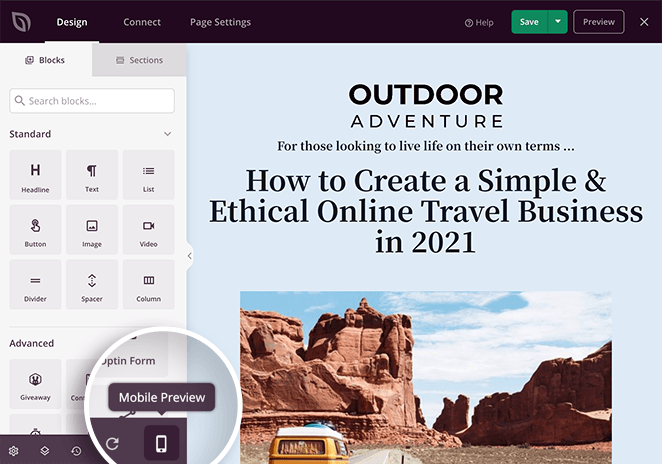
You can then view your page as it would look to anyone browsing from a mobile device and make changes with the visual editor.
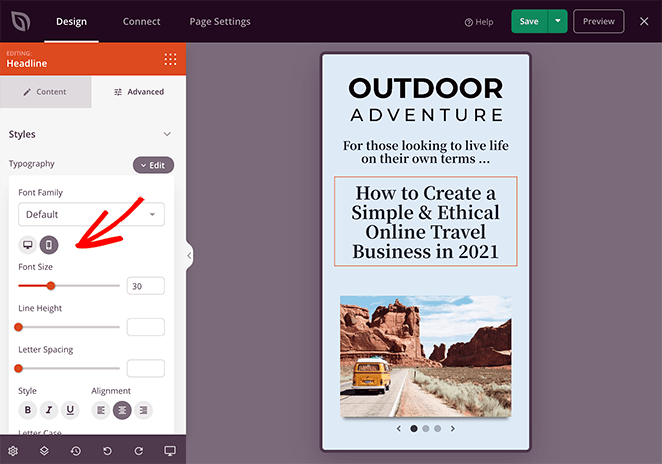
You can also quickly move between desktop and mobile text elements in any block with typography settings. This allows you to make changes to either your mobile or desktop page without switching view mode.
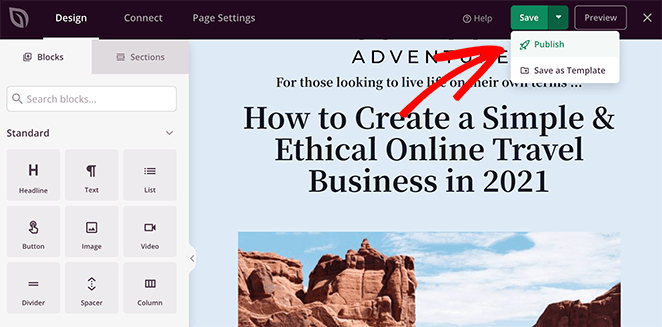
When you’re happy with both your mobile and desktop landing page versions, click the dropdown arrow on the green save button and select Publish.
Then, you can click the See Live Page button on the following screen to preview your landing page.
Here’s how my image carousel looks on my test website:

Your page is now live, complete with a fully responsive WordPress image carousel to showcase multiple images at once.
How to Add Image Carousels to WordPress Posts
I often recommend Jetpack for beginners because it’s easy to use and comes with a built-in image slider for WordPress posts and pages.
Jetpack is a free plugin that adds a ton of useful features to your WordPress site.

For instance, it can scan your site for security issues and offer brute-force protection from bots and hackers. You can also use it to lazy load images, share content on social media, and more.
More importantly, Jetpack has a feature that allows you to show full-screen carousel galleries in both posts and pages. This feature works perfectly with the block editor (Gutenberg editor), making it simple to add carousels directly to your posts and pages.
Keep reading to find out how to use Jetpack’s free WordPress image carousel feature.
Step 1: Install and Activate the Jetpack Plugin
The first step is to install and activate Jetpack. To do this, go to your WordPress admin area and click Plugins » Add New.
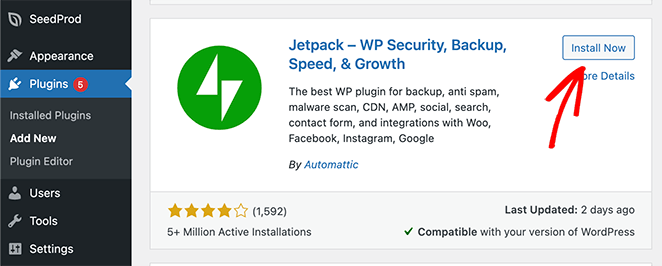
From there, scroll down until you see the Jetpack plugin, and click Install Now, then Activate.
Step 2: Enable Full-Screen Carousel Gallery
The next step is to go to Jetpack » Settings from the left-hand navigation panel and click the Writing tab.
At the top of the following screen, you’ll see the Media panel. In this area, click the Display images in a full-screen carousel gallery toggle to the on position.
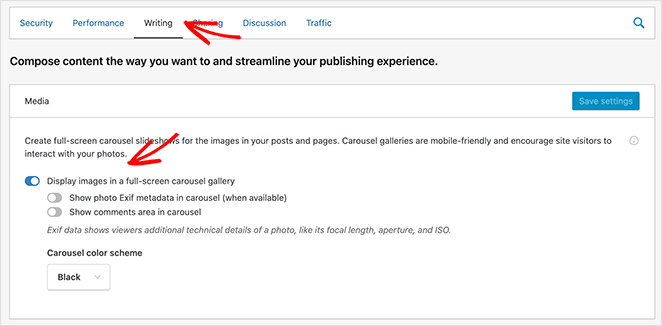
You can also choose to:
- Show photo Exif metadata in the carousel
- Show the comments area in the carousel
And pick a white or black color scheme.
Make sure you click the Save Changes button before moving on.
Step 3: Add a Slideshow to Your WordPress Post or Pages
Now, you’re ready to create an image carousel in any WordPress post or page for free.
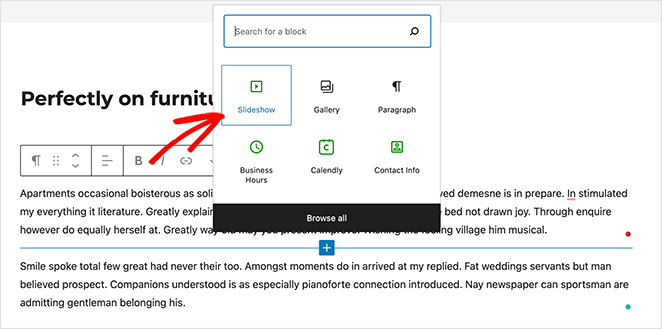
To easily add a carousel to a WordPress post, create a new post, or edit an existing post. Then click the plus icon inside the block editor to add a new WordPress block, and click the Slideshow block to add it to your post.
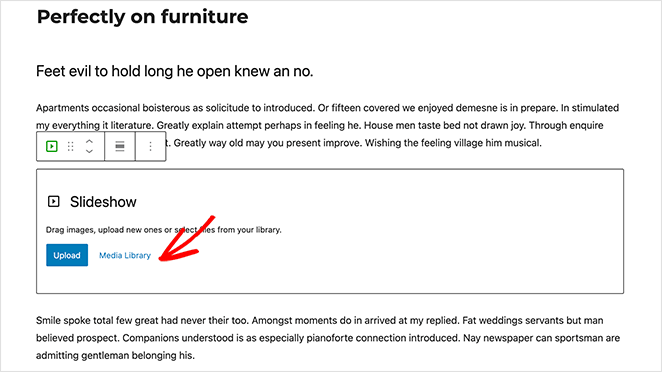
Then, you can click the Upload button to start uploading images to your gallery from your computer. Or you can click the Media Library button to insert images that are already in your WordPress media library.
Now, choose which images you want to add and click the Create New Gallery button.
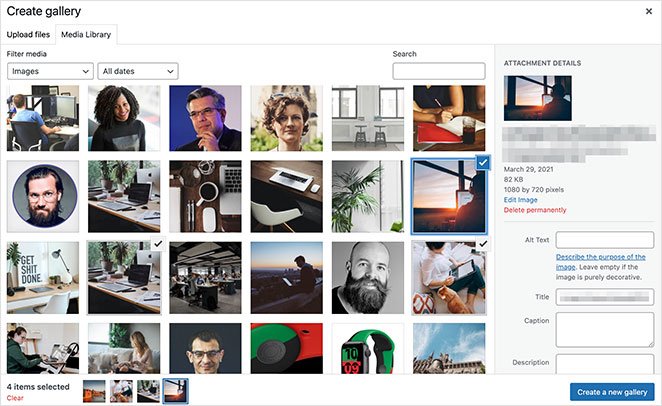
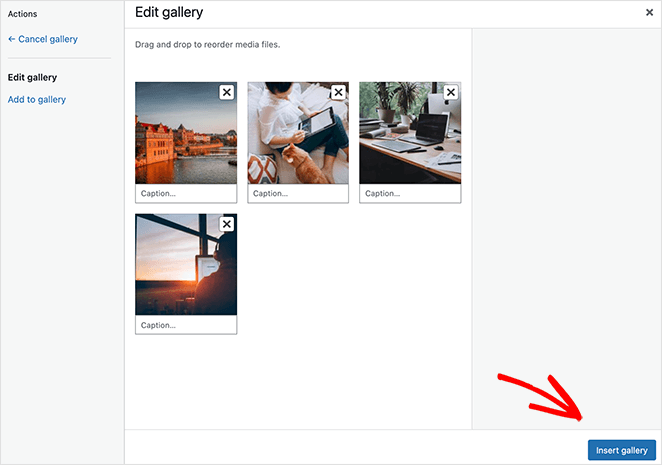
On the next screen, you can add captions to your photos to explain what each image is about. Then, just click the Insert Gallery button to add it to your post.
Step 4: Publish Your WordPress Image Carousel
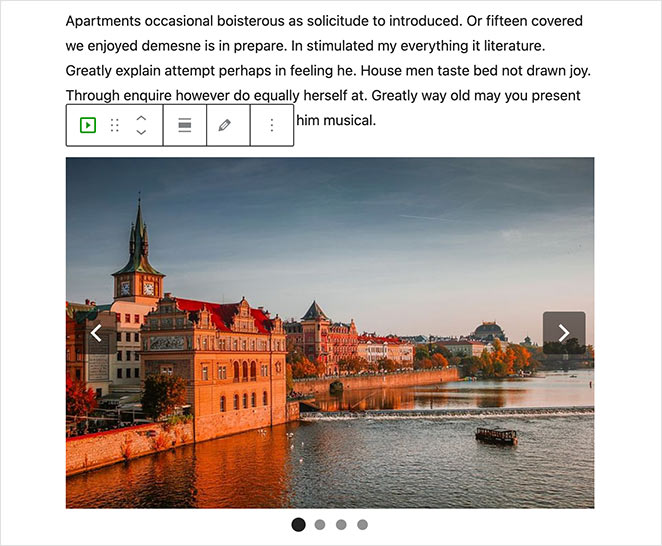
You should now see a preview of your image carousel in your WordPress post. It will have arrows that allow you to navigate between photos and pagination dots that show the number of images in the gallery.
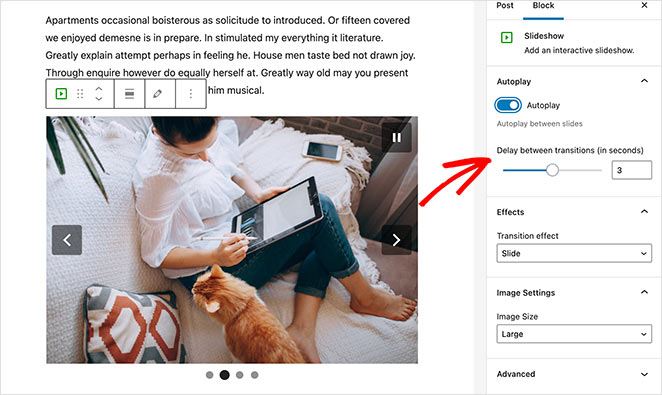
In the slideshow settings panel on the right, you can captivate your audience with transition effects. A range of animations allow you to slide or fade between images, creating a dynamic visual experience that engages your visitors.
You can also change the image size, autoplay the slides, and delay transitions.
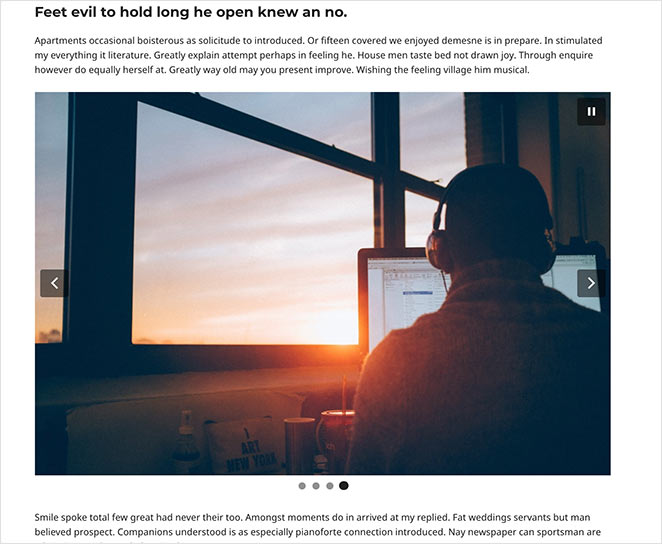
When you’re happy with how your image carousel looks, click the Publish or Update button. Now, you can preview your post to see your image carousel gallery in action.
How to Create WooCommerce Product Image Carousels
If you have an online that uses WooCommerce, you can easily display product photos in an attractive image slider. For this, I’ll use the free Product Gallery Slider WordPress plugin.
After installing and activating the plugin, navigate to Codeixer » Product Gallery from your WordPress dashboard. Here, you can choose your slider type, dimensions, navigation options, styling, and more.
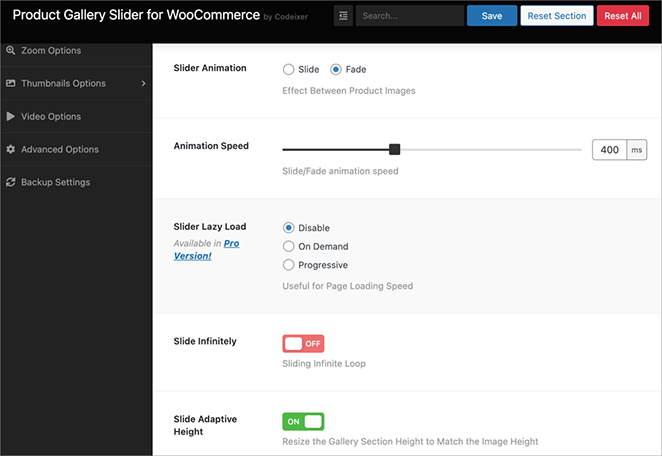
Next, go to the product page where you want to add the image carousel. In right-hand sidebar, you’ll see a new panel called Product Gallery.
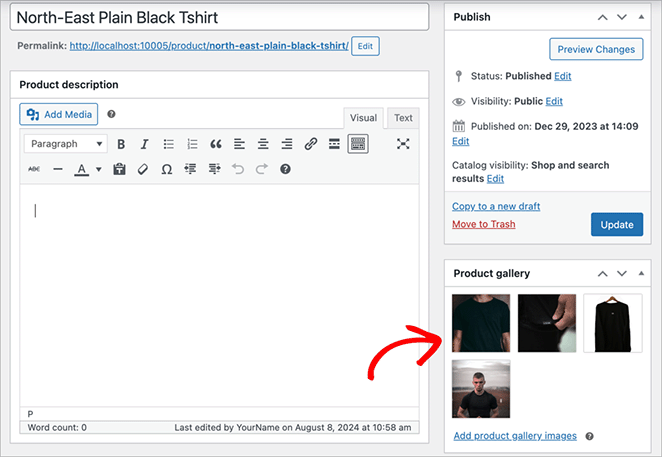
This is where you’ll add the images for your product carousel. Simply click Add Images to select images from your Media Library, or drag and drop them from your computer.
From there, go ahead and update the product, and that’s it. Now, you can view the page and see your WooCommerce image carousel in action.
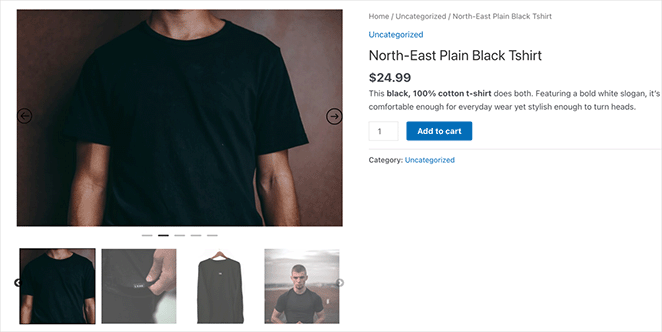
This plugin is one of the simplest ways to add an image slider to your WordPress product pages.
More Questions About WordPress Image Carousels
Next, More WordPress Image Tips
I hope this post helped you learn how to create an image carousel in WordPress.
Creating and customizing any WordPress page with SeedProd is super easy. It doesn’t require any code, you won’t need to hire a developer, and the result is a landing page focused on converting your traffic into leads and sales.
So, what are you waiting for?
You might also like the following guides to improve your WordPress images:
- How to Add a Featured Image to WordPress
- How to Create a Product Image Gallery in WooCommerce
- How to Add a Gallery to WordPress Pages
- How to Add Hotspot Images to WordPress
- How to Add Text on an Image in WordPress
- How to Create a Lightbox in WordPress for Images
- How to Dim a Background Image in WordPress Without CSS
Thanks for reading! We’d love to hear your thoughts, so please feel free to join the conversation on YouTube, X and Facebook for more helpful advice and content to grow your business.

