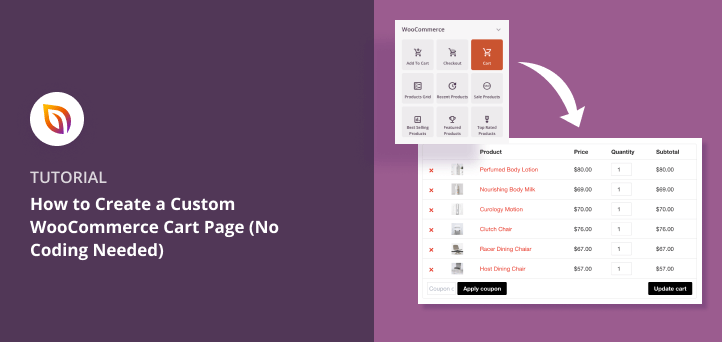
Do you want to create a custom WooCommerce cart page?
By default, the WooCommerce cart page isn’t optimized for conversions. But if you customize your cart layout and design, you can improve the user experience and generate more sales.
In this article, we’ll show you how to create a custom WooCommerce cart page without writing a single line of code.
Why Build a Custom WooCommerce Cart Page?
Did you know that 7 out of 10 customers abandon your shopping cart and never return? It’s true. Shopping cart abandonment accounts for $4.6 trillion in lost eCommerce revenue each year.
With that in mind, creating a custom WooCommerce cart and checkout page allows you to generate more sales without increasing your traffic. You’re essentially stopping existing traffic in its tracks and making them rethink the decision to exit your website.
Additionally, when shoppers have items in their cart, they’re proceeding to a checkout to complete the purchase. So your shopping cart should do everything possible to make that sale happen.
Some clever tactics to customize your cart and checkout flow can include:
- Offer free shipping
- Apply a coupon or discount
- Change the size of cart totals
- Include free extras
- Add an update cart button
Overall, the primary goal of creating a custom WooCommerce cart page should be to improve conversions and sales.
So how do you customize WooCommerce cart pages? Let’s jump in and find out.
How to Create a Custom WooCommerce Cart Page
Many people use shopping cart plugins to optimize cart pages in WooCommerce. But we think the easiest way to customize your cart is with a drag-and-drop page builder like SeedProd.

SeedProd is the best WordPress page builder with support for WooCommerce websites. You can use this plugin to create a custom WooCommerce cart page without writing code.
SeedProd offers 150+ fully responsive landing page templates to get started quickly. And with the visual editor, you can customize your page and see the changes in real time.
Plus, with tons of blocks and sections, you can get your cart page looking exactly how you want without hiring a developer.
Update: You can now create a custom WooCommerce theme with SeedProd, allowing you to build any WooCommerce page easily without code.
With that in mind, follow these steps to create a custom WooCommerce cart page with SeedProd.
Step 1. Install and Activate SeedProd
The first step is to download a copy of the SeedProd WordPress landing page plugin.
Then, install and activate the plugin on your WordPress website. For help with this step, see this detailed guide on installing a WordPress plugin.
Note: there is a free version of SeedProd that you can use. But for this tutorial, we’ll use the Elite version for the built-in WooCommerce support we need.
After activating SeedProd on your WordPress site, go to SeedProd » Settings and enter your product license key.
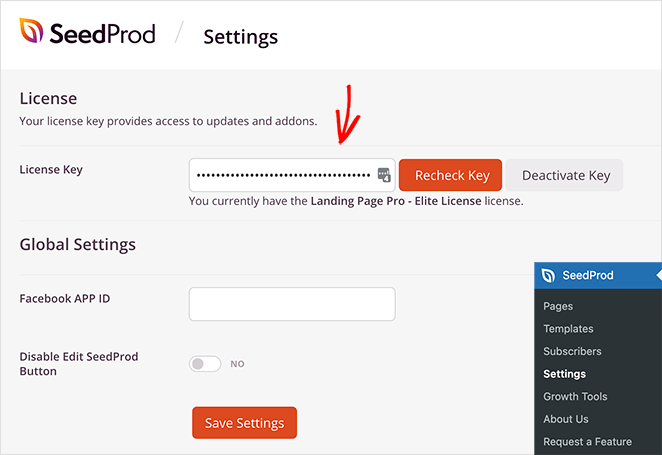
You can find your SeedProd license key in your account dashboard on the SeedProd website.

Step 2. Create a New WooCommerce Cart Page
After activating your license key, go to SeedProd » Pages and click the ‘Add New Landing Page’ button to create your cart page.
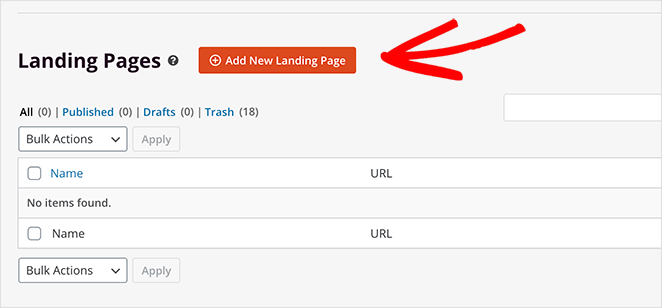
From there, you can choose a cart page template to use as the framework for your design.
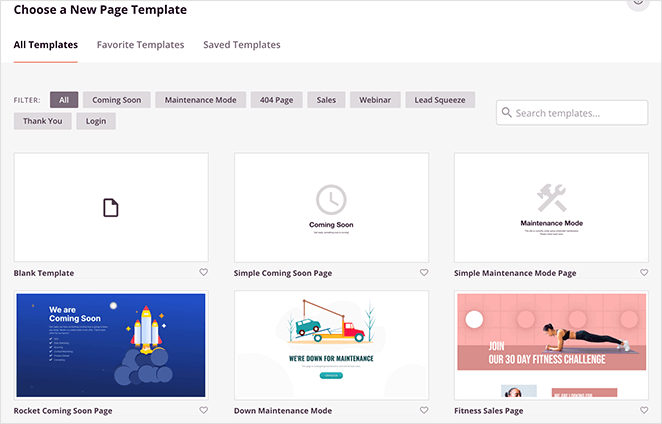
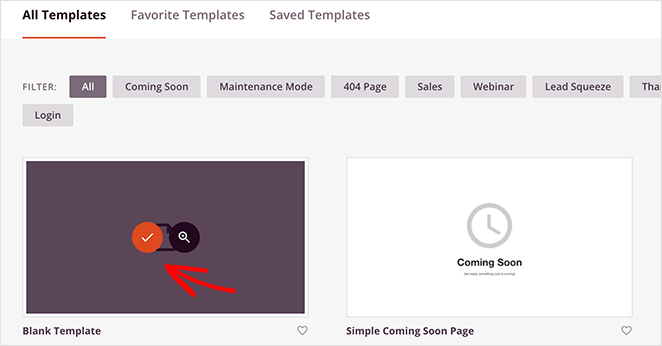
SeedProd offers hundreds of mobile-friendly templates for various industries, many of which you can use as WooCommerce templates. So when you find a template you like, hover your cursor over it and click the ‘Checkmark’ icon to launch it.
For this guide, we’ll use the ‘Blank Template.’ This template allows you to start from scratch and only add the sections and blocks you want.
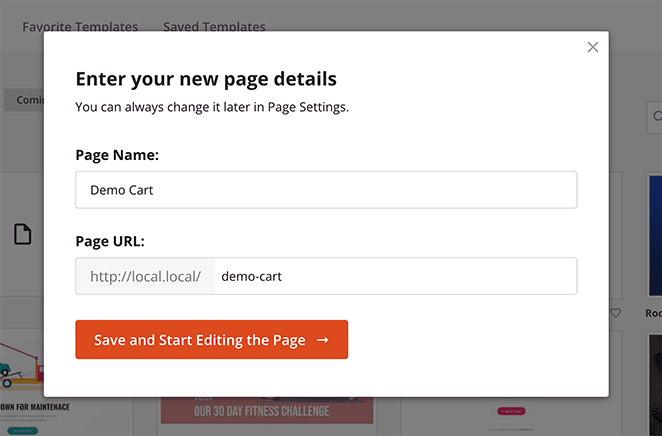
After choosing your template, a pop-up opens to add a name and URL to your page. Then, you can click the ‘Save and Start Editing the Page’ button to open the template in SeedProd’s visual editor.
Step 3. Customize WooCommerce Cart Page Content
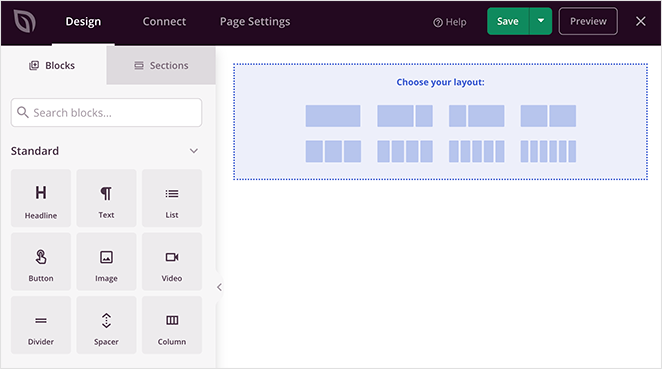
SeedProd’s drag-and-drop page builder has a distinct 2 column layout that makes it easy to use:
- On the left are blocks and sections for customizing your design
- On the right is a live preview of your page
Adding content to your cart page is as simple as dragging a block from the left to your preview on the right.
Let’s look at some of the essential elements you can include on your WooCommerce cart page.
Adding a Logo
To add a logo to your cart page, choose a section layout that will house your page elements, such as the standard section.
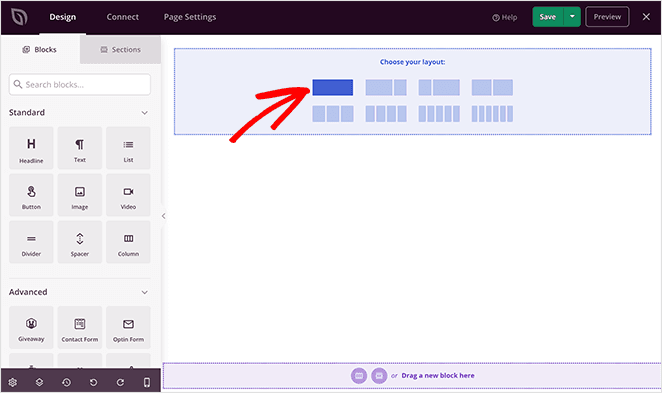
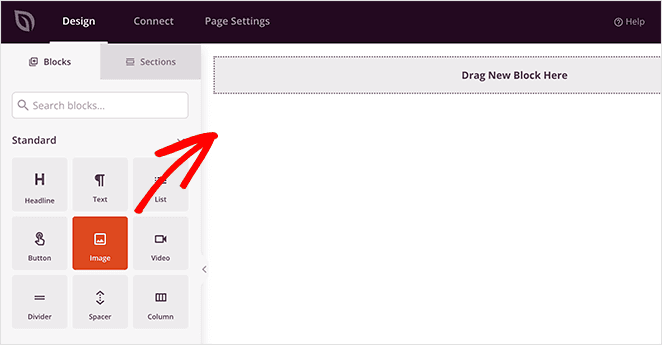
Next, choose the ‘Image’ block and drag it onto your new section on the right.
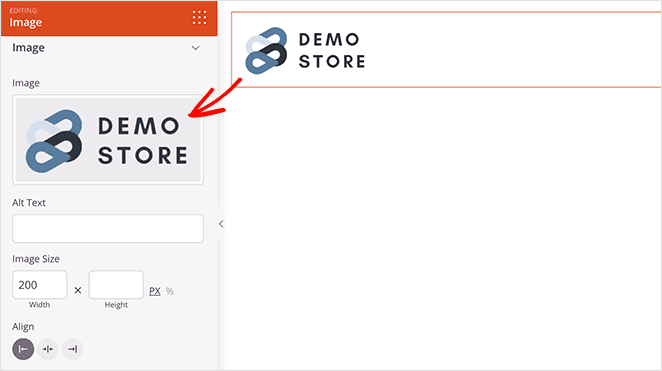
Clicking the image block opens the content settings panel, where you can upload a logo from your computer or WordPress media library.
From there, you can add a link back to your homepage, resize your logo, and change the alignment.
Adding a WooCommerce Cart
Now let’s add your WooCommerce shopping cart to the design. To do that, add a new section to your design and choose the content sidebar layout.
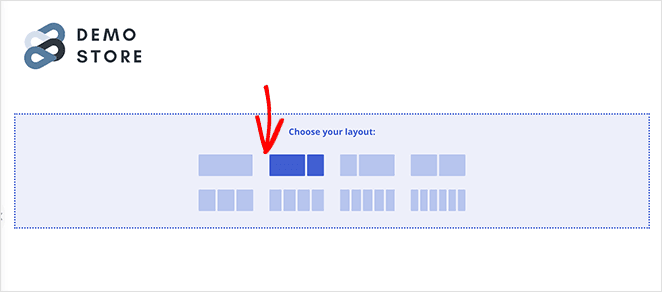
This layout allows you to add your cart to the larger column and leaves space in the smaller column for reviews, testimonials, and other important information.
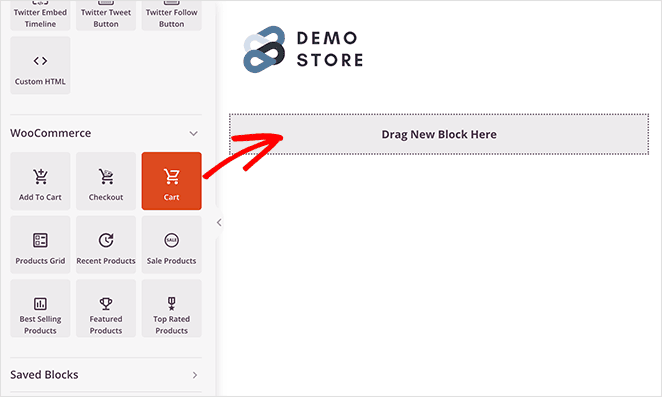
To add your WooCommerce cart to the page, scroll down to the WooCommerce blocks section and drag the ‘Cart’ block onto your new section.
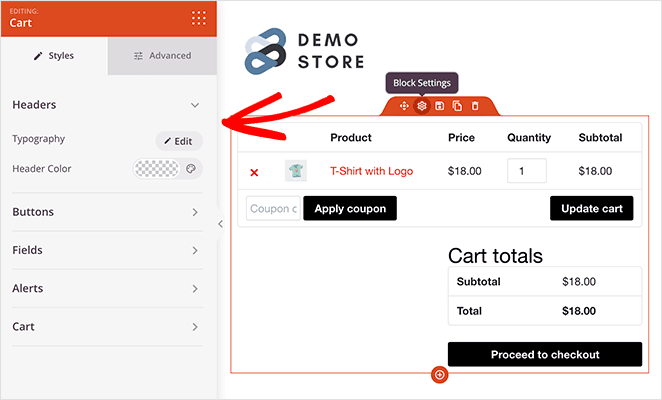
Clicking the cart settings icon shows a panel with color, font, and size customization settings for:
- Headers
- Buttons
- Fields
- Alert
- Cart
For example, we changed the button colors to better align with our store’s branding and logo.
Adding Reviews and Testimonials
Remember that second column? For this guide, we’ll use that column to showcase customer testimonials and star ratings.
Social proof like this can encourage shoppers on the verge of checking out to complete the sale. After all, positive reviews from real customers are much more convincing than taking a brand’s word for it.
To add testimonials to your WooCommerce cart page, find the Testimonials block under the ‘Advanced’ blocks heading and drag it over to your narrow column on the right.
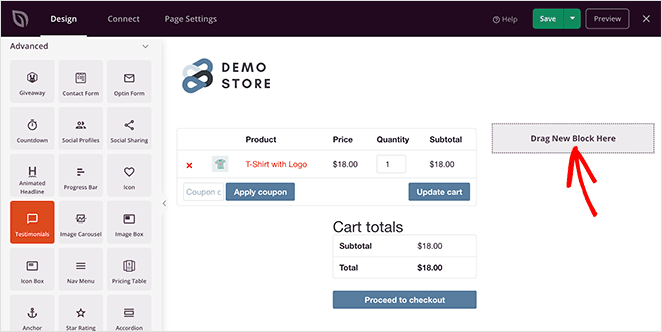
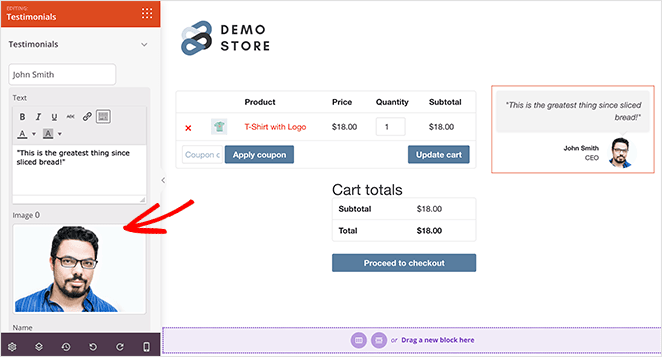
And like all of SeedProd’s blocks, clicking it shows settings for customizing your testimonial content. For example, you can add a custom headshot, and customer name, change the alignment, and even add multiple reviews in a testimonial carousel.
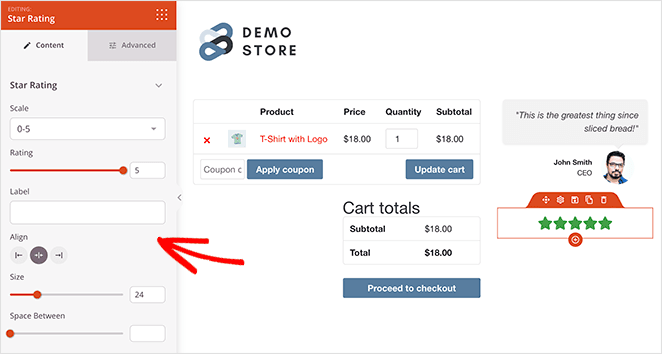
To make your reviews even more convincing, you can drag over the Star Rating block and place it under your testimonial carousel.
Adding Scarcity and Urgency
One of the best ways to get potential customers to your WooCommerce checkout is to create a sense of urgency. So if shoppers don’t act now, they can miss out on an exciting deal.
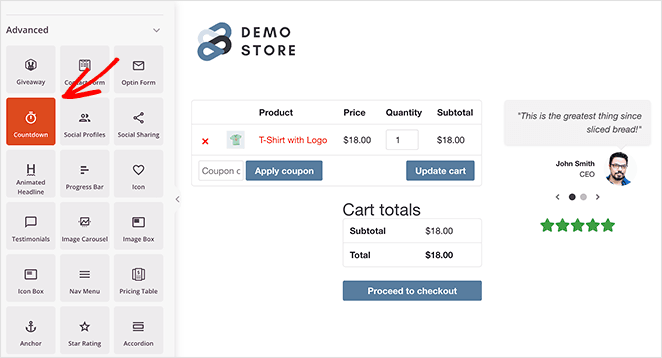
The easiest way to add scarcity to your WooCommerce cart page is with a scarcity timer or countdown clock. And SeedProd has that option built-in.
All you need to do is select the ‘Countdown Timer’ block from the ‘Advanced’ blocks section and drag it to the top of your cart. Then, select the ‘Visitor Timer’ option so that the timer refreshes for each visitor.
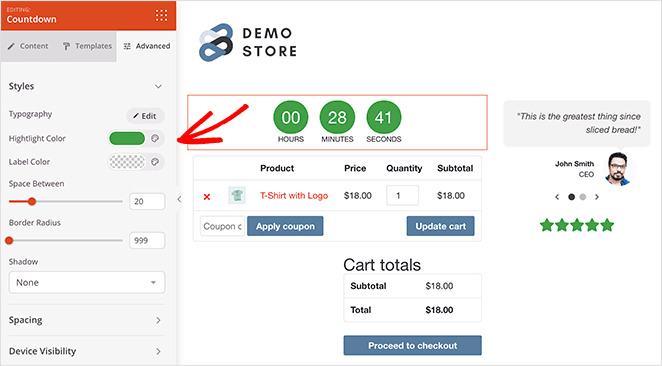
Then in the Advanced settings tab, you can customize the colors to match the rest of your cart.
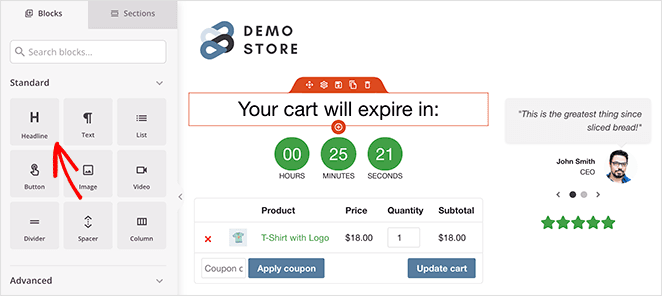
Now let’s add a heading telling people they have a set time until their cart expires. To do this, drag over the ‘Headline’ block and enter your text.
Cross-selling WooCommerce Products
Your WooCommerce cart page is an excellent place to promote and recommend other products or services. That way, you can catch shoppers before checking out with relevant products they may like.
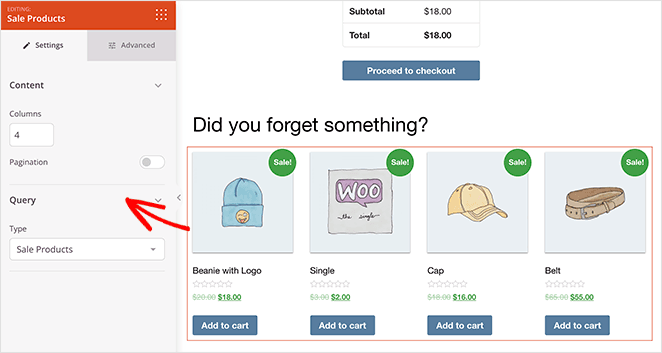
And the good news is, SeedProd offers several different product grids that allow you to showcase products on any page. You can find them by heading to the ‘WooCommerce’ blocks section and choose from:
- Recent products
- Sale products
- Best selling products
- Featured products
- Top-rated products
For example, you can drag over the ‘Sale Products’ block and add it right below your WooCommerce cart. That way, shoppers have the chance to add them to their carts before checking out.
Step 4. Publish Your Custom WooCommerce Cart Page
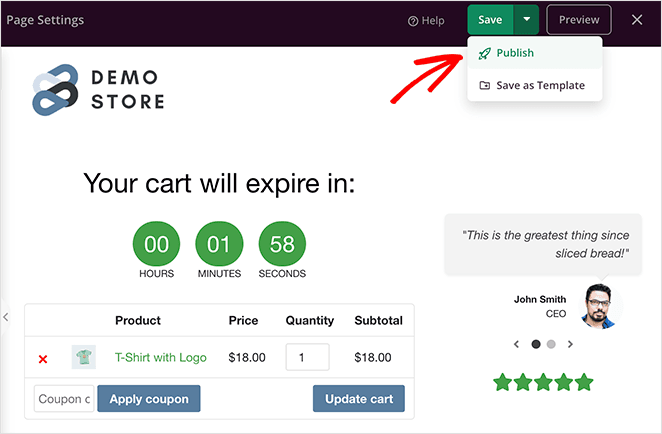
After making changes to your cart page, it’s time to publish it and make it live on your WooCommerce store. To do that, click the dropdown arrow next to the green Save button and select Publish.
Then the final task is to adjust your cart URL in the WooCommerce plugin settings. So navigate to WooCommerce » Settings and click on the Advanced tab.
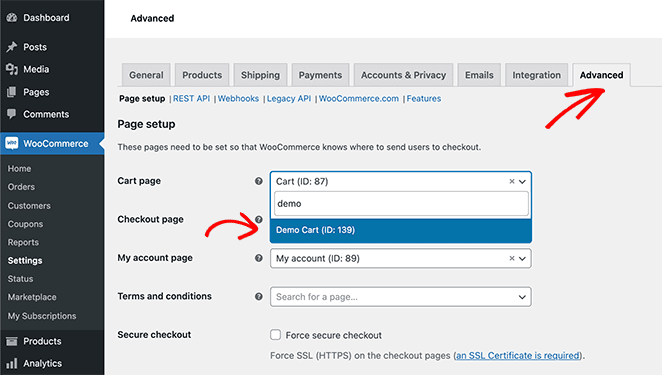
Then next to the ‘Cart Page’ heading, select the new cart page you created with SeedProd. Remember to click the Save Changes button at the bottom of the screen.
Now when shoppers can click the “View Cart” link on your website, they’ll see your new custom WooCommerce cart page.
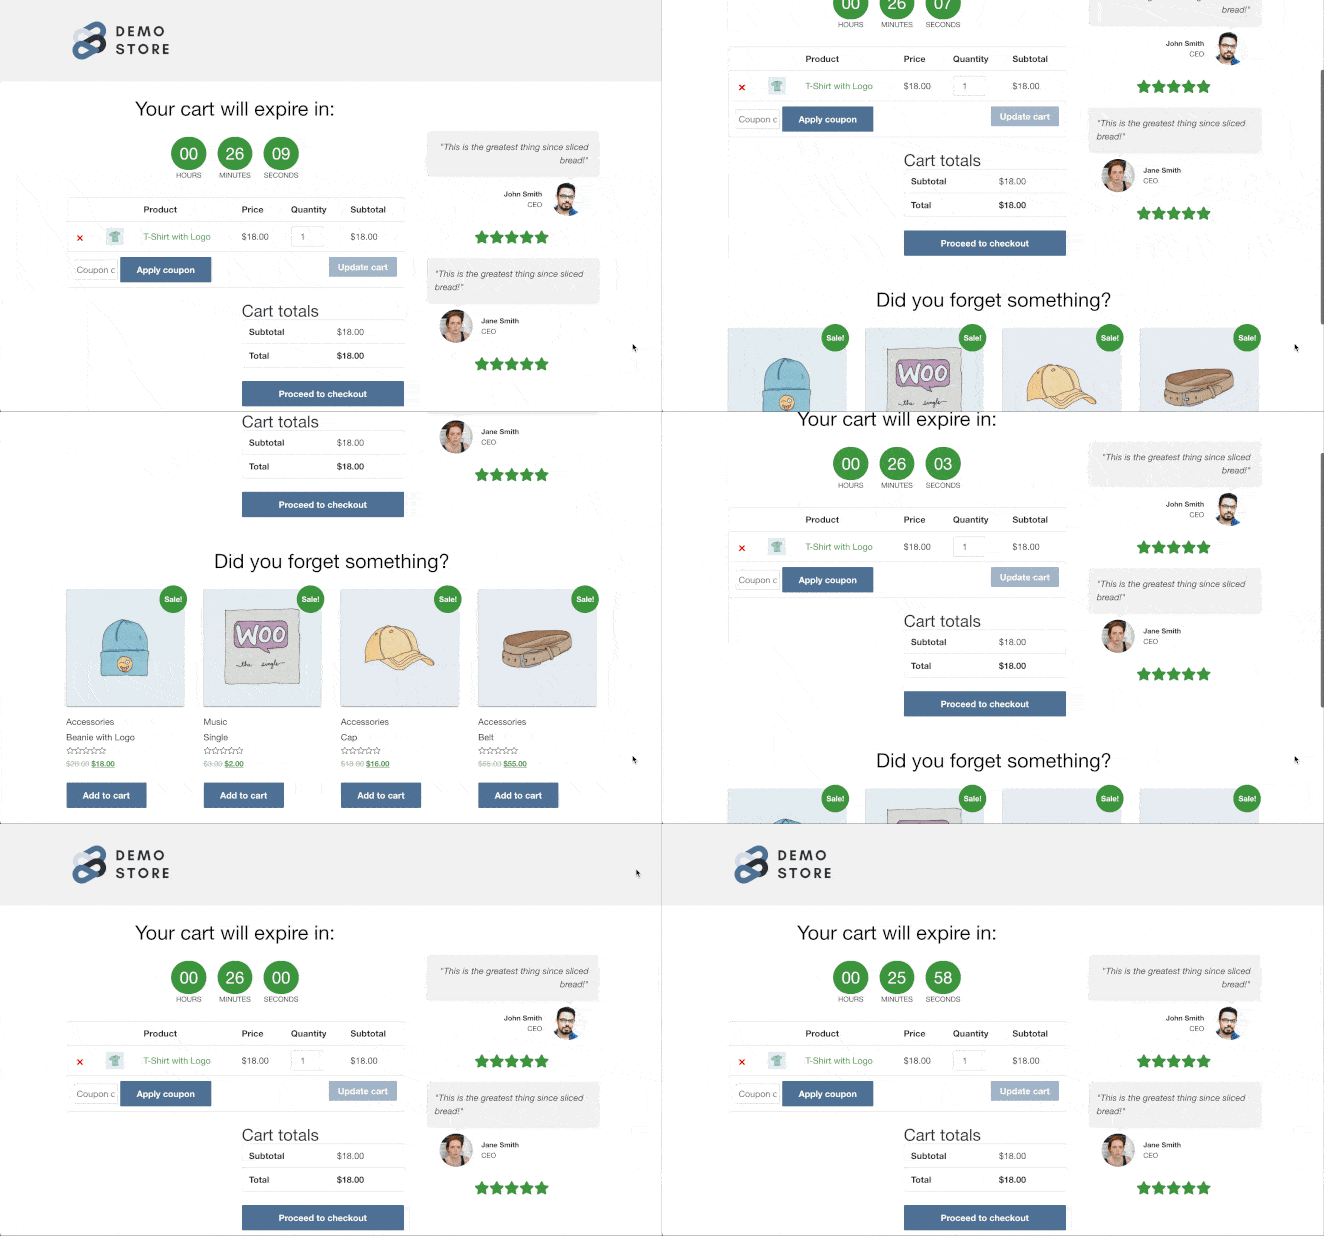
There you have it!
We hope this article helped you create a custom WooCommerce Cart Page without writing any code. If you want to track your WooCommerce cart conversions, see our post on setting up WooCommerce conversion tracking and this guide on how to fix WooCommerce view cart not working.
Thanks for reading. Please follow us on YouTube, Twitter, and Facebook for more helpful content to grow your business if you liked this article.

