Want to add custom WordPress social media icons to your site? With the right tools, you can place follow buttons in your header, footer, sidebar, or landing pages, even for newer platforms like Threads, Mastodon, or Bluesky.
This guide shows you three easy methods, including my favorite way with SeedProd, so visitors can find and follow you anywhere you’re active online.
Why Add Social Media Icons to Your WordPress Site?
Social media icons make it easy for visitors to follow you on other platforms. With people spending an average of 2 hours and 21 minutes a day on social media, adding icons helps you reach them where they’re already active.
Moreover, social media icons are small, allowing you to display them in many parts of your website, including:
- WordPress menus
- WordPress headers
- WordPress footers
- WordPress widget areas
- WordPress pages/posts
- WooCommerce products
Here’s a screenshot of how WPBeginner displays social media links in its WordPress sidebar.
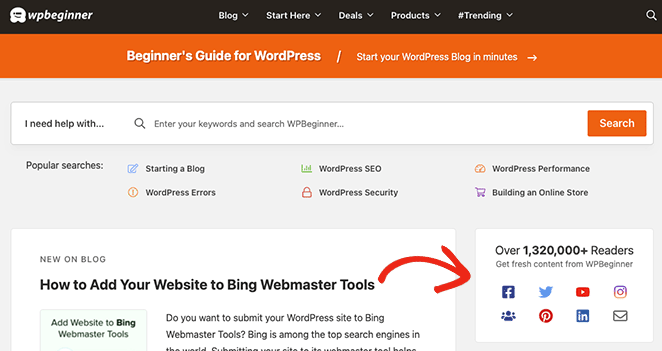
When adding social media icons to your site, it’s helpful to remember that social media follow buttons are different from social share buttons or social sharing icons. Instead of asking users to share content, they encourage visitors to follow your social media profiles.
With that being said, let’s look at how to add custom social media follow icons to your site.
How to Add Custom WordPress Social Media Icons: 2 Ways
As we mentioned earlier, many popular WordPress plugins don’t include the functionality to add custom social media icons to your website. You’re often limited to the main social platforms, like Facebook, Twitter, Instagram, YouTube, LinkedIn, and Pinterest.
If your audience is active on more niche social websites, you may struggle to find a plugin that caters to your needs. With that in mind, we’ll share 2 easy ways to add custom social media icons to your website below.
1. Adding WordPress Social Media Icons with SeedProd
The easiest way to add custom icons anywhere on your site is with SeedProd.

SeedProd is a drag-and-drop WordPress builder that lets you design headers, footers, sidebars, and landing pages without touching code. Its Social Profiles block makes it simple to add and customize icons for any network, including newer platforms like Threads, Mastodon, or Bluesky.
Step 1. Install and Activate SeedProd
First, visit the SeedProd pricing page, choose your plan, and create your account. For this guide, we’re using SeedProd Pro for its advanced features.
Next, log into your account dashboard and visit the Downloads tab. From there, you can download the plugin zip file and copy your license key.
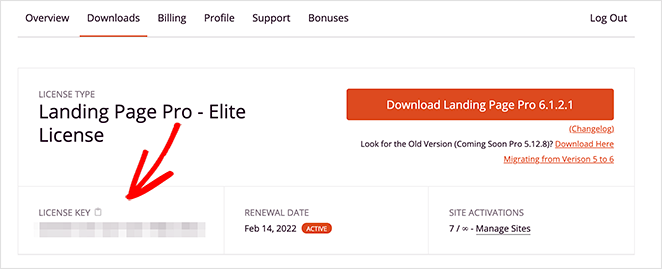
Now head to your WordPress admin area and upload the SeedProd plugin. If you need help with this step, follow this guide on installing and activating a WordPress plugin.
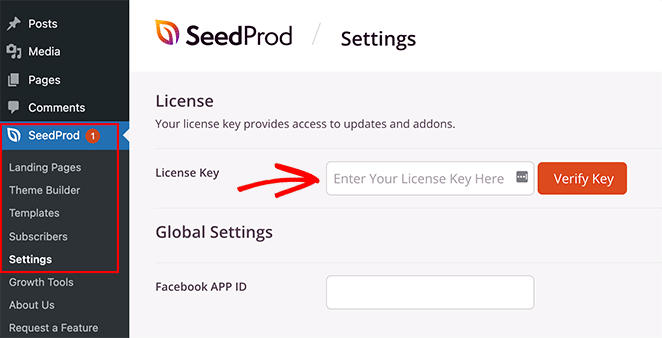
Once you’ve activated the plugin, go to SeedProd » Settings and paste the license key you copied earlier. Click the Verify Key button to save the settings, then move on to the next step.
Step 2. Create a WordPress Theme or Landing Page
The next step is to create a landing page or WordPress theme design; however, this will depend on which SeedProd license you chose in Step 1.
Basic and Plus users can build landing pages with SeedProd, while Plus and Elite users can create landing pages and WordPress themes with this plugin.
Follow the steps in these tutorials to build your SeedProd design:
After creating a landing page or WordPress theme, move to Step 3 to add your custom WordPress social media icons.
Step 3. Add Your Custom Social Media Icons to WordPress
SeedProd allows you to add custom social media icons anywhere in WordPress with its easy and powerful Theme Builder. After choosing your Website Kit, it’s simply a case of opening each theme part and adding the Social Profiles block.
Adding Social Media Icons to WordPress Header
Let’s start by adding social profile icons to your WordPress menu. To do this, go to SeedProd » Theme Builder, hover over your Header template, and click the Edit Design button.
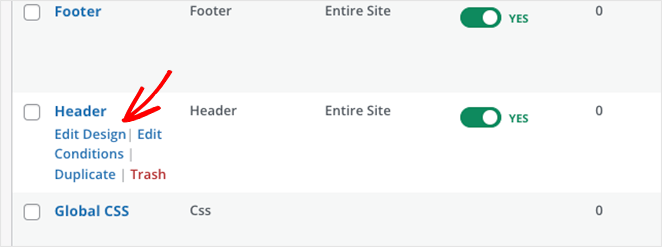
On the following screen, you’ll see a 2-column layout like this:

By default, the template we’re using has a 2 column header with a logo and navigation menu. In order to add your social profile icons, you’ll need to change it to a 3-column section.
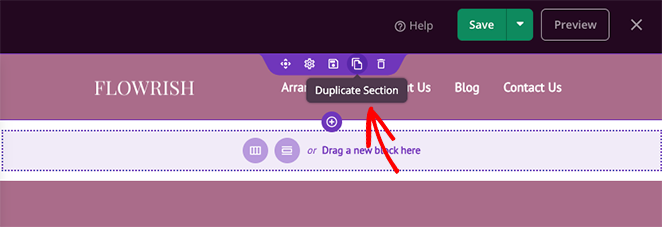
First, hover over the header section until it has a purple outline, then click the duplicate section icon.
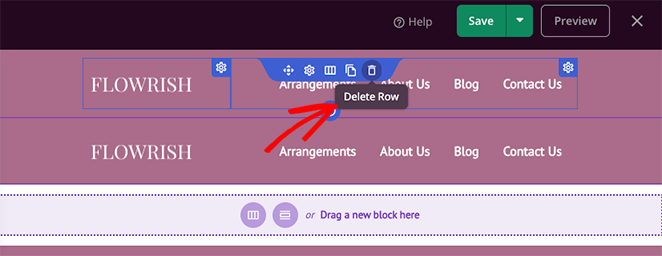
Now, in the new section, hover over the contents until it has a blue border, then click the Trashcan icon to remove it.
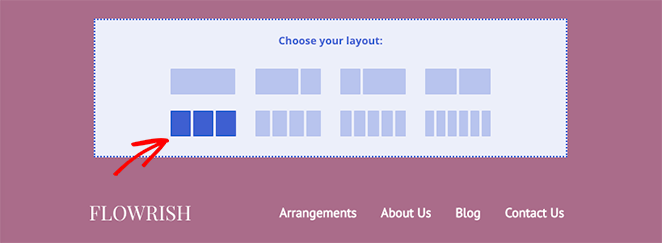
After that, click on the 3-column layout option to add it to your new section.
Next, move the elements from the old section into your new section by dragging and dropping.
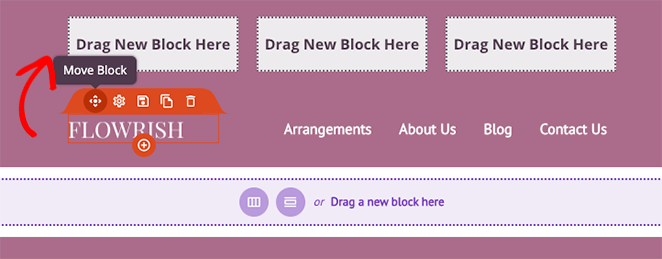
When you’ve finished, you should have 1 empty column left where you can add your social profile icons. Before you do that, hover once more over your old section and click the trash can icon to delete it.
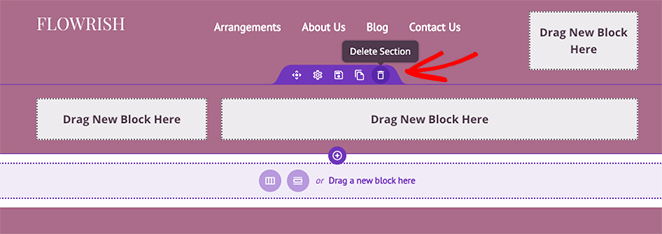
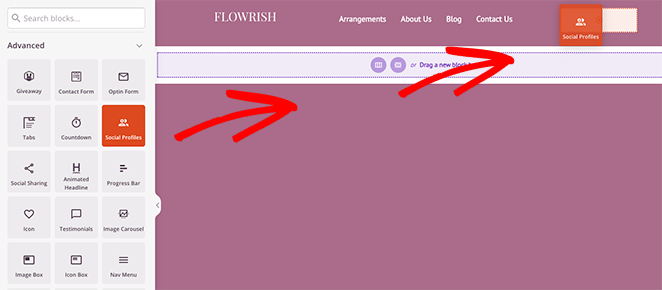
To add your custom social profiles to your header, find the Social Profiles block from the left-hand sidebar and drag it onto your empty column. Now you can click the block to see its customization options.
By default, the Social Profiles block will display icons for Facebook, Twitter, Instagram, and YouTube. You can change the icons by clicking each one and choosing a social media network from the dropdown menu.
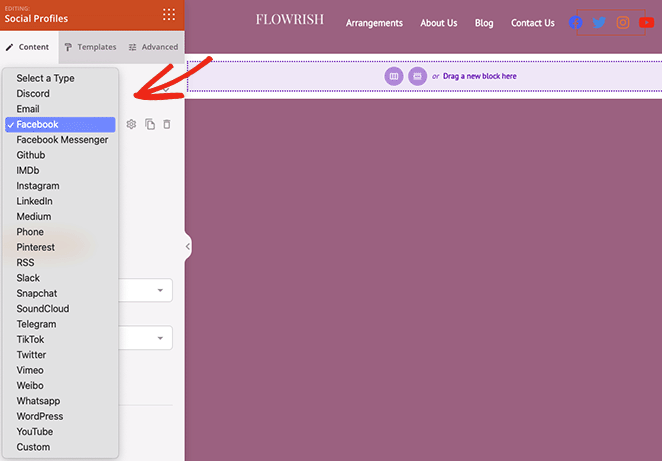
The platforms you can choose from include:
- Discord
- Facebook Messenger
- GitHub
- IMDB
- Medium
- Phone
- RSS
- Slack
- Snapchat
- SoundCloud
- Telegram
- TikTok
- Vimeo
- WordPress
- YouTube
- Custom
To add a custom social media profile button, click the Custom option and the gear icon to open the settings.
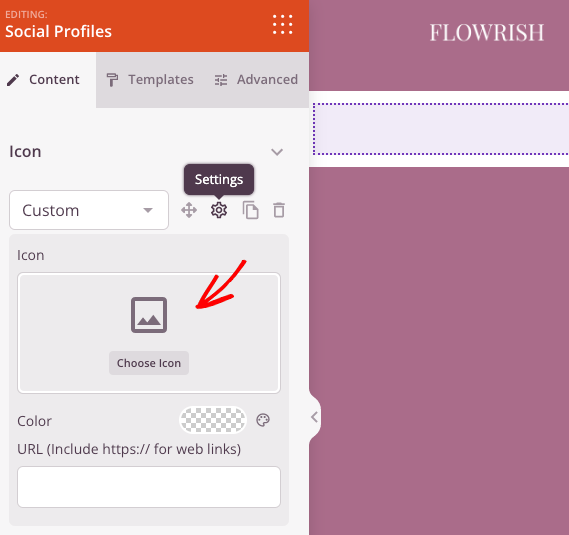
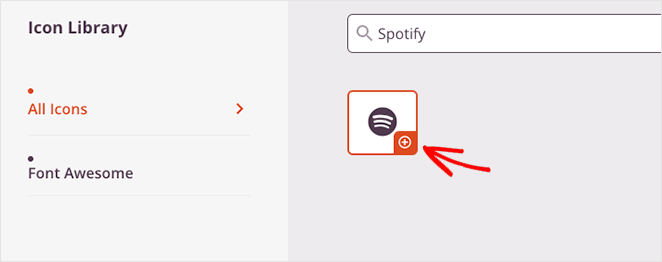
Next, click the Choose Icon option and search for a different icon using Font Awesome that fits your social media needs. For example, you can add custom social icons for Spotify, Skype, Tumblr, Behance, Airbnb, Audible, Playstation, and many more.
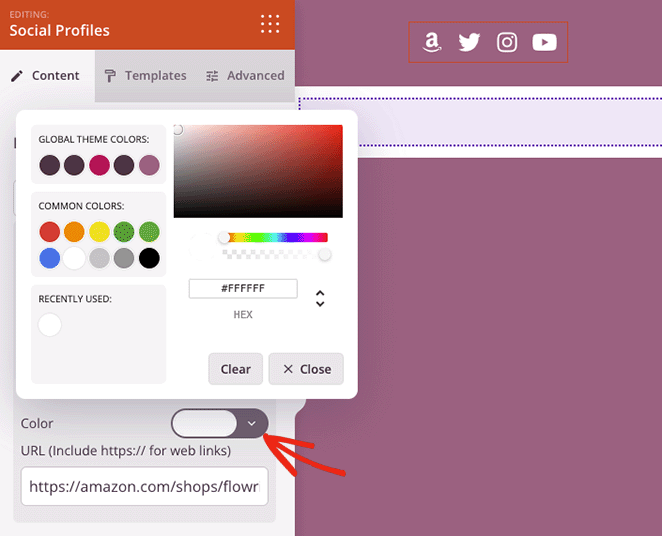
After choosing your custom social profile icon, you can change the icon color and add your custom link.
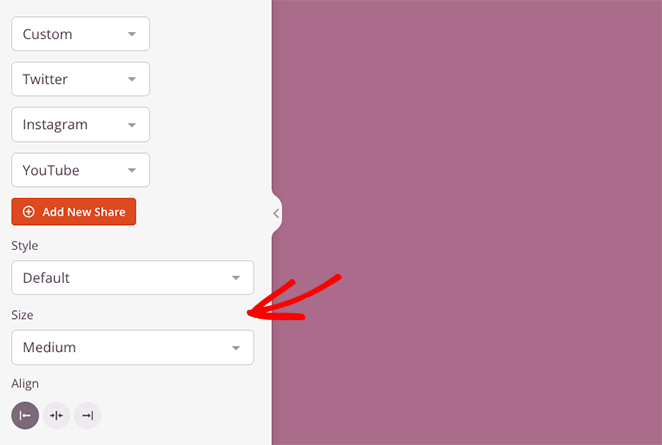
Further down the settings panel are options to change your icon style, size, and alignment.
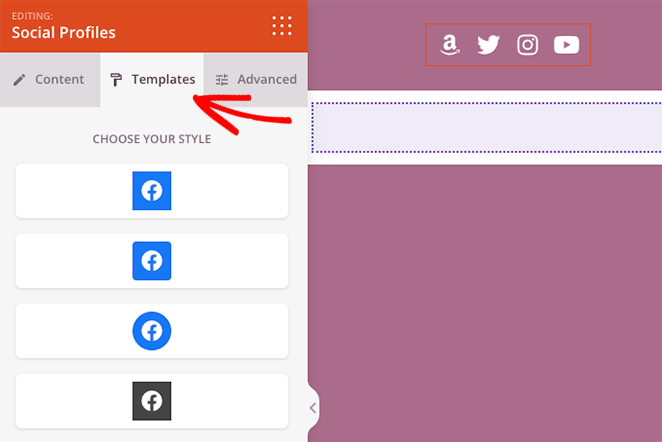
In the Templates tab, you can add a custom style to your icons with 1 click.
The Advanced tab offers settings to customize icon styles at a granular level. For example, you can change icon background color, size, space, shadow, margin, and padding.
You can also show or hide your social profile icons on mobile or desktop devices, which is an excellent way to improve mobile optimization for visitors using a smartphone or tablet.
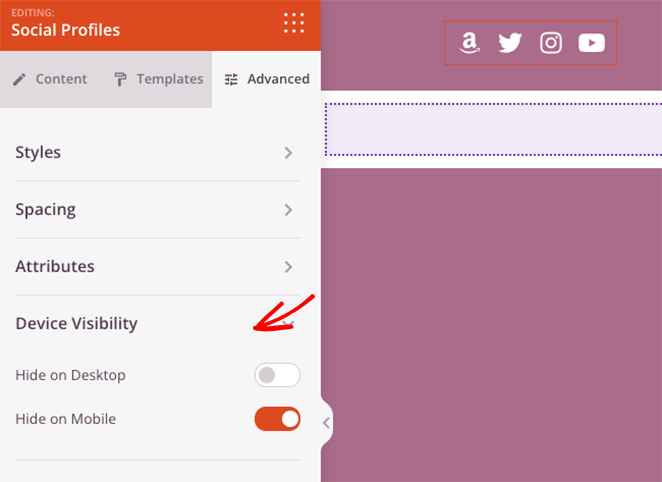
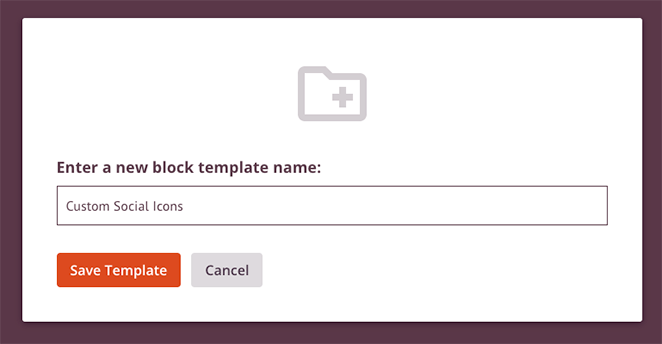
Before saving your changes, hover over your Social Profiles block and click the Save icon. This will allow you to re-use it on other areas of your website without manually adding each social link and custom icon again.

So in the popup window, give your block a name like “Custom Social Icons,” and save.
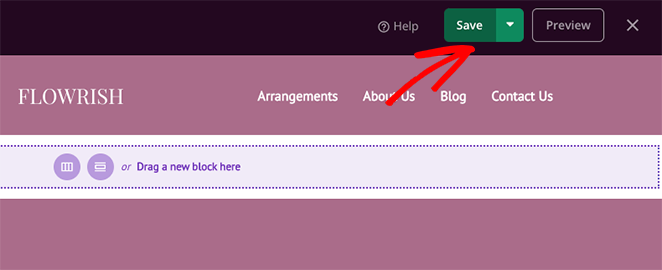
When you’re happy with your WordPress social media icons, click the Save button in the top-right of your screen.
Now, let’s add your social media icons to your website’s footer.
Adding Social Media Icons to WordPress Footer
To add social icons to your footer, go to the SeedProd theme builder dashboard, hover over the Footer template, and click the Edit Design link.
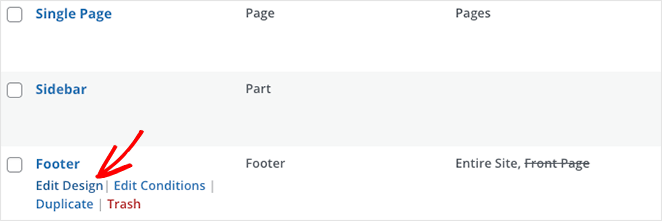
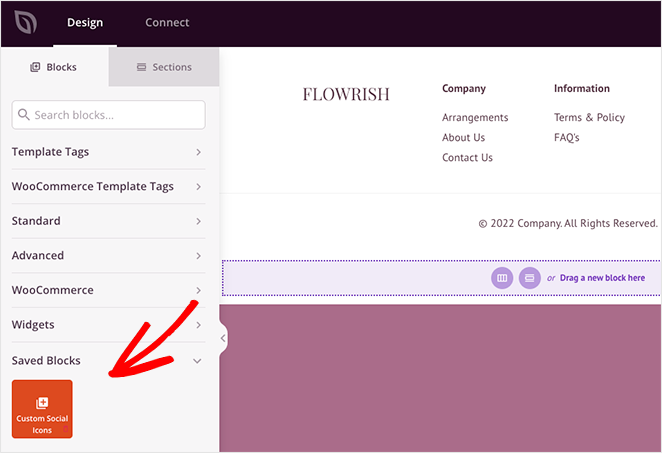
Next, open the Saved Blocks heading in the left sidebar, and drag over the custom social icons block you saved in the last step to a column in your footer area.
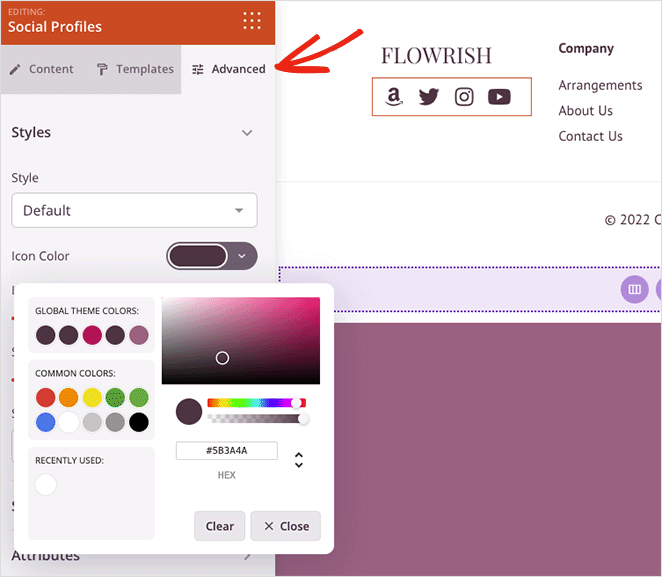
If your WordPress footer has a similar background color to your icons, you can click the Advanced tab and choose a new icon color with the color picker.
When everything looks suitable, click the Save button to store your changes.
Adding Social Media Icons to WordPress Sidebar
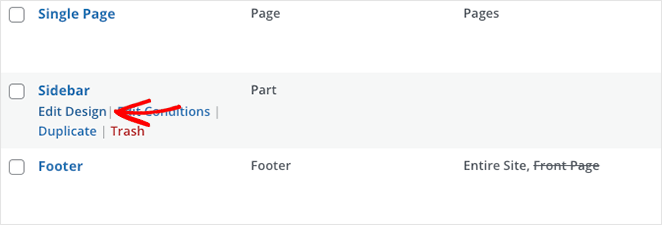
To add custom social icons to your WordPress sidebar, go back to the theme builder dashboard, hover over the Sidebar template, and click the Edit Design link.
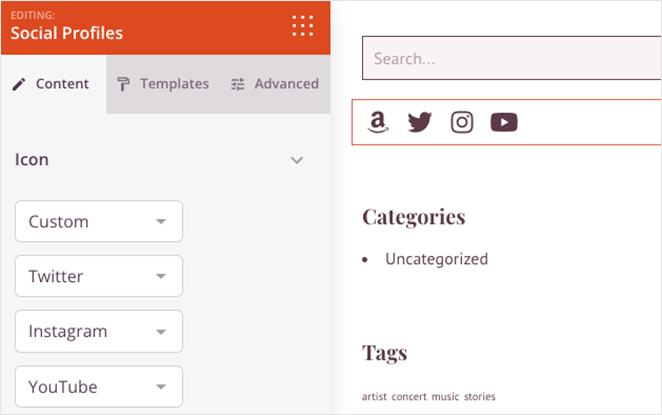
Now repeat the instructions from the previous step, and click the Save button when you’re finished.
You can also repeat this process for any page on your website, including your landing pages and content pages, such as your about, services, and contact pages.
Step 4. Publish Your Changes
The last step is to publish your new WordPress theme so your website visitors can see your new social media profile icons. To do that, go to the Theme Builder dashboard and turn the Enable SeedProd Theme toggle to the “Yes” position.

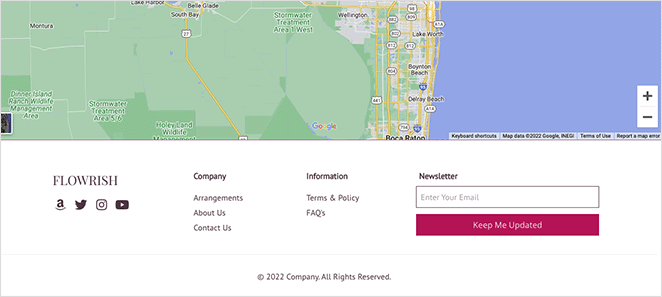
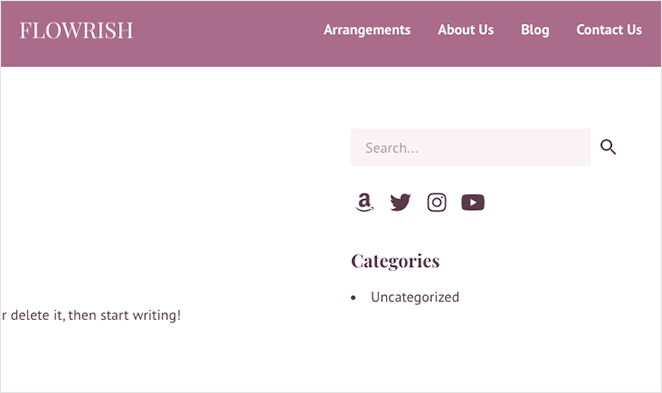
Now you can take a look at your changes. Here are a few examples from this tutorial:
Header

Footer
Sidebar
2. Using the Built-in WordPress Social Icons Block
If you’re running WordPress 5.4 or newer, you already have access to the Social Icons block. This is the fastest way to add icons without installing another plugin.
First, Go to Appearance » Editor (for full site editing) or edit any page/post where you want icons.
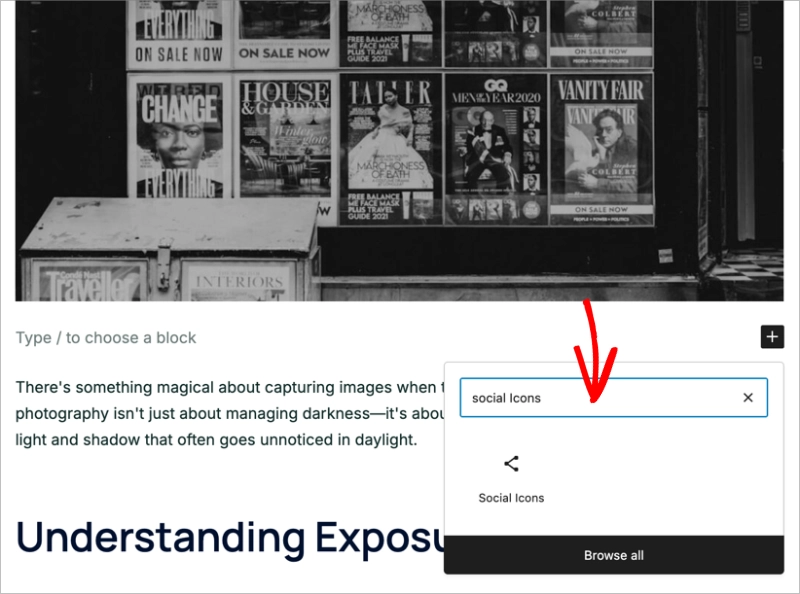
Click the + button, search for “Social Icons,” and insert the block.
Click + Add icon inside the block. You’ll see a list of built-in networks like Facebook, Instagram, LinkedIn, and X (Twitter). Select the ones you need.
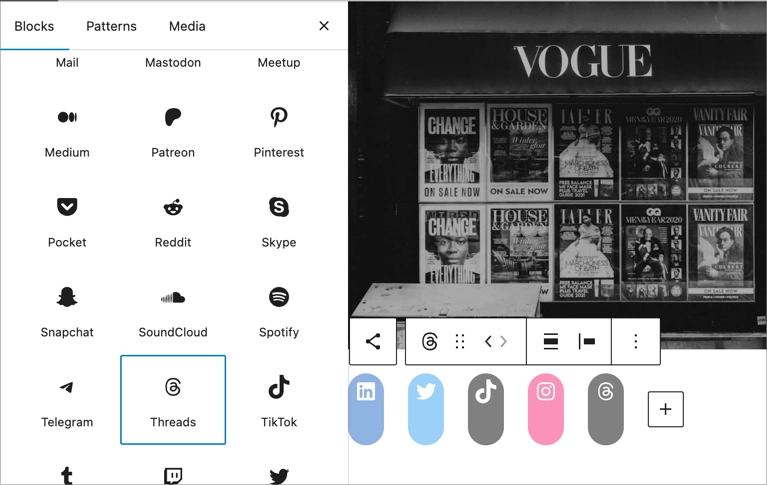
Each icon has a field for your profile URL. Paste your link, and it will connect instantly.
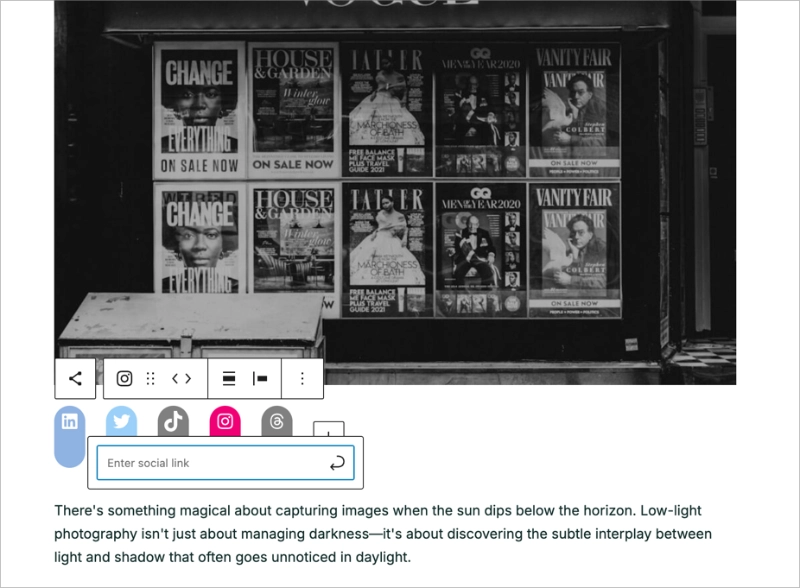
You’ll see that this block has some missing platforms. For any that are not available, you’ll need a plugin that supports custom icons — such as SeedProd.
FAQs on Adding Social Media Icons to WordPress
I hope this article has helped you learn how to add custom WordPress social media icons to your business website.
You might also like these other helpful guides from our blog:
- How to Create a Modern WordPress Under Construction Page
- How to Promote Your Blog (Beginner’s Guide)
- How to Embed Facebook Events on WordPress
Thanks for reading! We’d love to hear your thoughts, so please feel free to join the conversation on YouTube, X and Facebook for more helpful advice and content to grow your business.

