Artificial intelligence can help you create a high-converting landing page in WordPress faster than ever before. In this guide, I’ll show you a simple, three-stage process to do it right.
First, you’ll plan the page’s structure using an AI assistant like ChatGPT. Next, you’ll use a WordPress AI builder like SeedProd to generate the layout, write copy, and create images. Finally, you’ll optimize the page for search engines with All in One SEO so it can be easily found.
Table of Contents:
Can AI Generate a Landing Page?
AI can’t build a full landing page on its own. But with a WordPress AI landing page generator, you can do most of the heavy lifting, like writing headlines, suggesting layouts, and even designing images.
During my tests, I found several AI tools that make it easy to build a landing page from scratch. Some let you create basic layouts, while others (like SeedProd) help you design a full page inside WordPress using AI.
For example, I use ChatGPT to outline page content, and DALL·E to create custom images. I also rely on tools like AIOSEO, which integrates with OpenAI to write SEO titles and meta descriptions.
Why Use AI to Generate Landing Pages?
Incorporating AI tools can speed up landing page creation by as much as 70%, helping you design, write, and launch campaigns faster without sacrificing quality.
Building landing pages manually takes time, especially if you’re not a designer. A WordPress AI-powered landing page creator can handle the hard parts and help you:
- Write headlines, CTAs, and content sections automatically
- Generate images and illustrations for your brand
- Suggest layouts that boost engagement
- Offer SEO and readability improvements
- Create A/B test variations to increase conversions
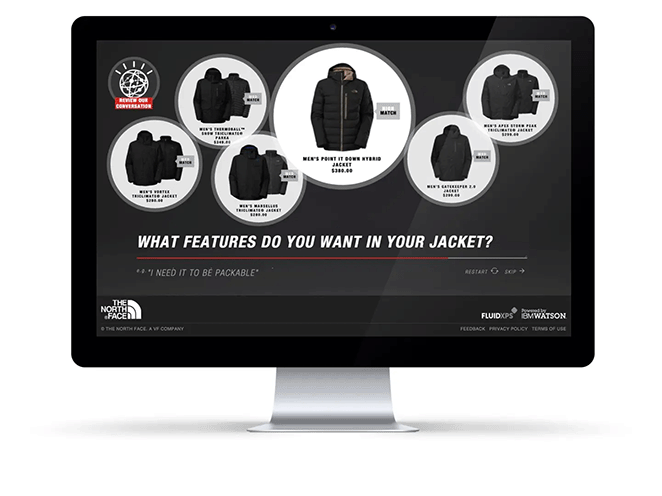
Even major brands use AI to optimize customer experiences. For instance, The North Face used AI to personalize product recommendations and saw a significant increase in sales.
I’ve noticed the same advantage in my workflow. Before AI, I built landing pages manually. Now, I can design, write, and publish a complete page in less than half the time.
| Feature | Manual Builder | AI Generator |
| Page Structure | Created from scratch | Outlined by AI in seconds |
| Content Writing | Write all text yourself | Generate copy with prompts |
| Image Design | Upload or use stock photos | Create visuals inside builder |
| Speed | Hours to complete | Done in minutes |
How to Create a Landing Page with AI in WordPress
Here’s how I use SeedProd, a WordPress AI landing page builder, to create an entire page with help from AI.

SeedProd is a popular drag-and-drop landing page builder and website builder. It lets you create a complete WordPress website and landing pages without hiring a developer. You can even use it to build a custom WordPress theme.
With hundreds of responsive landing page templates and customizable blocks, you can build any WordPress page in minutes. Its AI writing and image creation assistant lets you generate headlines, copy, and custom images for your page with just a few clicks.
1. Plan Your Landing Page with AI
The first step is to use an AI chatbot like ChatGPT to create a detailed structural outline for your landing page.
To get started, go to ChatGPT and enter your prompt.
In this example, I asked AI to outline a landing page promoting a webinar: “Outline a straightforward four-section landing page for a webinar.”
Here is the response with the outline for my page:
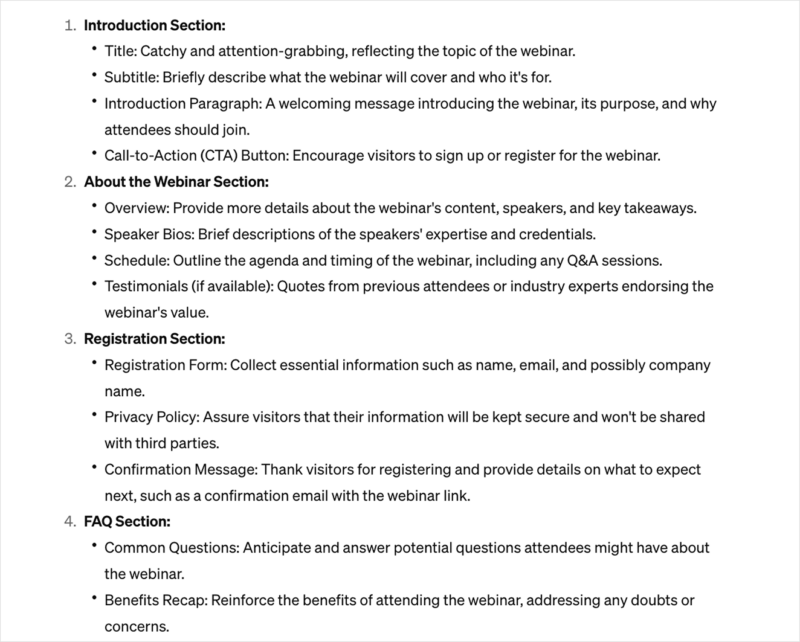
ChatGPT gave me a simple guide for my headlines, calls to action (CTA), landing page copy, forms, and FAQs. This information gives me a solid framework to inspire me during the design process.
Now, I can go ahead and start building my web page.
✏️ Note
I presume you already have website hosting, a domain name, and WordPress installed. If that isn’t the case, you can follow this easy guide on how to set up a WordPress website.
2. Install SeedProd
Next, install and activate SeedProd on your website. To use the AI features, you need a premium SeedProd plan. You can add the AI addon during the checkout process.
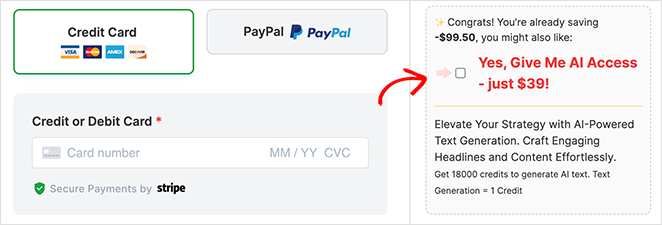
If you need help, you can follow these steps, showing you how to install SeedProd.
3. Create Your Landing Page
After installing SeedProd, navigate to SeedProd » Landing Pages from your WordPress admin and click the Add New Landing Page button.
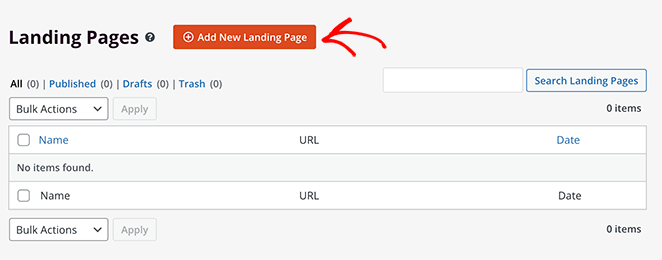
Now, you’ll see SeedProd’s library of responsive landing page templates. Click the tabs at the top of the page to filter the designs by purpose.
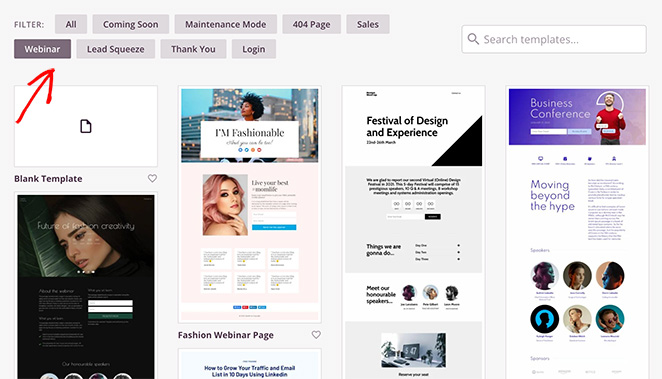
Since I’m creating a webinar landing page, I’ll click the Webinar tab. The templates make it easier to create a page that converts.
Because the essential elements are already in place, all you’ll need is to customize the page with your own content and branding.
To choose a template, hover over a design you like and click the checkmark icon.
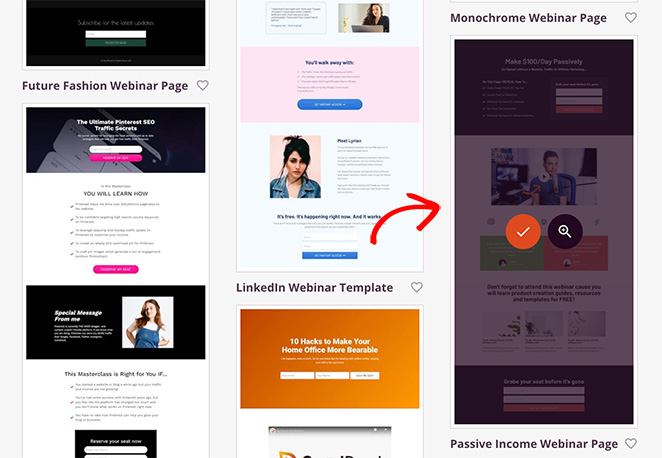
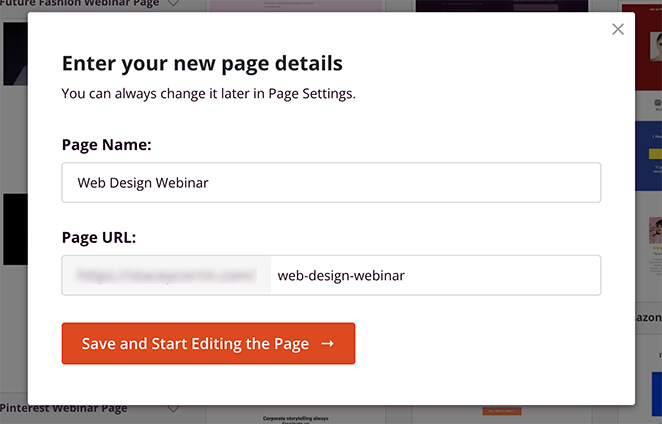
Next, name your page and click the Save and Start Editing the Page button.
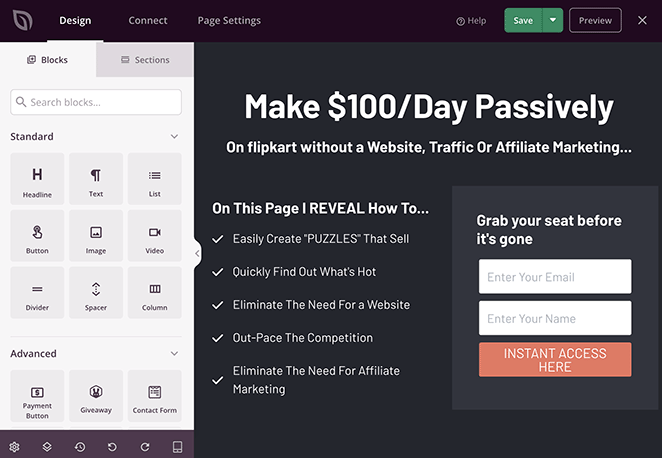
Your template will open in SeedProd’s drag-and-drop page builder, where you can customize the design. On the left, you’ll see blocks you can add to your page, and on the right is a live preview where you can see the changes in real-time.
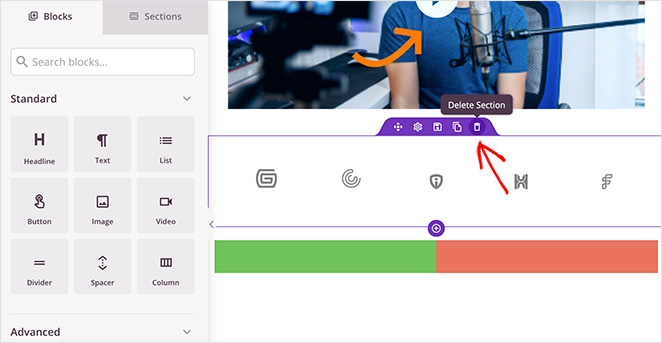
Start by removing elements you don’t need. To do this, hover over them and click the trashcan icon.
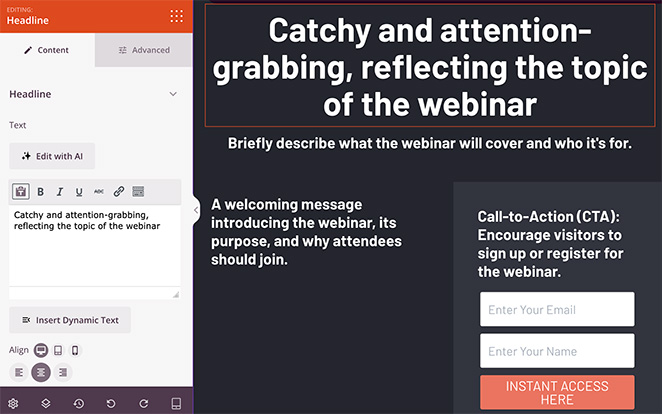
Next, perfect the structure of your page based on the ChatGPT outline. For now, you can simply copy and paste the suggestions like this:
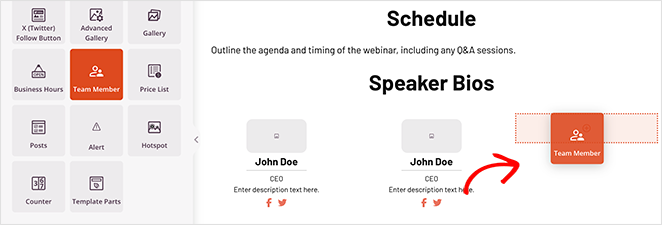
Since my outline calls for speakers, I’ll add placeholders for these using the Team Members block. To do this for your design, simply find it in the left-hand sidebar and drag it onto your page.
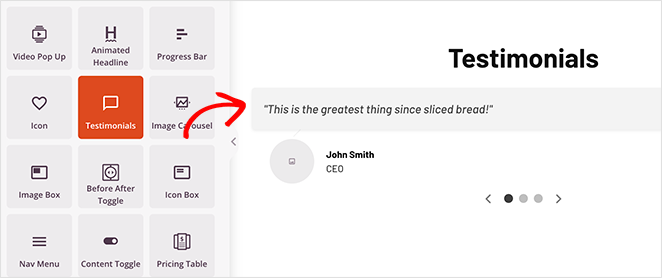
I’ll do the same for the social proof section using the Testimonials block.
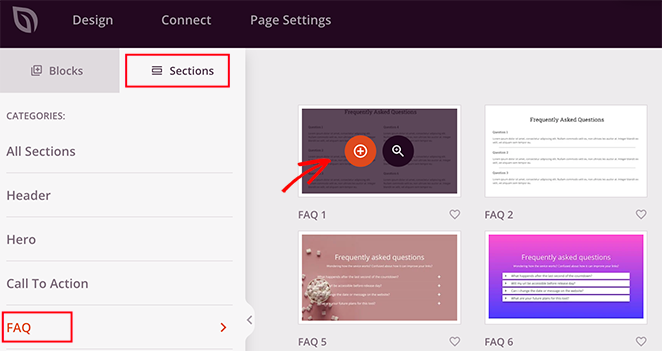
One final section I need to add is the FAQs. SeedProd has ready-made FAQ sections you can add to your page with a single click.
To find them, click the Sections tab in the left sidebar and click the ‘FAQ’ heading.
Now, choose a pre-made FAQ section you like and click the plus icon to add it to the bottom of your landing page.
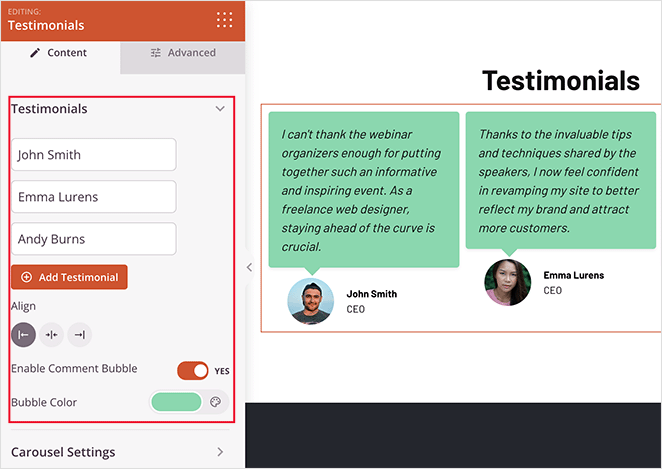
Customizing any of these new elements is simple. Just click them, and you’ll see their settings in the sidebar.
For example, in the Testimonials block, you can enable a sliding carousel, add photos, and adjust the fonts and colors without CSS or HTML.
4. Write Content with SeedProd AI
Once the page structure is in place, use SeedProd’s built-in AI writing assistant to generate compelling headlines and body copy.
SeedProd AI and its copywriting assistant makes this step easy. Select any headline block and click Edit with AI to generate the perfect text.
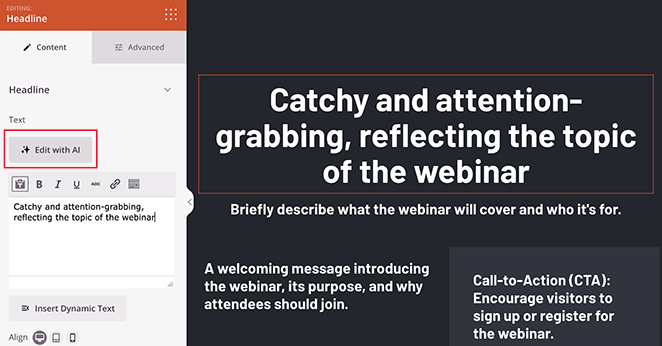
In the ‘Write with AI’ popup, type your prompt and click Generate Text. I used the following prompt: “Create an exciting page title, encouraging people to join our web design webinar.”
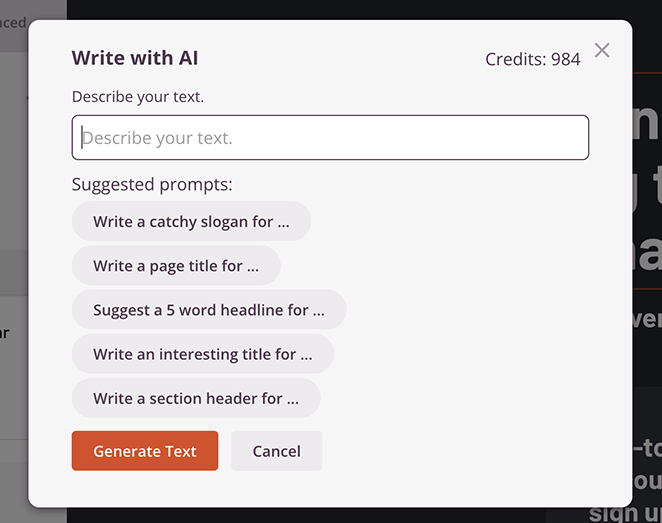
After a few seconds, you’ll see your AI-generated headline. You can use it as is or tweak it by clicking the buttons to shorten, lengthen, or simplify the language.
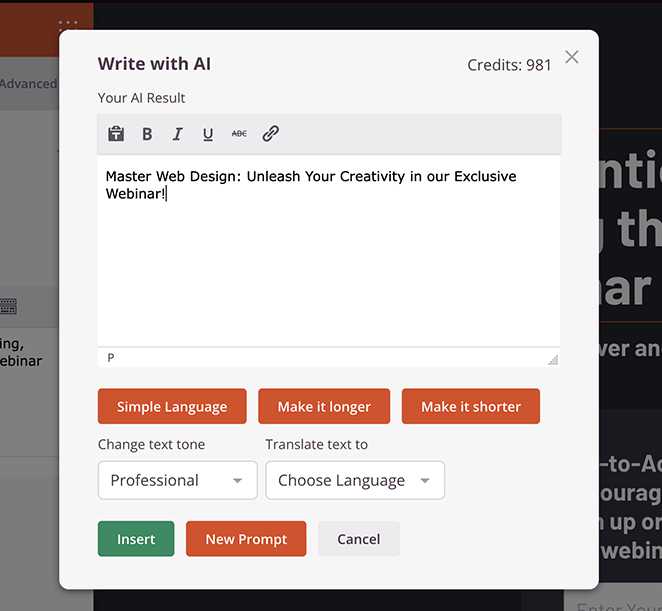
When you’re happy with the headline, click Insert to add it to your page. Remember, AI-generated text is a great starting point, but you should always review and personalize it to match your brand’s unique voice.
You can repeat this step to generate landing page content with AI for any part of your design. Click the ‘Write’ or ‘Edit with AI’ button in any text block and enter a relevant prompt.
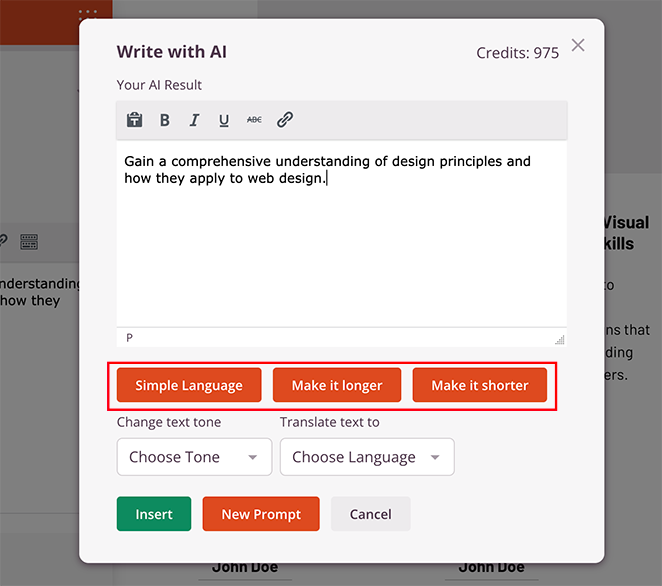
I used this approach to generate content for my FAQ sections:
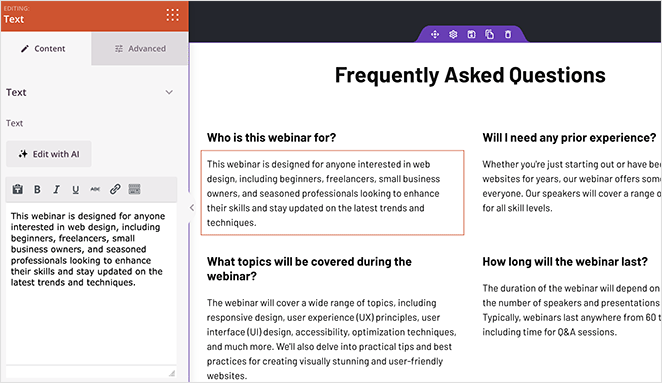
For more in-depth instructions, see my guide on how to use AI to write content.
5. Create Landing Page Images with AI
Now, let’s add an image to the landing page to help users understand what they’ll learn. For this, I’ll use SeedProd’s Image block which has AI image creation built in.
To use AI to generate images, drag over the Image block onto your page, then click the “Add with AI” button in the block settings.
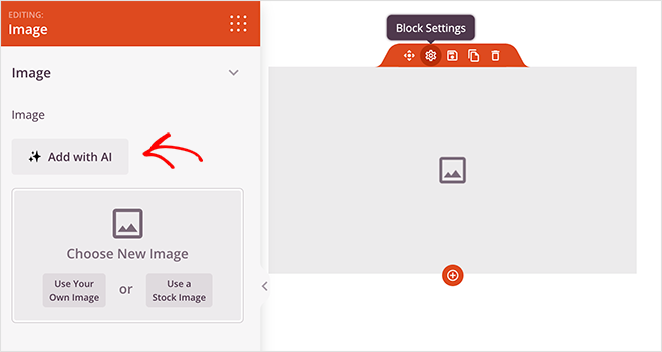
In the chat interface, enter your prompt and click “Generate Image.”
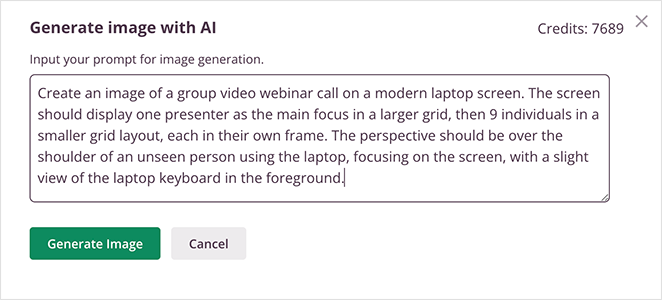
I used the prompt:
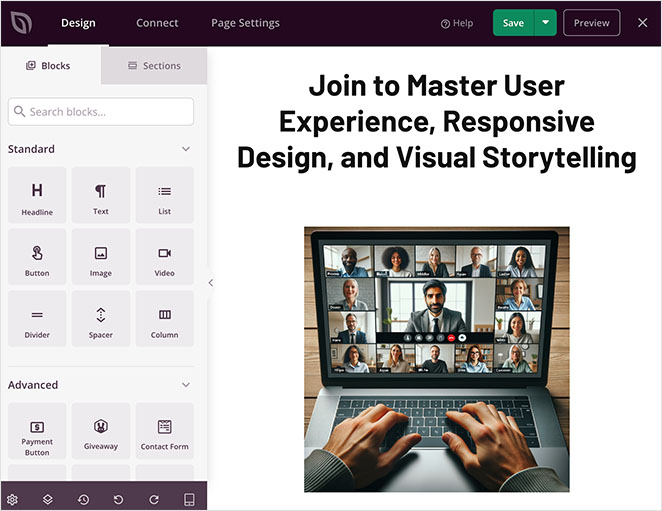
“Create an image of a group video webinar call on a modern laptop screen. The screen should display one presenter as the main focus in a larger grid, then 9 individuals in a smaller grid layout, each in their own frame. The perspective should be over the shoulder of an unseen person using the laptop, focusing on the screen, with a slight view of the laptop keyboard in the foreground.”
Pro Tip: Don’t feel like you need to be a ‘prompt engineer’ to get good results. While detailed prompts like this give you more control, you can start with simple phrases like ‘a webinar on a laptop screen’ and the AI will do a great job.
Once the image is generated, you can go back and refine it by clicking the “Edit with AI” option.

Here, you can generate more variations, edit portions of the image with a handy brush tool, or re-generate the image with a new prompt.
Once you’re happy with your final version, simply click Insert to add it to your page.
💡 Pro Tip
Before uploading an image to your WordPress website, resize and compress it to reduce the file size. Images that are too large can impact your page load times.
6. Optimize Your Landing Page with AI
Once your landing page looks great, it’s time to optimize it for SEO and conversions. With tools like All in One SEO, you can use AI to automatically write SEO titles and meta descriptions for your new page.
Here’s how to do it step-by-step:
- Click the AIOSEO button at the top right of the screen to open the SEO settings.
- Enter your main keyword in the ‘Focus Keyphrase’ field.
- Click the ‘Generate New Title’ button to get AI suggestions for your SEO title.
- Do the same for your meta description to create an engaging summary for search results.
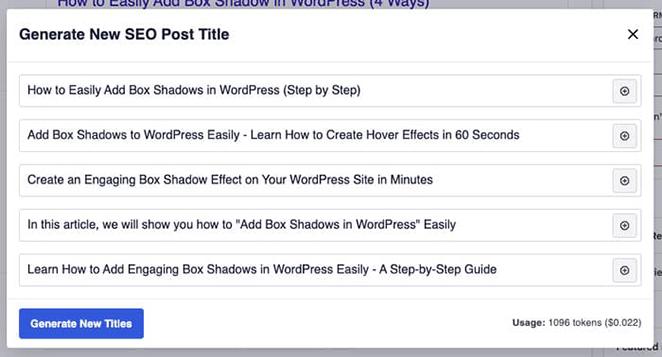
This process ensures your page is written for both readers and search engines, improving visibility and click-through rates.
Other AI tools that can help fine-tune your page include:
- Grammarly: Checks grammar, tone, and clarity.
- Thrive Ovation: Collects and displays testimonials for trust signals.
- WPForms: Sends AI-personalized form confirmations or follow-ups.
- Uncanny Automator: Automates social media posts by connecting ChatGPT with WordPress.
7. Publish Your AI Landing Page in WordPress
When you’ve finished optimizing your landing page, you’re ready to publish it. To do this, click the Save button at the top of your page and select Publish.

You can now visit your page to see it in action.
Here’s a final look at the AI landing page I made on my test website.

Best WordPress AI Landing Page Generators Compared
If you’re wondering which WordPress AI landing page generator is best for your site, here’s a quick side-by-side look at the top options I’ve tested.
| Tool | Starting Price | AI Features | Best For |
|---|---|---|---|
| SeedProd | $39/year | AI writing + AI image generation | Beginners who want a fast, no-code setup |
| Elementor AI | $59/year | AI text generation inside the page builder | Designers who want deeper customization |
| Divi AI | $89/year | AI copywriting + image generation | Agencies managing multiple client sites |
I personally use SeedProd on my own sites because it’s the most beginner-friendly and works entirely inside WordPress. But Elementor AI and Divi AI can be good fits if you’re already using those builders and need extra design flexibility.
FAQs on Creating a Landing Page with AI
– Suggest layouts
– Write headlines and copy
– Create images
– Optimize SEO
They speed up the process by doing most of the hard work for you.
Bonus Landing Page Guides
If you’d like to learn more about creating amazing landing pages, these guides are packed with useful tips:
- How to Use AI for SEO to Improve Rankings
- Landing Page Headline Formulas to Boost Conversion Rates
- Best Automation Marketing Tools for Small Business
- How to Build a WordPress Website with AI
- Top eCommerce Landing Page Examples to Drive Sales
- Landing Page URL Examples and Best Practices for Beginners
Create a Landing Page with AI Today
Now you know how to use a WordPress AI landing page generator to launch your own high-converting page. All that’s left is to try it out for yourself!
Thanks for reading! We’d love to hear your thoughts, so please feel free to join the conversation on YouTube, X and Facebook for more helpful advice and content to grow your business.

