Have you ever noticed some eCommerce websites show recent sales popup notifications when someone buys a product? And have you wondered how you can do the same for your online store?
Popups and notifications are great for generating new leads, improving conversion rates, and boosting sales. But adding them to your website can be hard if you’re not used to how they work.
Don’t worry, you’re in the right place.
By using a plugin like TrustPulse, creating a live sales notification is simple. In this article, we’ll show you how to add a recent sales popup to your WordPress site. What’s more, you won’t need to know any complicated technical wizardry.
Why Use TrustPulse for Your Recent Sales Popup?
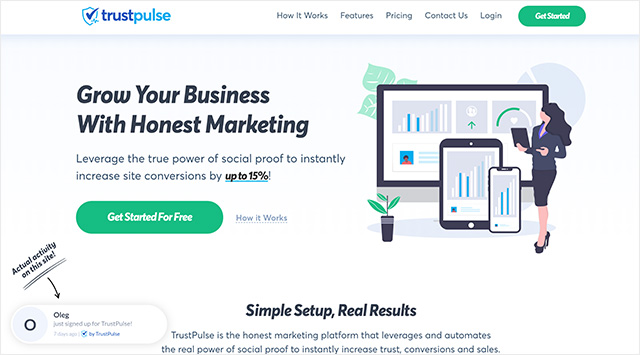
TrustPulse is one of the best WordPress plugins for adding social proof and FOMO (fear of missing out) popups to your site. Social proof has the power to increase site conversions by up to 15% as well as attract more website visitors. Even better, you can get started for free!
The free version of TrustPulse allows you to create different campaign types, plus you get 500 sessions a month which is ideal for getting started. Once you’re comfortable and need more sessions, consider upgrading to one of the premium plans.
Take a look at some of the attractive features TrustPulse has to offer:
- Real-time event tracking creates a sense of urgency
- Leverage FOMO with on-fire notifications for recent orders and product reviews
- Show notifications to the right people with smart targeting
- Create beautiful notifications with flexible design options
- Use actionable analytics to boost sales
- Integrate seamlessly with your WordPress website, Shopify apps, WooCommerce eCommerce store, and more marketing tools.
For more details, check out this TrustPulse review.
Now that you know the perks of using TrustPulse let’s take a look at how to set up your notifications on your WordPress site.
How to Create a Recent Sales Notification Popup in WordPress
TrustPulse makes it easy to create a recent sales popup. It can take as little as 8 steps to get up and running. Let’s get started with the first simple step.
- Step 1: Install the TrustPulse Plugin and Activate
- Step 2: Create Your TustPulse Account
- Step 3: Create a new Campaign for Your Sales Notification Popup
- Step 4: Choose a Campaign Type
- Step 5: Select the Design and Appearance of Your Sales Popup
- Step 6: Capture the Activity of Your Users
- Step 7: Set Your Recent Sales Popup Display Rules
- Step 8: Publish Your Recent Sales Popup in WordPress
Step 1: Install the TrustPulse Plugin and Activate
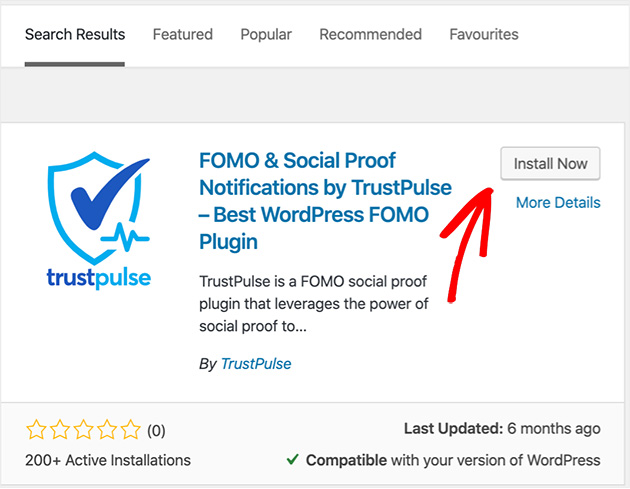
The first step is to add TrustPulse to your WordPress site. To do this, from your WordPress dashboard, navigate to Plugins, then click Add New.
In the search box, type TrustPulse and press Enter. Once the plugin appears in the results, click Install Now, then Activate.
For more detailed instructions, you can check out this guide on how to install a WordPress plugin.
Step 2: Create Your TustPulse Account
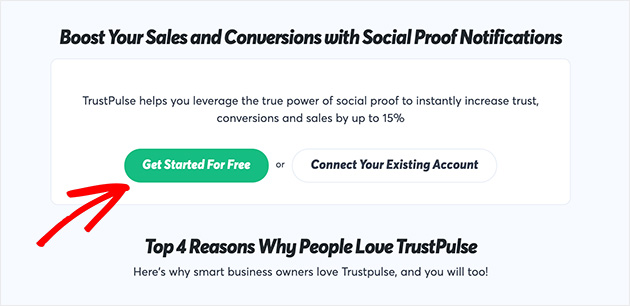
With the plugin installed and activated, you’ll be redirected to the TrustPulse dashboard. From here, you can create your new account. For this guide, we’ll be using the free version. For more advanced features and sessions, you can see the paid plans here.
Select Get Started for Free to create your account.
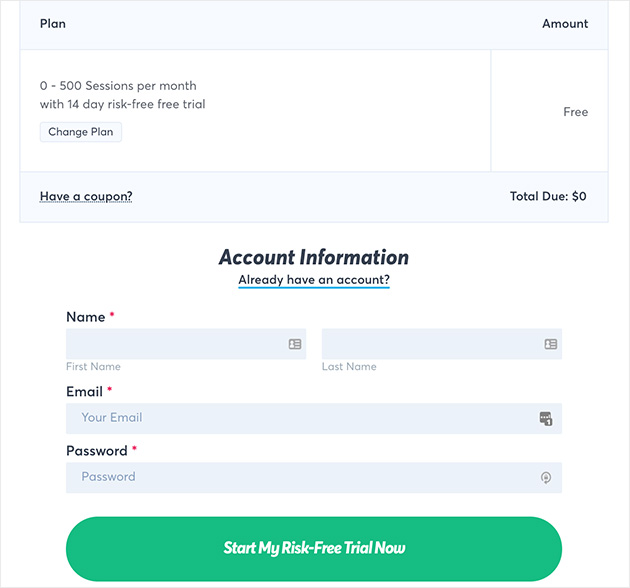
You’ll now see a summary of your plan. Enter your name, email, and password information to complete your account and click Start My Risk-Free Trial Now.
Step 3: Create a new Campaign for Your Sales Notification Popup
Now that you’ve created your account, it’s time to create your first sales pop up campaign. To do this, click View My Campaigns.
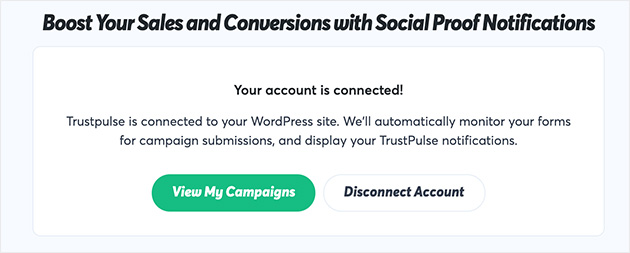
Because this is your first popup, you’ll need to click the green Create Campaign button.

Step 4: Choose a Campaign Type
To build a campaign, first, start by giving it a name and choosing the website the campaign will appear on.
Don’t worry. The name won’t be visible to your site visitors. It’s there to help you easily identify and organize your campaigns.
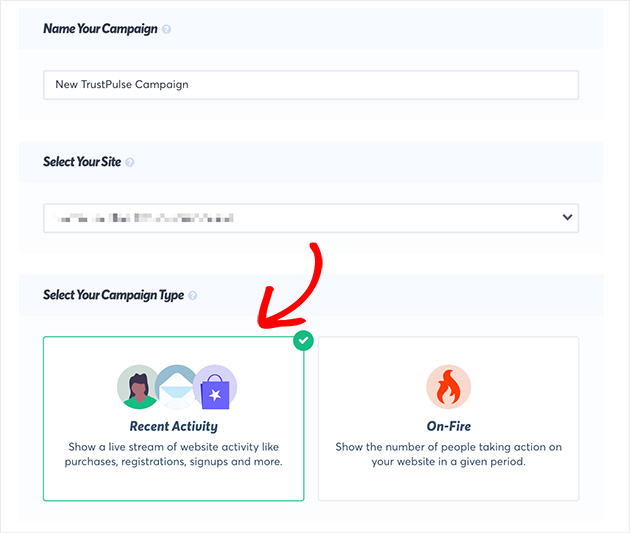
Now you’ll need to choose your campaign type. This is either Recent Activity or On Fire.
- Recent Activity – shows a live stream of activity on your websites like purchases and registrations
- On Fire – shows how many people are taking action on your site
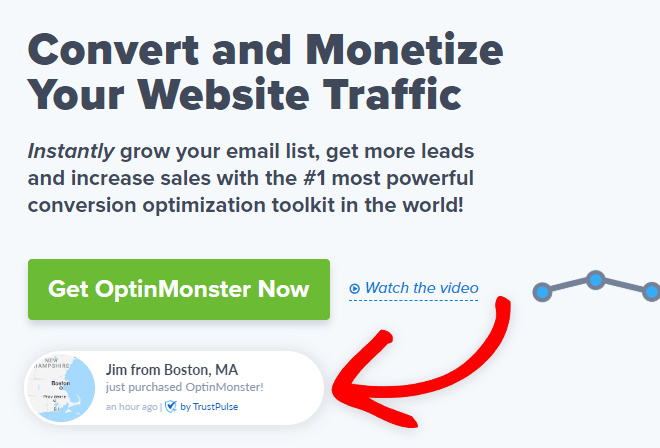
Here’s an example of the Recent Activity campaign being used on OptinMonster to show who’s recently bought the product.
Step 5: Select the Design and Appearance of Your Sales Popup
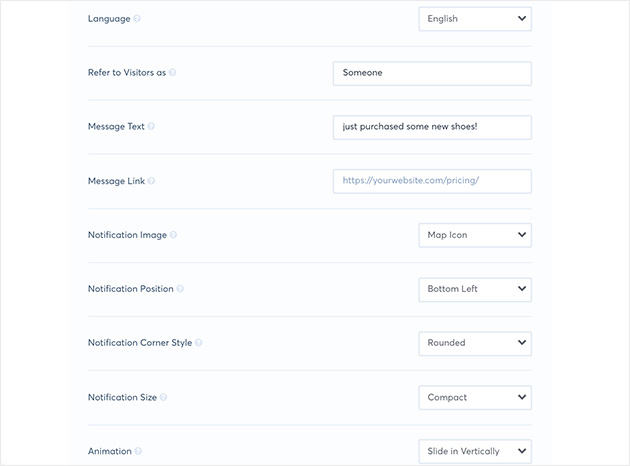
What really stands out about TrustPulse is how much you can customize your recent sales popup. For instance, you can change the corner styling to be sharp or rounded and even choose a different notification image.
To learn how to customize your WordPress login page check out this guide.
For sites in a language other than English, you can change the language that appears as well as the message text. This helps you tailor your notifications to your specific audience.
There’s even the option to display a default notification. This gives the impression of social proof even when your site is experiencing a dip in traffic.
Step 6: Capture the Activity of Your Users
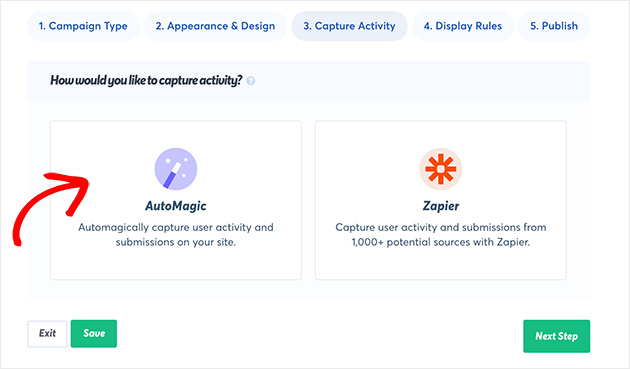
With your notification popup customized, the next step is to capture the activity of your site visitors. TrustPulse offers 2 ways to do this.
- AutoMagic – capture activity and submissions automatically
- Zapier – capture user activity from over 1,000 sources by using Zapier integration
For this setup guide, we’ll use the AutoMagic capture type. However, if you prefer to use Zapier, TrustPulse offers a one-click connection.
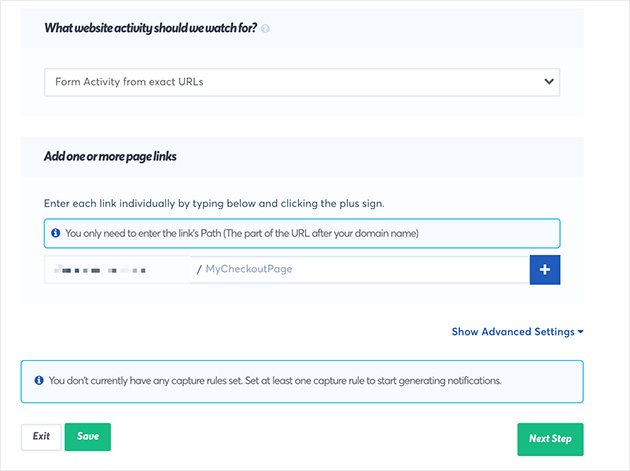
If you scroll a little further down the page after clicking AutoMagic, you’ll see a few more options. Here you can choose the activity you want to track.
To give you an example, you could track the activity on a sales page, product page, checkout page, or form submissions on an exact URL to track subscribers. What’s even better is you can track the same activity across more than one page. Just enter the URLs you’d like to track.
Step 7: Set Your Recent Sales Popup Display Rules
Before we get around to publishing your sales notification popup, you need to set the display rules. This determines where and when your popup will appear on your live site.
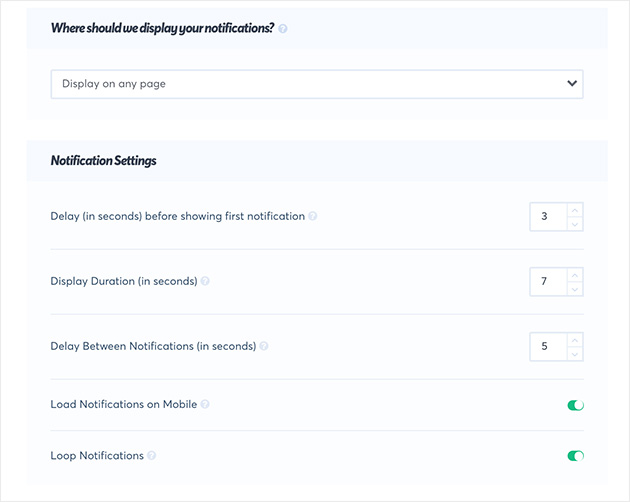
You can choose if you want your popup to display on any page, an exact URL, or even pages with certain text. TrustPulse also allows you to delay the display time between notifications.
If your website sees a lot of traffic from mobile users, the mobile notification option will come in pretty handy. And once a user has seen all of your popups, the loop rule cycles through them again, starting with the newest notification first.
Choose your display rules and then click Next Step.
Step 8: Publish Your Recent Sales Popup in WordPress
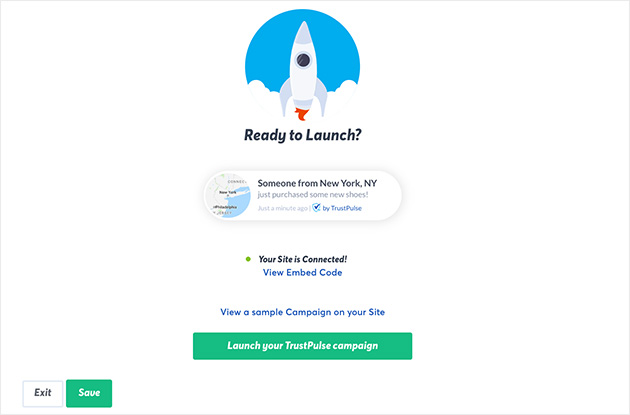
You’re nearly there! Now all that’s left is to launch your campaign on your WordPress site.
The amazing thing about TrustPulse is it automatically connects to your site with only 1 click. And since you’ve already connected to your site during this setup process, you’re ready to go.
Yet if you’d prefer, you can use the embed code provided to add your recent sales popup anywhere on your site.
If your site is still in maintenance mode and not quite ready yet, click view a sample Campaign on your Site to see an example.
Is everything looking good? Great! Now click the Launch your TrustPulse Campaign button.
Great job!
Frequently Asked Questions
A sales popup is a small, attention-grabbing message or window that appears on a website or app to inform users about special offers, discounts, promotions, or other sales-related information.
Websites and apps use sales popups as a marketing strategy to capture the attention of visitors and encourage them to make a purchase. These popups often display limited-time offers, discounts, free shipping, or other incentives to motivate users to take action.
Sales popups can be perceived as intrusive if they disrupt the user experience or appear too frequently. However, when designed and implemented thoughtfully, sales popups can be non-intrusive and provide valuable information to users.
Yes, sales popups can be personalized to some extent. By utilizing user data such as browsing history, purchase behavior, or demographics, websites and apps can tailor the content of sales popups to make them more relevant and engaging for individual users.
Yes, here are some best practices for using sales popups:
- Display popups at the right time, avoiding immediate on-page load.
- Limit the frequency of popups to avoid annoying users.
- Provide a clear and easy-to-find close button to allow users to dismiss the popup.
- A/B test different variations of your popups to identify the most effective design and messaging.
- Ensure that popups are mobile-friendly and don’t obstruct important content on smaller screens.
- Comply with privacy regulations and obtain user consent if collecting personal data through popups.
- Continuously monitor and optimize your popups based on user feedback and data analysis.
Yes, sales popups can be used for various purposes beyond promoting sales. They can be utilized to collect email addresses for newsletter subscriptions, encourage social media follows or shares, announce product updates or new releases, provide customer support or assistance, or gather feedback through surveys.
You’ve now successfully added a recent sales popup to WordPress using TrustPulse. Now you can use social proof marketing to increase sales and boost your traffic. What’s more, using FOMO in WordPress has the potential to skyrocket your conversions.
We hope you liked our article and found it easy to follow. You might want to check out our definitive guide on the best WordPress plugins you should use alongside your social proof software. And if you want beautiful WordPress lightbox popups, check out this showcase.
And don’t forget to like us on Facebook and follow us on Twitter for more useful guides on WordPress and tutorials about social proof.

